Looks like the updated kit was never assembled by the company to find out if there was a problems with the redesign.
-

Win a Free Custom Engraved Brass Coin!!!
As a way to introduce our brass coins to the community, we will raffle off a free coin during the month of August. Follow link ABOVE for instructions for entering.
-

PRE-ORDER SHIPS IN SCALE TODAY!
The beloved Ships in Scale Magazine is back and charting a new course for 2026!
Discover new skills, new techniques, and new inspirations in every issue.
NOTE THAT OUR FIRST ISSUE WILL BE JAN/FEB 2026
You are using an out of date browser. It may not display this or other websites correctly.
You should upgrade or use an alternative browser.
You should upgrade or use an alternative browser.
Panart: San Felipe 1:75 Scale Build Log [COMPLETED BUILD]
- Thread starter Donnie
- Start date
- Watchers 66
-
- Tags
- completed build
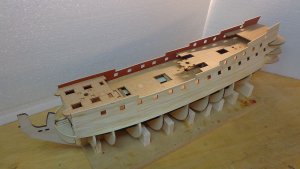
Donnie said:Continuing with inside bulwark planking. I am painting the strips first and then gluing on.
I see you went with the Red Ochre. Good choice, Donnie. I hope you are as happy with the choice as I was on my end.
Thank you Chuck...yes the Red Ochre is nice.
Gary,
Panart said in this manual that they spent a year prototyping and building the model to make sure it goes together well !!!! Anyway, I had a lot of extra time on the weekend to hopefully make a difference in things. I think it is starting to look better now after all the butchering I have done to it. I think the model has more wood glue than wood !!!
Last edited:
On Santa Maria I don't even follow the manual,I misplaced somewhere while moving 2 months ago,when I went through it just did not look right,I planned to kit bash anyway.
The only thing I can tell you Donnie,alway think ahead ,what else you need too install and won't interfere whit your next step.
Donnie , the alignment problem seems to be a common thing, on three of my models, Endeavour, Sovereign and the Mayflower all have a deck alignment issue. On the Mayflower for one of the upper decks the bulkhead is a tad more than 2mm wider than the deck. I glued a 2mm square strip on either side and will trim when deck is ready to be fitted. Wasn't your problem so no need to apologise. Sorry for all the problems you are encountering, lets hope there are no more by the time you get to above deck work.
Regards
Eric
Regards
Eric
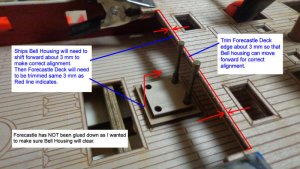
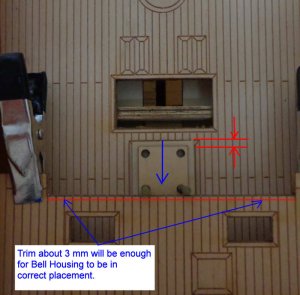
Some more "Gotchas" -- I am glad that I read forward about 10 or more pages. The Ship's Bell Housing will NOT clear successfully the aft edge of the Forecastle. It doesn't... so a little trimming will be needed.
The Deck has "score marks" on it so that you will know where to place items such as gratings, and in the case of the Bell Housing, it doesn't line up with the score marks. I mean, if I were to build the Bell Housing and place it where the score marks are, then the Forecastle will have to be trimmed.
This is what I am going to do--is to trim the "aft edge" of the Forecastle so that Ships Bell housing will be aligned correctly.
I could tell by looking down on Forecastle that the Bell Housing Stanchion where not going to clear, but needed about 3 mm or a little less clearance. So, this can be remedied by trimming off about 2 - 3mm of the aft edge of the Forecastle. Now that the Forecastle will be trimmed a little, then the Bell Housing will then be able to shift forward to sit into the correct place.
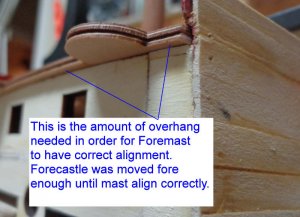
If I had not mocked up the Mast placement and the Ships housing placement, it would have been a disaster later on trying to fix these things. This really makes me paranoid about gluing stuff now. But, seriously, just got to be watchful. I guess I am proud of myself for looking into this instead of just plowing forward.
Also, the Forecastle piece is a little narrower and I had to wet the upper hull a little to help reshape (upper hull) where it attaches to Forecastle Deck. Clamped wet overnight and it is now corrected. Not too much - about 2mm on each side.
When all these things are settled down, then I will glue the Forecastle to the hull.
Note: The overhang looks like a lot, but it is not. It is about 2mm. But, that 2mm will make the Foremast have way too much "rake" and will look horrible and not real at all. It will look like a terrible mistake was made. So, I gotta fix it.
Last edited:
Donnie
I just looked at the online manual and the bell tower protrudes into the upper deck, check before you cut anything.
Its online at Caldwell Boats. This step is way after anything else you are up to.
Paul
I just looked at the online manual and the bell tower protrudes into the upper deck, check before you cut anything.
Its online at Caldwell Boats. This step is way after anything else you are up to.
Paul
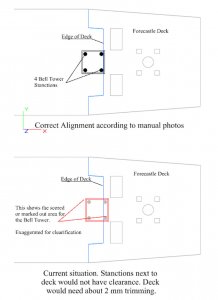
I agree, and to me, it is a little confusing. I prepared this CAD drawing to help demo my predicament. A little exaggerated to make a point. If I did not do anything by trimming the upper deck, I would have to drill holes into the upper deck to let the stanctions come through. Or, I would have to notch out some of the upper deck to make clearance.
Last edited:
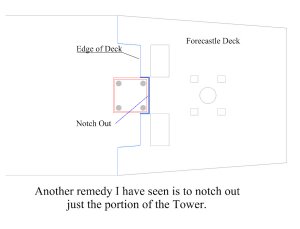
I found another Build Log from a German site of which he is building the Panart, but making his own adjustments as well. This person made a notch in the Upper deck and he noted that the manufacture did not make note of problem too. !!!
This CAD drawing is what he did to make provisions for the Bell Tower.
This CAD drawing is what he did to make provisions for the Bell Tower.
Last edited:
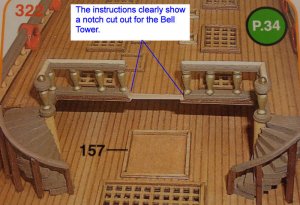
Ok,,,Sorry folks for all of my drama. Its just that even though the pictorial instruction manual is well done as far as picture clarity, it is least desired ONLY because it skips around and changes. One picture shows one thing while another picture shows something else. Well, of all my reading, I finally found a picture of the upper deck of where they FINALLY show where the upper deck is "notched out" --- all I can say is thank goodness because I was not certain as to handle this situation. I apologize for all my unnecessary panicking. I guess this is the reason why I would not be good at kit bashing.
Also shown is the Stanchions and the border for the Bell Tower.
Also shown is the Stanchions and the border for the Bell Tower.
Last edited:
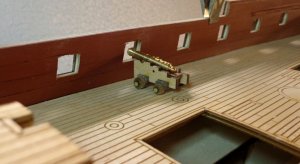
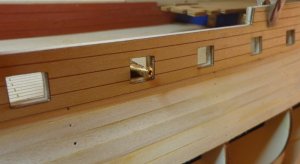
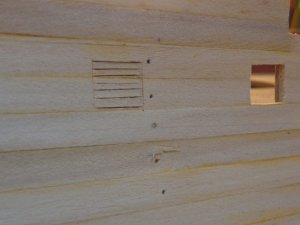
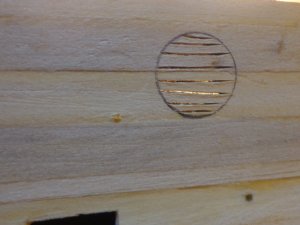
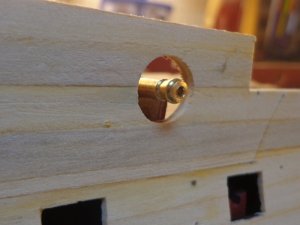
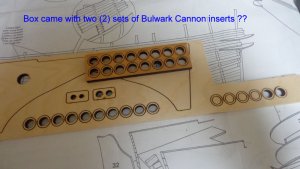
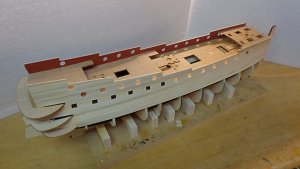
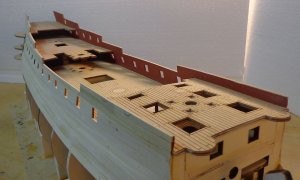
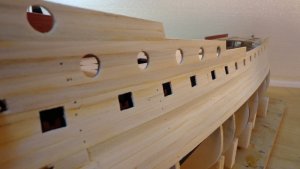
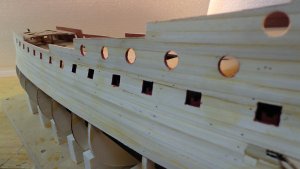
Does anyone know why the box has two (2) sets of Bulwark Cannon Inserts. The same quantity and size ?? Anyway, I decided to go ahead and cut out all the cannon openings. I finally figured out to make horizontal cuts, this helps to remove the cut-out better. This last image is another test to make sure my Cannons line up. It is evident from other forums that this is a major problem that people are running into. I am glad that I mocked up all of this before hand.
Last edited:
Are the inserts different timber Donnie? I have seen this in kits where a part is updated to a different material, but the kit still carries the earlier parts in the original material. Either they had lots of the sheets already cut that included the parts, or nobody updated the cut file.
Donnie, re the Bulwark Cannon Inserts, are ther perhaps supposed to go on the out side of the hole as in this picture: http://www.shipsofscale.com/sosforums/viewtopic.php?f=52&t=307&start=170 top most picture, the Sovereign has these 'fancy' rings on either side of the hole. Maybe some further investigation in the manual may reveal something.
Progressing nicely tho'
Regards
Eric
Progressing nicely tho'
Regards
Eric
Donnie,acctualy how did you cut out those gunports?
Zoltan: If you are referring to the gunports on the Bulwark, I used a simple xacto knife and was careful with small cuts. I also used a thin piece of timber on the "other side" of the cut so that the opening would not splinter as the knife goes through. Yes, I held with my fingers the other timber - no problem as the cuts were not enough pressure to cut through to my fingers. If you are referring to how I cut the round port holes out of the template of parts, well, they were relieved with one "tab" that easily cut through and the part fell out.
Yes, the two sections are of two different type of materials. Both are same quantity of 12 and exact same size. I guess I can just take my pick !!
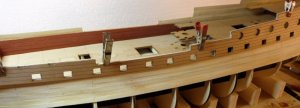
Ok, so after some clean up this is where I am with the build. I opened up all my gun ports using the Lazer Bulwark piece as a template to go by. My next thing to do is to clean up the Terraces. (Stern area). Not looking too much to this task as the pieces are a little contrary (difficult).
Last edited:
Shes coming along great, Donnie!
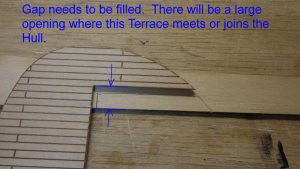
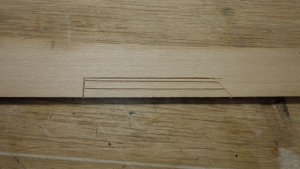
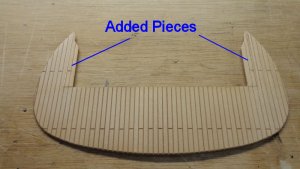
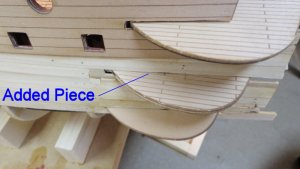
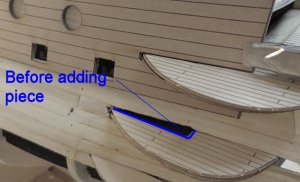
Thank you Gemma and company. I appreciate the compliments. Well, it is onward to the Terrace, Stern part. This was not as bad as I thought. I had to make a piece to fill in a gap of one of the Terrace pieces. It is very clear that they did not design this piece correctly. I saw hints of them (panart) trying to cover this up in their pictorial instructions. Lacking any creative notions, I just did the best I could. I took some scrape material that the lazer piece came from and tried to construct a fake planking. I used a clay type sculpturing tool to widen the gap of the planking. All in all, about the time the Gallery pieces are put on and trimmings, about 75 % of this problem will be covered up anyway. I showed the before and after pictures last.
Last edited:
Nice fix to the gallery. Its very hard to spot unless you know its there. But even now that we know it there, Its still difficult to spot it. For someone who didnt read this log it will be impossible to spot that bad part panart included in the kit.
So great job! And this log is already very valuable for people making the san felipe from panart.
I am now very sure that the san felipe will not be my next build and that it will stay on my shelf until i have built allot more ships. I am not ready to risk a hairloss because of too much stress with this kit.


