Ro-marin Happy Hunter Tug-1/50-Multifunction RC

NMBROOK

Staff member
Forum Moderator
Joined
Jul 15, 2013
Messages
2,593
Points
688

Location
Yorkshire England
Hi All

Summer is here and I want to take a short break from spending ALL my spare time in the workshop.I am going to fill a few hours a week with this build which I anticipate should take me around 300 hours.This kit is a completely different style of building to what I normally post and so are the materials involved.We are seeing a few RC builds on the forum and I hope this log may be of use to someone who decides to build a working model.The model will include numerous working features including deck crane.Control of the model will be via a Robbe/Futaba F14 radio which is fully expanded and also was converted to 2.4GHz by Ripmax for me last year.This system is old tech now but is on of the few that were designed for use in a model boat.With the expansion modules I have fitted,this is capable of 144 different functions,far far more than most modern RC control units.I will cover the R/C aspect and it's implementation when I reach the wiring stage.

There is a bit of a story between me and this model.The kit used to be marketed by the now defunct German company Robbe.I bought the kit around 28 years ago and built to the hull stage but the part built model got badly damaged during some impromptu house moves after a messy divorce.The kit was rereleased a few years ago when Krick had purchased the insolvent Robbe company.Krick has remained fairly true to the original offering but has chosen to make some small alterations to reduce costs.Some of the machined fittings supplied by Robbe are now resin,but I still have the original Robbe parts from the kit I bought all those years ago.The micro geared motors for the working functions are not available but Krick has a different replacement for these.I anticipate some small changes to the mounting holes will be necessary.Biggest improvement though is that the ABS plastic frets are now fully laser cut.Robbe used to stamp these and the cuts never went all the way through the thick plastic.the stamping process also caused distortion of the parts which remained buckled even when cut from the fret.

I will include a brief history of the vessel before moving on to a few box pics(but not a proper review as such) then the build.I am playing catch up though,in one weekend I have the main running gear fitted and am working constructing the rear deck assembly now.This build will move faster than my updates such is the nature of construction.

I also have had lots of issues with my laptop and have a new apple Imac being delivered Monday.Having always used windows based computers I anticipate a bit of a learning curve using it.

Kind Regards

Nigel
 
The iMac is a great PC. You can partition the drive and add the Windows OS. That should reduce your learning curve.

I look forward to your build and the R/C parts. I’m almost at the point where I have to decide what direction I want to go with my Tug. Static model or R/C.

Jan
 
Thanks Jan,I am looking forward to having a PC that works properly.My laptop cuts out randomly as the second battery is on the way out.It's four years old and the speakers no longer work and there is a big crack in the back,so I figured time for a new one plus now I have space for a desk,I can revert back to desktop.
RC ships can be as simple or as complex as you want them to be.Normal operation is easy,adding working functions makes things more interesting and complex.My base unit transmitter was a Robbe/Futaba collaboration and they were out of production for a few years when Robbe went into insolvency.They came back but at the moment it appears they are unobtainable and have been removed from Krick's website.The base unit is 40Mhz and can be switched to 2.4Ghz at the flick of a switch and removal of the crystal.2.4Ghz is random channel hopping a bit like your car key remote.This prevents the need to ensure you are using a different frequency to other users on the lake.The 2.4Ghz radio waves do not penetrate water though so should I ever build an RC submarine I can switch back to the old 40Mhz.

Kind Regards

Nigel
 
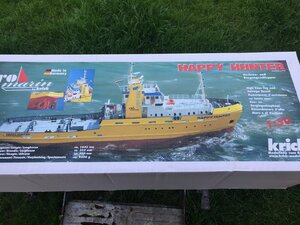
A brief history and a few pictures of the kit.

in 1978 the Happy Hunter was the last ship ever to be launched in Arnhem close to the German border.The Arnhemsche Sheepsbouw Maatschappij was permanently closed after delivery of the Happy Hunter.After only four years Mammoet sold the vessel to competitor Smit and she was renamed Smit Hunter and had a refit including the instalation of a larger stern roller enabling her to be used for anchor handling on offshore oil/gas platforms.
Sadly in July 2003 a fire broke out whilst in drydock for repairs at a yard in Pernis,the Netherlands.Unfortunately the vessel was classed as a total loss as a result and was taken to the breakers.

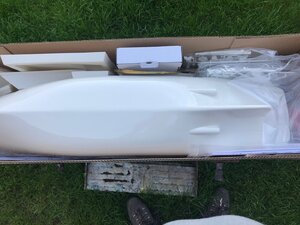
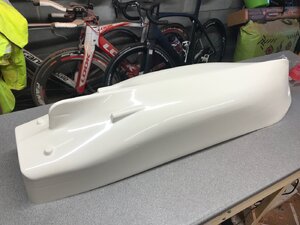
The Ro-marin kit makes extensive use of vacuum formed ABS plastic parts.This includes the hull which one may regard as flimsy.However once the decks and other internal parts are in place,the assembly stiffens a great deal.The vacformed hull is much lighter than a Fibreglass hull and this is important.If you fit all the working functions there is only a small leeway for ballasting.GRP and other heavy parts are not what you want with this build.You could argue that the use of Lipo batteries and brushless motors could save weight but I wanted to keep the "old tech" approach of the original Robbe kit.

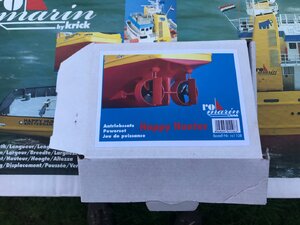
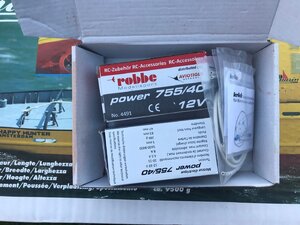
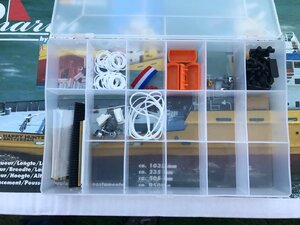
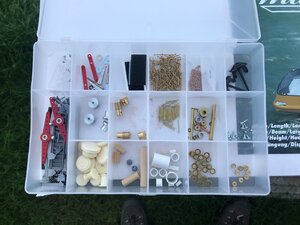
In addition to the basic kit,the powerset and fittings are bought seperately.I bought my kit with the fittings from a local modelshop and paid considerably less than the current sticker price at Cornwall Model Boats. I am certain they had made a mistake.I did have to order the powerset from Krick in Germany but their mail order service is second to none using their website.The fittings come in a box contained in plastic bags.I have sorted these into my own organiser trays for easy of finding and to prevent loosing anything.

Kind Regards

Nigel
HH1.jpgHH2.jpgHH3.jpgHH4.jpgHH5.jpgHH6.jpgHH7.jpg
 
It is bringing me also back to my jouth.
When I was 12 to 16 I was building together with my father several RC-ships, but our favorite manufacturer was at this time Graupner.
So I built (with fathers help) the Löschkreuzer Weser and the tugboat Bugsier. Good old time.......
Somewhere I have still the SMS Emden kit......
I will follow your log with big interest - and maybe with some tears in my eyes (by the dust.....) Redface
 
Wipes drool from side of lips.
Wish list product!
I will follow with great interest.
My old imac is 12 years old this August. Still use it every day ( runs 24 hrs a day not powered off) , not missed a beat since I got it. It takes about an week to work out the differences with windows.
( cmd key instead of ctl is about it!) plus no no nasty windows viruses.
 
Last edited:
Uwe,yes I remember several kits by the German Manufacturers I used to drool over when younger.I have acquired a vintage untouched Hegi Oceanic tug kit from the 70's.Missing fittings, but these can be obtained or made.
I would like to see if Krick bring back the Berlin lifeboat with daughter boat.I has seen this built and it is a stunning model.

Kind Regards

Nigel
 
My old imac is 12 years old this August. Still use it every day ( runs 24 hrs a day not powered off) , not missed a beat since I got it. It takes about an week to work out the differences with windows.
( cmd key instead of ctl is about it!) plus no no nasty windows viruses.

Ditto, my iMac is going on three years old, the only time it has not been up and running was during a local electrical power failure.

I‘m looking forward to the multi-function R/C installation. I’m in the “old timer” mode, the most functions I ever used were elevators, throttle and rudder. That was flying a 1/24 scale Sopwith Camel.


Jan
 
Last edited:
Wipes drool from side of lips.
Wish list product!
I will follow with great interest.
My old imac is 12 years old this August. Still use it every day ( runs 24 hrs a day not powered off) , not missed a beat since I got it. It takes about an week to work out the differences with windows.
( cmd key instead of ctl is about it!) plus no no nasty windows viruses.

Paul
I received my iMac today and am typing this on it.A little confusion at first to find hash tag as this is different on the English UK keyboard.Sorted that but I will get to grips with everything properly next week.
I got sick of replacing computers every three or so years and also wanted to revert back to desktop.

Kind Regards

Nigel
 
Hi All
I have been distracted of late getting to grips with my new PC.I am struggling to migrate images to the Imac.It refuses to find my windows PC on WiFi:mad:
Anyway this is the last update using my old laptop.Again the build is progressing much faster than my updates.Currently I am doing the final internal fit out in readiness to start fitting decks.

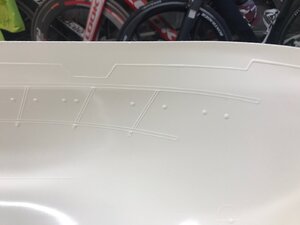
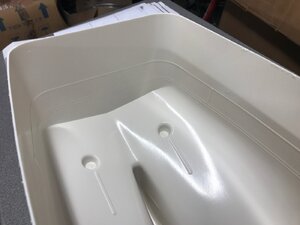
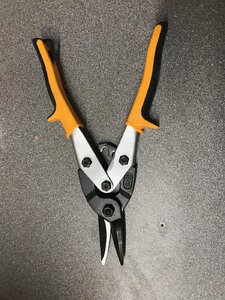
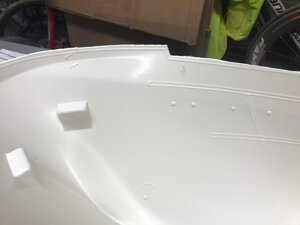
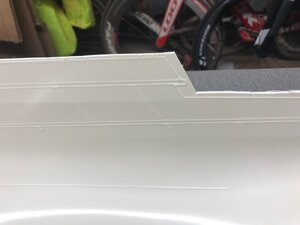
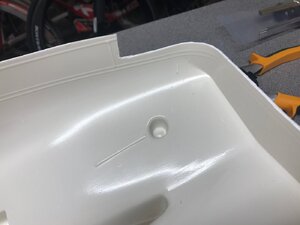
The vac formed hull has moulded raise detail inside to locate the 2mm square ABS strip that the deck sits on and the upper edge of the bulwarks.The hull is trimmed roughly well above these lines.The bulwark top are trimmed to the final height after the decks,bulwark liners and cap strip are in place.For this job I used some aviation snips.

Kind Regards

Nigel
HH10.jpgHH11.jpgHH12.jpgHH13.jpgHH14.jpgHH15.jpg
 
Bow Thruster installation.

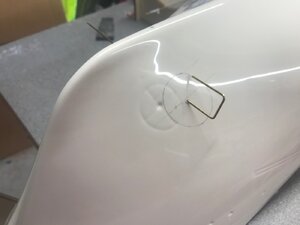
I deviated from the recommended bow thruster as this was different to the original Robbe kit.The original bow thruster had proper propellers instead of being the paddle type.It was also larger if memory serves me right.I opted to use a Raboesch variant with brass propellers.The central core is wider than the original Robbe so I moved the position slightly aft.This is also more in keeping with pictures of the original in dry dock.

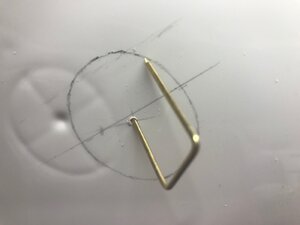
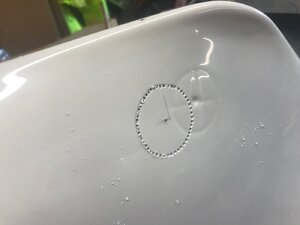
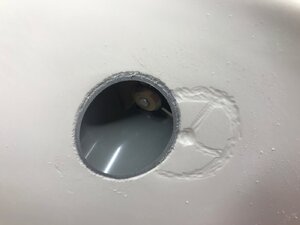
I drilled a 1.5mm hole in the centre of the hole to be cut out in each side of the hull.I then bent some brass 1.5mm wire to make a scriber set at the correct radius.With the wire passed through both holes,I marked the holes to be cut out.These are a true circle when viewed from the side but are an ellipse in the hull face due to the hull contours.I chain drilled around the holes and cut the centres out cleaning up with a drum sander.

I realise now that I did not take any pics of the installation itself.The thruster was assembled in the hull and when set in position the inside was bonded with a fillet of two part acrylic Stabilit Express adhesive.This is the only real proper glue to use gluing structural joints in ABS plastic.I order it direct from Germany via Ebay as it is nearly half the price than in the UK even after postage.

The bow thrust tubes were cut and sanded flush each side of the hull and a burr was used to form a gouge in the joint to take filler.I also roughed the indentations that marked the original position to take filler.For filling on the hull I use Upol acrylic glazing putty for car body repair.This bonds to ABS plastic and can be wet sanded to a glass smooth finish.It is also waterproof and not porous like convention two part body filler.

Kind Regards

Nigel
IMG_1670.jpgIMG_1671.jpgIMG_1673.jpgIMG_1674.jpg
 
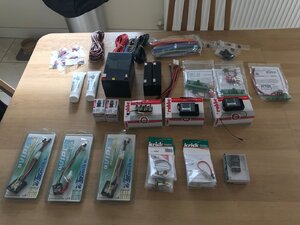
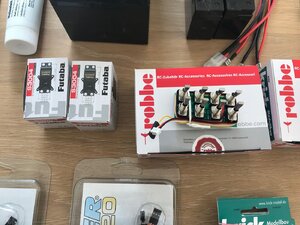
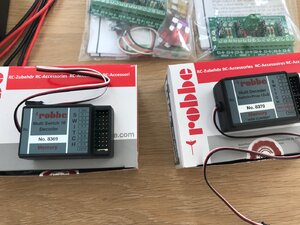
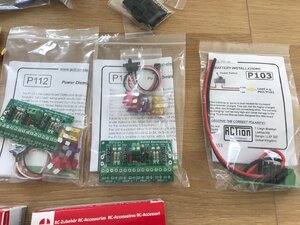
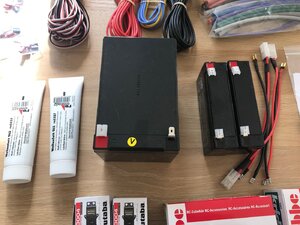
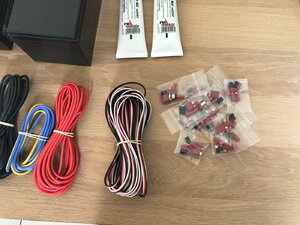
Ok I promise I will upload further build pictures this weekend.In the meantime I have been obtaining a few bits and bobs over the last two weeks from the UK and Krick in Germany.Here is a list of what is in the pics and yes it will all fit in the hull..........justROTF;

One 12volt and two 6volt sealed lead acid batteries
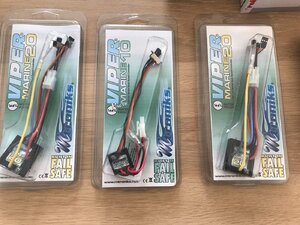
3 Mtronics Speed controllers(1 for each prop plus one for bowthruster)
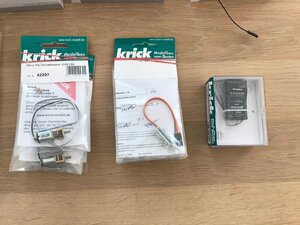
One 8 channel 2.4Ghz Futaba reciever
Two ballraced servos(1 for rudder,1 for working tow release)
One multiswitch module to go in the transmitter I already have
One multiswitch decoder to suit above
One Multiprop/switch decoder(module already fitted in transmitter)
5 mini geared motors(3 for the crane,1 for the anchor and 1 for the radar)
4 Transistor Polarity reversing modules for above
2 Action electronics fused power distribution boards(one for 12volt and one for 6volt)
1 Action Electronics Mosfet board to run the two 6v batteries in parallel without risking backcharging
Deans Marine connectors(I will loose the Tamiya style connectors,they are garbage)
Silicon wire
Futaba male and female servo connector plugs
5m of servo wire
Heatshrink
Two tubes of Propshaft grease

And still some outstanding items currently out of stock but should be available when the world gets back to normal;

Action Electronics Noisy thing sound module plus speaker
Two digital voltage displays(one for each powerboard to indicate battery charge level)

Kind Regards

Nigel
HH16.jpgHH17.jpgHH18.jpgHH20.jpgHH21.jpgHH22.jpgHH23.jpgHH24.jpgHH25.jpg
 
Hi Jan

The instructions include a large shopping list of components, however some changes have been made to allow for a neater and better "engineered"installation.Even in the kit instructions, the black and white pics show a rats nest of wiring.I prefer something a little tidier.The power distribution boards help with this as well as protecting the circuits with fuses.
Because of the many working functions,I find the best was is to instal everything I can before the decks are fitted and plan my cable runs.Remove it all, paint the inside of the hull, then refit before installing the decks.

Kind Regards

Nigel
 
Back
Top