Good morning Jack. You know I am a fan of your work…always love the way you get things to look so realistic…..as the coal burn and weathering on the funnel. BTW your locker is brilliant and certainly replaces the waffle makerWell things are still a bit disconnected and I am still unable to work on the main deck until I have finished painting the outside of the hull and waited until it is safe to handle. For the hull I am using I am using western approaches white paint made by an Italian company and sold under the name of 'Lifecolor '. It is a water thinable acrylic and although easy to use it has a very slow 'tail' to it's drying characteristics, although dust free in about half an hour you can still mark it the next day and this has slowed things up a bit. But I am nearly there now.
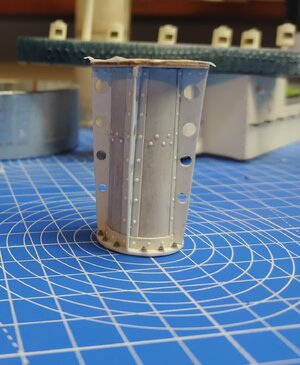
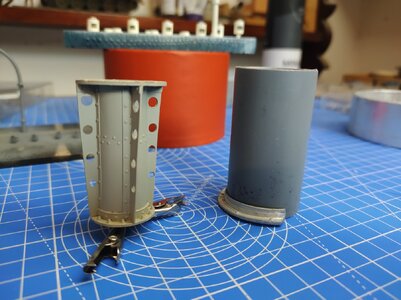
While waiting I set about trying to make something of the funnel and Caldercraft's equivalent of a bisected toilet roll centre the two halves formed from vacuum shaped styrene. Having cut them out and glued them together I threw them in the bin. Then using their dimensions I made a wooden former and 'plated' it with thin sheets of styrene adding some fake rivets and bands. The next question was just how dirty did a white painted funnel get on a coal burning steam ship? Very I think and contemporary photographs show that. So I had a go at ageing mine, not sure I am happy yet but will wait until I finish the boiler room section before I decide.
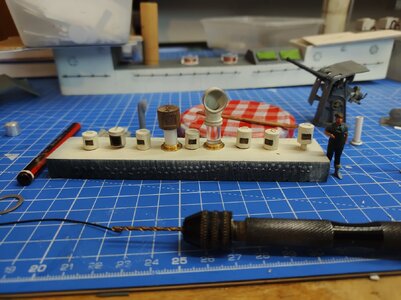
As well as the funnel I have been making some other parts to be added when I get working on the hull again. The highlight I suppose was the replacement of the ships flag locker. Caldercraft produced something that looked like a mini waffle maker out of white metal, so I replaced it with one I made from half millimetre pear, yet to paint it though.
Also made a few other bits and pieces, as you see they are gathering up. Lets hope the hull dries and I can get back to fitting them.
View attachment 422777
These ventilators are sprouting up like.... like mushrooms.
View attachment 422778
Cheers JJ..
View attachment 422770
-

Win a Free Custom Engraved Brass Coin!!!
As a way to introduce our brass coins to the community, we will raffle off a free coin during the month of August. Follow link ABOVE for instructions for entering.
-

PRE-ORDER SHIPS IN SCALE TODAY!
The beloved Ships in Scale Magazine is back and charting a new course for 2026!
Discover new skills, new techniques, and new inspirations in every issue.
NOTE THAT OUR FIRST ISSUE WILL BE JAN/FEB 2026
You are using an out of date browser. It may not display this or other websites correctly.
You should upgrade or use an alternative browser.
You should upgrade or use an alternative browser.
Round Table class Minesweeping Trawler 1942/45 Scale 1:48Built from the Calder Craft kit Sir Kay [COMPLETED BUILD]
- Thread starter Jack Jäger
- Start date
- Watchers 16
Great appearance - so realistic - maybe better to say: I would imagine, that a funnel of such a ship would look like - I love it
- Joined
- Aug 14, 2018
- Messages
- 829
- Points
- 403

Never built anything like this before Uwek, so I am working from photographs, memory and guesswork. Thank you JJ..Great appearance - so realistic - maybe better to say: I would imagine, that a funnel of such a ship would look like - I love it
- Joined
- Aug 14, 2018
- Messages
- 829
- Points
- 403

Thanks for your support Grant, I am having some fun doing something a bit different. As for the waffle maker it doesn't even fit where it's meant to go. Still 'first world problems'. Cheers JJ..Good morning Jack. You know I am a fan of your work…always love the way you get things to look so realistic…..as the coal burn and weathering on the funnel. BTW your locker is brilliant and certainly replaces the waffle maker. Cheers Grant
- Joined
- Aug 14, 2018
- Messages
- 829
- Points
- 403

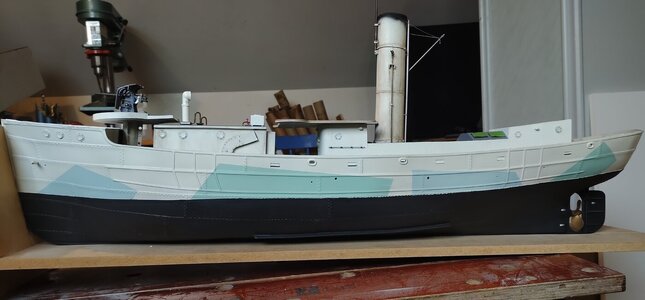
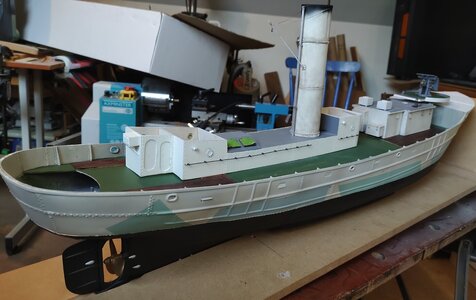
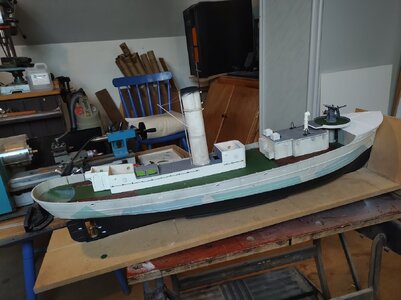
Kay gets her war paint.
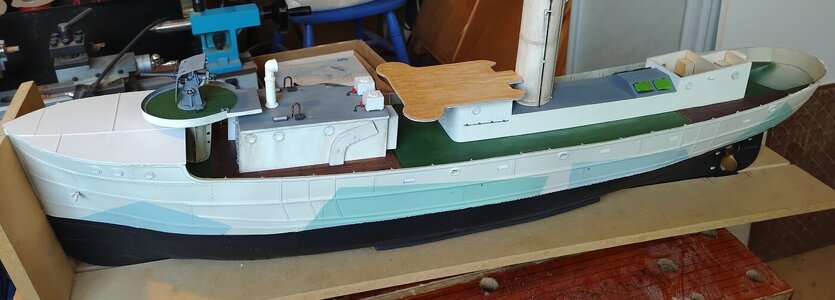
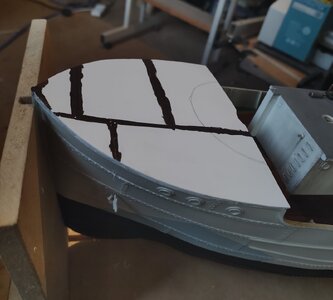
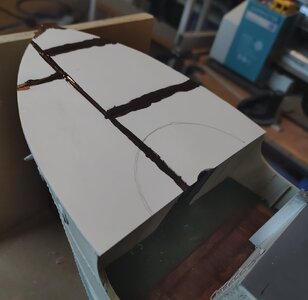
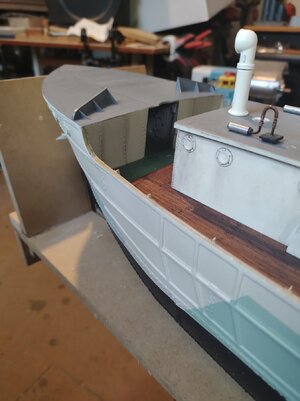
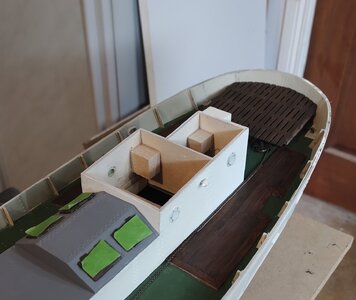
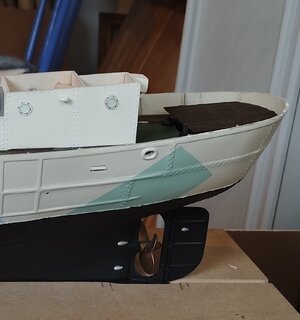
Well after an age waiting for the paint to dry fully I crossed my fingers and removed all the masking tape and.... Not a single flake was pulled off. Only two of the eight 'Tables' where painted off white and as near as I can tell from the overexposed b/w photos the green and blue blocks are as painted, seems a shame to mucky them up but they are just too clean. Buts that's for the future.
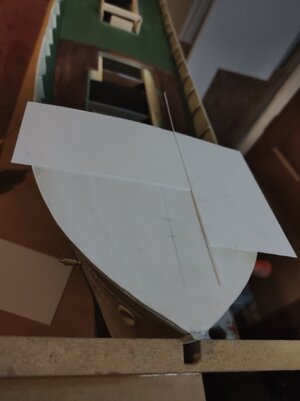
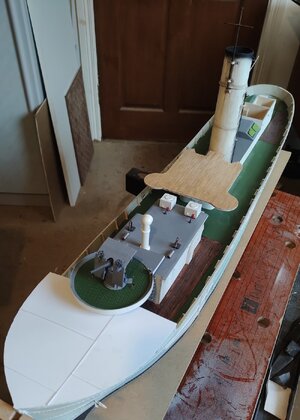
Unlike the rivets everywhere construction of the rest of the ship the forecastle had steel armoured plates welded on top. I experimented with different ways to replicate the welds but with little success, and the best that I could come up with was to place some thin (0.25mm) styrene slivers between the 'plates' then when all is dry I will attempt to rub them down until they just show (here's hoping).
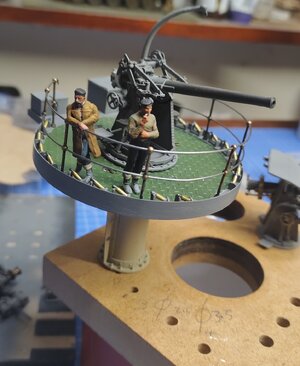
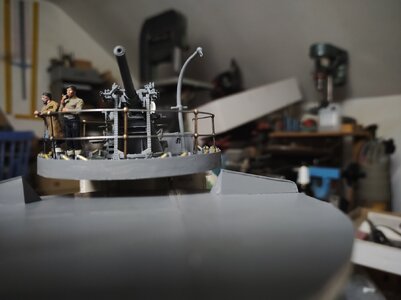
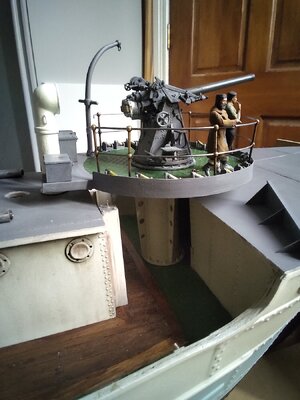
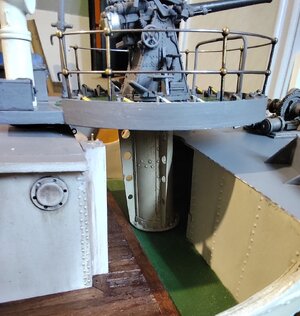
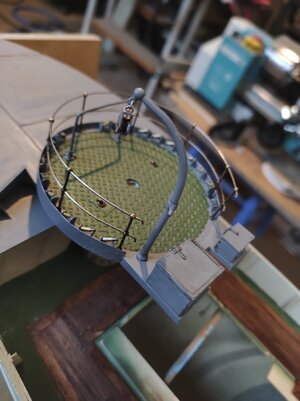
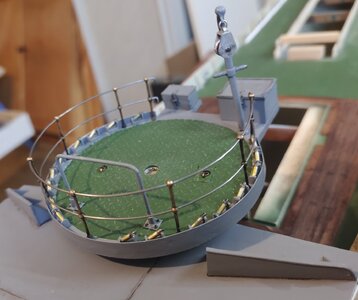
Something else that caused a bit of head scratching was the plinth for the forward gun platform. The Roundtable trawlers where ballasted to have a three degree fall to the stern, but the gun forward sits on a platform that is parallel to the water line i.e. three degrees forward. that makes it very tricky to get all planes right especially as the base sits on the crown of the deck. After a bit of work I came up with what I think turned out quite a nice support. Well is is most certainly better that the piece of plastic plumbing pipe supplied with the kit.
Some of the following pics. show the position of all the superstructure bits in place and for the first time I have the feeling of things coming together. Beginning to like things.
- Joined
- Aug 14, 2018
- Messages
- 829
- Points
- 403

Just a quick update on my 'welds', I carefully paired them down until just above the surface then gently sanded them to round the edges. Before painting the deck grey I used a dark brown over the seams, followed by a coat of clear gloss and a coat of Vallejo chipping medium so that I may add some paint chips in the future.
I made a pair of breakwaters from 0.5mm styrene and fixed them to the deck.
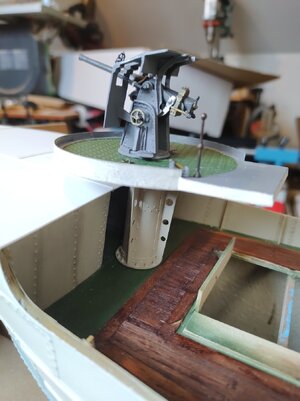
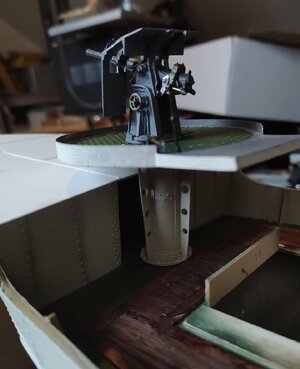
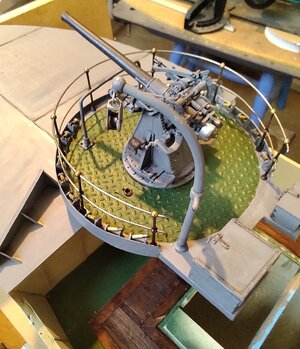
While this was going on I done some work to the 12 pound gun deck. I had to modify the support for the ready use boxes as it interfered with the large vent. Still a few bits to add but its coming on nicely.
Mizzen deck at the stern next then I can start to add detail to the deck.
- Joined
- Jan 9, 2020
- Messages
- 10,566
- Points
- 938

Hi Jack. You have an uncanny ability to unearth the most fascinating build subjects - and this one is certainly no exception. Also, I have this sneaky suspicion that this one is going to be something REALLY special! I will most certainly follow along.
- Joined
- Aug 14, 2018
- Messages
- 829
- Points
- 403

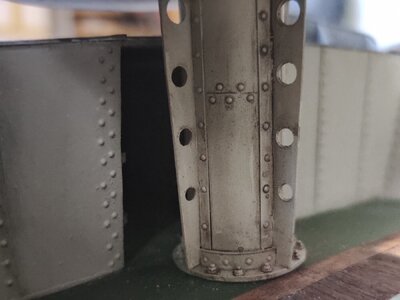
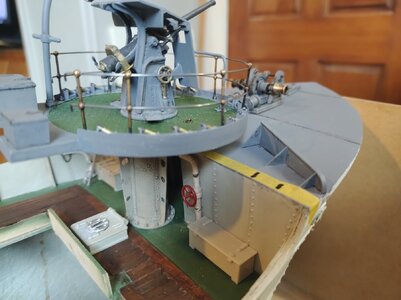
Hi folks. I am steaming on rightly now that I have a building order in my head rather than building the random bits and pieces I have done up to now. I have finished the 12 pound gun platform ( a mini-kit by itself,) and it turned out quite well. The block on the davit looks too large in the pictures but is right to scale so I will probably keep it.
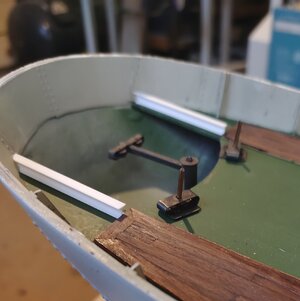
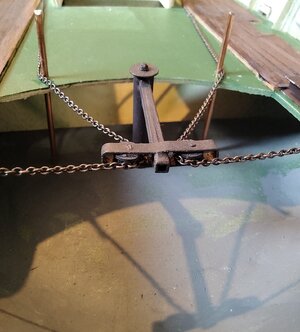
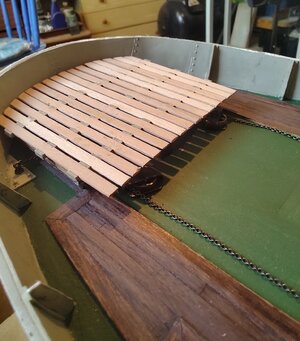
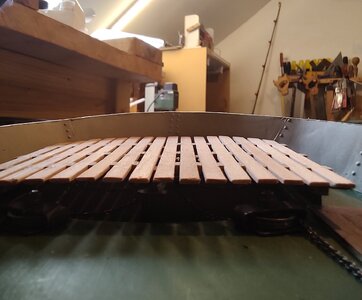
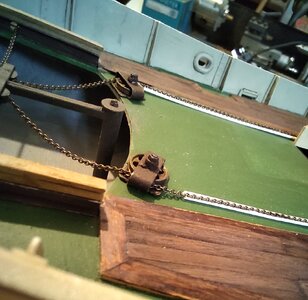
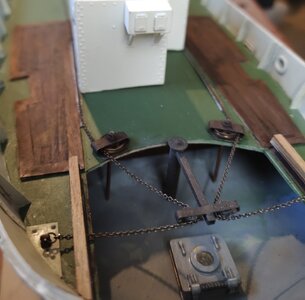
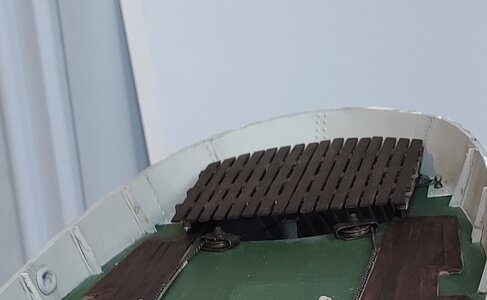
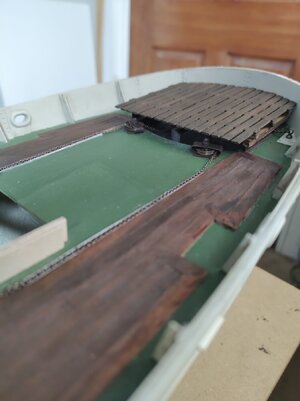
The column looks grotty but when you look at old photographs of these ships they where truly filthy, although I don't think I will go that far. Next up was to make a start on the steering gear. I had to smile as, except for steam assistance, the method of getting from wheel to rudder has not changed much in two hundred years. Still a wheel and a barrel and in this case chains rather than ropes connected to a tiler through a set of sheves. The wheel and it's steam engine sits at the rear of the wheel house from where a chain, wrapped, around the barrel falls to port and starboard until nearly at the deck level then from there around a 9 inch sheve to head sternward. the chains travel along a pipe until near the end of the stern cabin from there they drop into an 'u' channel to a 15 inch sheve then to a another 9 inch sheve attached to the tiler. From here the ends of the chain take a 90 degree turn out through a hole in the 'H' girders that support the grating there to be bolted to the deck. The deck grating was made up from some 5 x 1 mm pear and will be used to support the 'LL' cable rollers etc.. Interestingly even in a small ship like Sir Kay it took twenty six full turns of the wheel to move the rudder from full port to full starboard, little wonder you needed steam assistance.
There are several layers of deck furniture to be added before I can permanently fix the central casing and finish the steering chains, and that is where I am heading now.
Cheers JJ
Absolutely love the details, Jack! Well made.
Good afternoon Jack. Details and more details done like you do- brilliant. Cheers GrantHi folks. I am steaming on rightly now that I have a building order in my head rather than building the random bits and pieces I have done up to now. I have finished the 12 pound gun platform ( a mini-kit by itself,) and it turned out quite well. The block on the davit looks too large in the pictures but is right to scale so I will probably keep it.
View attachment 425099View attachment 425100View attachment 425101View attachment 425102View attachment 425103The column looks grotty but when you look at old photographs of these ships they where truly filthy, although I don't think I will go that far. Next up was to make a start on the steering gear. I had to smile as, except for steam assistance, the method of getting from wheel to rudder has not changed much in two hundred years. Still a wheel and a barrel and in this case chains rather than ropes connected to a tiler through a set of sheves. The wheel and it's steam engine sits at the rear of the wheel house from where a chain, wrapped, around the barrel falls to port and starboard until nearly at the deck level then from there around a 9 inch sheve to head sternward. the chains travel along a pipe until near the end of the stern cabin from there they drop into an 'u' channel to a 15 inch sheve then to a another 9 inch sheve attached to the tiler. From here the ends of the chain take a 90 degree turn out through a hole in the 'H' girders that support the grating there to be bolted to the deck. The deck grating was made up from some 5 x 1 mm pear and will be used to support the 'LL' cable rollers etc.. Interestingly even in a small ship like Sir Kay it took twenty six full turns of the wheel to move the rudder from full port to full starboard, little wonder you needed steam assistance.
View attachment 425118View attachment 425119View attachment 425120View attachment 425122View attachment 425123View attachment 425124View attachment 425125View attachment 425127View attachment 425128View attachment 425130View attachment 425131There are several layers of deck furniture to be added before I can permanently fix the central casing and finish the steering chains, and that is where I am heading now.
Cheers JJ
- Joined
- Aug 14, 2018
- Messages
- 829
- Points
- 403

Hi Grant, I guess I better beware, they say 'detail is where the Devil lurks'!Good afternoon Jack. Details and more details done like you do- brilliant. Cheers Grant
Cheers JJ..
- Joined
- Jan 9, 2020
- Messages
- 10,566
- Points
- 938

Hi Jack - you are indeed "steaming" along with tons of progress. I don't believe the "devil in the details" holds any threat for you - for that you are far too good. Keep on pursuing those details - that is what sets your builds apart from the rest!
- Joined
- Aug 14, 2018
- Messages
- 829
- Points
- 403

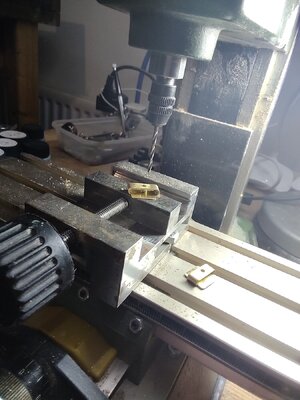
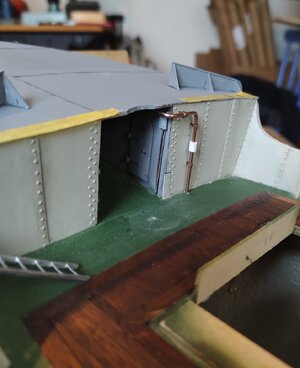
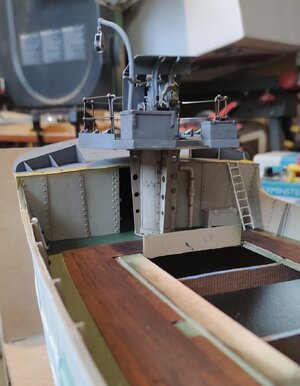
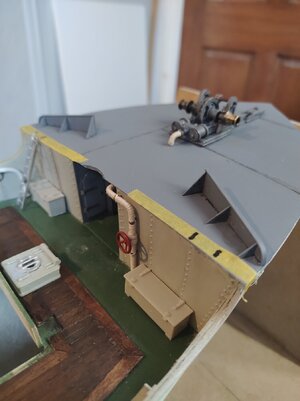
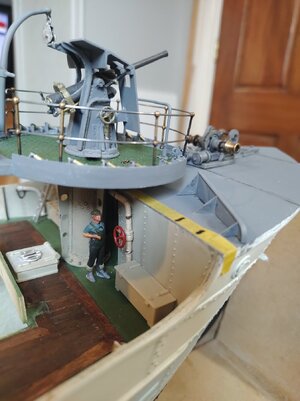
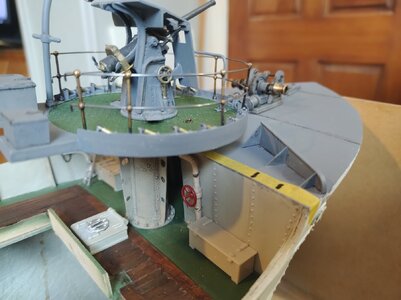
Hi folks, I though that when I started this build it would be, apart from the hull, 75 percent kit parts and 25 percent scratch or replacement parts now I am beginning to think it's 25/75. Anyway I spent the morning making and adding the steam pipe for the steam winch on the forecastle. I doesn't sound like a lot for a morning but it was quite fiddly and hard to get as I wanted it, but I think it turned out ok. I made a start on the vents but the football is coming on so they will have to wait.


That he does….Hi Grant, I guess I better beware, they say 'detail is where the Devil lurks'!
Cheers JJ..

- Joined
- Aug 14, 2018
- Messages
- 829
- Points
- 403

AmenThat he does….
A bit late, Jack, I see a very nice riveted steel hull. The invested time has paid off.I had the bad feeling that I was wasting my time adding a zillion 'rivets' to the hull but after a coat of primer/surfacer I now think they look quite nice and it was worth doing. The rivets scale up to about two inches and this would be quite large for a trawler but hopefully with many more coats of paint to come they will blend in.
Regards, Peter
By every post there are more very fine ad-on’s en more details. It’s becoming a great model, Jack.Hi folks, I though that when I started this build it would be, apart from the hull, 75 percent kit parts and 25 percent scratch or replacement parts now I am beginning to think it's 25/75. Anyway I spent the morning making and adding the steam pipe for the steam winch on the forecastle. I doesn't sound like a lot for a morning but it was quite fiddly and hard to get as I wanted it, but I think it turned out ok. I made a start on the vents but the football is coming on so they will have to wait.
View attachment 425600View attachment 425603
View attachment 425599
View attachment 425601
Regards, Peter
- Joined
- Aug 14, 2018
- Messages
- 829
- Points
- 403

Compared to you Peter my rivets are crapA bit late, Jack, I see a very nice riveted steel hull. The invested time has paid off.
Regards, Peter
 Cheers JJ..
Now you're selling yourself very short, Jack. Your neat paint job makes them look very realistic.Compared to you Peter my rivets are crapCheers JJ..


Regards, Peter
- Joined
- Aug 14, 2018
- Messages
- 829
- Points
- 403

Peter some of them look like something maybe I should scratch ! JJ..Now you're selling yourself very short, Jack. Your neat paint job makes them look very realistic.
Regards, Peter

