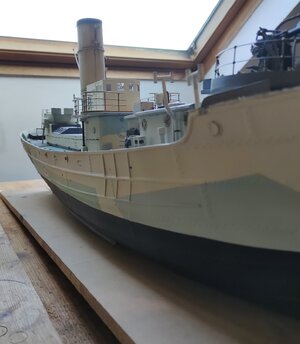
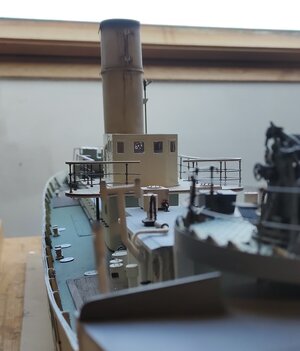
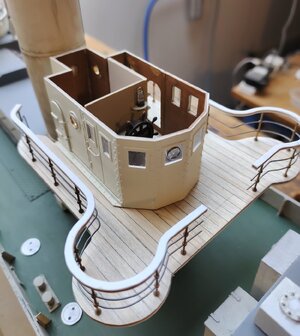
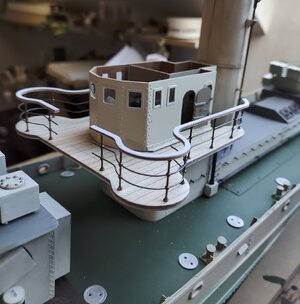
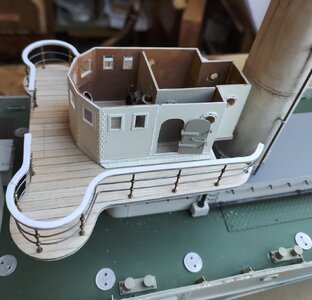
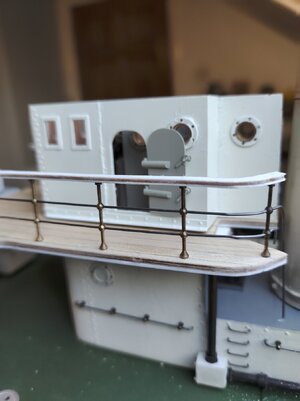
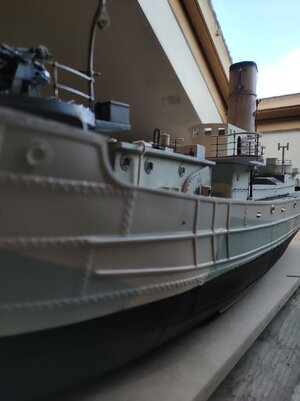
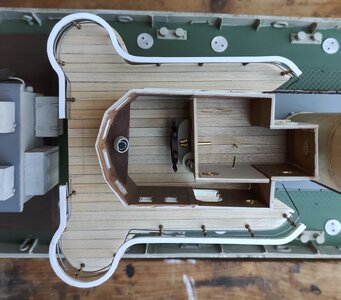
Beautifull work Jack, and you made a torough study of mine sweepers, i think
-

Win a Free Custom Engraved Brass Coin!!!
As a way to introduce our brass coins to the community, we will raffle off a free coin during the month of August. Follow link ABOVE for instructions for entering.
-

PRE-ORDER SHIPS IN SCALE TODAY!
The beloved Ships in Scale Magazine is back and charting a new course for 2026!
Discover new skills, new techniques, and new inspirations in every issue.
NOTE THAT OUR FIRST ISSUE WILL BE JAN/FEB 2026
You are using an out of date browser. It may not display this or other websites correctly.
You should upgrade or use an alternative browser.
You should upgrade or use an alternative browser.
Round Table class Minesweeping Trawler 1942/45 Scale 1:48Built from the Calder Craft kit Sir Kay [COMPLETED BUILD]
- Thread starter Jack Jäger
- Start date
- Watchers 16
- Joined
- Aug 14, 2018
- Messages
- 829
- Points
- 403

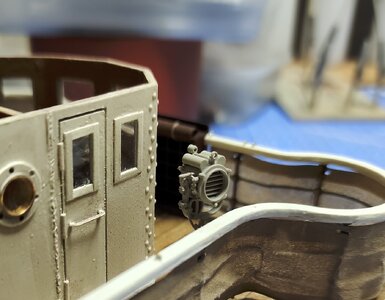
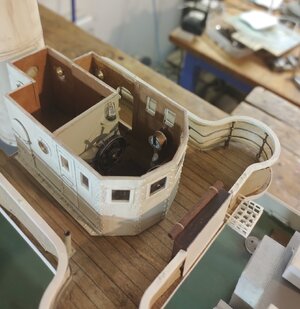
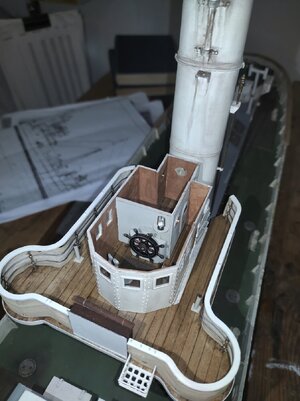
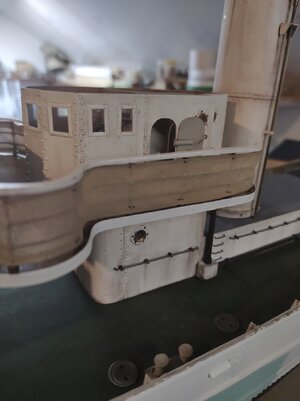
I was going to show you some photographs of the construction of the wheel house, but I must have been so engrossed in the building that I forgot to take any ! Well that's my excuse. Although going in to have a new batch of anti-bodies pumped into me may also have been a distraction, (this is something that happens every three or four years and now I am well used to it.
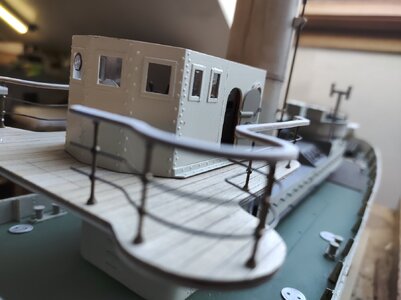
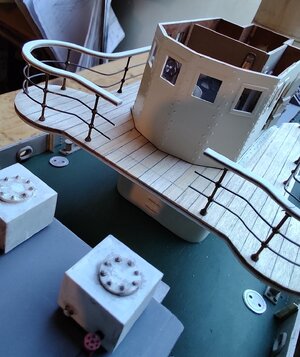
Anyway I have taken some photos of the finished, well nearly finished, wheel house. I still have to work out how many and where to put the voice pipes, other than that just the telegraph. The trickiest part was getting the lights all the same height considering the angles they are to each other. I 'glazed them with 0.25mm clear styrene. I had a go at making a clear view glass the front starboard light and reckon it came out ok.
Well no building for a week or so, but at least I will have my phone so I can look in and see what's going on.
Cheers JJ..
Fantastic work my friend! All the best for the pending fill-up...
The build up of the steering house looks very nice with all the details, Jack.I was going to show you some photographs of the construction of the wheel house, but I must have been so engrossed in the building that I forgot to take any ! Well that's my excuse. Although going in to have a new batch of anti-bodies pumped into me may also have been a distraction, (this is something that happens every three or four years and now I am well used to it.
Anyway I have taken some photos of the finished, well nearly finished, wheel house. I still have to work out how many and where to put the voice pipes, other than that just the telegraph. The trickiest part was getting the lights all the same height considering the angles they are to each other. I 'glazed them with 0.25mm clear styrene. I had a go at making a clear view glass the front starboard light and reckon it came out ok.
View attachment 432043View attachment 432044View attachment 432045View attachment 432047View attachment 432048View attachment 432049View attachment 432050View attachment 432051View attachment 432052View attachment 432053View attachment 432054
Well no building for a week or so, but at least I will have my phone so I can look in and see what's going on.
Cheers JJ..
Regards, Peter
DittoFantastic work my friend! All the best for the pending fill-up...
That’s a beauty. Well done.
- Joined
- Jan 9, 2020
- Messages
- 10,566
- Points
- 938

Hopefully the refueling will not leave you lethargic but endow you with even more energy! The wheelhouse is just brilliant - I love the rivets; they look so good. Before you place the roof, please remember to show us the interior. I would love to see the feng shui of that. 

- Joined
- Aug 14, 2018
- Messages
- 829
- Points
- 403

Thanks Heinrich, this is the fifth time round and the third during the week of my birthday so I could not have a better present and hope it will keep me ticking for a while longer. The ship is starting to come together and also starting to look a bit better. The flying bridge sits atop the wheel house so there will be a couple of voice pipes running through, hopefully I can find a way to show them. Hears hoping that they pipe a large dollop of feng shui into me, I need the force!Hopefully the refueling will not leave you lethargic but endow you with even more energy! The wheelhouse is just brilliant - I love the rivets; they look so good. Before you place the roof, please remember to show us the interior. I would love to see the feng shui of that.
Cheers JJ..
- Joined
- Aug 14, 2018
- Messages
- 829
- Points
- 403

Thanks PaulFantastic work my friend! All the best for the pending fill-up...
Greetings Jack, I came upon your build log of a Round Table class trawler this morning.
A truly outstanding project as many other readers have mentioned. I took most of the morning
enjoying reading the whole thing. Thanks for sharing.
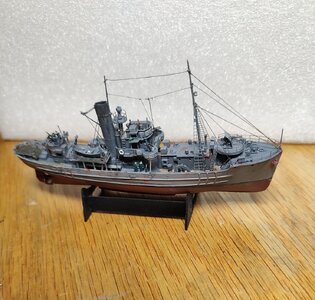
I had to visit your ship's baby brother, HMS Sir Gareth. It's a bit smaller at 1/350 but made reviewing
your log that much more enjoyable.
A truly outstanding project as many other readers have mentioned. I took most of the morning
enjoying reading the whole thing. Thanks for sharing.
I had to visit your ship's baby brother, HMS Sir Gareth. It's a bit smaller at 1/350 but made reviewing
your log that much more enjoyable.

- Joined
- Aug 14, 2018
- Messages
- 829
- Points
- 403

Hello Tigerdvr, thank you for your kind comments, I normally build sailing ships and only one of them in such a big scale (1/48 scale 20 gun ship from Modelship Dockyard),so this is a bit different for me. Now that I am into it I am starting to enjoy it. Sir Gareth looks great, was it a scratch build from John Lambert plans?Greetings Jack, I came upon your build log of a Round Table class trawler this morning.
A truly outstanding project as many other readers have mentioned. I took most of the morning
enjoying reading the whole thing. Thanks for sharing.
I had to visit your ship's baby brother, HMS Sir Gareth. It's a bit smaller at 1/350 but made reviewing
your log that much more enjoyable.
View attachment 432259
I don't think my eyes would let me see the parts at that scale.
All the best Jack.
This HMS Sir Gareth is a kit from Starling Models (UK) and about an inch long. I only do minor scratch additions.
That's why I find following your scratch project is so fascinating.
Cheers, Harley
That's why I find following your scratch project is so fascinating.
Cheers, Harley
- Joined
- Aug 14, 2018
- Messages
- 829
- Points
- 403

Hi Harley, thanks for the reply. I thought it might have been a scratch build from Lambert plans because of the raised chequer plate platform alongside the boil room casing, something shown on Lamberts plans that I have never been sure about. But since another company has shown the same I might have a rethink. Most steam trawlers have these plates, but they are at deck level and cover openings in the deck, there to facilitate the installing/ removal of the boiler. I could never figure out a reason for a raised platform.This HMS Sir Gareth is a kit from Starling Models (UK) and about an inch long. I only do minor scratch additions.
That's why I find following your scratch project is so fascinating.
Cheers, Harley
I am in dry dock this week so I won't be building much, still plenty of time for reading.
All the best Jack.
- Joined
- Aug 14, 2018
- Messages
- 829
- Points
- 403

Out of Drydock and back in the Shipyard.
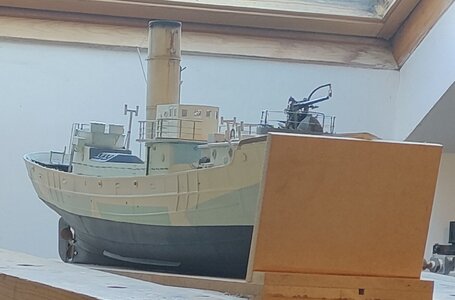
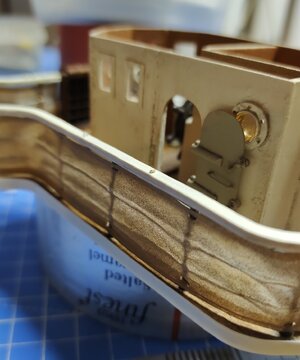
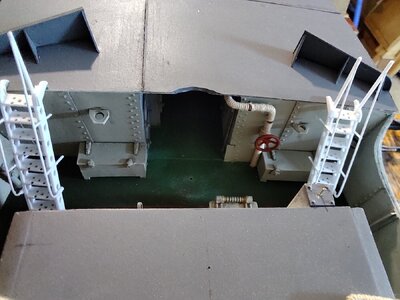
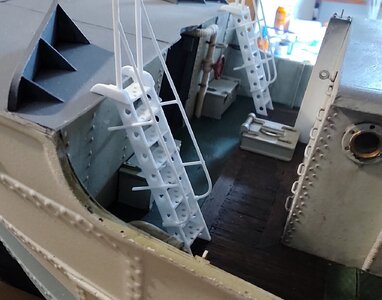
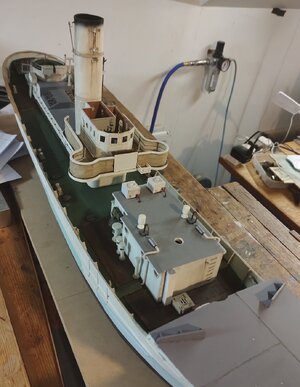
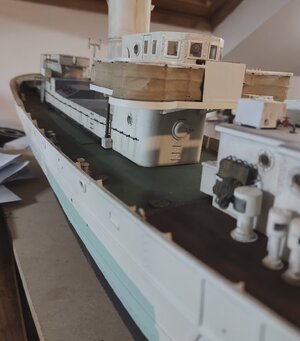
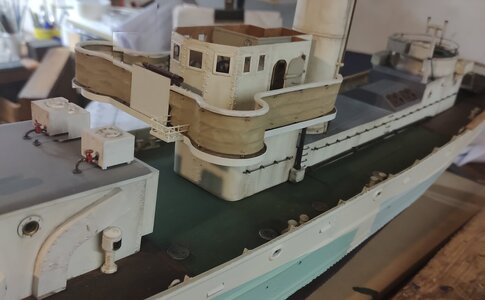
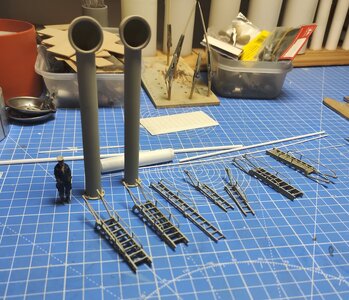
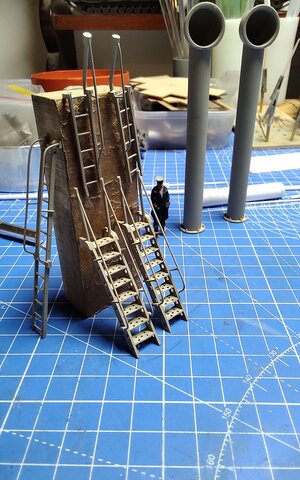
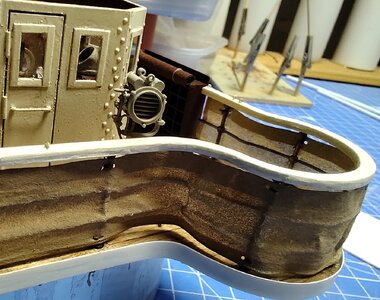
Well after sitting around reading and watching old films and being fussed over for a week or so I am now back on an even keel and even managed to get some building done over the weekend rejoicing in the solitude of my workshop. To ease myself back in I have mostly been going over already built sections adding a bit of detail. I have been concentrating on the wheelhouse and bridge and have just about finished them. At the stern I have started to fit the wooden cap to the gunnel. From the photographs I have the wooden rail only goes forward until just past the galley and, I think, slightly less on the port side. The mid section of both sides is capped just in flat steel, then up to the forecastle is wood again. All will be painted in RN white later on. I am pleased with the covering of the bridge rail with 'canvas' and think that the silkspan done a good job. There was a little basket to be made and fitted to the front of the bridge beside the flag locker this is for stowing the black at anchor boys etc.. I have added two upright stanchions to support the the ship's 10" signalling lamp.
Other than that I have decided not to use the w/m ladders that came with the kit, instead I have hade had a go at making them myself. they will end up painted white as well. The boiled air intake vents have been made and given a coat of shipyard grey for now. They are huge, nearly a scaled six meters tall!
Here are some pics..
- Joined
- Jan 9, 2020
- Messages
- 10,566
- Points
- 938

A bit more challenging, Jack - from where I sit those look pretty challenging to me!  There is just so much to look at and see during your updates, it's difficult to fathom the full extent of the work. The canvas and scratch made ladders are the standouts for me, however. Ican still not figure out how is it possible to scratch build ladders like that! Chapeau, young man.
Good morning Jack. I’m with Heinrich on this. Bravo on those ladders. The “used” appearance of your smoke stake is impressive. So many details to view- great modelling. Cheers GrantOut of Drydock and back in the Shipyard.Well after sitting around reading and watching old films and being fussed over for a week or so I am now back on an even keel and even managed to get some building done over the weekend rejoicing in the solitude of my workshop. To ease myself back in I have mostly been going over already built sections adding a bit of detail. I have been concentrating on the wheelhouse and bridge and have just about finished them. At the stern I have started to fit the wooden cap to the gunnel. From the photographs I have the wooden rail only goes forward until just past the galley and, I think, slightly less on the port side. The mid section of both sides is capped just in flat steel, then up to the forecastle is wood again. All will be painted in RN white later on. I am pleased with the covering of the bridge rail with 'canvas' and think that the silkspan done a good job. There was a little basket to be made and fitted to the front of the bridge beside the flag locker this is for stowing the black at anchor boys etc.. I have added two upright stanchions to support the the ship's 10" signalling lamp.
Other than that I have decided not to use the w/m ladders that came with the kit, instead I have hade had a go at making them myself. they will end up painted white as well. The boiled air intake vents have been made and given a coat of shipyard grey for now. They are huge, nearly a scaled six meters tall!
Here are some pics..
View attachment 435926View attachment 435927View attachment 435929View attachment 435930View attachment 435931View attachment 435932View attachment 435933View attachment 435934View attachment 435935View attachment 435936View attachment 435937View attachment 435938
All being well I will get into something a bit more challenging this week.
Cheers JJ..
View attachment 435928
- Joined
- Aug 14, 2018
- Messages
- 829
- Points
- 403

Thank you Heinrich for your kind words, I was not intending to sound blasé about the little ladders they are difficult to make, but I have made them before so had a good idea what I had to do. The challenging part is to now build a convincing flying bridge as it will be clearly visible, no hiding place ! And to be consistent I will need to add quite a bit of detail, and that's another challenge as there are not too many pics. close up of navy trawler bridges.A bit more challenging, Jack - from where I sit those look pretty challenging to me!There is just so much to look at and see during your updates, it's difficult to fathom the full extent of the work. The canvas and scratch made ladders are the standouts for me, however. Ican still not figure out how is it possible to scratch build ladders like that! Chapeau, young man.
Thanks again JJ..
- Joined
- Aug 14, 2018
- Messages
- 829
- Points
- 403

Thanks Grant, I can only imagine how mingingly dirty that funnel would have got on an old coal burning steamer, wouldn't want to have been one of the plebs that had to clean it navy style.Good morning Jack. I’m with Heinrich on this. Bravo on those ladders. The “used” appearance of your smoke stake is impressive. So many details to view- great modelling. Cheers Grant
Cheers JJ..
This level of detailing is breathtaking Jack. My respect! SO MUCH to look at!
True story…..Thanks Grant, I can only imagine how mingingly dirty that funnel would have got on an old coal burning steamer, wouldn't want to have been one of the plebs that had to clean it navy style.
Cheers JJ..

