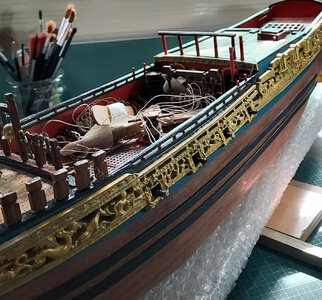
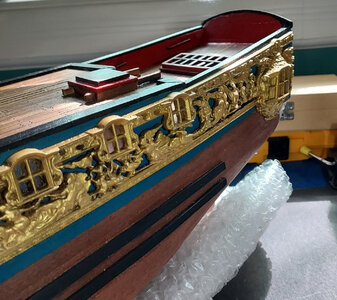
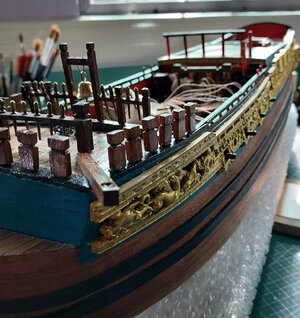
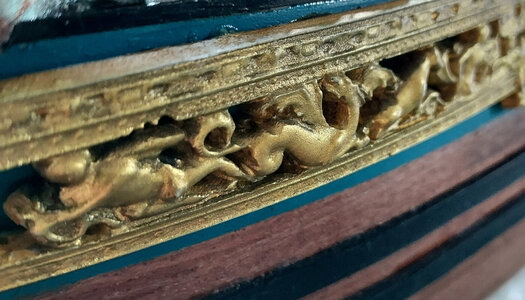
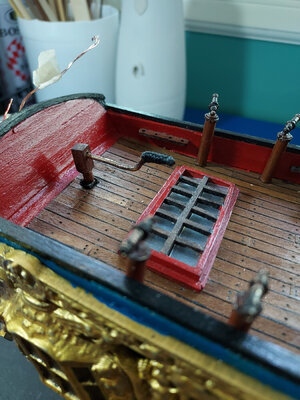
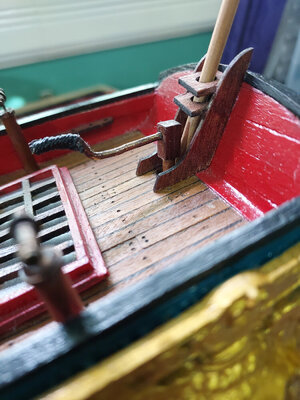
Royal Caroline 1:50 YuanQing/ZHL [COMPLETED BUILD]

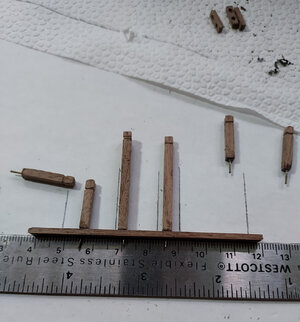
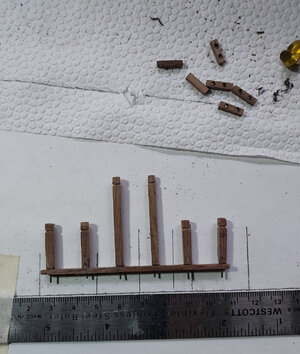
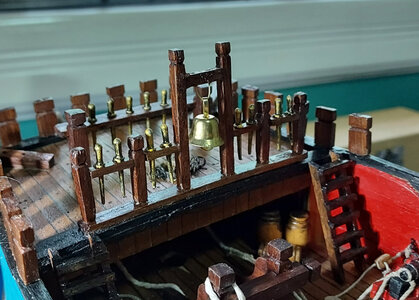
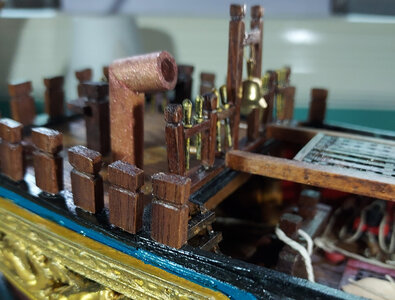
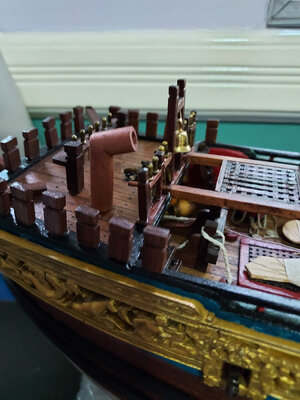
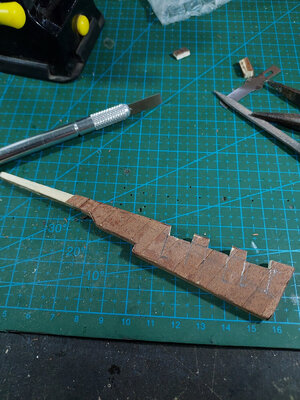
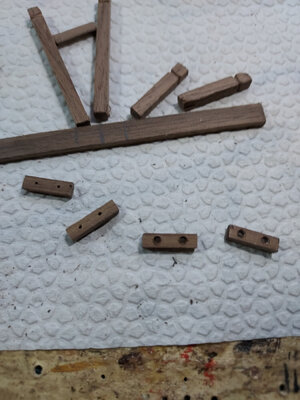
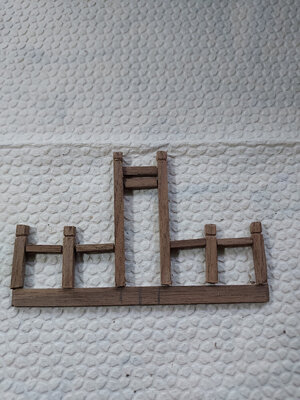
Still working on deck pieces. Next up was the bell rack assembly. As usual, various wood strips had to be cut and shaped, including the pin racks.

PSX_20210704_201533.jpgPSX_20210704_201519.jpg

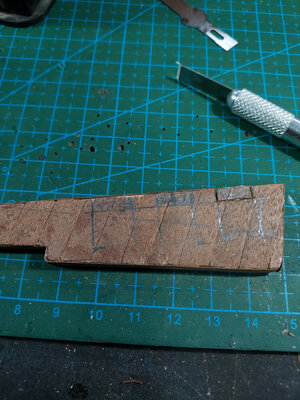
In order to ensure the verticals are at right angles, I taped a straight edge and drew right angle lines to help me align the vertical posts. The posts were pinned with a piece of stiff wire.
PSX_20210704_201656.jpg
PSX_20210704_201814.jpg

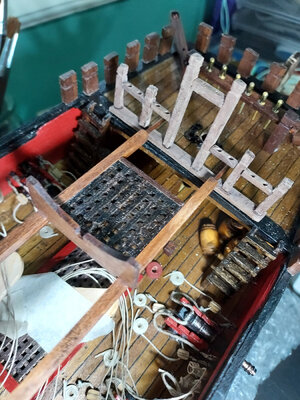
I dry fitted the assembly on to the forecastle to make sure the vertical posts are not in the way of the boat rack.
PSX_20210704_201844.jpg


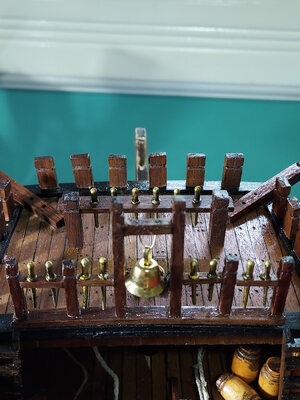
Here's the finished piece.
PSX_20210704_202741.jpg
PSX_20210704_202757.jpg

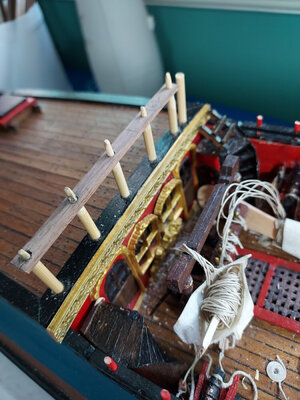
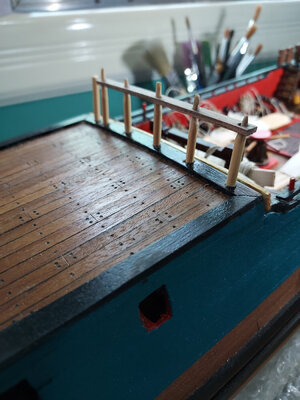
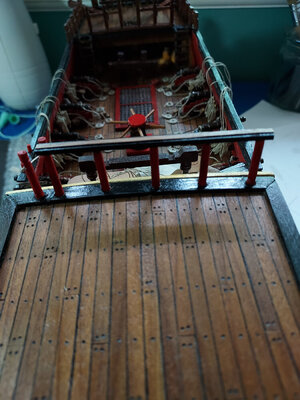
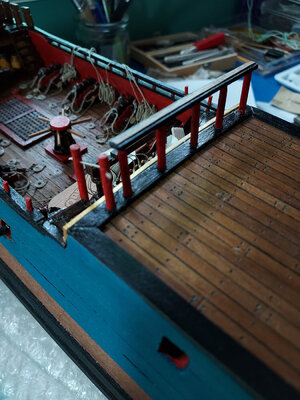
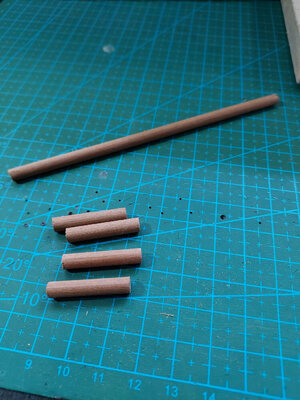
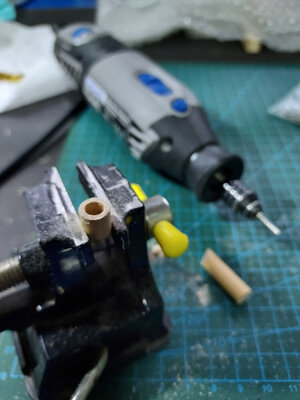
Next up was the mid deck railing. Holes were drilled on the top and bottom pieces, and a round dowel inserted and glued on. The excess dowels were trimmed and sanded and covered with a piece of planking strip.
PSX_20210704_202036.jpg
PSX_20210704_202052.jpgPSX_20210704_202114.jpgPSX_20210704_202128.jpg

That's it for now. Thanks for dropping by.
 
Still working on deck pieces. Next up was the bell rack assembly. As usual, various wood strips had to be cut and shaped, including the pin racks.

View attachment 242179View attachment 242180

In order to ensure the verticals are at right angles, I taped a straight edge and drew right angle lines to help me align the vertical posts. The posts were pinned with a piece of stiff wire.
View attachment 242181
View attachment 242182

I dry fitted the assembly on to the forecastle to make sure the vertical posts are not in the way of the boat rack.
View attachment 242183


Here's the finished piece.
View attachment 242185
View attachment 242186

Next up was the mid deck railing. Holes were drilled on the top and bottom pieces, and a round dowel inserted and glued on. The excess dowels were trimmed and sanded and covered with a piece of planking strip.
View attachment 242196
View attachment 242197View attachment 242198View attachment 242199

That's it for now. Thanks for dropping by.
I'm learning these small additions take SO MUCH time. Wonderful job. Oh, and one of your barrels fell over - or was that for effect?
 
You are making very good progress Reggie. Like Paul said, these fittings are incredibly time-consuming, but the devil is indeed in the detail. This is what will ultimately make the model special.
 
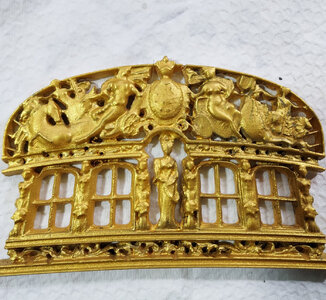
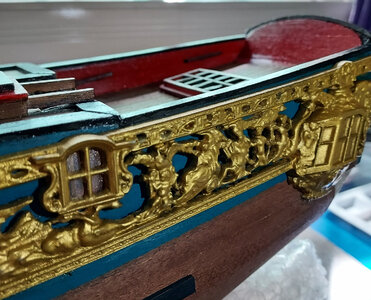
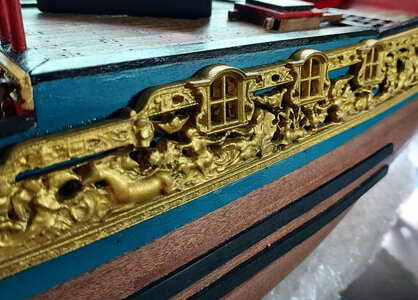
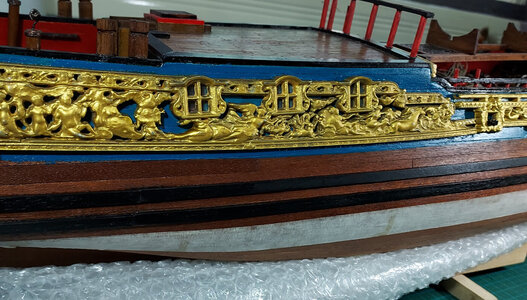
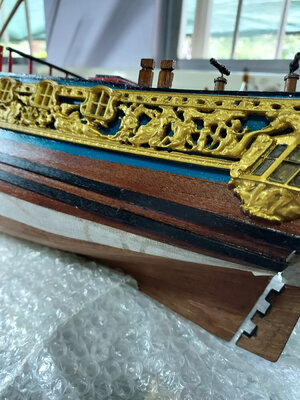
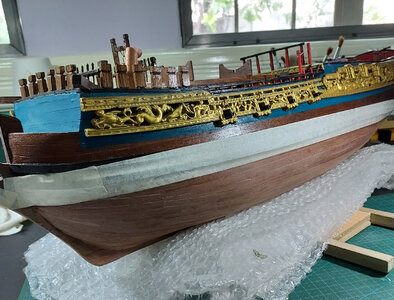
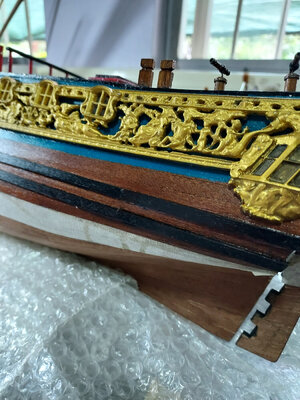
Today is a very special day. Good ole Lady Caroline is getting fitted with her golden finery. Granted these resin carvings aren't quite as elegant as the ones in her more exquisite cousin, the 1:30 ZHL Royal Caroline kit or even the fine Panart model. But I have to be content with what I have, and I was quite pleasantly surprised how nicely the carvings added to the overall look of the ship. Perhaps nowhere near historically accurate, but will have to do for now.

In a prior post, I discussed how I prepared the resin carvings and painting them gold. I was debating whether to apply a very light dark wash, since I initially thought the wash dulled the sheen of the gold somewhat. But, after much thought, and heeding the advice from some friends in the forum, I decided to do the wash, using diluted black acrilyc paint.

The pictures below show the comparison between the washed portion vs the unwashed. The right side is the washed portion.
PSX_20210714_134115.jpg

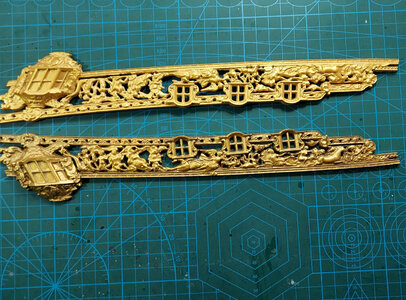
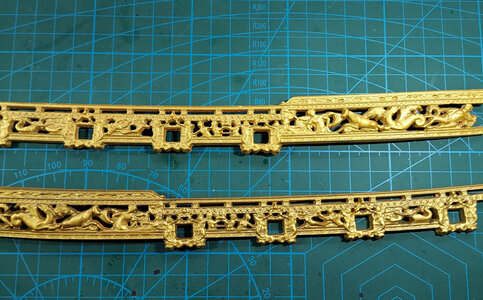
In the following pictures, the bottom pieces are washed.
PSX_20210714_134219.jpgPSX_20210714_134208.jpg

The difference is very subtle, but the washed pieces definitely look better... a bit more definition and deeper details.

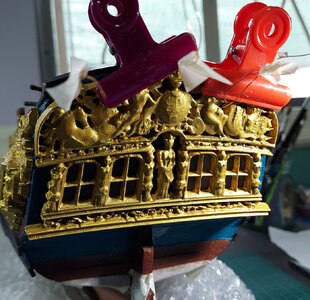
Gluing them to the hull was quite a challenge. Earlier (before I painted them), I molded the resin to the contours of the hull by heating them with a blow dryer and clamping them to shape.

I used contact cement initially, but later discovered that the contact cement wasn't strong enough to hold the pieces in place. There was still a bit of pull and resistance when I fitted the resin pieces. Even with clamping and waiting several days to dry, I found certain spots were peeling off. So I supplemented the contact cement with CA gel glue at the stress points. So far so good.

Here are some pictures.
PSX_20210714_135229.jpgPSX_20210714_135251.jpgPSX_20210714_135311.jpgPSX_20210714_135356.jpgPSX_20210714_135408.jpgPSX_20210714_135422.jpg

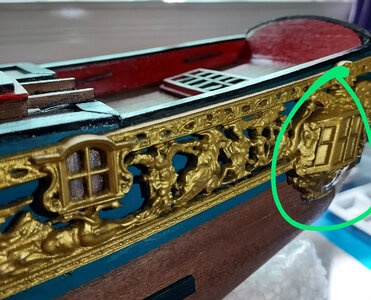
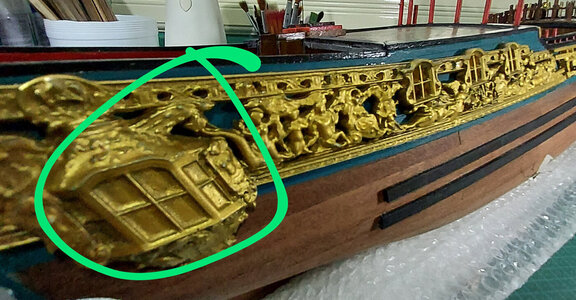
Initially, I wanted to open up the gallery windows by drilling the area highlighted in green. I wanted to put LED lights inside the gallery, but later changed my mind. The resin piece was really thick, and I felt I didn't have the skills and the knowledge to carve out the windows cleanly. So I left them as is, and just painted the window panels with a somewhat dark shade. You can see this in a later picture.
PSX_20210714_135558.jpgPSX_20210714_135606.jpg

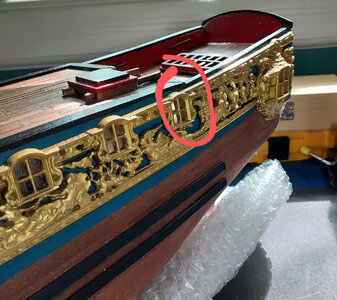
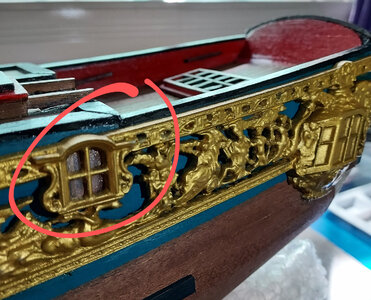
One thing I need to point out about the resin piece is that one of the windows in the mid section is poorly designed. As can be seen in the following photo (red highlight), the third window is grossly misproportioned...it is positioned too far back outside of the midship galleries. Oh well, not much I can do but just grin and bear it.

PSX_20210714_135541.jpgPSX_20210714_135550.jpg

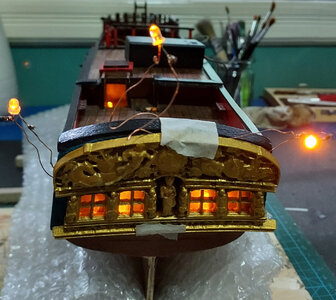
Next I worked on the transom piece. I made things a bit more complicated for myself because I decided to put lights inside the gallery as well as in the lanterns (this wasn't part of the kit instructions).

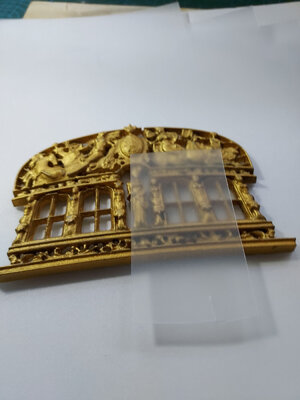
I glued on a piece of stiff translucent plastic to the back of the window frame to simulate glass
PSX_20210714_134307.jpg

I test fitted the transom piece to make sure the windows line up with the holes I carved out earlier.
PSX_20210704_202558.jpg

The three LED lights you see just loosely hanging at the rear are meant for the lanterns. At this point in the build, I haven't quite figured out how and where to position the wires. This I have to figure out before I glue on the transom piece.

Eventually I came up with a plan and decided to pass the wires on the top corners and center of the transom. Now I can glue it in place. Later on you will see why it's so important to position these properly for the lantern installation.
PSX_20210801_201301.jpg

That's it for now. Hope I didn't bore you too much with the detailed discussion.

Thanks for stopping by.
Continue to be safe my friends.
 
Today is a very special day. Good ole Lady Caroline is getting fitted with her golden finery. Granted these resin carvings aren't quite as elegant as the ones in her more exquisite cousin, the 1:30 ZHL Royal Caroline kit or even the fine Panart model. But I have to be content with what I have, and I was quite pleasantly surprised how nicely the carvings added to the overall look of the ship. Perhaps nowhere near historically accurate, but will have to do for now.

In a prior post, I discussed how I prepared the resin carvings and painting them gold. I was debating whether to apply a very light dark wash, since I initially thought the wash dulled the sheen of the gold somewhat. But, after much thought, and heeding the advice from some friends in the forum, I decided to do the wash, using diluted black acrilyc paint.

The pictures below show the comparison between the washed portion vs the unwashed. The right side is the washed portion.
View attachment 247363

In the following pictures, the bottom pieces are washed.
View attachment 247365View attachment 247364

The difference is very subtle, but the washed pieces definitely look better... a bit more definition and deeper details.

Gluing them to the hull was quite a challenge. Earlier (before I painted them), I molded the resin to the contours of the hull by heating them with a blow dryer and clamping them to shape.

I used contact cement initially, but later discovered that the contact cement wasn't strong enough to hold the pieces in place. There was still a bit of pull and resistance when I fitted the resin pieces. Even with clamping and waiting several days to dry, I found certain spots were peeling off. So I supplemented the contact cement with CA gel glue at the stress points. So far so good.

Here are some pictures.
View attachment 247367View attachment 247368View attachment 247369View attachment 247370View attachment 247371View attachment 247372

Initially, I wanted to open up the gallery windows by drilling the area highlighted in green. I wanted to put LED lights inside the gallery, but later changed my mind. The resin piece was really thick, and I felt I didn't have the skills and the knowledge to carve out the windows cleanly. So I left them as is, and just painted the window panels with a somewhat dark shade. You can see this in a later picture.
View attachment 247375View attachment 247376

One thing I need to point out about the resin piece is that one of the windows in the mid section is poorly designed. As can be seen in the following photo (red highlight), the third window is grossly misproportioned...it is positioned too far back outside of the midship galleries. Oh well, not much I can do but just grin and bear it.

View attachment 247373View attachment 247374

Next I worked on the transom piece. I made things a bit more complicated for myself because I decided to put lights inside the gallery as well as in the lanterns (this wasn't part of the kit instructions).

I glued on a piece of stiff translucent plastic to the back of the window frame to simulate glass
View attachment 247392

I test fitted the transom piece to make sure the windows line up with the holes I carved out earlier.
View attachment 247393

The three LED lights you see just loosely hanging at the rear are meant for the lanterns. At this point in the build, I haven't quite figured out how and where to position the wires. This I have to figure out before I glue on the transom piece.

Eventually I came up with a plan and decided to pass the wires on the top corners and center of the transom. Now I can glue it in place. Later on you will see why it's so important to position these properly for the lantern installation.
View attachment 247391

That's it for now. Hope I didn't bore you too much with the detailed discussion.

Thanks for stopping by.
Continue to be safe my friends.
Good show, Reggie! I’m going to try several methods on my Soleil’s gold ornaments. I thought about using two different golds and dry brushing the lighter, shinier one over. Yours look terrific.
 
Continuing the work with some deck fittings.

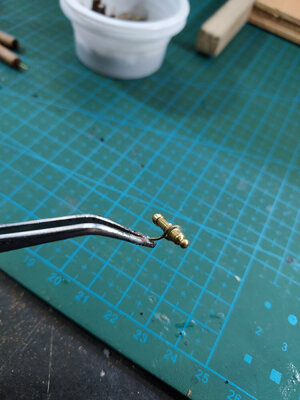
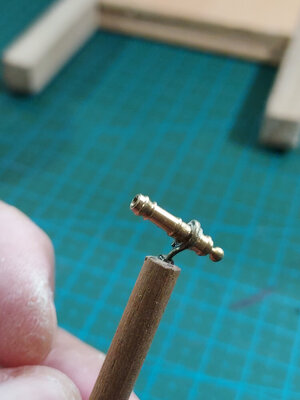
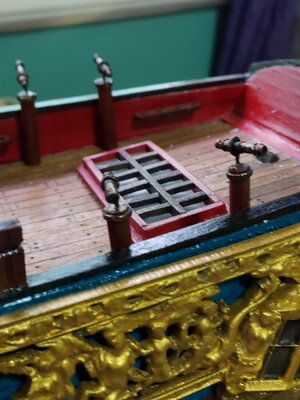
Although not part of the kit instructions, I decided to add a couple falconet guns. I scrounged around my parts stash and found a couple of tiny cannons from a prior kit.

I didn't have the skills to do a proper mounting at this scale, so I just improvised and went with a simple wire loop to hold the guns.

PSX_20210801_202159.jpgPSX_20210801_202214.jpgPSX_20210801_202228.jpgPSX_20210801_201750.jpg

Next was the chimney. This was a simple dowel with a hole drilled through one end. I painted it red copper (the only copper paint I have).
PSX_20210801_201330.jpgPSX_20210801_201403.jpgPSX_20210801_201732.jpg

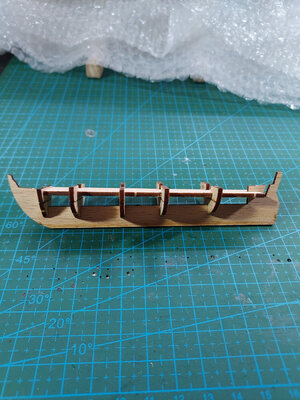
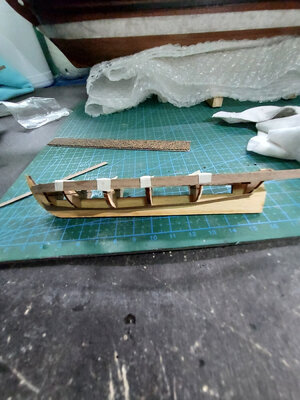
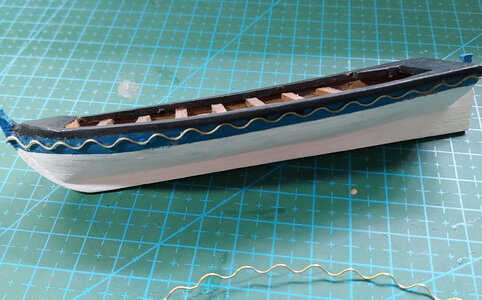
Now the fun part....the small boat. I really enjoyed doing this little thing. The instructions were fairly straightforward and I really liked that they designed it so there is a temporary piece that helped align the bulkheads properly. This temporary piece was later removed. You can see in the picture below the long temporary piece that sits on top of the bulkheads. You can also see the lines on the bulkheads that have been scored and will later be broken off.

PSX_20210801_201423.jpg

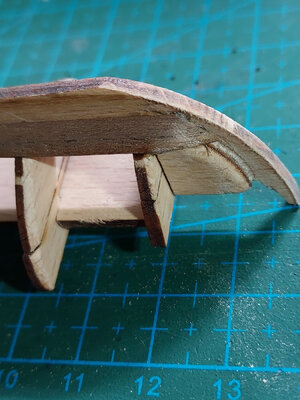
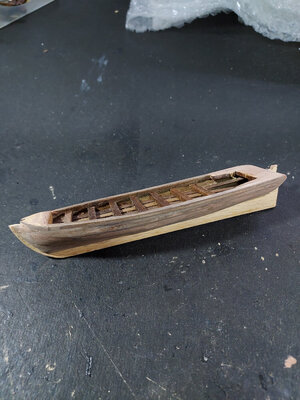
The instructions call for 5mm planking strips but I thought that looked too wide, so I was back to my stash box and I found some smaller strips. I started with the bottom plank and then fitted the top (making sure I didn't glue the strips to the middle bulkheads which will be removed later on).
PSX_20210801_201458.jpgPSX_20210801_201539.jpgPSX_20210801_201825.jpg

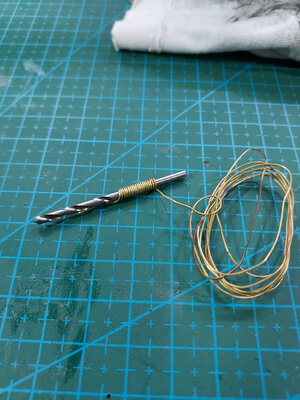
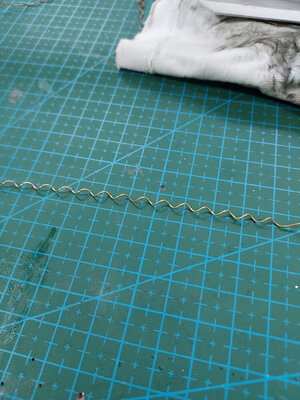
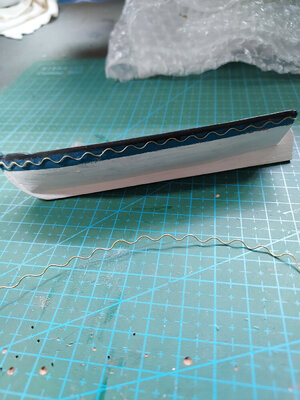
The boat was painted turquoise blue on the upper part, and white on the bottom. To simulate the golden designs, I twirled a piece of wire on a drill bit and stretched it out to form the wavy design.
PSX_20210801_201840.jpgPSX_20210801_201849.jpgPSX_20210801_202024.jpgPSX_20210801_202047.jpg

Still have the oars and other small details to do. But will leave that to a later time.

Till next time.
 
Continuing the work with some deck fittings.

Although not part of the kit instructions, I decided to add a couple falconet guns. I scrounged around my parts stash and found a couple of tiny cannons from a prior kit.

I didn't have the skills to do a proper mounting at this scale, so I just improvised and went with a simple wire loop to hold the guns.

View attachment 247399View attachment 247398View attachment 247397View attachment 247400

Next was the chimney. This was a simple dowel with a hole drilled through one end. I painted it red copper (the only copper paint I have).
View attachment 247403View attachment 247402View attachment 247404

Now the fun part....the small boat. I really enjoyed doing this little thing. The instructions were fairly straightforward and I really liked that they designed it so there is a temporary piece that helped align the bulkheads properly. This temporary piece was later removed. You can see in the picture below the long temporary piece that sits on top of the bulkheads. You can also see the lines on the bulkheads that have been scored and will later be broken off.

View attachment 247415

The instructions call for 5mm planking strips but I thought that looked too wide, so I was back to my stash box and I found some smaller strips. I started with the bottom plank and then fitted the top (making sure I didn't glue the strips to the middle bulkheads which will be removed later on).
View attachment 247417View attachment 247418View attachment 247413

The boat was painted turquoise blue on the upper part, and white on the bottom. To simulate the golden designs, I twirled a piece of wire on a drill bit and stretched it out to form the wavy design.
View attachment 247411View attachment 247409View attachment 247407View attachment 247406

Still have the oars and other small details to do. But will leave that to a later time.

Till next time.
I like the temporary piece to hold things together. I wish I had designed one like that for my Pearl. It was very difficult to build the boats on that one. My Connie’s boats were easier. They actually had a permanent piece like that. Unfortunately, I couldn’t show the insides of the boats so I placed gray tarps over them. They look great, Reggie! Uh oh. Time for church.
 
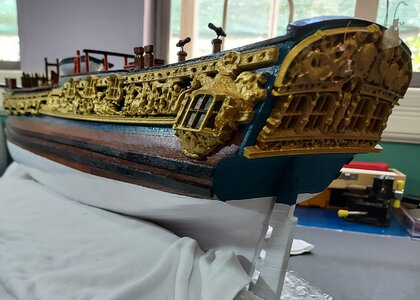
Today is a very special day. Good ole Lady Caroline is getting fitted with her golden finery. Granted these resin carvings aren't quite as elegant as the ones in her more exquisite cousin, the 1:30 ZHL Royal Caroline kit or even the fine Panart model. But I have to be content with what I have, and I was quite pleasantly surprised how nicely the carvings added to the overall look of the ship. Perhaps nowhere near historically accurate, but will have to do for now.

In a prior post, I discussed how I prepared the resin carvings and painting them gold. I was debating whether to apply a very light dark wash, since I initially thought the wash dulled the sheen of the gold somewhat. But, after much thought, and heeding the advice from some friends in the forum, I decided to do the wash, using diluted black acrilyc paint.

The pictures below show the comparison between the washed portion vs the unwashed. The right side is the washed portion.
View attachment 247363

In the following pictures, the bottom pieces are washed.
View attachment 247365View attachment 247364

The difference is very subtle, but the washed pieces definitely look better... a bit more definition and deeper details.

Gluing them to the hull was quite a challenge. Earlier (before I painted them), I molded the resin to the contours of the hull by heating them with a blow dryer and clamping them to shape.

I used contact cement initially, but later discovered that the contact cement wasn't strong enough to hold the pieces in place. There was still a bit of pull and resistance when I fitted the resin pieces. Even with clamping and waiting several days to dry, I found certain spots were peeling off. So I supplemented the contact cement with CA gel glue at the stress points. So far so good.

Here are some pictures.
View attachment 247367View attachment 247368View attachment 247369View attachment 247370View attachment 247371View attachment 247372

Initially, I wanted to open up the gallery windows by drilling the area highlighted in green. I wanted to put LED lights inside the gallery, but later changed my mind. The resin piece was really thick, and I felt I didn't have the skills and the knowledge to carve out the windows cleanly. So I left them as is, and just painted the window panels with a somewhat dark shade. You can see this in a later picture.
View attachment 247375View attachment 247376

One thing I need to point out about the resin piece is that one of the windows in the mid section is poorly designed. As can be seen in the following photo (red highlight), the third window is grossly misproportioned...it is positioned too far back outside of the midship galleries. Oh well, not much I can do but just grin and bear it.

View attachment 247373View attachment 247374

Next I worked on the transom piece. I made things a bit more complicated for myself because I decided to put lights inside the gallery as well as in the lanterns (this wasn't part of the kit instructions).

I glued on a piece of stiff translucent plastic to the back of the window frame to simulate glass
View attachment 247392

I test fitted the transom piece to make sure the windows line up with the holes I carved out earlier.
View attachment 247393

The three LED lights you see just loosely hanging at the rear are meant for the lanterns. At this point in the build, I haven't quite figured out how and where to position the wires. This I have to figure out before I glue on the transom piece.

Eventually I came up with a plan and decided to pass the wires on the top corners and center of the transom. Now I can glue it in place. Later on you will see why it's so important to position these properly for the lantern installation.
View attachment 247391

That's it for now. Hope I didn't bore you too much with the detailed discussion.

Thanks for stopping by.
Continue to be safe my friends.
Very nice! The black wash really adds to the pieces.
 
Great work Reggie. You are so right - we need to make do with what we have. The ornamentation looks great and all of a sudden the RC looks "royal". The lifeboat looks good - I now just how tricky those little pests can be but yours turned out great.
 
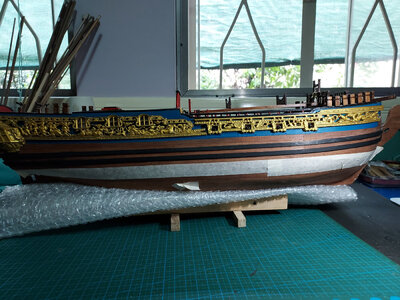
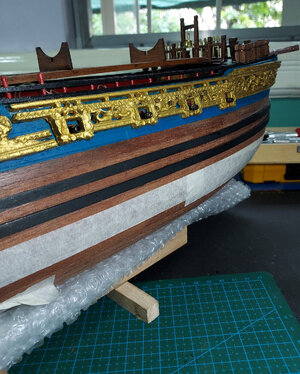
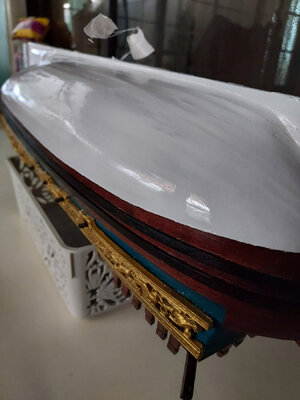
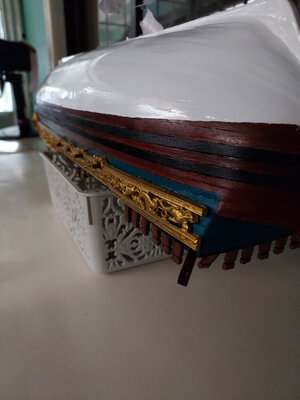
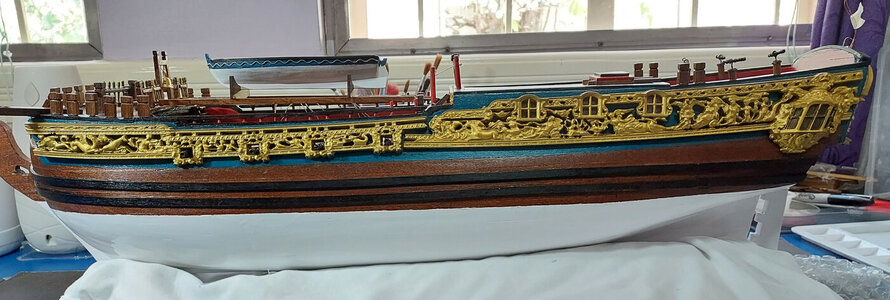
Early on, I decided that I wanted to finish the hull with 3 distinct sections... the top part will be turquoise blue, the middle section will have tung oil finish, and the bottom section will be white.

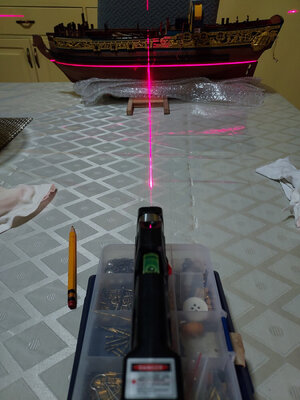
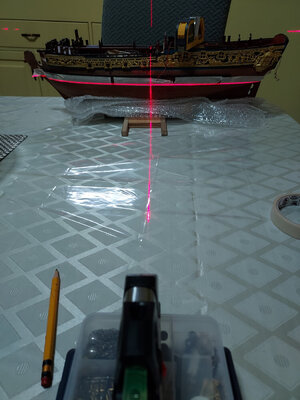
First, I had to establish the water line, which will coincide with where the white section will be.

I bought a cheapie laser level to help me mark off the water line. Instead of drawing a pencil mark, I outlined it with painters tape.

PSX_20210801_200851.jpgPSX_20210801_200905.jpg

Oops, I put the masking tape on the wrong side of the line. I wanted to do the tung finish on the middle section first, which means the tape will have to be south of the water line. No problem...I just had to follow the edge and apply tape on the other side.

PSX_20210801_200927.jpgPSX_20210801_201046.jpg

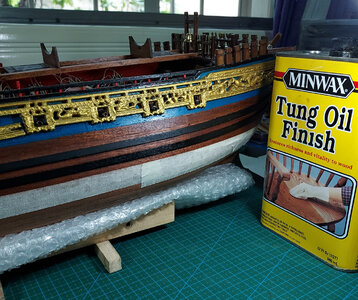
I love the look of tung oil on walnut. It really gives the wood a deep, rich finish. The pictures below show the difference between the tung-finished section versus the bare wood towards the bottom.
PSX_20210801_201132.jpgPSX_20210801_201238.jpg
PSX_20210801_201615.jpg

Now, time to prepare the bottom section before I paint it white. First I had to move the painters tape to the other side of the water line.
PSX_20210806_072342.jpg

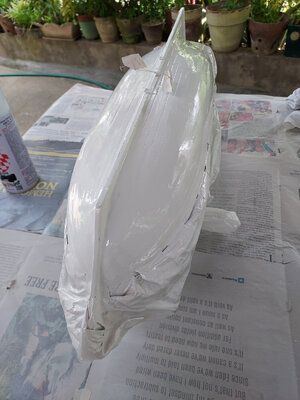
Then I covered up the sections that I needed to protect.
PSX_20210806_072458.jpg

I didn't have an airbrush, so I just used canned spray paint.
PSX_20210806_072514.jpgPSX_20210806_072528.jpg

Removed the tape but I wasn't thoroughly happy because I didn't get a razor sharp edge. Not sure whether it was the tape or the kind of paint that I used. Or maybe it's because I applied the tung oil to the upper portion ahead of the white paint. No matter, there wasn't much I can do about it. It wasn't perfect, but maybe good enough.

PSX_20210806_072543.jpgPSX_20210806_072610.jpg
PSX_20210811_210214.jpg
PSX_20210811_210227.jpgPSX_20210811_210236.jpg

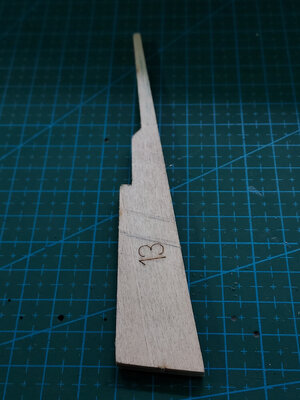
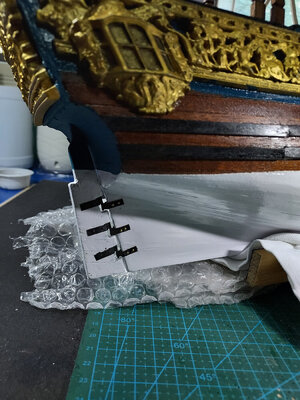
I also worked on the rudder assembly. Here's the piece that came with the kit. It goes in through a hole at the bottom, and up towards the deck at the stern.

PSX_20210801_200743.jpgPSX_20210801_200507.jpg

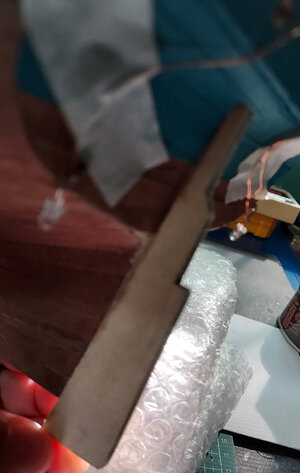
If I were to mount the hinges to this piece, I realized there will be a wide gap where the hinges would be placed. So, I decided to cut notches so that the hinges will have room to fit into.
PSX_20210801_200814.jpgPSX_20210801_200827.jpg
PSX_20210801_201615.jpg

I fashioned the hinges using the brass strip included in the kit. I crimped the part where the nail bolt is inserted. For such a small part, it took me a couple of days to finish this.
PSX_20210811_210254.jpg


I then assembled the steering mechanism on the deck. This is attached to the tip of the rudder. The mounting for the flagpole was also incorporated in this assemby.
PSX_20210811_210313.jpgPSX_20210811_210325.jpg

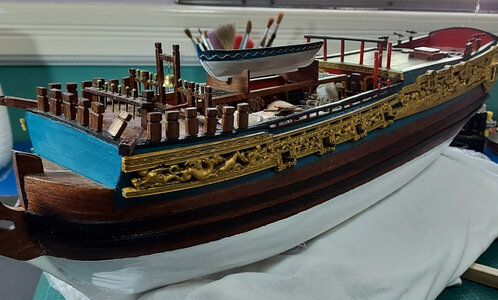
Old Lady Caroline is starting to take shape. The little details and the good quality wood is adding to her charm. I realized this will be my 8th month working on this project. Still a lot to be done. But I pause to admire what it has turned out to become, considering, and notwithstanding some design challenges that I had to overcome. What a glorious hobby we find ourselves in, my friends.

Keep safe and happy modeling.
 
Hi Reggie. Man you are flying along. Your non-sharp paintline is the direct result of applying the Tung Oil first. Even though you used tape, the oil still "seeps" to the most immediate adjacent areas. However, I really do not think you have to fret - the line looks entirely realistic. The only suggestion I would make if you will allow me is to see if you can get the white more matte and less shiny. Steel wool maybe?
 
Painting over tape with spray paint usually requires that you cut along the edge of the tape with an xacto prior to removing the tape, to prevent chipping. Especially since you have a thick layer of paint.
You can clean the edge up by using some thin white graphic tape.
 
the best tape for waterline ( or elsewhere ) is electrical tape. not the cheap stuff at the dollar store but the good stuff at about $3.00 a roll. the seal is watertight and you will get a perfect line. much better than masking or painters tape. Heinrich is correct in that the tung oil should have been applied after all painted areas are complete. otherwise, she is looking great. keep up with the build log.
 
the best tape for waterline ( or elsewhere ) is electrical tape. not the cheap stuff at the dollar store but the good stuff at about $3.00 a roll. the seal is watertight and you will get a perfect line. much better than masking or painters tape. Heinrich is correct in that the tung oil should have been applied after all painted areas are complete. otherwise, she is looking great. keep up with the build log.
Interesting info on using electrical paint. I will have to give it a try sometime.
 
Hi Reggie. Man you are flying along. Your non-sharp paintline is the direct result of applying the Tung Oil first. Even though you used tape, the oil still "seeps" to the most immediate adjacent areas. However, I really do not think you have to fret - the line looks entirely realistic. The only suggestion I would make if you will allow me is to see if you can get the white more matte and less shiny. Steel wool maybe?
Thanks for the comments @Heinrich ...lots of lessons learned....will try the steel wool on a small section and see how it will turn out...I was also thinking, maybe apply a very light beige wash? Will let you know how it turns out....Thanks again and please keep safe. This Delta variant is really scary.
 
Back
Top