San Felipe 1690 from ZHL

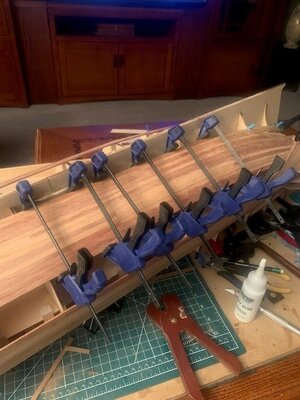
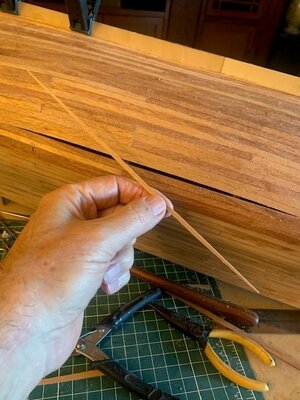
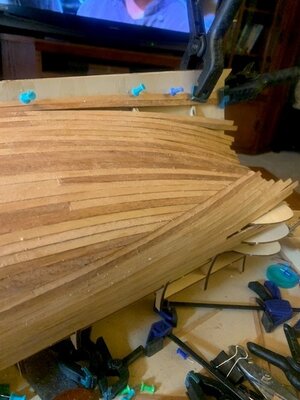
Hello everyone, I am still plugging away at planking. Kurt - I was about two thirds done with this and thought to myself. "I should have put some balsa in these gaps". LOL.

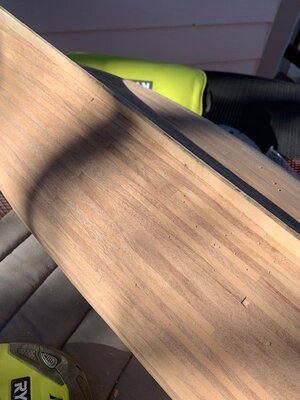
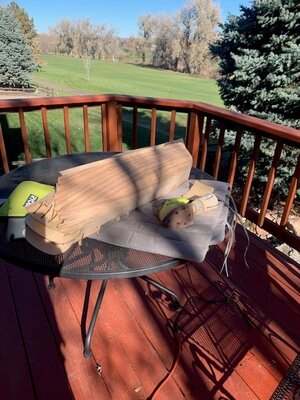
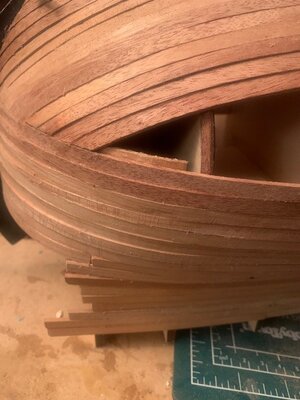
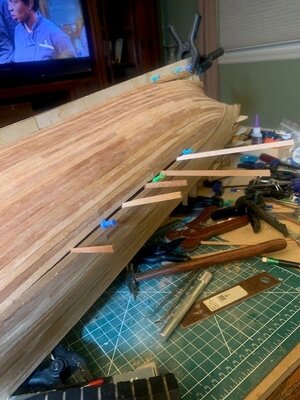
I just have a few more planks to close out the stern section and I am done with the starboard side. I don't know if this Mahagony is going to look interesting or absolutely stupid. When I purchased the wood it all looked very much the same. But after ripping and sitting around for a couple of months it clearly aged. Several shades, with the lighter colored ones being very soft. I'll need to be very careful when sanding. I only made a few mistakes that I can easily fix as I kept a lot of the sawdust.

I'll get the port side done, do the sanding, then the staining and we'll know if this was a total mistake or a success. Fingers crossed.

One thing for sure is my praise for these clamps. My absolute favorite new tool. They work great!!

On a side note. Tomorrow is Nov 7, election day. I figure by 10 or 11 pm tomorrow night I'll know if I got elected to Westminster City Council or not.
11-06-2023 Planking almost done pic 2.jpg11-06-2023 planking almost done pic 3.jpg11-06-2023 Planking almost done pic 4.jpg11-06-2023 planking almost done starboard side pic 1.jpg
 
Hello everyone, I am still plugging away at planking. Kurt - I was about two thirds done with this and thought to myself. "I should have put some balsa in these gaps". LOL.

I just have a few more planks to close out the stern section and I am done with the starboard side. I don't know if this Mahagony is going to look interesting or absolutely stupid. When I purchased the wood it all looked very much the same. But after ripping and sitting around for a couple of months it clearly aged. Several shades, with the lighter colored ones being very soft. I'll need to be very careful when sanding. I only made a few mistakes that I can easily fix as I kept a lot of the sawdust.

I'll get the port side done, do the sanding, then the staining and we'll know if this was a total mistake or a success. Fingers crossed.

One thing for sure is my praise for these clamps. My absolute favorite new tool. They work great!!

On a side note. Tomorrow is Nov 7, election day. I figure by 10 or 11 pm tomorrow night I'll know if I got elected to Westminster City Council or not.
View attachment 405081View attachment 405082View attachment 405083View attachment 405084
Good morning Scott. If the council vote is anything like your planking you have this. Good luck. Cheers Grant
 
Ok - an update on things here.

Unfortunately, I came in 5th place on the election. Needed to be in the top three. Turns out, being on the top of the electors list is a big deal!! There are tons of studies on this and sure enough it showed. So, I guess I can focus on spare time working on the boat. I gave it my best shot.

Election Results.png
 
Here is an update on the boat. The bulk of the planking is finished. All of the mahogany is done! I finished with three planks to spare (phew). I gave it a good sanding, and all seems well. To my surprise I did not have many gaps to deal with. I attribute that to those longer clamps. Cannot say enough good things about these.

So now it's back to the Cherry planks (I have plenty) to wrap up the upper sections and the stern. Instructions are sooooooo poor that you just have to pay attention to everything. Don't just glue something on per the instructions until you have examined instructions 20 to 40 steps in the future.

This week's goals are to finish the upper sections, stern section and deal with any quirks that have presented themselves (from a planking perspective).

If I get time, I'll mess around with stains to see how they get absorbed by the harder and softer mahogany.

Have a great day everyone.

Scott 11-13-2023 Hull finished pic 1.jpg11-13-2-23 Hull Sanding Pic 1.jpg11-13-2023 Last of the mahogany.jpg
 
Time for a big update.

  • Planking and sanding of the cherry and the mahogany completed.
  • Staining the mahogany completed. But..... Not happy.
  • Phase one of decking the lower deck completed. Next phase is to do the tree nailing
  • Started the task of glueing the interior planks.
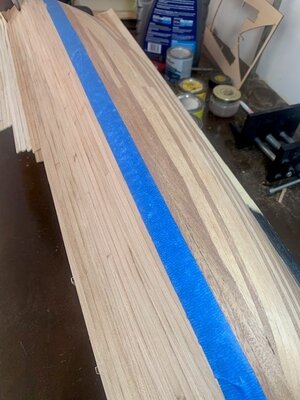
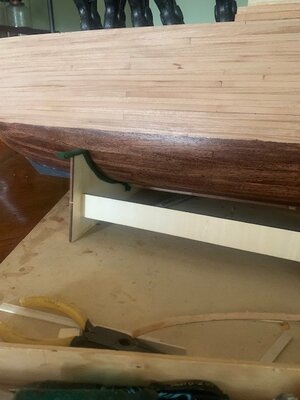
After sanding the daylights out of the cherry and mahogany I was very pleased. Only a couple of thin gaps that needed to be filled. Beveling worked out great and I still cannot say enough about the clamps. So, it's time to stain the bottom whilst the top is still basically empty of detail. Blue tape and the stain was "Red Mahogany". Even after using my fingernail and pressing the tape down very hard it still blead into the cherry. ARG. Next!! The stain looks more like walnut then mahogany. I'm going to sand it off and use something different. My concern is those softer mahogany planks soaking in the wood too far to sand off. If that is the case I'll be stuck with this darker stain. We'll see.

11-19-2023 Prepping for stain.jpg11-19-2023 Red Mahogany - not so good.jpg
 
With the bottom essentially finished it's time to start refining the decking and getting the interior planking going. This boat doubles up on planking to stiffen the walls. But before applying the interior planks you need to get the decking planking done. So this weekend that was my primary focus. Instead of using the gunk planks that the kit provided for deck planking I instead substituted the pear vinier that was provided for the exterior planking. It may be too wide (for sure not to scale), but it gives me enough space for tree nailing.

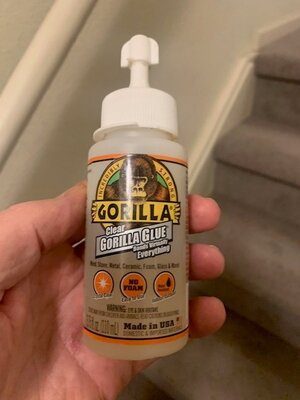
I found that using regular wood glue on these wider vinier planks causes them to warp (the outsides warping up making a sort of trough) thus forcing me to hold everything down to endure a flat plank. So I switched glues to one that although takes a long time to dry but does keeps the planks flat. The stuff was like using oil instead of glue. The planks were very easy to slip around so when adding more planks pretty easy to readjust previously laid planks if you needed to. Here is the stuff I used.

Gorilla Glue for deck planking.jpg

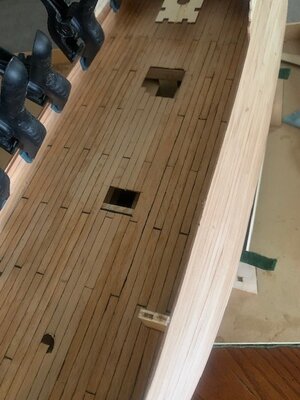
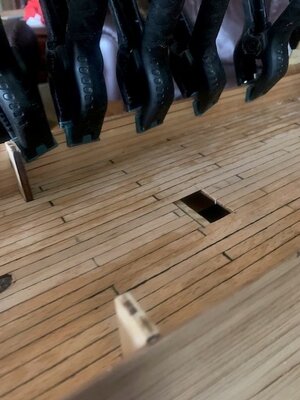
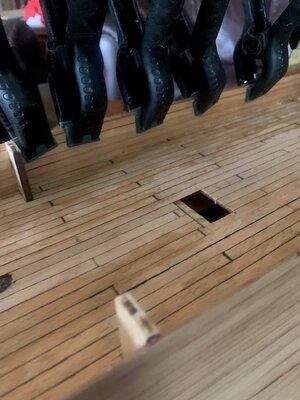
Here are a couple of pictures of the unfinished deck planks. This afternoon and into the evening I want to mark and drill the holes for the tooth picks.
You'll also notice the clamps holding the interior planks. I was impressed with how much these increased the strength of the..... walls? This is going to be very important on the upper sections.

11-20-2023 Lower decking phase one complete..jpg


Wish me luck on removing that stain.

11-20-2023 Adding interier planks.jpg

11-20-2023 Adding interier planks.jpg
 
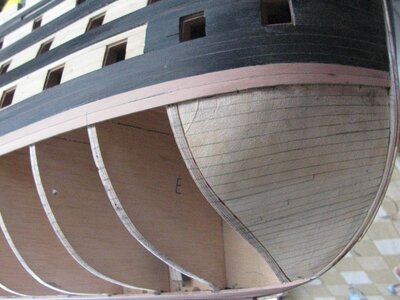
If the planks are very soft, you had probably better use fill blocks of balsa between the frames, or you will see hard bend lines (red) over each frame near the bow and flat areas between frames. And, you can't use filler and sanding to hide these defects if you are making a single planked hull. Sight you eye down the length of the hull and you'll see if the curves are smooth or segmented.
View attachment 403733
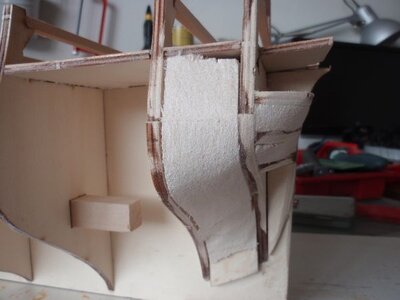
you are very right, but I have never used Balsa Wood. I used some wooden pieces cut into to fit the frames. I filled the entire hull -at least up to the lover gun rail. Few are my models with a double planking

265-BOW-BULKHEADS, FILLING.jpg

364--STERN FILLING.jpg
 
you are very right, but I have never used Balsa Wood. I used some wooden pieces cut into to fit the frames. I filled the entire hull -at least up to the lover gun rail. Few are my models with a double planking

View attachment 408291

View attachment 408292
Using a harder wood than balsa is really a waste of effort because it's much harder to sand and shape with no benefit, because balsa does a good job of supporting the outer plank layer in shape.
 
Using a harder wood than balsa is really a waste of effort because it's much harder to sand and shape with no benefit, because balsa does a good job of supporting the outer plank layer in shape.
do not agree with you. I have never had a problem my way. the blocks inserted have exactly the shape of the half bulkhead, so the whole thing is sanded to fit the planks. Solly used -for years ago- a biochemical product, which could be moulded before being set to dry. His build are somewhere here, maybe 3-4 years ago.

178-casco relleno con una sponja.jpg

175--440-TOOL GADGET 004 (1).jpg

177 -TOOL GADGET 004 (3) - copia.jpg

179- sponja cortado-hull.jpg

200- RELLENO - FILLING-PECIAL PLANK.jpg

202- EL RELLENO-FILLING MATERIAL.jpg
 
do not agree with you. I have never had a problem my way. the blocks inserted have exactly the shape of the half bulkhead, so the whole thing is sanded to fit the planks. Solly used -for years ago- a biochemical product, which could be moulded before being set to dry. His build are somewhere here, maybe 3-4 years ago.

View attachment 408390

View attachment 408391

View attachment 408392

View attachment 408393

View attachment 408396

View attachment 408397
We were comparing WOOD fillers, soft versus hard. I've never heard of the product you use, but if it works, it works! :DThumbsup
 
With the bottom essentially finished it's time to start refining the decking and getting the interior planking going. This boat doubles up on planking to stiffen the walls. But before applying the interior planks you need to get the decking planking done. So this weekend that was my primary focus. Instead of using the gunk planks that the kit provided for deck planking I instead substituted the pear vinier that was provided for the exterior planking. It may be too wide (for sure not to scale), but it gives me enough space for tree nailing.

I found that using regular wood glue on these wider vinier planks causes them to warp (the outsides warping up making a sort of trough) thus forcing me to hold everything down to endure a flat plank. So I switched glues to one that although takes a long time to dry but does keeps the planks flat. The stuff was like using oil instead of glue. The planks were very easy to slip around so when adding more planks pretty easy to readjust previously laid planks if you needed to. Here is the stuff I used.

View attachment 408268

Here are a couple of pictures of the unfinished deck planks. This afternoon and into the evening I want to mark and drill the holes for the tooth picks.
You'll also notice the clamps holding the interior planks. I was impressed with how much these increased the strength of the..... walls? This is going to be very important on the upper sections.

View attachment 408269


Wish me luck on removing that stain.

View attachment 408274

View attachment 408276
Good morning Scott. Looking very good. I have also been using CA glue more than I used to....however my preference is still wood glue. Cheers Grant
 
Hey guys. I am way past the issue of planking around the front of the boat. But. On the next one I'll for sure stuff that front end with some sort of either balsa or some other material. Thanks for the advice.

Now back to the task at hand. As everyone knows I swapped out the kit provided decking for a much wider pear veneer in order to do tree nailing. The lower deck needed to be done first before moving forward so that is what I focused on these last 48 hours or so.

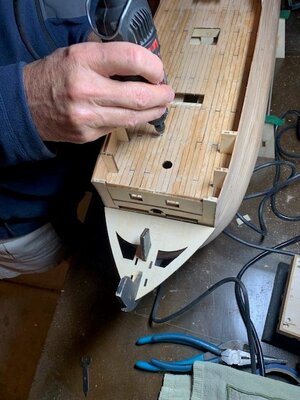
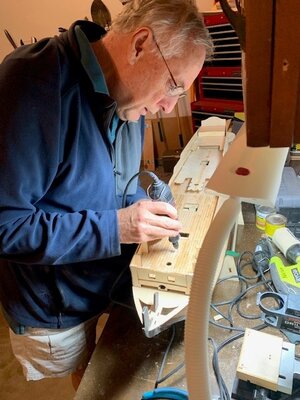
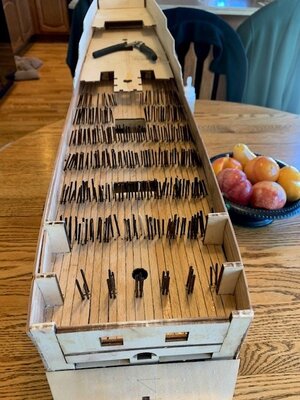
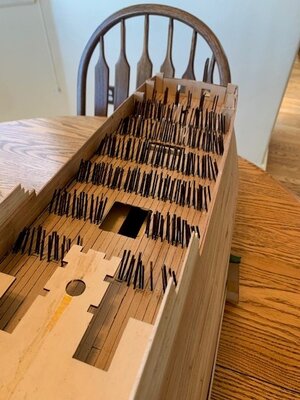
I ordered the dark wood toothpicks but found them not really dark enough. So last night I soaked 250 toothpicks with dark walnut stain. I also drilled the holes. One thing I learned doing my first set of tree nails is to make sure to have the hole location punched first. Otherwise, the Dremel can jump. Got it all done and drilled last night.

This morning I went ahead and started placing the toothpicks in those wobbly holes. Geeze!! 430+ holes. Didn't seem like that drilled that many. But alas I sure did. Each pick was dipped in that gorilla glue first. This evening I'll clip them all and sand accordingly. I am anxious to see how it turns out.

oh oh - now I know why everyone puts tape over the deck holes. I'll tape them closed before I start cutting all of these picks.

I also sanded off the stain.

Here are a couple of pics.

11-21-2023 Prepping for tree nails pic 1.jpg11-21-2023 Prepping for tree nails pic 2.jpg11-21-2023 430 tooth pick holes pic 2.jpg11-21-2023 430 tooth pics pic one.jpg
 
Hey guys. I am way past the issue of planking around the front of the boat. But. On the next one I'll for sure stuff that front end with some sort of either balsa or some other material. Thanks for the advice.

Now back to the task at hand. As everyone knows I swapped out the kit provided decking for a much wider pear veneer in order to do tree nailing. The lower deck needed to be done first before moving forward so that is what I focused on these last 48 hours or so.

I ordered the dark wood toothpicks but found them not really dark enough. So last night I soaked 250 toothpicks with dark walnut stain. I also drilled the holes. One thing I learned doing my first set of tree nails is to make sure to have the hole location punched first. Otherwise, the Dremel can jump. Got it all done and drilled last night.

This morning I went ahead and started placing the toothpicks in those wobbly holes. Geeze!! 430+ holes. Didn't seem like that drilled that many. But alas I sure did. Each pick was dipped in that gorilla glue first. This evening I'll clip them all and sand accordingly. I am anxious to see how it turns out.

oh oh - now I know why everyone puts tape over the deck holes. I'll tape them closed before I start cutting all of these picks.

I also sanded off the stain.

Here are a couple of pics.

View attachment 408497View attachment 408498View attachment 408499View attachment 408500
For the moment a little black. Hope you have a very sharp X-Knife- flat at the end -it will cut it nicely- happy cutting
 
Back
Top