-

Win a Free Custom Engraved Brass Coin!!!
As a way to introduce our brass coins to the community, we will raffle off a free coin during the month of August. Follow link ABOVE for instructions for entering.
-

PRE-ORDER SHIPS IN SCALE TODAY!
The beloved Ships in Scale Magazine is back and charting a new course for 2026!
Discover new skills, new techniques, and new inspirations in every issue.
NOTE THAT OUR FIRST ISSUE WILL BE JAN/FEB 2026
You are using an out of date browser. It may not display this or other websites correctly.
You should upgrade or use an alternative browser.
You should upgrade or use an alternative browser.
How can I refuse a request from such a distinguished shipbuilder and member of this forum?Hi Glenn. You must please show us how you use the files on the deck. That is one smooth-looking deck!
This will be more describe than show. I did take one pic showing my most used riffler in position. It shows how tight the area is, I am unable to access it with a scraper so filing is the alternative I use.
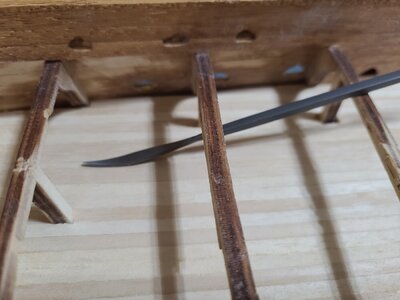
I did scrape the areas that were large enough to do so. Scraping works by shaving off the high spots, shaving these down until the surface is smooth. To me scraping leaves a superior surface and has become my preferred method to finish where it is feasible.
Filing is similar to sanding, but utilizes a file. Looking a the photo you can see due to the angle a standard file would only have contact with the tip of the file, so I use a Riffler which has the abrasive surface curved. Because of this curvature only a limited number of teeth are in contact with the surface at once so one needs a light touch to avoid undesired effects and/or clogging the file.
When I begin filing I use my fingertip and fingernail to determine which planks are higher than the others. These I will file until they match those surrounding it. The goal at this point is to make the transition between the planks as smooth as I can, so my fingernail does not catch. At this point the deck is smooth but not necessarily level.
Next I use my fingertip to determine the high spots. Now I work on these, filing in several directions to bring the high spot down evenly. This is continued until I am satisfied with it. So far I have been unable to get an area so it feels as level as a scraped area, however as you can see from my previous photos they appear level.
I will continue to scrape when I can as it creates a much flatter and smoother finish.
Thank you for looking and all of the likes!
Glenn
- Joined
- Jan 9, 2020
- Messages
- 10,566
- Points
- 938

Thank you very much Glenn. You will have noticed that on the Willem Barentsz, I also have limited space to work on the deck with all the crossbeams in the way. This certainly adds an option and that was what I liked to see. Your help in this regard is highly appreciated!
Heinrich it is my pleasure to help and contribute to this wonderful forum.Thank you very much Glenn. You will have noticed that on the Willem Barentsz, I also have limited space to work on the deck with all the crossbeams in the way. This certainly adds an option and that was what I liked to see. Your help in this regard is highly appreciated!
Your WB is progressing nicely! Yes, I see the confined space you must work in, I do hope I was able to give you some ideas to help you out. Thank you for providing this opportunity.
Glenn
I finished the next deck in the fo'castle.
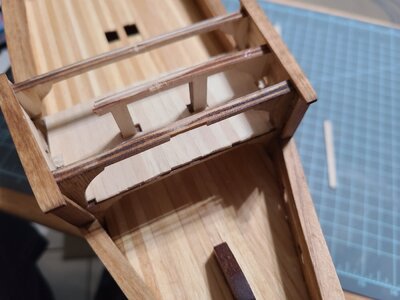
Also most of the third deck aft. I'm leaving the outer decks off until I have the bulkhead permanently in place.
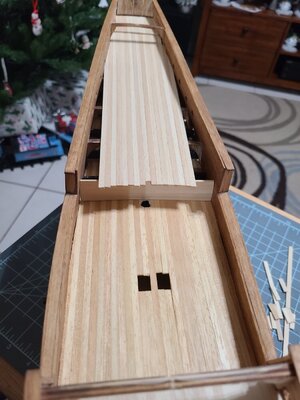
I began making the bulkheads by shaping one flat strip to match the curvature of the second deck. Then I edge glued more strips, fitting the ends after each strip. Finally I sanded it smooth to 220#.
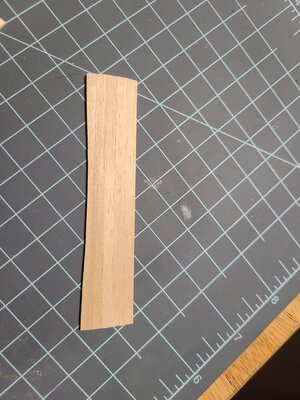
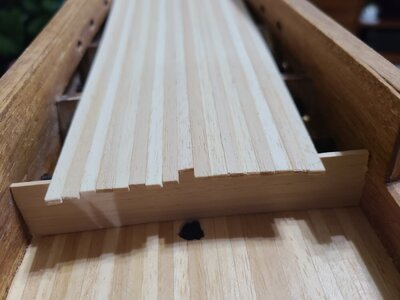
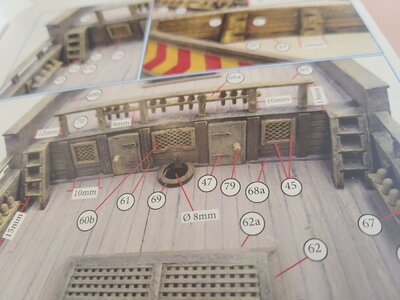
Now I need to work out my next order of operations. Ultimately this bulkhead needs to be stained, glued in and has 2 doors, 3 windows and a ladder/stair at each end.
Once it is glued in I can finish the third deck.
Happy holidays everyone!
Glenn

Also most of the third deck aft. I'm leaving the outer decks off until I have the bulkhead permanently in place.

I began making the bulkheads by shaping one flat strip to match the curvature of the second deck. Then I edge glued more strips, fitting the ends after each strip. Finally I sanded it smooth to 220#.


Now I need to work out my next order of operations. Ultimately this bulkhead needs to be stained, glued in and has 2 doors, 3 windows and a ladder/stair at each end.

Once it is glued in I can finish the third deck.
Happy holidays everyone!
Glenn
- Joined
- Jan 9, 2020
- Messages
- 10,566
- Points
- 938

You are making very good progress Glenn. The decks really look smooth and they like the "clean" look on them. Weathered decks can so often go wrong and simply turn out too dark and look messy - especially at the scale we are working at.
Santa was good to me this year  . He brought me an Occre workstation and Sea of Galilee Boat.
I'm starting the new boat, my intentions are to build both for now as the planking will be slow on this new boat.
Thank you for looking and all of the likes.
Glenn
I'm starting the new boat, my intentions are to build both for now as the planking will be slow on this new boat.
Thank you for looking and all of the likes.
Glenn
Hello Glenn. Your deck looks amazing. I enjoy the different shades of the wood.I finished the next deck in the fo'castle.
View attachment 277849
Also most of the third deck aft. I'm leaving the outer decks off until I have the bulkhead permanently in place.
View attachment 277850
I began making the bulkheads by shaping one flat strip to match the curvature of the second deck. Then I edge glued more strips, fitting the ends after each strip. Finally I sanded it smooth to 220#.
View attachment 277851
View attachment 277852
Now I need to work out my next order of operations. Ultimately this bulkhead needs to be stained, glued in and has 2 doors, 3 windows and a ladder/stair at each end.
View attachment 277853
Once it is glued in I can finish the third deck.
Happy holidays everyone!
Glenn
Thank you Grant. I actually paid attention to the shade of planks I was putting down for a change.Hello Glenn. Your deck looks amazing. I enjoy the different shades of the wood.
Hi GlennQuick update. Progress has been slow, planking the hull using PVA and clamps. I am only adding a nail at the bow to hold the plank as it is nearly impossible to clamp the planks.
So far I have followed the instructions closely with two exceptions. I am tapering the front of the planks where they meet the bow. I have also added two additional blocks one either side of the keel at the lower bow so I have something to glue the ends of the planks to.
Here are a few pictures of my progress.
View attachment 255141
View attachment 255142
View attachment 255143
Comments are welcome.
Thank you for looking,
Glenn
This is reallly helpful as I am about to begin the planking of my hull, also my first wood ship build. I think I will copy your method of claming the planks if that's OK?
I was thinking about using a hairdryer to heat the planks after soaking??
Chris
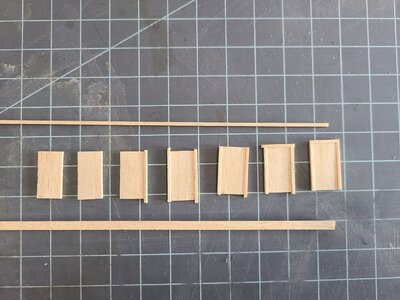
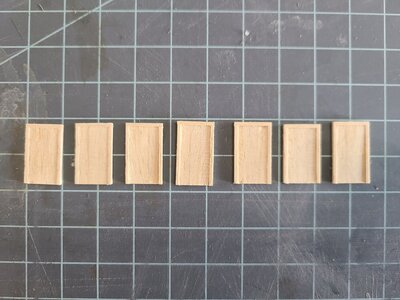
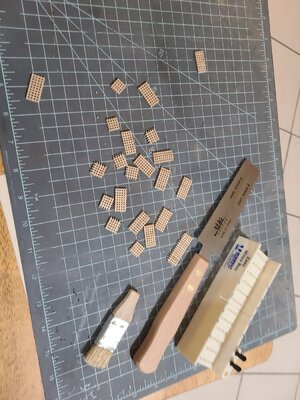
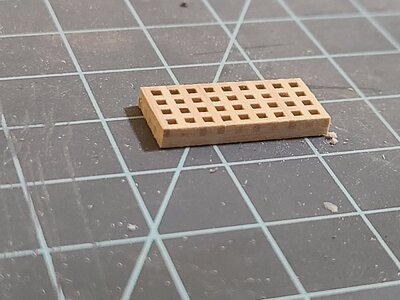
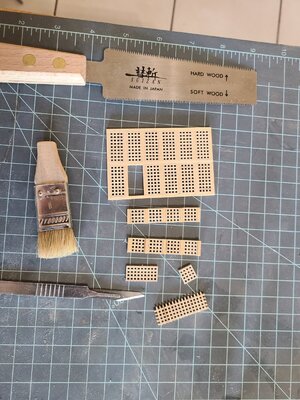
Good morning Glenn. That is a lot of gratings. Looking excellent. Are your gratings wood? I had a resin(for a better word) based gratings which discolour a little. I like why you have done hereStill plugging along making furniture and whatnot for the deck and bulkheads. Here are the gratings under construction.
View attachment 292753
View attachment 292772
View attachment 292773
These will be finished with natural Danish Oil.
Thank you for looking and all of the likes!
Glenn

Of course you are welcome to use this method, I'm not the originator of it. Glad to help!Hi Glenn
This is reallly helpful as I am about to begin the planking of my hull, also my first wood ship build. I think I will copy your method of claming the planks if that's OK?
I was thinking about using a hairdryer to heat the planks after soaking??
Chris
I have also read of builder's using the plastic headed tacks/push pins pushed into the bulkhead/frame immediately adjacent to the plank in lue of the clamps when there isn't enough room to clamp. Of course I found out about this AFTER I was done planking.
The hair dryer is worth trying. Let us know how it goes. A curling iron might also be worth trying if you have access to one.
Glenn
You have that right Heinrich! But I enjoyed it.Gratings are at best a tedious exercise which requires great care and lots of fiddly work. Yours look very good Glenn. Are you taking a break from the Sea of Galilee boat for a while?
I'm still at the point on the Galilee where it needs considerable sanding of the hull. This is annoyingly loud for the Admiral so I only do this while she isn't home, she hasn't gone out much lately so I haven't got it finished. The few times she's left the house I have been in the middle of doing something on this ship so....I'll call it an unplanned break. She and her siblings are very close and gather frequently so I'll have an opportunity to finish sanding soon.
Thank you for visiting!
Glenn
Hello Grant!Good morning Glenn. That is a lot of gratings. Looking excellent. Are your gratings wood? I had a resin(for a better word) based gratings which discolour a little. I like why you have done here
Yes. Lots of little gratings that eventually became two larger ones. They started as the small notched pieces of 1x2mm (I think) notched planks. These were put together into 15 X 15 (planks) gratings. 4 of these larger in total. These were then cut into the smaller pieces in the photos. The smaller pieces were joined with 2x3mm framing into the completed gratings.
We're your resin gratings complete or did you have to build them similar to mine? Maybe you can paint or stain them?
Thank you for the compliment
Glenn
Hi Glenn - I had to make them, however in much larger sections. I did sand the resin to clean up, so came out not too bad. I think the wood medium creates nicer gratings and way more variable in terms of finish and staining etc. cheersHello Grant!
Yes. Lots of little gratings that eventually became two larger ones. They started as the small notched pieces of 1x2mm (I think) notched planks. These were put together into 15 X 15 (planks) gratings. 4 of these larger in total. These were then cut into the smaller pieces in the photos. The smaller pieces were joined with 2x3mm framing into the completed gratings.
We're your resin gratings complete or did you have to build them similar to mine? Maybe you can paint or stain them?
Thank you for the compliment
Glenn


