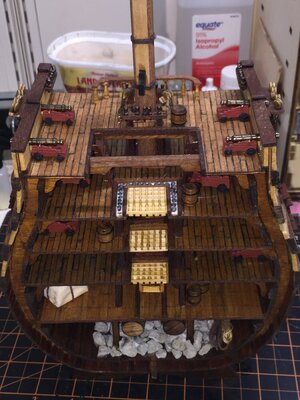
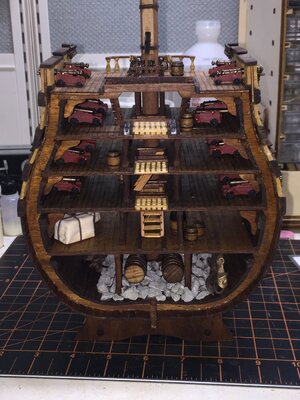
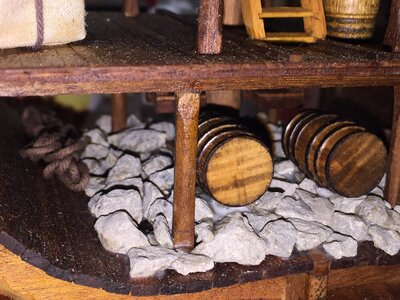
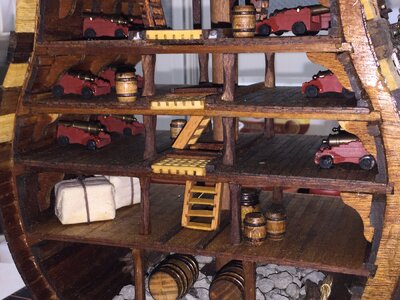
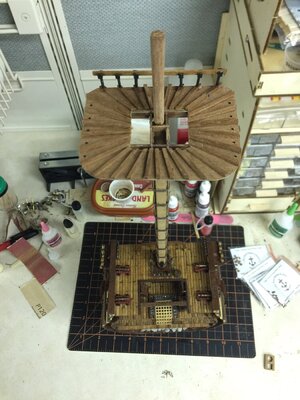
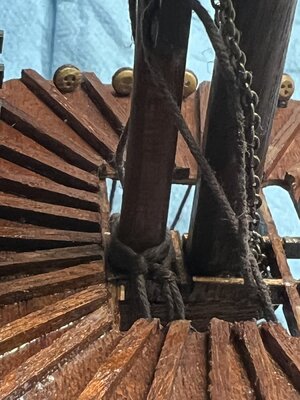
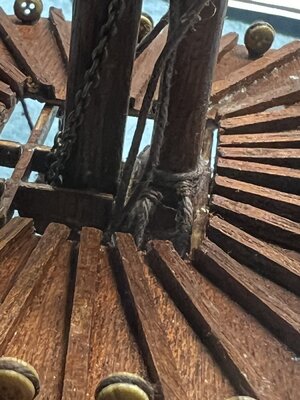
Your cross section is coming out very nice Kurt. Makes me wonder now how often they had to pull the ballast out to perform hull inspections.
-

Win a Free Custom Engraved Brass Coin!!!
As a way to introduce our brass coins to the community, we will raffle off a free coin during the month of August. Follow link ABOVE for instructions for entering.
-

PRE-ORDER SHIPS IN SCALE TODAY!
The beloved Ships in Scale Magazine is back and charting a new course for 2026!
Discover new skills, new techniques, and new inspirations in every issue.
NOTE THAT OUR FIRST ISSUE WILL BE JAN/FEB 2026
You are using an out of date browser. It may not display this or other websites correctly.
You should upgrade or use an alternative browser.
You should upgrade or use an alternative browser.
Santisima Trinidad Cross-Section 1:90 Kit Build
- Thread starter Kurt Konrath
- Start date
- Watchers 25
Kurt Konrath
Kurt Konrath
I had heard that most ballast movement happened when in port to let off or take on cargo. More cargo on board less ballast needed, and vise versa.
Kurt Konrath
Kurt Konrath
Kurt Konrath
Kurt Konrath
Thank you Heinrich. I hope I can figure the mast, yards and rigging out to keep going.
I received an order from Dry Dock Models with replacement pull-ups and blocks and now can proceed with rigging.
I received an order from Dry Dock Models with replacement pull-ups and blocks and now can proceed with rigging.
Kurt Konrath
Kurt Konrath
At last I found it!
The missing “Round Tu-It”
I have put away my trains for now, for the most part, to get back to work on some of my unfinished builds.
This cross section is first up for work again.
After a day of sorting what I had done and what my next step is I finally got more work done!
The missing “Round Tu-It”
I have put away my trains for now, for the most part, to get back to work on some of my unfinished builds.
This cross section is first up for work again.
After a day of sorting what I had done and what my next step is I finally got more work done!
Last edited:
Kurt Konrath
Kurt Konrath
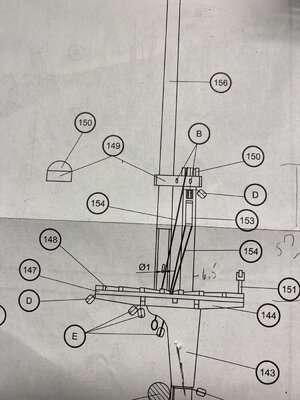
I was thinking of starting rigging on the lower crows nest but soon determined I must get the next section of mast installed first as some of the pulleys attach to mast cap.
So back to mast constructions and drawings. With little written instructions at this point it’s all guess work.
I started by cutting two pieces of requires wood to form the caps. Glued them together and then onto the piece they sit on. Can’t remember it’s name and I don’t have plans with me now.
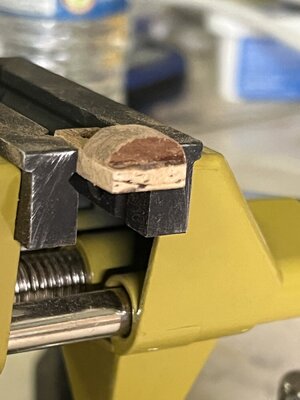
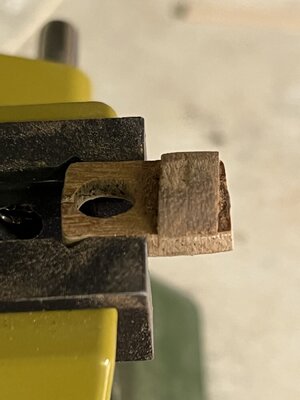
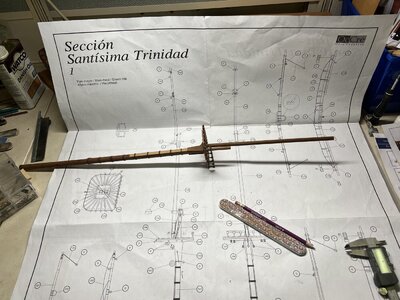
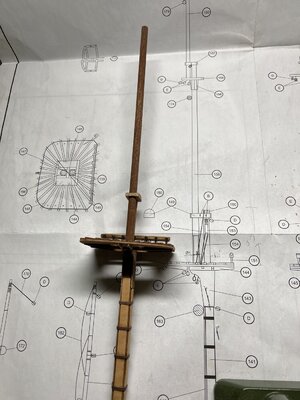
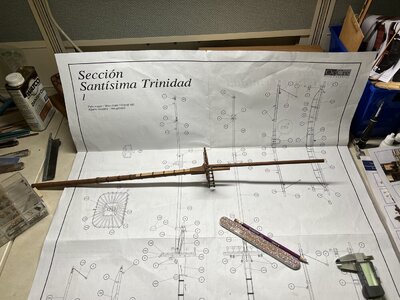
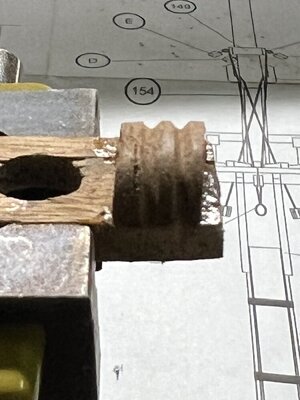
Notches for rigging lines to rest in we’re done with razor saw first and widened with file.
I then measured cut and filed next mast section and worked to get it proper size for top attachments.
So back to mast constructions and drawings. With little written instructions at this point it’s all guess work.
I started by cutting two pieces of requires wood to form the caps. Glued them together and then onto the piece they sit on. Can’t remember it’s name and I don’t have plans with me now.


Notches for rigging lines to rest in we’re done with razor saw first and widened with file.
I then measured cut and filed next mast section and worked to get it proper size for top attachments.
Last edited:
Kurt Konrath
Kurt Konrath
Next will be to glue this section to lower main mast and then I can start all the rigging and work up the mast with sections and rigging as I go
Kurt Konrath
Kurt Konrath
Ok back in the boat shed again tonight.
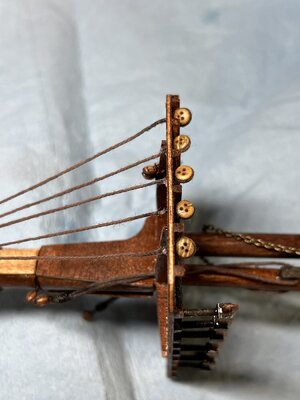
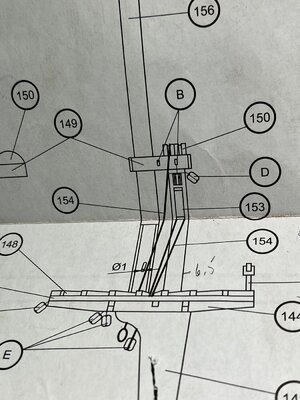
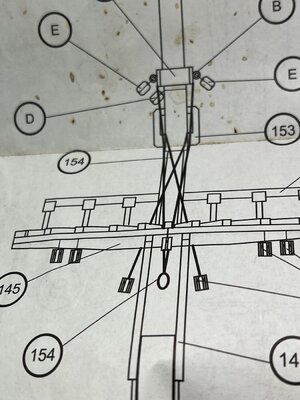
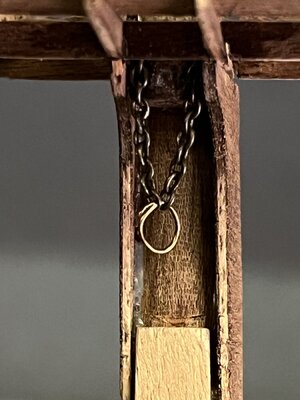
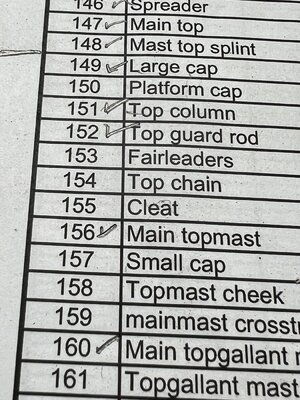
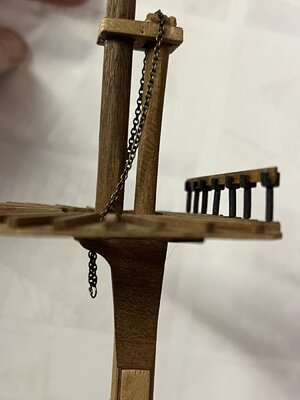
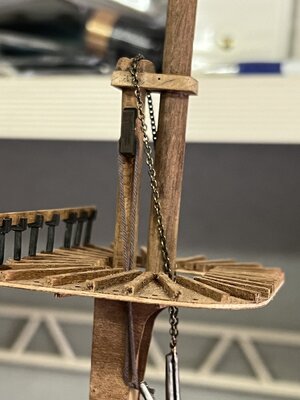
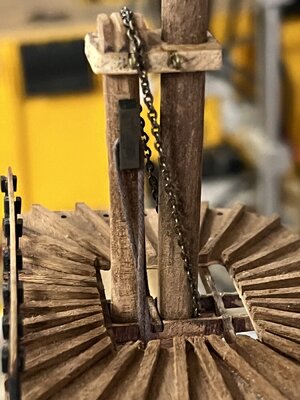
Started working rigging hardware for main mast at crows nest. Almost a dozen pulleys to install all around. And the Top Chain as listed in parts manual. There are some errors in parts list and numbers as the call the top chain and two separate pulleys the same PN and title.
I did have length of fine chain in parts box not listed anywhere and I made my own ring from scrap for top Chain. Assembled off mast and then installed.
I also attached fittings on side of lower mast which the miss identified pulleys run thru and down front
Need to get smaller line to rig remaining pulleys as stock 0.5m is oversized in my opinion
More later


Nice to see you back at the bench Kurt.
Kurt Konrath
Kurt Konrath
Glad to get back into my ship work, slower but a bit more satisfying for me.
Train show seasons are almost year long, but I only attend a few now a days, to costly to travel towing a big trailer and paying hotels bills.
I can save the funds to buy another ship to put on the shelf, or new tools to work on current projects.
I have about 4 projects in work and want to get them finished so I can concentrate on one or two at time.
Kurt Konrath
Kurt Konrath
In review of rigging diagrams I am left with a big question maybe someone can help with.
It has to do with the lines which hold up the main yard to the mast. Construction diagrams show chains looped over lower mast cap hanging down to a circle.
This is listed as top chain. But rigging diagrams show what looks like triple block on chain and double on mast.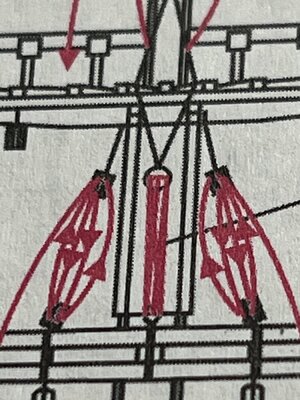
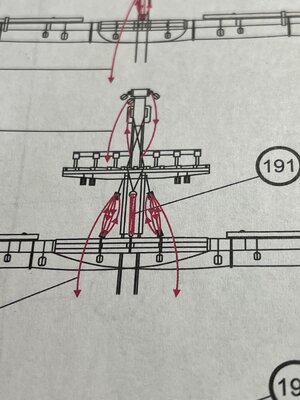
Also there appears no place these rigging lines go down to on the deck so how where they secured to hold mast up and in place?
Kurt
It has to do with the lines which hold up the main yard to the mast. Construction diagrams show chains looped over lower mast cap hanging down to a circle.
This is listed as top chain. But rigging diagrams show what looks like triple block on chain and double on mast.


Also there appears no place these rigging lines go down to on the deck so how where they secured to hold mast up and in place?
Kurt
Kurt Konrath
Kurt Konrath
Kurt Konrath
Kurt Konrath
I figured out a simple way to strop a block after struggling with the first few.
Not sure it’s 100% correct but worked for me till I learn more.
Start with length of thread and make simple loop, I use the right over left method so I can remember the second half of square knot later
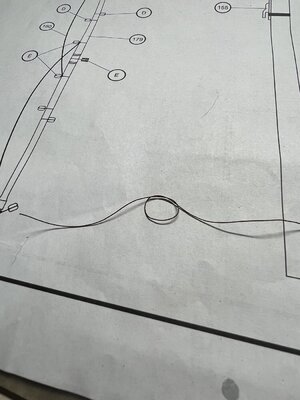
Next I drop loop over one tip of angled tweezers with long strings to outside
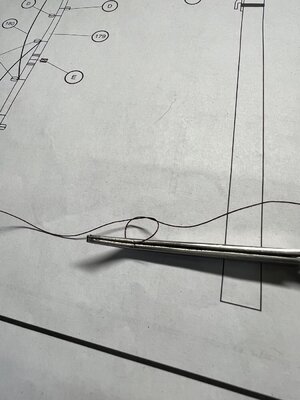
Next I pick up the block and pinch it in my finger tips with pulley face exposed and grip it with the tweezers
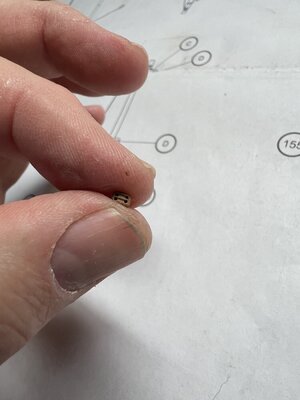
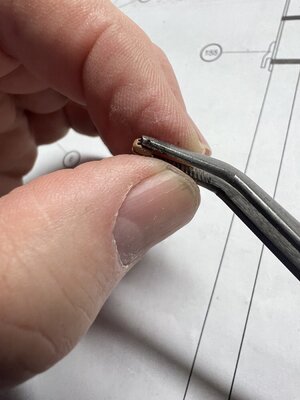
then I set the tweezers down and pull knot up and in place around the block and pull knot tight. I then make the second half of knot and pull tight
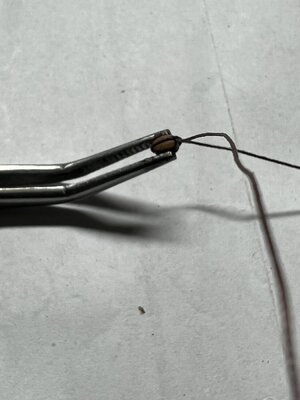
Lastly I remove the block and adjust the knot to ensure it’s top center of block and then add drop of CA to bottom of block to hold it in place
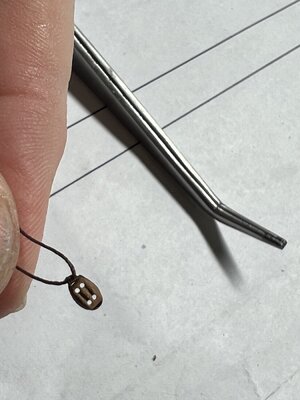
For those who might be wondering, this very nice blocks are from Dry-Dock Model Ships & Parts.
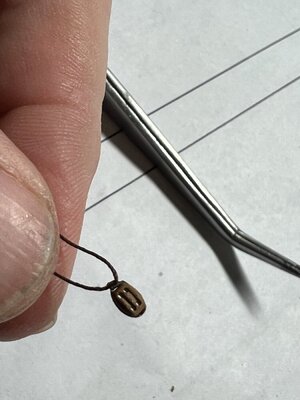
Not sure it’s 100% correct but worked for me till I learn more.
Start with length of thread and make simple loop, I use the right over left method so I can remember the second half of square knot later

Next I drop loop over one tip of angled tweezers with long strings to outside

Next I pick up the block and pinch it in my finger tips with pulley face exposed and grip it with the tweezers


then I set the tweezers down and pull knot up and in place around the block and pull knot tight. I then make the second half of knot and pull tight

Lastly I remove the block and adjust the knot to ensure it’s top center of block and then add drop of CA to bottom of block to hold it in place

For those who might be wondering, this very nice blocks are from Dry-Dock Model Ships & Parts.

Last edited:
Kurt Konrath
Kurt Konrath
Kurt Konrath
Kurt Konrath
Kurt Konrath
Kurt Konrath
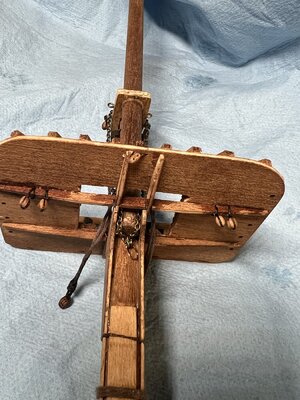
Well back to work on the mast of cross section
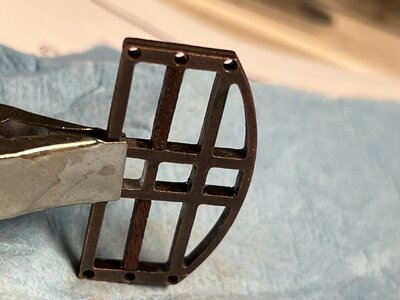
Working main mast (only one on this kit) cross tree and noticed a problem with kit provided casting. It was missing cross members in between front and rear members.
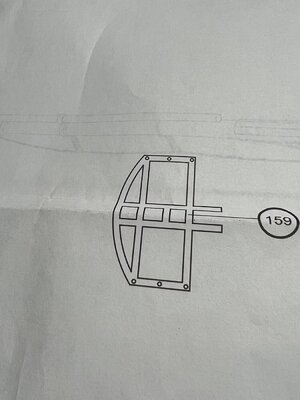
So I found scrap of African Walnut that was same size and cut and glued two pieces in. I verified they were missing from photos in instruction book
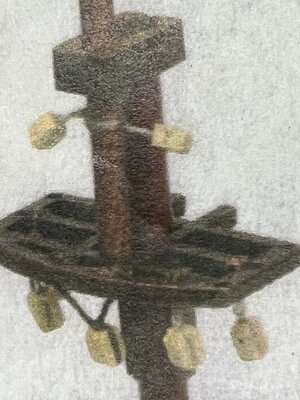
Next I added rigging blocks as shown in instructions
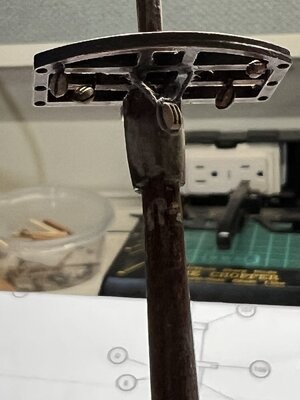
And after several of thinking trying and sanding I finally got the top mast checks installed
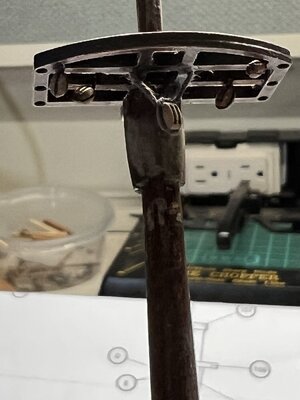
And now ready to move up to top gallant mast cleats
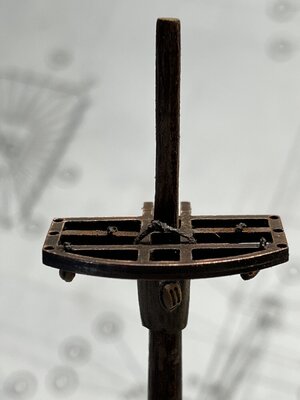
Working main mast (only one on this kit) cross tree and noticed a problem with kit provided casting. It was missing cross members in between front and rear members.

So I found scrap of African Walnut that was same size and cut and glued two pieces in. I verified they were missing from photos in instruction book


Next I added rigging blocks as shown in instructions

And after several of thinking trying and sanding I finally got the top mast checks installed

And now ready to move up to top gallant mast cleats

Kurt Konrath
Kurt Konrath
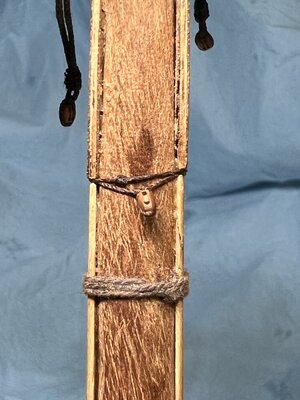
Back working on topgallant mast checks tonight.
Plans call for 6 pieces of wood and I had to use 8.
Have to led glue dry and then sand to shape.
I also got the top of mast sanded down to install the mast final.
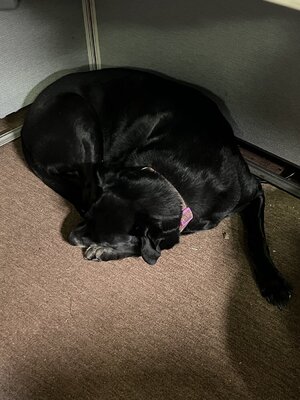
All while my work shop security stayed close by often next to my seat so I couldn’t move but she found a good spot finally
Plans call for 6 pieces of wood and I had to use 8.
Have to led glue dry and then sand to shape.
I also got the top of mast sanded down to install the mast final.
All while my work shop security stayed close by often next to my seat so I couldn’t move but she found a good spot finally

I wish you a Happy Birthday  and all the best Kurt.
My work shop security takes care of warm feet for me when he is lying around.
But I have to take care not to let wooden parts fall on the floor, he is quite quick to chew them up.
 and all the best Kurt.
My work shop security takes care of warm feet for me when he is lying around.
But I have to take care not to let wooden parts fall on the floor, he is quite quick to chew them up.
And a very happy birthday from me too Kurt, have a great day.


