Happy birthday Kurt.
-

Win a Free Custom Engraved Brass Coin!!!
As a way to introduce our brass coins to the community, we will raffle off a free coin during the month of August. Follow link ABOVE for instructions for entering.
-

PRE-ORDER SHIPS IN SCALE TODAY!
The beloved Ships in Scale Magazine is back and charting a new course for 2026!
Discover new skills, new techniques, and new inspirations in every issue.
NOTE THAT OUR FIRST ISSUE WILL BE JAN/FEB 2026
You are using an out of date browser. It may not display this or other websites correctly.
You should upgrade or use an alternative browser.
You should upgrade or use an alternative browser.
Santisima Trinidad Cross-Section 1:90 Kit Build
- Thread starter Kurt Konrath
- Start date
- Watchers 25
Happy birthday for yesterday Kurt.
Kurt Konrath
Kurt Konrath
First off a many thanks for the birthday wishes.
Here in the US we call it the Medicare birthday when all your healthcare insurances all change because your an old fart.
Here in the US we call it the Medicare birthday when all your healthcare insurances all change because your an old fart.
Kurt Konrath
Kurt Konrath
So todays work to show off. Last week I got they topgallant mast checks attached and sanded to shape the best I could and test fitted all the mast sections together
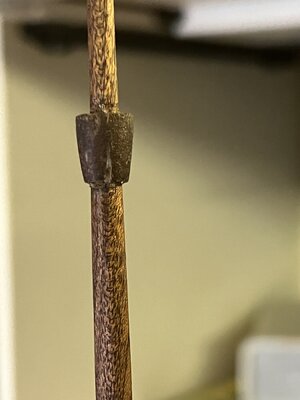

Next after taking it apart I worked on attaching the topgallant blocks as shown in the diagrams. At least rigging is simplified as no rigging is shown going for or aft between masts. All but two block done which go on after final mast assembly


Next after taking it apart I worked on attaching the topgallant blocks as shown in the diagrams. At least rigging is simplified as no rigging is shown going for or aft between masts. All but two block done which go on after final mast assembly

Kurt Konrath
Kurt Konrath
Todays work is I assembled and glued the main top gallant mast in place. This completed the mast assembly and it’s ready to install in hull section and start the shrouds.

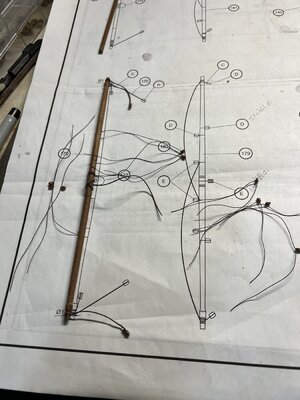
Next I started work on the main top gallant yard, marked and cut the round stock and then slowly carved the ends as shown in plans. The have a small area like a band near the ends and taper a a little bit back towards center.
Next I pulled out the blocks identified and stropped them for attachment later.
I did get the two long block attached to ends of the yard install before the time ran out.
It’s a shame when your in the groove and you have to stop to get sleep so you can goto work and earn funds in the morning.


Kurt Konrath
Kurt Konrath
Kurt Konrath
Kurt Konrath
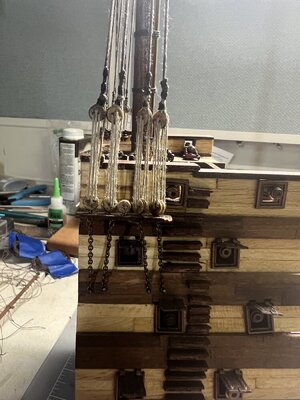
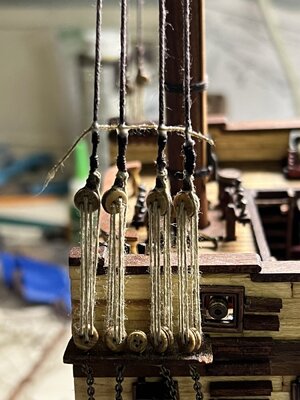
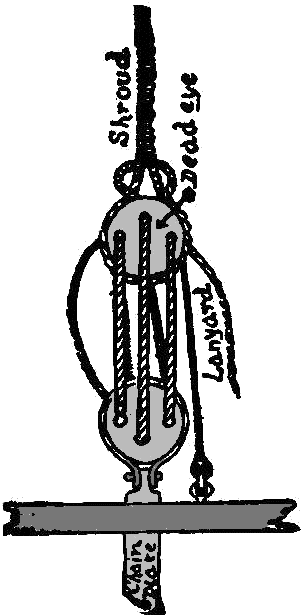
It appears you rig the deadeyes opposite way. Take a look at the red dots and reference images for correct placement.Well back in shop today and installed upper deadeye for lower mast and then rigged it to see how it look
View attachment 352671

The correct rigging of the deadeyes
Kurt Konrath
Kurt Konrath
Thank you for finding my error, I will work to fix this issue and show you what I come up with. That is why I did one and stopped to see what I did correct or wrong.
Even with the deedeye's turned wrong, I think I got the method of securing them done correct enough for this scale.
Even with the deedeye's turned wrong, I think I got the method of securing them done correct enough for this scale.
Looking nice Kurt. If you want to, you can treat the rigging line with beeswax and it will keep the fuzzies down. Just an idea.
Kurt Konrath
Kurt Konrath
Thanks for the reminder to treat. This kit has cheap extra fuzzy ropes and after a triple coating and dubbing the lines look about the sameLooking nice Kurt. If you want to, you can treat the rigging line with beeswax and it will keep the fuzzies down. Just an idea.
Kurt Konrath
Kurt Konrath
Thank you also Jimsky for pointing out improper rotation of deadeyes. I have now fixed my first on the best possible as the kit deadeyes are not all that good as for hole alignments

And now after twisting all the lower row of deadeyes for best alignment I have three shrouds completed but the fourth will have to wait on repairs to chain plate. As I was twisting the deadeye the end of chain broke loose and will have to be fixed tomorrow.
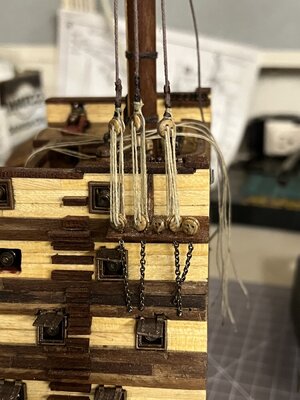

And now after twisting all the lower row of deadeyes for best alignment I have three shrouds completed but the fourth will have to wait on repairs to chain plate. As I was twisting the deadeye the end of chain broke loose and will have to be fixed tomorrow.

Kurt Konrath
Kurt Konrath
Ok after a week or so break to due my Model railroads I am back in shop on the cross section again.
I fixed the problem with one deadeye strap the broke loose when I was correcting orientation of the deadeyes.
That allowed me to compleat the last shroud on the first side.
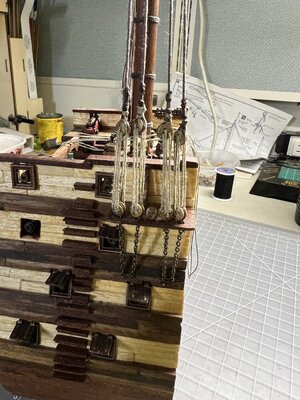
Having done that a few nights ago I have started on the opposite side and have two shroud lines done.

Now to finish the last two and start with rat lines. Oh so much fun coming!
I fixed the problem with one deadeye strap the broke loose when I was correcting orientation of the deadeyes.
That allowed me to compleat the last shroud on the first side.

Having done that a few nights ago I have started on the opposite side and have two shroud lines done.

Now to finish the last two and start with rat lines. Oh so much fun coming!
Bravo Kurt, Good luck with the ratlines.
Kurt Konrath
Kurt Konrath
Hi Kurt, I once read an argument in favor of natural rat lines. The shrouds can be tarred but since you climb on the rats you would get tar on your shoes, your hands and then every you walked. I really don't know the correct answer though. Your cross section is coming along nice, great job.
Kurt,
Also FYI I used kit's rigging instructions for the sails. This may cause you some grief.
scroll down to to image #154 if you care to have a look...
My earlier Avatar and name (md1400cs) for reasons that have now been cleared up
Also FYI I used kit's rigging instructions for the sails. This may cause you some grief.
scroll down to to image #154 if you care to have a look...
My earlier Avatar and name (md1400cs) for reasons that have now been cleared up
Santisima Trinidad cross section Occre - bashed [COMPLETED BUILD]
Wow! It's really very very realistic ! :cool:
shipsofscale.com
Kurt Konrath
Kurt Konrath
Very nice Kurt. The only thing I would have done is try to run those lanyard lines through some beeswax to get rid of most of the fuzzies. But other than that - it is good to go !!!
Are you making knots, or is the ratline fixed to the shroud only with the glue? In moment it is looking like only glue
Maybe, when you use thinner rope material (in moment you are using the same like for the lanyards between the deadeyes) you could make the correct knot (especially at the inner shouds) and you would not need any glue at the inner shrounds.
What is also working, that you use water based wood glue, thinned with water, so the glue can panatrate into the knot and afterwards you do not have a hardened visible glue drop at the points. Definitely try to reduce the glue quantity per point, f.e. using the top of a needle


