Santisima Trinidad - Occre Build Log [COMPLETED BUILD]

Re: OcCre Santisima Trinidad Build Log

Things like the cannon carriage become so tiny of scale, it becomes almost impossible to fully accurately "within reason" to build something that small with all features like the hooks. Things at this point become "representative". At this point, you have to put things in proper perspective and put a hook or cannon as close to the size relative to what you are building. So, that was the long answer. The short answer is probably not. I don't think that I can make a hook that would be finite accurate within reason on such a tiny object. As a matter of fact, this whole short post is on dealing with scale accuracy and what the Model Manufactures gives us "are" sometimes not accurate and to the trained eye, those pieces would need to be changed. However, I am not a historian nor a naval historian. Sometime parts become relative within scale and appearance to please the wide range of modelers. The whole idea of what started all of this is that I wanted to put cannons on the third (waist) deck. The model calls for false cannons glued to side of ship. So, if I follow the instructions, I would not have a headache !!!

ps. thanks for staying tuned.
 
  • Like
Reactions: VIU
Re: OcCre Santisima Trinidad Build Log

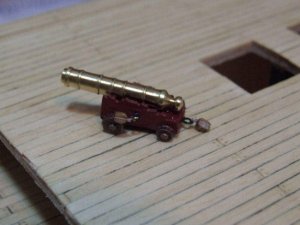
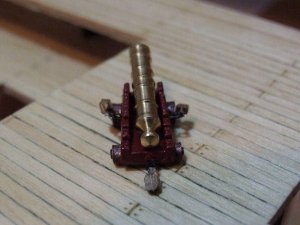
I have decided that I am going to keep this one. It is the original kit version cannon and carriage. I then painted it Anti-foul red as previously mentioned. I then added some rigging rings that I scratch built out of some soft brass wire and then painted them black. I left the wheels the natural bronze color. I then lightly sanded the edge of the wheels to reveal the axles.
I also used the 3/32" (2.5mm) Single Walnut Block from Model Shipways that I had laying around. As far as the third deck, I think that I am going to abandon the idea of adding cannons to this third or waist deck. I would rather place all my energy on the main deck. I will scratch build my own carronades for the main deck as well. I have some carronades that got back ordered from ME that I am waiting on. I appreciate everyone's patience. I know that some said to themselves that I wish that Donnie would hurry up and decide what he wants to do because he is driving us crazy.

samplecannon06.jpg

samplecannon07.jpg
 
Re: OcCre Santisima Trinidad Build Log

I have made a decision. I am not going to put full cannons/carriages of any type on the Third (waist) deck.
1) I want to focus my energy on the main deck detailing the cannons there.
2) I decided to use the original cannons / carriages that came with kit.
3) I am going to paint the kit carriages with a dark red and use original cannons.
4) I am going to add the ring-bolts to the kit carriages along with 2.5mm (3/32") walnut single blocks.
5) I might deviate and put some howitzers on main deck.

I have already made the decision last night and then I glued the main deck onto frame using Tite Bond II glue. I did not use Cynoacrylate because I needed the time for the parts to be positioned and added weights to the main deck to hold it in place for about 12 hours. I believe that I will be happy with my decision. Why the decision? Well, I know what my limits are I guess. I would rather focus my energy on the main deck. I am bracing myself for a lot of tedious work on the cannon modification.
 
Re: OcCre Santisima Trinidad Build Log

This is showing the start of dry fitting the Bulwarks. I am also trying out my plank holders for the first time from Micromark.com<br/>
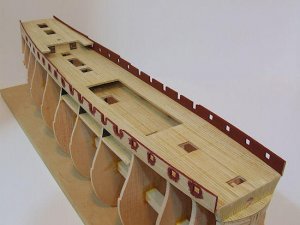
The Fourth (main) Deck has been glued down. I decided not to add cannons to the Third (waist) Deck.

bulwarkdryfit01.jpg
 
Re: OcCre Santisima Trinidad Build Log

I have started shaping the Hull to accept the Bulwarks. (No photos yet)

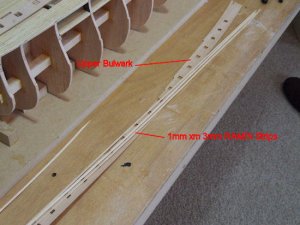
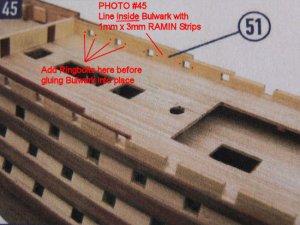
Now I was reading far in advance and found that PHOTO #45 wants me to line the "inner" upper most Bulwarks with the 1mm x 3mm RAMIN wood strips. Now, it seems to me, it would be easier and more manageable to do this "before" I glue the upper most Bulwark in place. I can also prepare and add the Ring Bolts to the inner upper Bulwark since it will not be installed just yet.

I was wondering if anyone has done this step this way or considering it? It just seems more difficult to add the inner upper Bulwark strips "after" the upper most Bulwark has been glued in.
 
Re: OcCre Santisima Trinidad Build Log

I added more information about what I am referring to here. I was thinking that if I did this in advance, it would be easier than adding the RAMIN strips AFTER the bulwark is in place.
This demonstrates the possible idea of adding the RAMIN strips now and the Ring Bolts as well before the upper Bulwark is glued in. Any comments welcome. The photo at the bottom is an image from the instruction book at step.

bulwarkdryfit01.jpg

bulwarkdryfit02.jpg

bulwarkdryfit03.jpg

 
Re: OcCre Santisima Trinidad Build Log

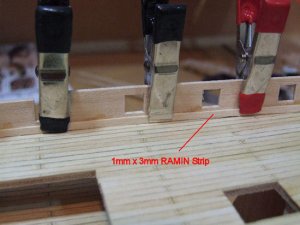
I went ahead and took the plunge and tack glued the first 1mm x 3mm RAMIN strip onto the inside upper Bulwark. Then I will remove the upper Bulwark and plank the rest of it. The reason I did it this way is to make sure that the first 1mm x 3mm strip will have the correct space on the deck for secure tight fit. <br/>
The instructions call for this to be done much later after the hull is complete and some furnishings are added. I thought about planking the inside Bulwark and also add the ring bolts for the cannons so that it will not be a strain to get those items done later.

bulwarkdryfit03.jpg

bulwarkdryfit04.jpg
 
Re: OcCre Santisima Trinidad Build Log

I am trying to figure out the arrangement for the ring bolts to be placed on the inner Bulwark. I want to put two pairs. One pair for the breaching line and one pair for the block and tackle. One some research (of what is very limited) I have seen the ring Bolts horizontal side by side and some found to be vertical side by side. I wish someone would offer me some sound advice on this subject, because I am at the stage of doing this. Thanks for anyone willing to help.

ringbolts.jpg
 
Re: OcCre Santisima Trinidad Build Log

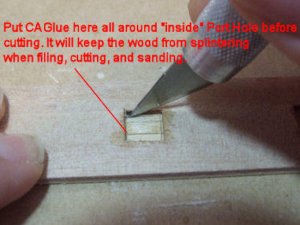
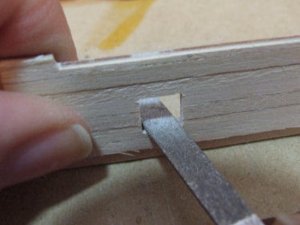
Working on Port Holes. I used CA glue (cynoacrylate) on inside of port holes. This way, when I file the openings after cutting them out, the wood will not spinter. So far no splinters. So this technique worked pretty good.
This images shows the "inside" of the Bulwark. I have decided to put four Ring Bolts to the Port holes. There is a lot of guessing out there as to what is going on with how the cannons are rigged. I will paint and rig the Ring Bolts last. Otherwise (in my opinion) it would be giving me a neck ache to try to do this afterwards. Hey, I did say that I was lazy didn't I??

portholes01.jpg

portholes02.jpg
portholes03.jpg
 
Re: OcCre Santisima Trinidad Build Log

Just to recap. The instructions call for you to glue the top Bulwark on first, then follow with the next, etc. After studying the situation, I decided to do something different which is not like me to venture off from the instructions. I am the kind of go by the instructions guy.

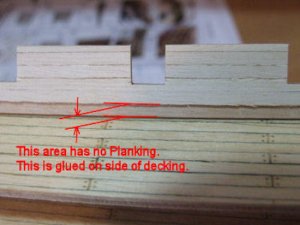
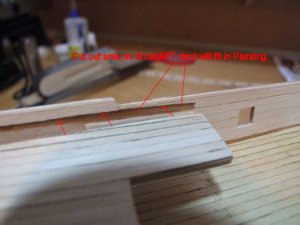
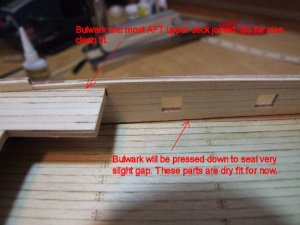
Well, I decided to dry fit the Bulwark and then removed the Bulwark and proceeded to plank the entire length except for the aft of ship under the most upper Deck which will not be seen. Then as you can tell, I had to carve out a small section to make the upper deck fit well.

When I get all the upper Bulwark (2) pieces completed fitted which I am basically complete, then I will remove the Bulwark, and use a template to drill holes for the Ring Bolts. I plan to use 4 Ring Bolts per carriage. They will be spaced vertically on each side. The Ring Bolts will be painted Black with the Bulwark anti-fowling red. (it isn't the name as much as the color red has a deeper color and not a bright red.)

In further thinking ahead after the Ring Bolts installed and everything is painted, then I plan to rig the Breaching line and leave enough line so that I can locate the center of the line and form a loop to make it around the end of the cascabel. My plans are also to rig the single walnut block to the Ring Bolts as well. I have seen a post that someone actually had their cannon completed rigged and then glued the cannon/carriage/ring bolt assembly onto the bulwark. I think that I would have to have a Jig Station to do this. I don't think at this point, I will do it this way.

But at any rate, enjoy and thanks for reading.

bulwarkdryfit06.jpg
bulwarkdryfit07.jpg
 
Re: OcCre Santisima Trinidad Build Log

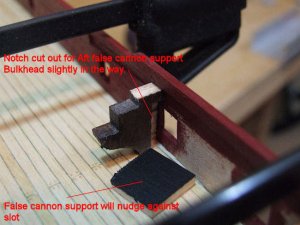
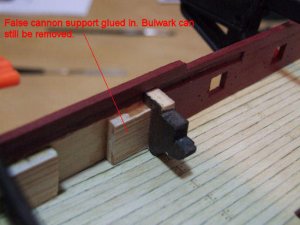
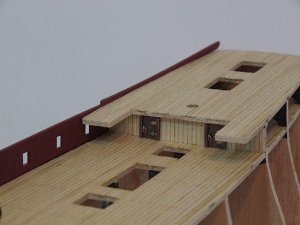
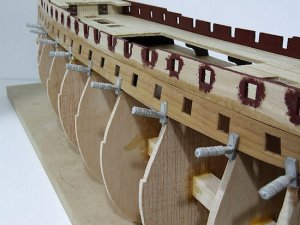
This has been an ordeal in some ways trying to make sure several parts are going to all fit together. The False Cannon pieces, main deck at aft, upper deck at aft and Bulwarks all have to come together and fit nicely or there could be a problem down the way. I jumped ahead of the instructions to do this, but anyone building this kit would not necessarily have to do this. I wanted to get the painting and dry fitting done. I have already drilled out the holes to accept the cannon rigging, but they will be added later.

bulwarkdryfit08.jpg
bulwarkdryfit09.jpg
 
Re: OcCre Santisima Trinidad Build Log

Trying to do some more dry fitting. I have ventured way away from the original instructions by planking the inside of the Bulwark first. Then I realized that reading further into plans that I had this wall to build with the doors. I am almost ready to glue down the Bulwark and then after this, the so called dreaded Hull planking with "one" layer of planking. The Quarter Deck will get the false treenail and planking treatment next.

hull03.jpg
 
Re: OcCre Santisima Trinidad Build Log

Finally after a few weeks, I have got the first set of Bulwarks on the Port and Starboard side. Here is my progress so far. To answer Kip, I had mentioned to him that I am basically lazy and I used the doors that came with the kit that get installed on the Quarter Deck lower wall. I did use some gold testors paint to paint the hinges and also the directions did call for me to add a Ring Bolt to the door with an additional ring fastened. So, I followed the directions. The doors seem to be finished with some type of bronze finish.

hull04.jpg
hull05.jpg
hull06.jpg
 
Re: OcCre Santisima Trinidad Build Log

This is the Prep work to install the next Bulwark. The strip of wood (Bulwark) does look darker because I have brushed water on it. The end at the head was soaked in water for a few minutes. I used the Planking Clamps to temp. secure Bulwark until wood dries. So far I have used Titebond II for the entire hull. The CA Glue just dries too fast and can not get items positioned in time. Therefore it seems that I am going to use Titebond to build most of the rest of the hull. I also will show a picture of some additional supports that I wanted to add between the Bulkhead and right under the deck. I found that the Bulwark wanted to have a natural sag between the Bulkheads, so therefore I decided to add some more support. This is not shown in the image below. I will have to detail this later in another picture. I have yet to add the Gun Port false covers. The Gun Port false covers are going to rest on top of some of the bulkheads and therefore I will have to make cutouts in a few places. This is normal as the instructions mention this. I am not saying this is a bad design. I am however saying that at least the instructions acknowledge this fact. I will demo this part in another picture.
I was finally able to get my camera setting to show "in focus" within reason from the front of image to rear. Just to let some know that are struggling with this, my manual settings on my camera was f11 and 1/2 of a second and using timer mode so as not to shake camera at that "slow" of a shutter speed. With f11 (f Stop 11) you are letting the camera lens close down to a tiny pinpoint of an opening.

hull07.jpg
 
Re: OcCre Santisima Trinidad Build Log

I have built 2 plastic models several years ago.
They were bought at my wife's hobby store. The box art says Captain Kidd Pirate ship, but after some research and some expert feedback, it is actually very close to the Wappen Von Hamburg. It is very close. The other one is a box art of Jolly Roger Pirate ship, however again after some research and some expert feedback, it was determined that it is close to the French La Flore. Not too much info out there on this ship. It is interesting as it has been told to me that the Plastic models are often times renamed to something else to assist in marketing as in a younder generation may find it appealing to build a "pirate ship", but the person that has the interest (as in me at that time) knew nothing about ships. The only thing at that time, was that this particular plastic model "had" to represent something in real life at some time. I doubt very seriously that a model manufacture like Lindberg would put a lot of effort in designing a mold for a fictitious model, but I guess it is done all the time. But, for a ship, it would be more difficult. Ok, I have rambled on enough about this topic - sorry. I also must mention that about 15 years I picked up a Model Shipways Bluenose II Schooner. Well, at that time, I build the hull bottom, with no deck furnishings. At that time, it was the Scuppers that discouraged me with the mundane task of punching all those scupper holes. (this is why I encourage others to start out with something that does not have a lot of repetition in it at first). Then I have built the Midwest Maine Lobster Boat (R/C) version. I have the Radio gear, but yet to install that as of now. So, there you have it.
Why did I choose the Santisima Trinidad. I guess I was after something unique, majestic, and I also felt daring enough to try. I still have that Bluenose sitting there, but for some reason, can't get back to it. It might be that I don't have much interest in Schooners. My interest is in warships with the cannons and riggings.
Thanks for asking - hope I did not bore too many out there with this long write up. <br/>

ps. there is a huge difference in building a large ship "knowing" what you are getting into, rather than building a ship that you do not know what you are getting into.

It really has nothing to do with a persons talent and abilities. It has a lot to do with a persons patience, commitment and determination character that you are building more than the ship itself.
 
Re: OcCre Santisima Trinidad Build Log

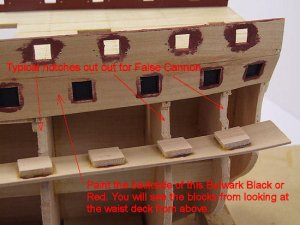
False Cannon Supports

falsecannon01.jpg
 
Re: OcCre Santisima Trinidad Build Log

Arrg !!
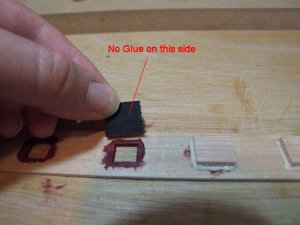
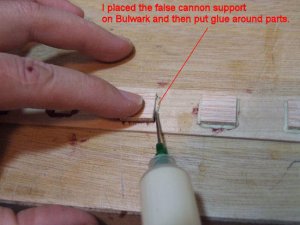
Even more false Cannon Support covers added to back of Bulwark. I think I lost count at about 108 of these.
I used CA on one of these and found out real quick that this was not going to happen like I want. The CA (even the thicker stuff) would run underneath the cover and make a mess - no matter how careful I was. So I resorted to Titebond I this time. The Titebond I will settle down and not look so thick. It will dry and shrink up and become somewhat translucent to the point that you can not hardly tell.

falsecannon02.jpg
falsecannon03.jpg
 
Re: OcCre Santisima Trinidad Build Log

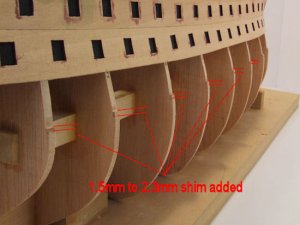
Problem:
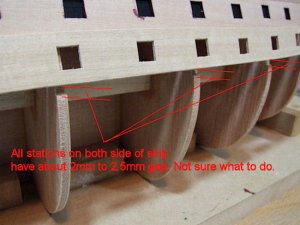
Starting to install the last Bulwark and noticed that I will have a gap of about 2mm to 2.5mm on all frame stations on both sides of ship. Some frames have about 1.5mm gap.
Has anyone ever run across this situation before and how did you correct it ?

Plan A: Do nothing as the main walnut planking will cover it and it will not matter anyway.
Plan B: Put wooden shims in the gap -sand down -

I am not sure how I got this gap. It must be a collective measurement problem or something. I am not too worried about it. But you will notice that the Bulkheads do have an "edge" of where the last Bulwark is supposed to "rest" on. I would really appreciate some advice here.

hull_problem.jpg
 
Re: OcCre Santisima Trinidad Build Log

This is the best that I know how and what to do. I have researched and I do not know where I went wrong with having that gap.

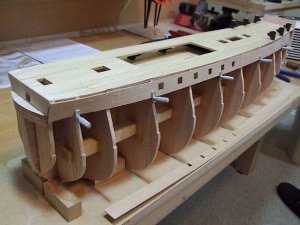
Here is the shims that I am adding. The worst case is 2.3mm. I hope that this would not cause a problem. I don't think that it really will. The upper deck cannon placements seems fine. The only thing that I can think of is that I sanded some on each of the Bulwark strips and a little here and there just accumulated error. Does anyone think that 2.3mm is all that bad?

hullshim.jpg
 
Back
Top