• LUCZORAMA SHIPWRECK SCAVENGER HUNT GIVEAWAY. 4 Weeks of Fun • 1 Legendary Prize ((OcCre’s Fram Ship)) • Global Crew Welcome!
    **VIEW THREAD HERE**

School for model ship building

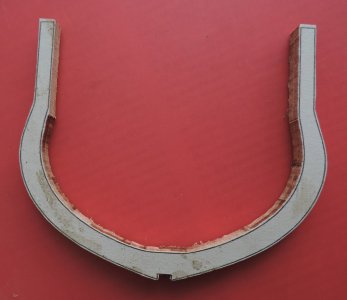
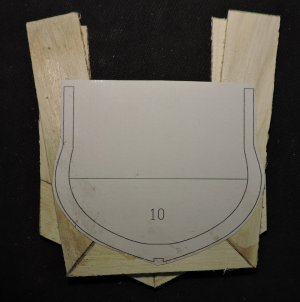
i left off building a frame blank and cutting the outer edge, to finish up the frame i cut the inner edge on the table top 10 inch bandsaw. Cutting along the line by hand is no problem as long as you go slow and steady. there is enough material on the frame to allow you to shape the framing once the hull is built. So if your a little wobbly with your cut it will not matter.

FRAME28.jpg

at this point of making the frames you can smooth out the inside as you build each frame or not and leave the finish when you sand the hull.
 
The advantage to sanding the inside of the frames before assembly of the hull is it is easier to do as opposed to sanding the inside of the hull. you still have to sand in the bevel, which you will have to mark out on the frame if your finish sanding each frame.

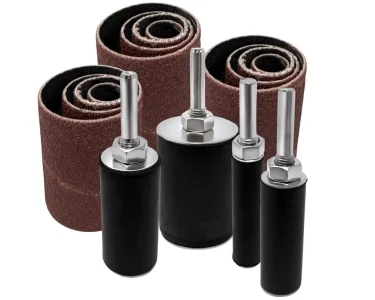
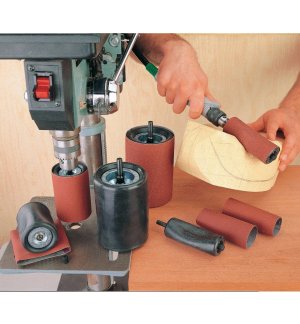
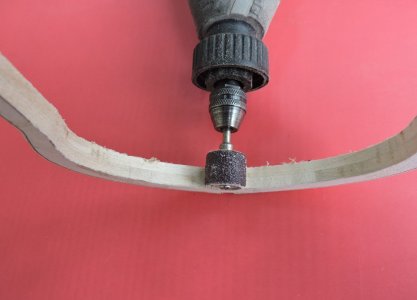
There are a few tools for sanding the inside. If you have a drill press get a set of drum sanders. There are pros and cons to use a drill press in this manner. simply a drill press is meant to drill up and down and not to be used sideways. If someone wants to shed light on the why it can or can not be done please post.

s-l1600.webp


45190-pneumatic-sanding-drums-u-01.jpg

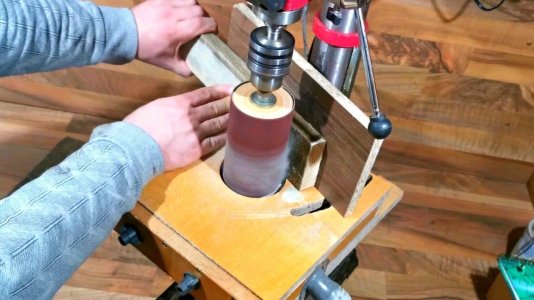
if your going to use a drill press for more than drill holes then here is a setup for thickness sanding

maxresdefault (1).jpg
 
Last edited:
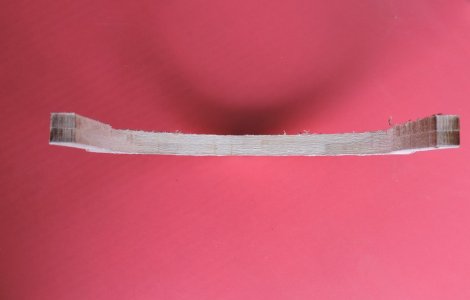
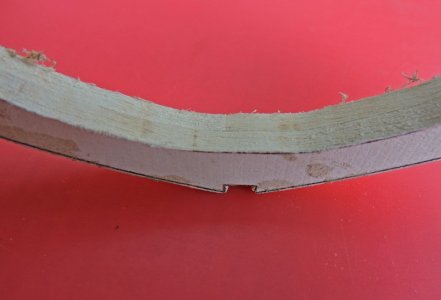
if you do not have a spindle sander or a drill press then a Dremel tool will do the job. I suggest you at least smooth out the inside of each frame before building the hull then once the hull is built then go in and sand the entire inside of the hull. Each frame at the bulwarks have to be inline which would be very difficult sanding each frame one at a time then trying to line them all up.

FRAME30.jpgFRAME29.jpgFRAME27.jpg
 
To recap the build so far, imaginary group A are builders with a table saw and bandsaw or jig saw and means to thickness sand the framing stock.
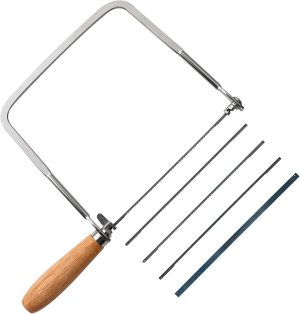
imaginary group B who purchased framing stock will avoid the need for a table saw and a way to thickness sand the material BUT still need a saw to cut out the frames. There are two ways to cut out framing one way is the tried-and-true coping saw. Yes i know, a what? and are you serious? Well this is a hobby and there is no rush and if you want to improve your skills then this is the ZEN way of doing it.

611RS+T8CAL._AC_SL1500_.jpg


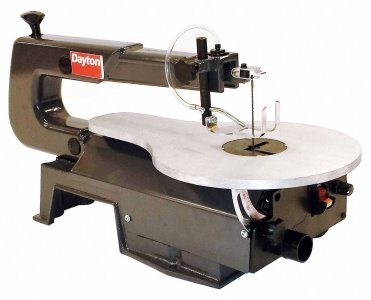
Or you can buy a jig saw or scroll saw, i do not quite know the difference between the two types of saws. But you can buy one for less than 100 bucks. The small hobby toy versions like i posted earlier will not cut it so avoid the "hobby" size tools.

38UK50_AS02.jpg
 
Back in the early days Harold Hahn was hailed the grand master of plank on frame model building with his innovative methods, his drawings and artistic approach to the subject. Then along came a group who's trash talking put a dark shadow over the "Hahn method" they made fun of building a ship upside down saying that is not how ships were built. Well! that is true that is not how real ships were built but we are building a model, so anything goes. Buy the way Harold hated the term "building upside down." Harold was criticized for putting little people on his ships, they did not like his framing style and most of all his method of building blanks and adding extensions to the top of the frames to fit into the jig.

As far as a waste of wood well maybe, but it is a toss up of succeeding in the building of frames and the much harder methods used of building up frames futtock by futtock. (piece by piece)
If you are using expensive wood at a cost of $26.00 to $35.00 a board foot then any amount of savings is a good thing. If your using not so expensive wood then the little waste outweighs the method to insure or at least gives you a fighting chance of making the correct shape of the frames and using a jig.
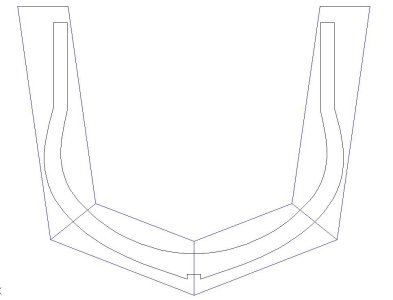
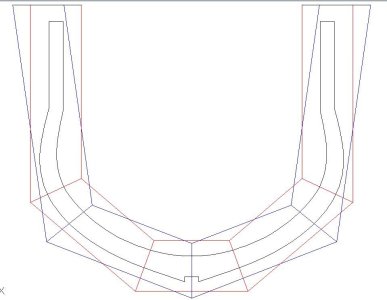
Here are a couple tips in saving wood when building frames using a blank method. Looking at the picture the actual blank Hahn used for the sir Edward Hawke, By lowering the jig between the top of the frames you can see the amount of wood saved from the pattern to the original blank. Hahn had the Sir Edward Hawke jig higher to clear the upper deck and stern. By splitting the jig you can lower the jig

FRAME17.jpg

Harold tried to make a blank pattern to be used for as many frames as possible. This way he could use the same setup and cut out all the blank pieces. The sir Edward Hawke used the same blank for frames 4 to 18. In order to cover all the frame shapes he used framing material from 1 1/4 to 1 1/2 wide. you can cut this way down by using narrower material. In the drawing the same frame is using material 3/4 wide which is quite a large savings in material. The downside is you will have to make many more blank patterns to fit the changing shape of the frames. So, you saving on wood but adding a lot more time to making different blank patterns.


blank1.JPGblank3.JPGblank2.JPG
 
Last edited:
I had no qualms about using the Hahn method when building the Roebuck 25 years ago and it worked. Not my preference today for a few reasons including the cost of wood as you mentioned, but a good alternative for anyone that is worried about traditional frame assembly to consider.

Allan
 
A. Couple of comments:

On many full sized drill presses the end of the drill quill, the thing that spins the chuck, is tapered with a Morse Taper. The drill chuck is pressed on to this taper. For drilling this works fine as everything is in compression but this arrangement is not designed to withstand sidewise forces. Sidewise forces can cause the drill chuck to fall off. Personal experience.

You used to be able to buy a collet chuck. This also presses on to the Morse taper but has a threaded collar that fastens to threads on the quill. This allows the drill press to be used for light duty jobs producing sidewise forces; routing and drum sanding.

There’s lots of different brands of drill presses. Best to check yours before drum sanding.

I like the Hahn method but we have since learned that not all sips were built with regularly spaced sistered frames. There’s no reason, however, why his basic idea cannot be adapted for different framing arrangements.

Building right side up or upside down; what a silly thing to argue about!

Roger
 
Roger and Allen the Sir Edward Hawke is an upgraded version of Hahns original methods. Once i get the parts back from the laser cutter i will get into the finer details.
 
Finally all caught up.

Recap of what I have learned so far as a complete newbie:
- the three parts of most drawings is a side view of the ship -obvious. The front and back view of the ship. Smashed together to look like one odd ship. One side will be the front, the other will be the back. The third drawing is from the bottom of the ship as if you were on the sea floor staring up at it. There are horizontal lines called waterlines that spread the three drawings to provide additional reference points to take a 2d drawing and make it 3d.
- tools used don't have to be complex. To start with an exact knife and tongue depressors or coffee sticks will do the trick if you are strapped for cash but still want to learn. Personally I'm using scissors and cardboard for my first build but look forward to moving on to wood someday.
- there are lots of words I don't know. The ones I have figured out so far: Frame is uh... one of the ribs of the hull. Hull is the bottom of the boat. Aft is the back of the boat. Keel - the bottom center beam of the ship that the frames are attached too.
- frames are made by glueing up multiple cuts of wood together instead of one solid piece. It is ok to use one solid piece though if you aren't too concerned with accuracy or wood waste. The joints are offset to make each rib frame thing stronger.
- frames are set into the keel. You can attach them to the keel using a square of some sort or the jig that holds the tops in place and builds upsidedown
- cad makes it a lot easier especially if you have a friend with a laser cutter. However, tracing paper or holding printouts to a window or taking a piece of paper to a dark room and holding it over your computer/tablet screen also works to trace onto paper. Note - if your screen isn't glass like an iPad be very careful with the amount of pressure supplied to not ruin your screen.
- I'm sorry to hear of the loss of a great model builder. Thank you for teaching us what you learned to from him.
- everyone here is very passionate and polite even with different opinions which is super encouraging. Everyone can art is my belief for sure.
 
Наконец все собрались.

Краткое изложение того, чему я научился, будучи полным новичком:
- три части большинства рисунков - это вид сбоку корабля - очевидно. Вид спереди и сзади корабля. Сбитые вместе, чтобы выглядеть как один странный корабль. Одна сторона будет спереди, другая - сзади. Третий рисунок - вид снизу корабля, как будто вы находитесь на дне моря и смотрите на него. Есть горизонтальные линии, называемые ватерлиниями, которые раздвигают три рисунка, чтобы обеспечить дополнительные опорные точки, чтобы взять 2D-рисунок и сделать его 3D-рисунком.
- используемые инструменты не должны быть сложными. Для начала подойдет точный нож и шпатели для языка или кофейные палочки, если у вас мало денег, но вы все равно хотите научиться. Лично я использую ножницы и картон для своей первой сборки, но с нетерпением жду, когда смогу перейти к дереву.
- есть много слов, которых я не знаю. Те, которые я пока разобрался: Frame - это... одно из ребер корпуса. Hull - это дно лодки. Aft - это задняя часть лодки. Keel - нижняя центральная балка судна, к которой крепятся шпангоуты.
- рамы изготавливаются путем склеивания нескольких кусков дерева вместо одного цельного куска. Можно использовать один цельный кусок, если вас не слишком волнует точность или отходы древесины. Соединения смещены, чтобы сделать каждую часть рамы более прочной.
- рамы устанавливаются в киль. Вы можете прикрепить их к килю с помощью какого-нибудь угольника или приспособления, которое удерживает верхние части на месте и собирается вверх дном
- cad значительно упрощает задачу, особенно если у вас есть друг с лазерным резаком. Однако, калька или поднесение распечаток к окну или взятие листа бумаги в темную комнату и поднесение его к экрану компьютера/планшета также работает для кальки на бумаге. Примечание - если ваш экран не стеклянный, как у iPad, будьте очень осторожны с силой нажатия, чтобы не испортить экран.
- Мне жаль слышать о потере великого конструктора моделей. Спасибо за то, что научил нас тому, чему ты научился у него.
- все здесь очень увлечены и вежливы, даже с разными мнениями, что очень воодушевляет. Искусство может быть у каждого, это мое убеждение.
Вы также забыли упомянуть об эмпирическом методе рисования внутренней части рамы, который подобен гаданию на кофейной гуще.
 
Вы также забыли упомянуть об эмпирическом методе рисования внутренней части рамы, который подобен гаданию на кофейной гуще.-Google translate: You also forgot to mention the empirical method of drawing the inner part of the frame, which is similar to guessing on coffee grounds.
You are so true I did! Shows I didn't quite learn that one yet lol ))
Thanks for the call out - Glad I haven't mess that up in my frames yet - was definitely about to.
 
good Saturday morning shipwrights
todays topic is group build C

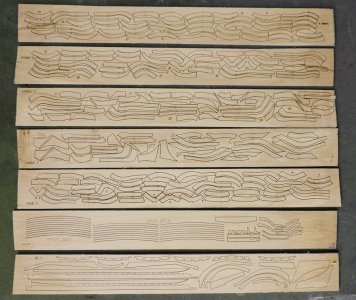
in groups A and B it is hard core scratch building, in group C it will be semi-scratch. There are 2 phases to model ship building, phase 1 is the mill work prepping modeling wood from lumber, phase 2 is building a framed-up hull. A problem faced with a first time builder is if your interested in trying to build a framed hull you needed the tools to prep the wood and cut out frames. It is difficult to try the build without the up front investment of buying the tools. What if you find it is not for you? then you have all these tools.
In group C we are going to skip all the prep work and dive right into building. If you are successful in 'building" the model then you can slowly build up your tools for future builds.
 
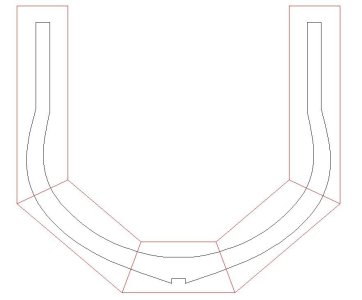
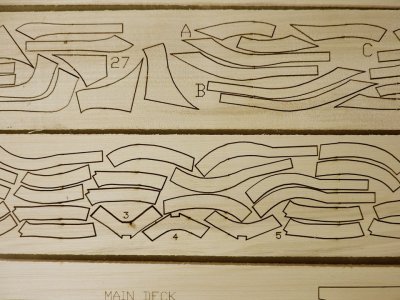
This is what is used to build the frames there is no need to build frame blanks and cut out the frame. What is going in here is building a frame from laser cut parts.
So what is the difference between assembling kit parts and building these frames from precut laser pieces? In a plank on frame "kit" you assemble the parts into a finished frame no additional work required. In a semi-kit with laser cut parts you first assemble the frames the difference here you assembled a frame blank, that is it is not a final frame it requires you to shape and finish the frame.

DSCN8751.jpg


one of the issue when building frame blanks is the waste of wood, with laser cut parts they are nested very close together. This was done first to save on wood and secondly to cut back on weight and package size for shipping.

DSCN8752.jpg
 
This coming week i will build the framing and prep up next Saturday's discussion but this Saturday it is about "how" the model will be framed.
There is the subject of being historically accurate and i will say there is no such thing unless we have the actual remains of the Sir Edward Hawke, which we do not. So, we will rely on best guess or what can be said "ship building practices" for the time and place the Sir Edward Hawke was built.

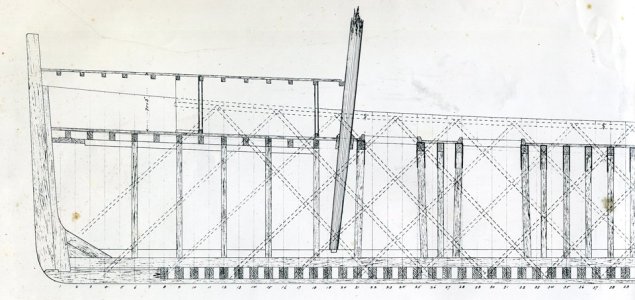
Let's begin with what Hahn drew, he has been criticized for his stylized framing. The actual truth those who criticized the framing and called it stylized are wrong. The way Hahn framed his hulls were an actual framing system called room and space. This was a system where the width of the frame (sided dimension) was equal to the space between the frames.

redo plans1.jpg

do we have proof this was a real type of framing? let us take a look at the evidence

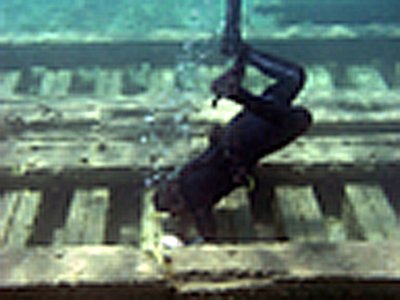
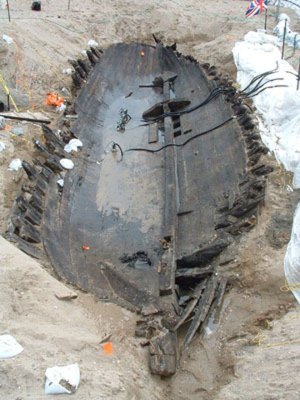
Great Lakes schooner 1840

alvin frames.jpg


shipwreck date unknown

detroit1874 cargo.jpg

plans of a wooden hull bulk freighter

argo bow.jpg


so room and space is indeed real.
 
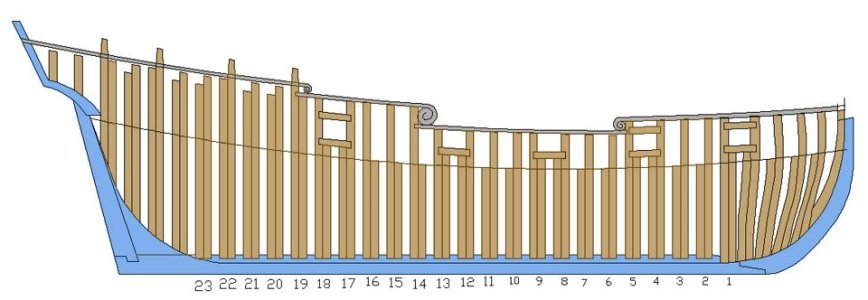
What Harold did do was tinker with the scantlings (size of timbers) he did this to open up the hull as a visual effect. He wanted the frames to stand out at first glance. He is looking at the framing from an artistic view. Rather than showing a hull with framing very close together it looked more like a solid wall of wood. Space out framing has more of a visual impact,

looking for a balance between the historically minded and the artistic visual appearance of the model i tweeted Hahn's original framing.

new framing.JPGredo plans1.jpg


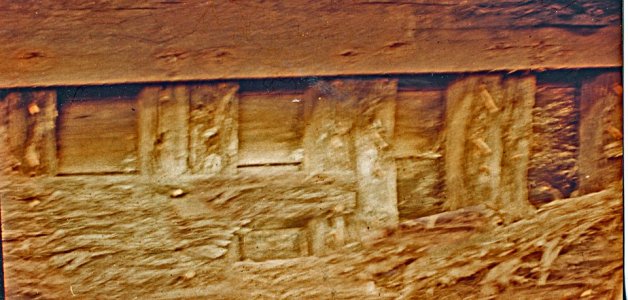
for the historical evidence what is the model based on? what was used is archaeological research and actual shipwrecks.

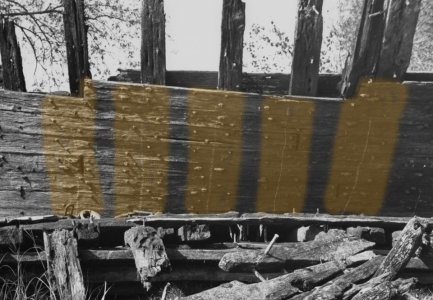
using the nail pattern in the planking i colored in the size of the frames as you can see the space is much narrower than the size of the frames.
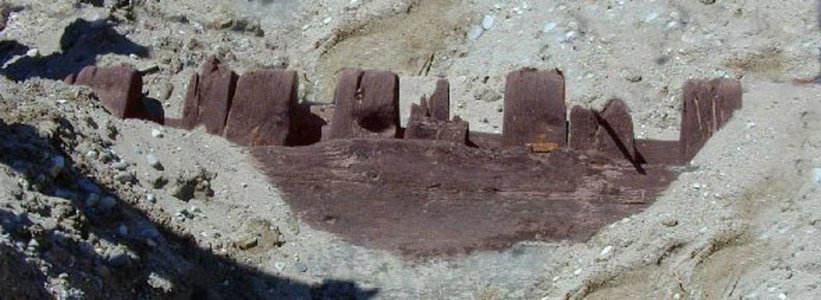
shipwresk 1815 Great Lakes

Capturehull.JPG

shipwreck 1800ish

hunter wreck.jpg

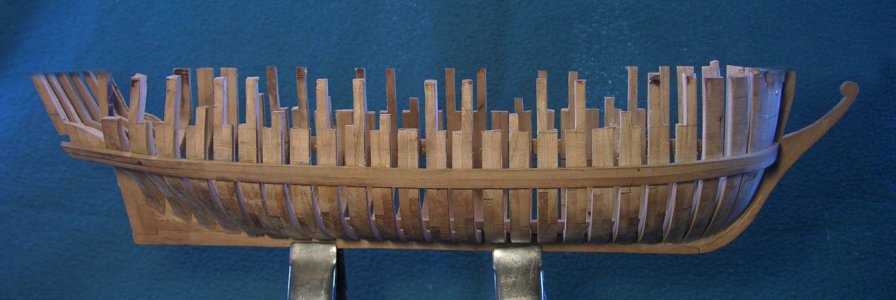
Framing is heavy and close together average 4 to 6 inches spacing

frames in sand1.jpg

a model of the hull above

h jig.jpghunter 2 23 15.jpg

further evidence framing of the Eagle built on the lakes 1812

Eagle framing section.jpg

keel and frame profile used for the model of the Sir Edward Hawke based on shipwrecks of the period and archeological studies done on ships of the type and period.

keel.JPG
 
This week i will spend building frames from the laser cut parts and discussing the jig for building the hull.
next discussion will be next Saturday morning.

i am building the prototype and i expect to find drafting errors but then again maybe not. you just don't know until you start building.

the framing sheets, keel parts and building jig will be available if you want to build along. more details will be posted
 
What Harold did do was tinker with the scantlings (size of timbers) he did this to open up the hull as a visual effect. He wanted the frames to stand out at first glance. He is looking at the framing from an artistic view. Rather than showing a hull with framing very close together it looked more like a solid wall of wood. Space out framing has more of a visual impact,

looking for a balance between the historically minded and the artistic visual appearance of the model i tweeted Hahn's original framing.

View attachment 515935View attachment 515936


for the historical evidence what is the model based on? what was used is archaeological research and actual shipwrecks.

using the nail pattern in the planking i colored in the size of the frames as you can see the space is much narrower than the size of the frames.
shipwresk 1815 Great Lakes

View attachment 515938

shipwreck 1800ish

View attachment 515940

Framing is heavy and close together average 4 to 6 inches spacing

View attachment 515941

a model of the hull above

View attachment 515942View attachment 515943

further evidence framing of the Eagle built on the lakes 1812

View attachment 515944

keel and frame profile used for the model of the Sir Edward Hawke based on shipwrecks of the period and archeological studies done on ships of the type and period.

View attachment 515945
Hi , to understand me well, I ask: these images are design or not?Thanks, Frank
 
Hi , to understand me well, I ask: these images are design or not? Thanks, Frank

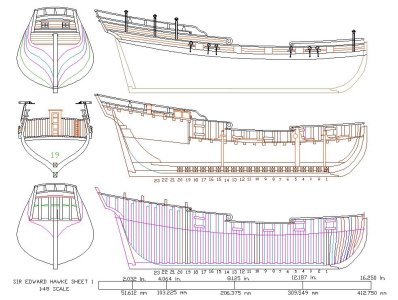
i am not quite sure what you are asking i think you are referring to the drawings, the images are used as examples.

all the drawings are used in the design of the project they are modeling plans that are used to build the model.

sheet 1.JPG
 
Hi , to understand me well, I ask: these images are design or not? Thanks, Frank

i am not quite sure what you are asking i think you are referring to the drawings, the images are used as examples.

all the drawings are used in the design of the project they are modeling plans that are used to build the model.

View attachment 515953
I was asking are they original reliefs? The translations are a real trouble.Frank
 
Hi Dave,

Interesting stuff!

I only had a chance to meet Harold Hahn twice; once in 1975 and again, I think 1980. Prior to that, I had stumbled on to a copy of Charles Davis’s book The Built Up Ship Model. I believe that Davis’s work was based on his experiences in World War I shipyards building wooden merchant vessels. By the early 1900’s regularly spaced double framing was the way large wooden ships were built.

As a result of reading Davis’s book I attempted, unsuccessfully to build a POF model. Hahn’s method offered something not described in Davis’s book; a way to align the frames. My next attempt using Hahn’s method produced a model that I am happy with. I believe that you judged it at one of the contests held at the Inland Seas Museum.

Since you knew Hahn well, I have a question that you can perhaps answer. To what extent was he influenced by Davis’s work and book? Was his method originally a way to improve on Davis’s work by adding the upside down building jig? If so it made building POF models practical for many of us.

Relative to criticism directed at him for the double sistered frames: In the early 1970’s I don’t remember any American ship modelers publishing any research about actual Eighteenth Century framing practes. Later on, people began to criticize Davis’s reconstruction of the Brig Lexington including the double sistered frames. This spilled over to Hahn’s work as well.

Roger
 
Back
Top