Happy birthday!!
-

Win a Free Custom Engraved Brass Coin!!!
As a way to introduce our brass coins to the community, we will raffle off a free coin during the month of August. Follow link ABOVE for instructions for entering.
-

PRE-ORDER SHIPS IN SCALE TODAY!
The beloved Ships in Scale Magazine is back and charting a new course for 2026!
Discover new skills, new techniques, and new inspirations in every issue.
NOTE THAT OUR FIRST ISSUE WILL BE JAN/FEB 2026
You are using an out of date browser. It may not display this or other websites correctly.
You should upgrade or use an alternative browser.
You should upgrade or use an alternative browser.
お誕生日おめでとうございます! 

- Joined
- Sep 5, 2023
- Messages
- 2
- Points
- 1
Tem como disponibilizar esses planos em alta resolução? Por favor!Não sabemos o tamanho real do Silent Mary. Talvez eu não esteja fazendo minha pesquisa direito, mas não consegui encontrar online. Não tive escolha a não ser fazer um desenho que lembrasse o tamanho do HMS Victory.
O tamanho é cerca de 1/98. É melhor chamá-lo de fora de escala.
View attachment 282963
Is there a way to make these plans available in high resolution? Please!
Last edited by a moderator:
- Joined
- Jun 28, 2020
- Messages
- 544
- Points
- 353

Hi janiosp.Tem como disponibilizar esses planos em alta resolução? Por favor!
I will upload the drawing with a resolution of 200 dpi, though not right away.
Please wait until then.
I have been so busy that I could use a cat's help.
I am working on a chopper and a workbench.
There are too many requests for production.
A happy sigh.
- Joined
- Jun 28, 2020
- Messages
- 544
- Points
- 353

Mr. janiosp,Tem como disponibilizar esses planos em alta resolução? Por favor!
Is there a way to make these plans available in high resolution? Please!
Please go to
There is a drawing in the middle of the page, please click on it.
You will see a 200dpi jpg drawing.
Please copy it.
- Joined
- Sep 5, 2023
- Messages
- 2
- Points
- 1
Cara... Muito, muito obrigado mesmo. Estava a muito tempo procurando esses planos, mas não encontrava em lugar nenhum. Foi é o melhor!Mr. janiosp,
Please go to
There is a drawing in the middle of the page, please click on it.
You will see a 200dpi jpg drawing.
Please copy it.
Dude... Thank you very, very much indeed. He was looking for these plans for a long time, but he couldn't find them anywhere. It was the best!
Last edited by a moderator:
mellpapa, today I viewed your log from the first post and also checked out your website using 'Translate'. This blog has been so instructive and the artistry and originality you display is like watching 'Kōhei Uchimura' competing. Fabulous work. - cheers to you and family.
- Joined
- Jun 28, 2020
- Messages
- 544
- Points
- 353

The Silent Mary, which has not been touched for over a year, has finally resumed its crafting.
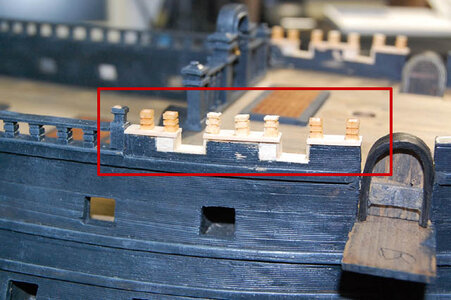
The first step is to craft the handrail posts on both sides of the bow.
This is the starboard side.
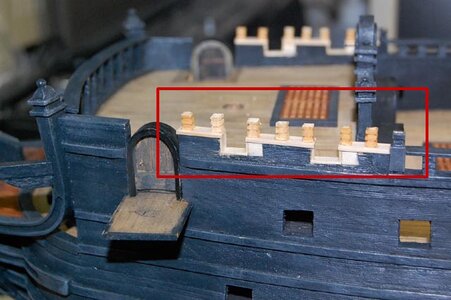
This is the port side.
Brass wire is used for both port and starboard struts to give them strength.
I left it until the glue is dry.
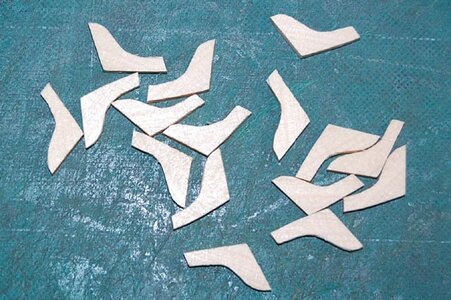
While the glue was left to dry, I was making arm parts to support the gangway, about 16 pieces should do it.
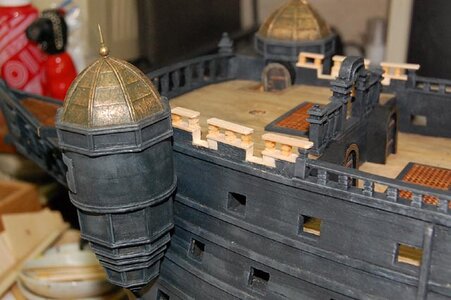
The handrail is glued in place.
This is the port side.
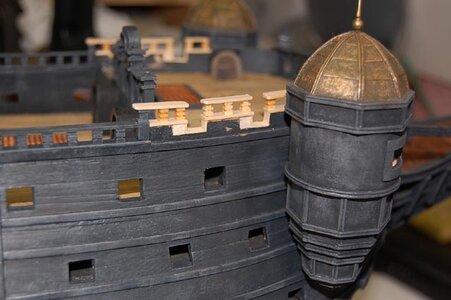
This is the starboard side.
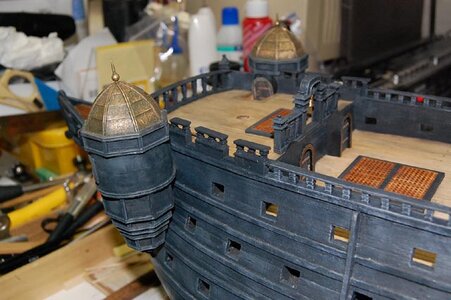
Now that the glue is dry, I painted German gray.
It's not dry yet, so I'll drybrush it later.
This is the port side.
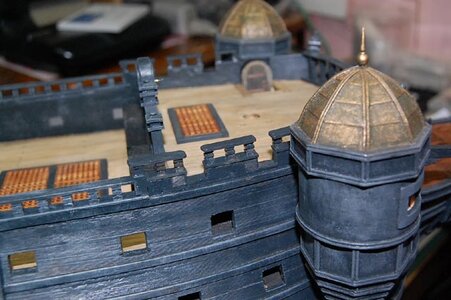
This is starboard.
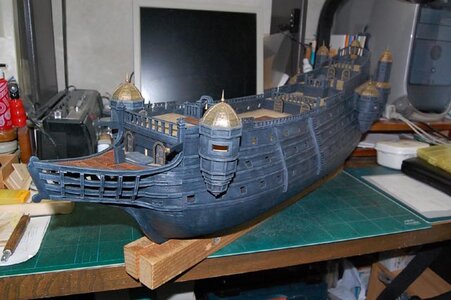
Sometimes, it is an overall image.
Here is an image from diagonally forward on the port side.
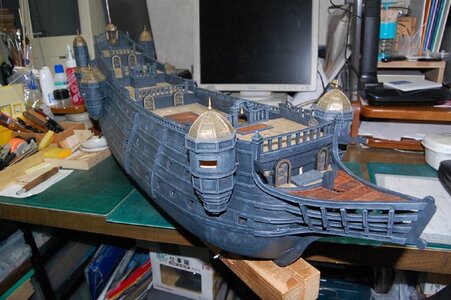
This image is from diagonally forward to starboard.
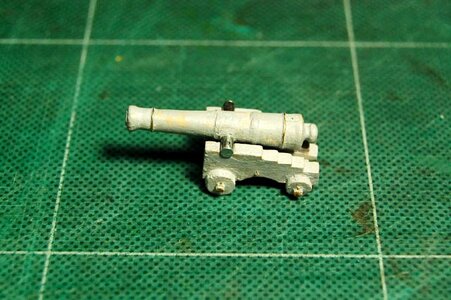
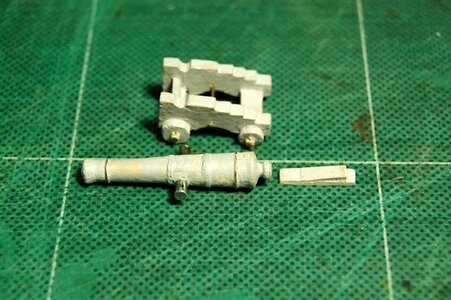
I made this cannon about 10 years ago by cutting some wood. It is painted gray-surf.
It was just the right size for the Silent Mary.
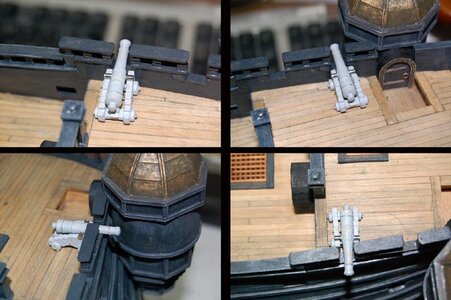
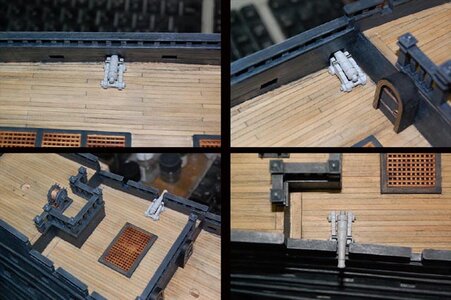
Here is an image of it placed on each cannon section. Just right.
This will be molded in silicone and replicated in resin in the number needed for the Silent Mary.
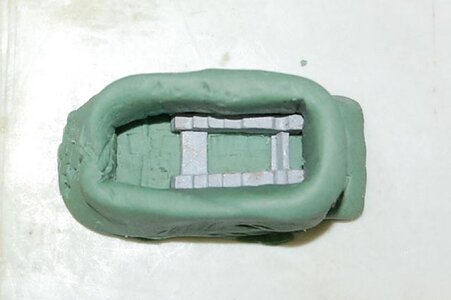
First, cover the bottom and the surrounding area of the carriage with clay.
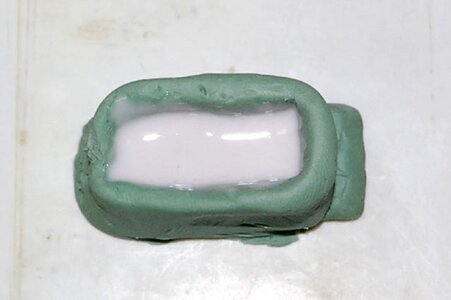
Since the mold is made by tying the carriage together, we pour the silicone inside the carriage.
We wait for it to harden in this state, so we can leave it overnight.
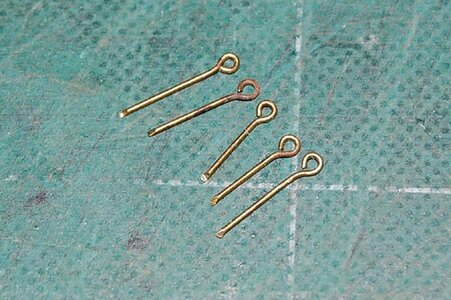
You'll need a lot of these ring pins in a model sailboat. There are some sold as parts, but I'll make my own.
I have special pliers to make these.
I'll make about 50 for now. If I run out, I can make more.
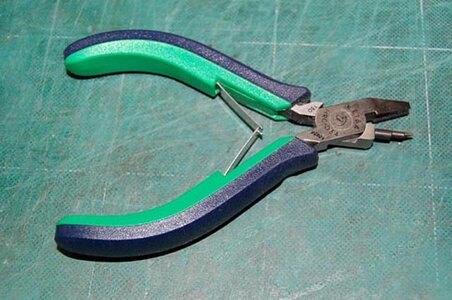
Made with special pliers above.
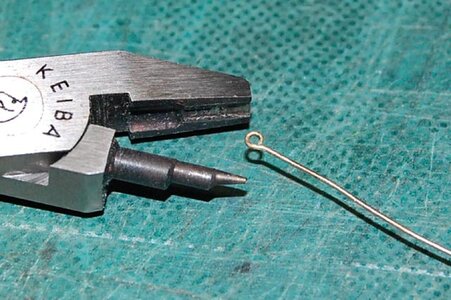
The tip of the special pliers looks like this.
It is the best shape for making rings.
This is the craft so far today.

The first step is to craft the handrail posts on both sides of the bow.
This is the starboard side.

This is the port side.
Brass wire is used for both port and starboard struts to give them strength.
I left it until the glue is dry.

While the glue was left to dry, I was making arm parts to support the gangway, about 16 pieces should do it.

The handrail is glued in place.
This is the port side.

This is the starboard side.

Now that the glue is dry, I painted German gray.
It's not dry yet, so I'll drybrush it later.
This is the port side.

This is starboard.

Sometimes, it is an overall image.
Here is an image from diagonally forward on the port side.

This image is from diagonally forward to starboard.


I made this cannon about 10 years ago by cutting some wood. It is painted gray-surf.
It was just the right size for the Silent Mary.


Here is an image of it placed on each cannon section. Just right.
This will be molded in silicone and replicated in resin in the number needed for the Silent Mary.

First, cover the bottom and the surrounding area of the carriage with clay.

Since the mold is made by tying the carriage together, we pour the silicone inside the carriage.
We wait for it to harden in this state, so we can leave it overnight.

You'll need a lot of these ring pins in a model sailboat. There are some sold as parts, but I'll make my own.
I have special pliers to make these.
I'll make about 50 for now. If I run out, I can make more.

Made with special pliers above.

The tip of the special pliers looks like this.
It is the best shape for making rings.
This is the craft so far today.
I never have seen that plier somewhere. But now i gonna search for it.
Your silent mary really is amazing a real beautiful piece of art.
Your silent mary really is amazing a real beautiful piece of art.
- Joined
- Jun 28, 2020
- Messages
- 544
- Points
- 353

Mr. Nietslim,I never have seen that plier somewhere. But now i gonna search for it.
Your silent mary really is amazing a real beautiful piece of art.
Thank you very much.
I think you can find these pliers online.
Here is the link to the manufacturer and their productsI never have seen that plier somewhere. But now i gonna search for it.
Your silent mary really is amazing a real beautiful piece of art.
You can purchase them on Amazon
Look at tools for jewelry making....I never have seen that plier somewhere. But now i gonna search for it.
Your silent mary really is amazing a real beautiful piece of art.
The Silent Mary, which has not been touched for over a year, has finally resumed its crafting.
View attachment 402804
The first step is to craft the handrail posts on both sides of the bow.
This is the starboard side.
View attachment 402805
This is the port side.
Brass wire is used for both port and starboard struts to give them strength.
I left it until the glue is dry.
View attachment 402806
While the glue was left to dry, I was making arm parts to support the gangway, about 16 pieces should do it.
View attachment 402807
The handrail is glued in place.
This is the port side.
View attachment 402808
This is the starboard side.
View attachment 402809
Now that the glue is dry, I painted German gray.
It's not dry yet, so I'll drybrush it later.
This is the port side.
View attachment 402810
This is starboard.
View attachment 402811
Sometimes, it is an overall image.
Here is an image from diagonally forward on the port side.
View attachment 402812
This image is from diagonally forward to starboard.
View attachment 402813View attachment 402814
I made this cannon about 10 years ago by cutting some wood. It is painted gray-surf.
It was just the right size for the Silent Mary.
View attachment 402815
View attachment 402816
Here is an image of it placed on each cannon section. Just right.
This will be molded in silicone and replicated in resin in the number needed for the Silent Mary.
View attachment 402817
First, cover the bottom and the surrounding area of the carriage with clay.
View attachment 402818
Since the mold is made by tying the carriage together, we pour the silicone inside the carriage.
We wait for it to harden in this state, so we can leave it overnight.
View attachment 402819
You'll need a lot of these ring pins in a model sailboat. There are some sold as parts, but I'll make my own.
I have special pliers to make these.
I'll make about 50 for now. If I run out, I can make more.
View attachment 402820
Made with special pliers above.
View attachment 402821
The tip of the special pliers looks like this.
It is the best shape for making rings.
This is the craft so far today.
- Joined
- Jun 28, 2020
- Messages
- 544
- Points
- 353

Jimsky and Philski, it has been a while.
Thanks for the info on the special pliers.
I bought these pliers about 6 years ago at Tokyu Hands in Sapporo.
I see that you can also buy them on Amazon.
Well, today I'm working on molding cannon and carriage.
Thanks for the info on the special pliers.
I bought these pliers about 6 years ago at Tokyu Hands in Sapporo.
I see that you can also buy them on Amazon.
Well, today I'm working on molding cannon and carriage.
I lived in Chitose for 3 years. Loved Sapporo! Beautiful city! The beer and the skiing was excellent!
Good to hear from you. How about the build log of your cannon and carriage?Jimsky and Philski, it has been a while.
Thanks for the info on the special pliers.
I bought these pliers about 6 years ago at Tokyu Hands in Sapporo.
I see that you can also buy them on Amazon.
Well, today I'm working on molding cannon and carriage.
- Joined
- Jun 28, 2020
- Messages
- 544
- Points
- 353

Mr. Philski,I lived in Chitose for 3 years. Loved Sapporo! Beautiful city! The beer and the skiing was excellent!
I lived in Sapporo for 3 years when I was young.
I enjoyed the snow festival in winter.
- Joined
- Jun 28, 2020
- Messages
- 544
- Points
- 353

Hi JimskyGood to hear from you. How about the build log of your cannon and carriage?
I looked up when this cannon was made and found that it was made during the first Flying Dutchman I made. The silicon molds from that time are no longer available, so I have to re-make the silicon molds.


