Silent Mary by Mellpapa

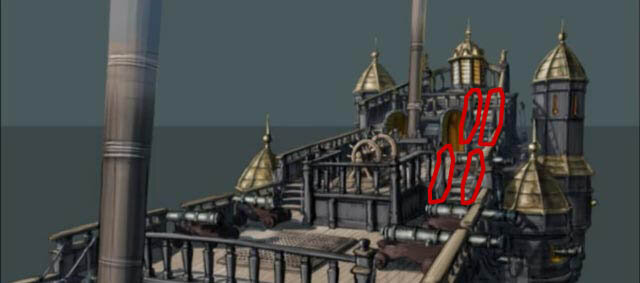
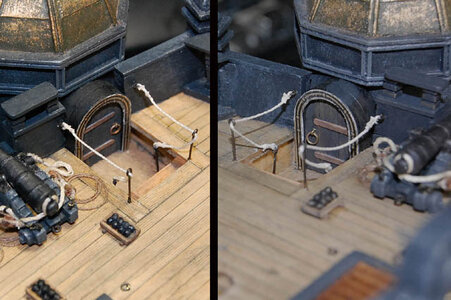
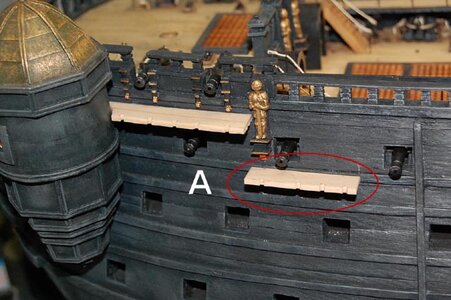
Often such stairs were removable and were removed with the order "Ready for action" -
the same reason like the removing of all internal walls above the waterline - to prevent injuries by splintering when a ball hits wood
Hello Mr. Uwek.
Thank you for your valuable input.
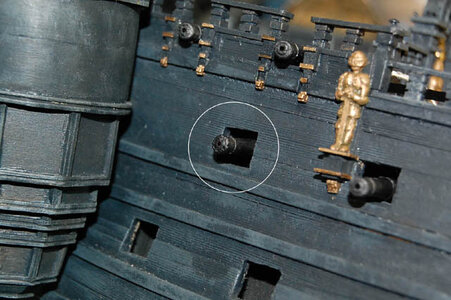
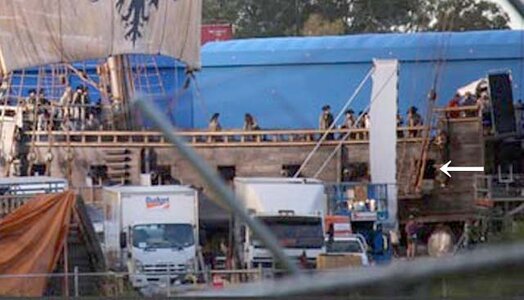
Uwek is probably right, as the Silent Mary is a warship.
However, it seems that the set crew for the movie removed the cannon and utilized the stairs.
SilentMary-16-02.jpg
In this image, I don't see the cannon set.
I wonder if it is due to budgetary reasons?
I heard that the cannon on the film set is made of rubber to prevent actors from getting hurt.
I am a very picky person, so I utilized both the stairs and the cannon. ;)

ROTF
 
SilentMary-35-42.jpg
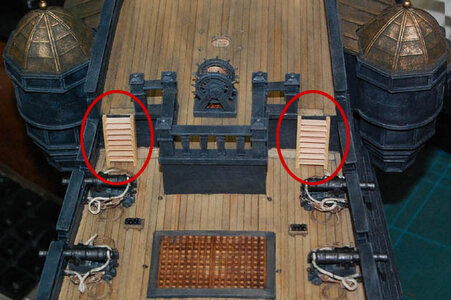
The rest of the staircase is circled in red.
During the process of making the staircase, the electric circular saw broke down, and it took a long time to fix it.

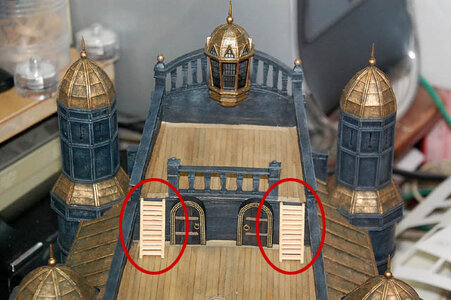
SilentMary-35-43.jpg
The stairway construction is finished by building the stairs in the red circled area here.
Next, we need to figure out what to do with the handrail.

SilentMary-35-44.jpg
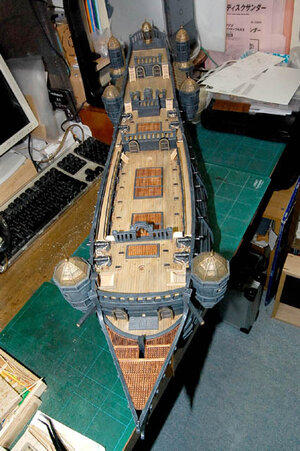
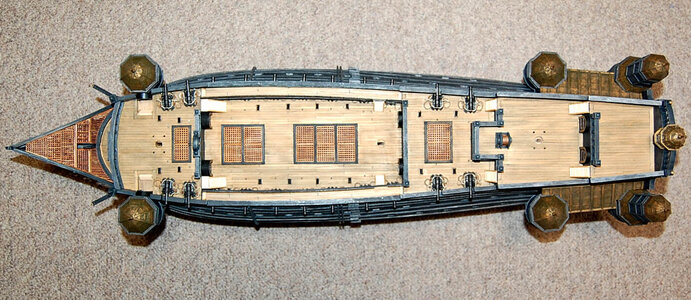
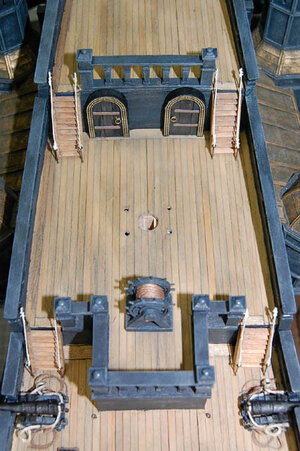
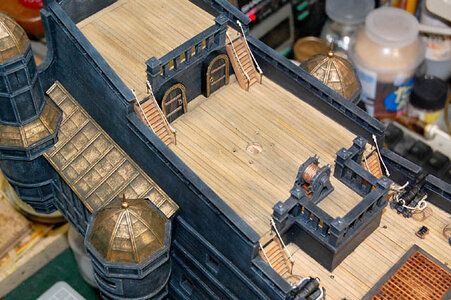
It has been a long time since I took a picture of the whole picture.

DSC_8111-01.jpg
I took a shot from directly above, just for the heck of it.
 
SilentMary-35-46.jpg
Is the handrail a rope or a chain? ......
It looks like a chain or a rope...

SilentMary-35-47.jpg
The illustration looks like a rope...
I used 0.5mm brass wire for the handrail posts.

SilentMary-35-48.jpg
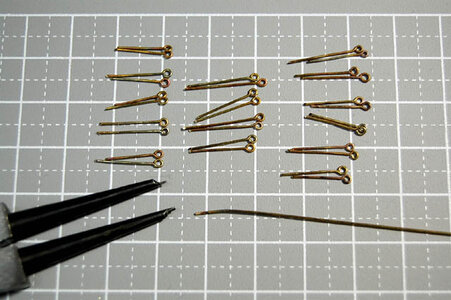
Using 0.5mm brass wire, make a loop at the end and cut it at a certain length.
The ring at the end of the brass wire is not quite the same size.
Is there anyone who can make the ring exactly the same size?

SilentMary-35-49.jpg
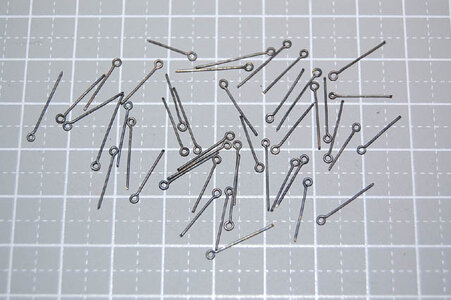
I made about 40 of them and dyed them black.

SilentMary-35-50.jpg
The black-tinted posts are glued into their respective positions. The gluing was done with a two-component epoxy adhesive, so it will be left overnight today. It will harden completely tomorrow.
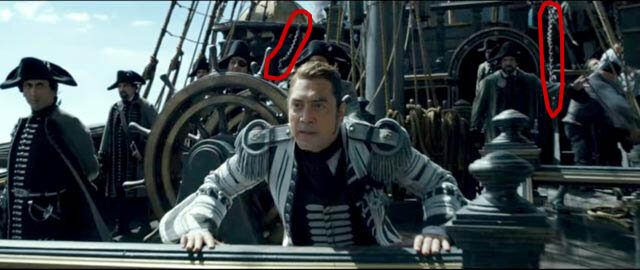
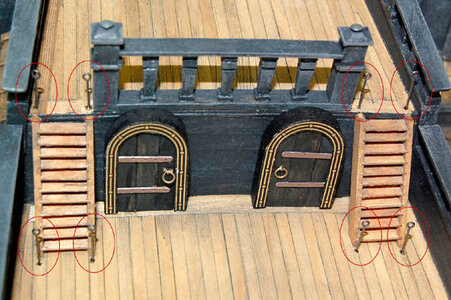
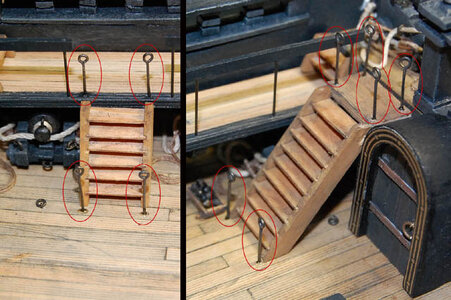
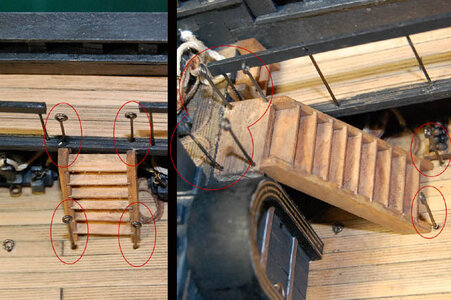
Note the red frame!
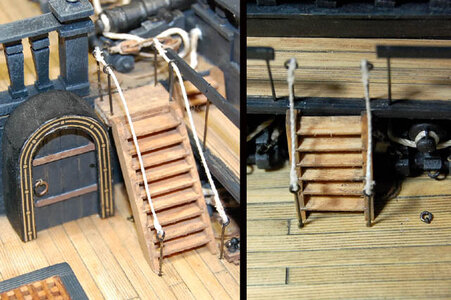
This is the stanchion for the stairs to the top deck at the stern. There are no thin chains, and I'll use rope for the handrail.
Rope tensioning will start tomorrow.

SilentMary-35-51.jpg
Note the red frame!
This is the stanchion for the stairway to the middle deck at the stern.

SilentMary-35-52.jpg
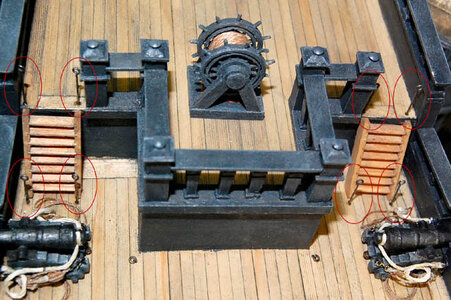
Note the red frame!
These are the stanchions for the stairs to the gangway on the port side and the stairs to the bow-most deck.

SilentMary-35-53.jpg
Note the red frame!
These are the stanchions for the stairs to the gangway on the starboard side and the stanchions for the stairs to the bow-most deck.
 
SilentMary-35-54.jpg
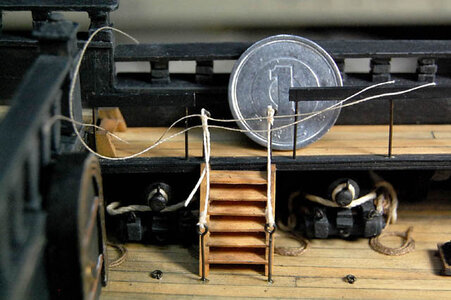
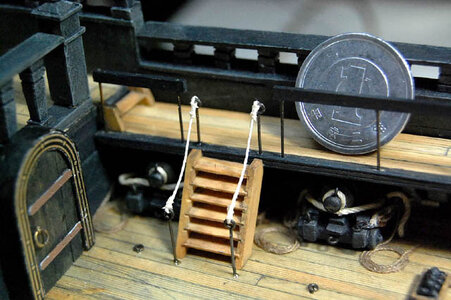
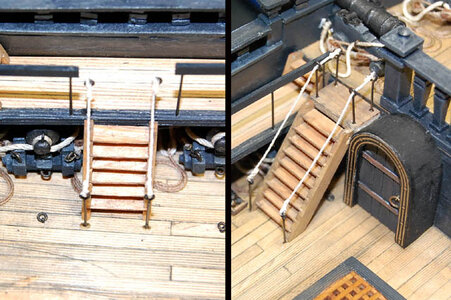
This is the process of stretching a rope on a handrail post.
Thread the rope for the handrail through the loop of the post, bend it, and tie it with thin thread.
After gluing with instant adhesive, cut off the excess rope and thin thread.

SilentMary-35-55.jpg
After cutting the excess rope and thin threads, make sure the rope is properly slack.
It is easy to make it taut, but it is difficult to make it look naturally slack.

SilentMary-35-56.jpgSilentMary-35-57.jpg
Ropes have been attached to the support columns at each position.
This is the handrail rope on the aft side.
This is a shot taken from above.
Here is a shot from diagonally above.

SilentMary-35-58.jpg
Gangway handrail rope on port side.

SilentMary-35-59.jpg
Gangway handrail rope on the starboard side.

SilentMary-35-60.jpg
This is the handrail rope at the bow side turret entrance.
I am not sure if the Silent Mary in the movie had a handrail here.
In my imagination, I installed a handrail rope here as well.
This is for safety. ROTF ROTF
 
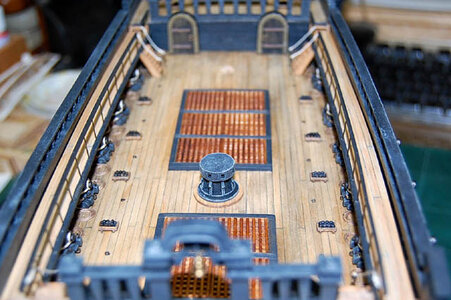
■ Making a capstan ■
SilentMary-36-01.jpg
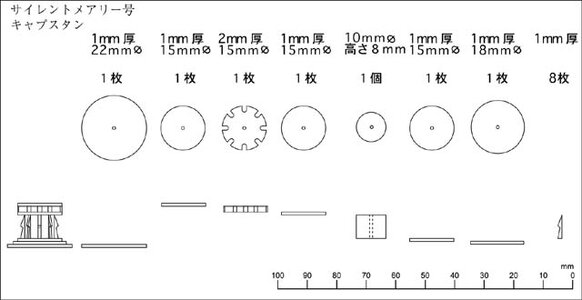
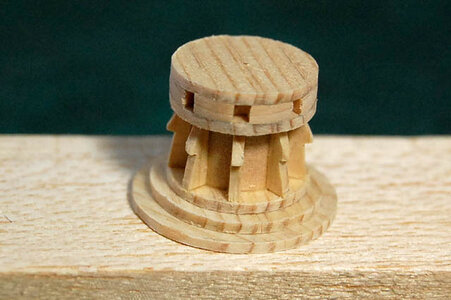
This is a drawing of a capstan part.
Based on this, material is cut out.
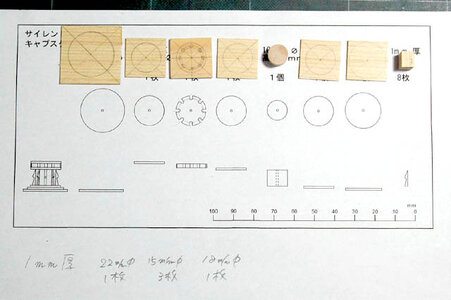
SilentMary-36-02.jpg
Materials have been cut out.
We are going to make each part from now on.

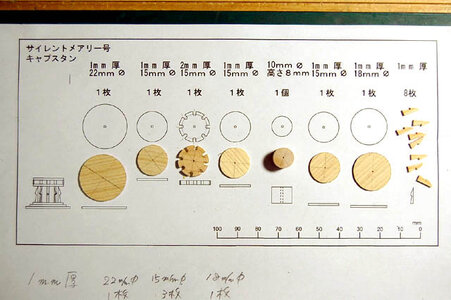
SilentMary-36-03.jpg
Each part has been machined into the shape of the component.
It is not exactly the same as the parts drawing, but it is OK as long as it is similar.

SilentMary-36-04.jpg
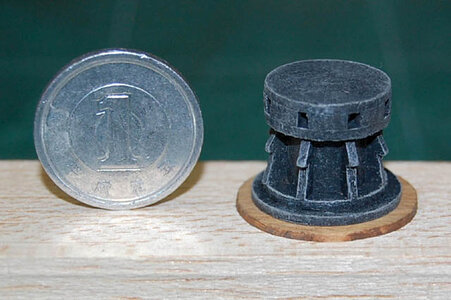
I put it together.
It's a "fake capstan", isn't it?
Well, it's okay because it looks like it.

SilentMary-36-05.jpg
Paint with German gray, mix with light gray, and dry brush the highlights.

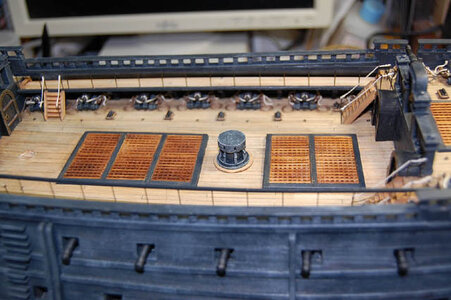
SilentMary-36-06.jpg
I quickly put it on the hull.

SilentMary-36-07.jpg
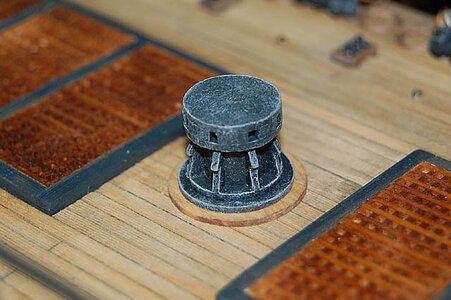
I zoomed in.
I think it's fine.
It was only in the movie when it was a ghost ship and it came out a little bit.
I made this one in my imagination, because the capstan before it was a ghost ship was never in the movie.

SilentMary-36-08.jpg
This image shows the capstan from diagonally above the bow.
Well, a Happy New Year, everyone! :)
 
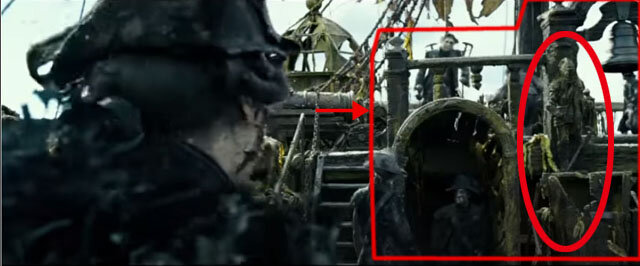
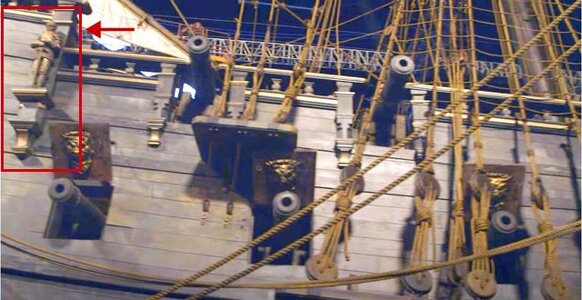
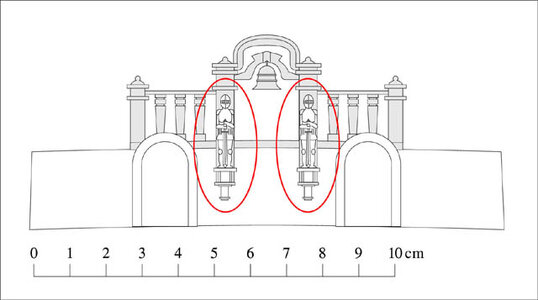
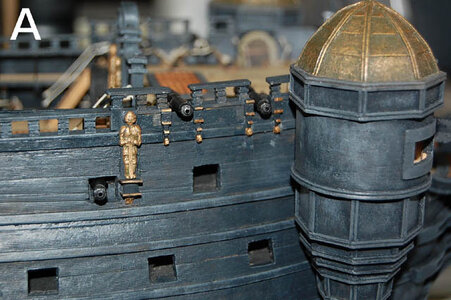
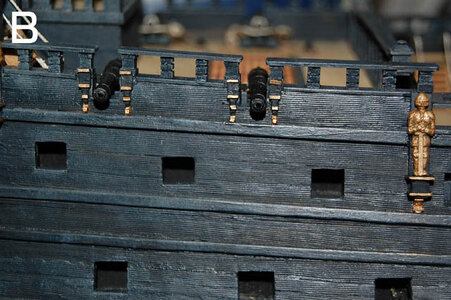
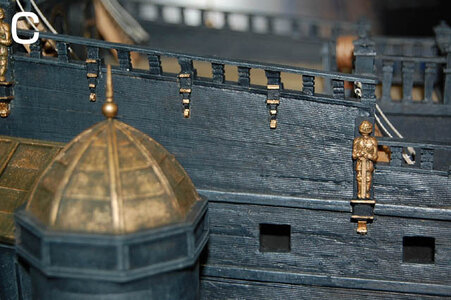
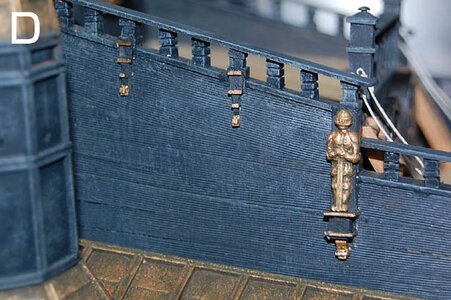
■■ Making the armored statues on the pillars of the Bell House ■■
GC0StiJacAAAJ_1.jpg
SilentMary-30-58.jpg
SilentMary-36-09.jpg
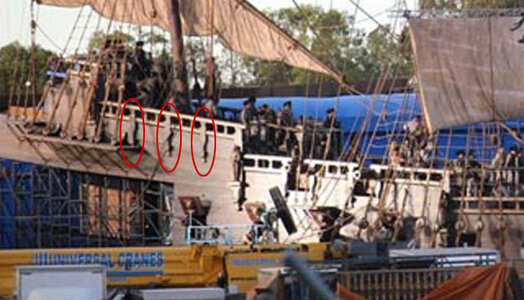
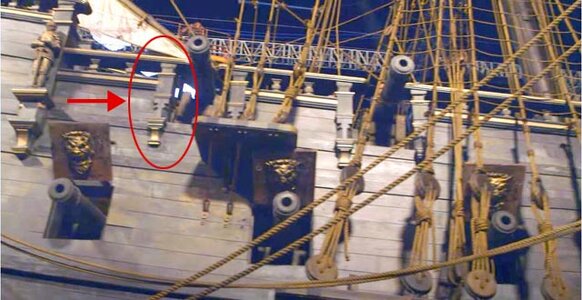
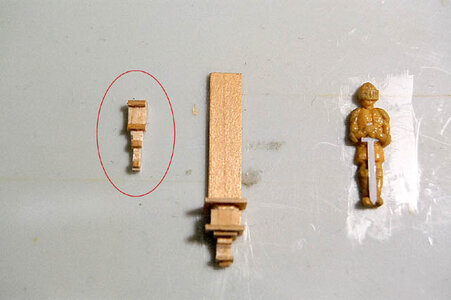
The area is circled by the red oval.

SilentMary-36-10.jpg
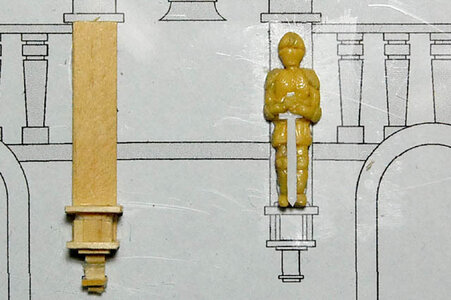
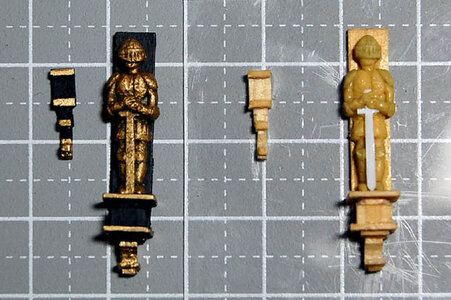
First, make a pedestal out of wood, just like that.

SilentMary-36-11.jpg
The sculpture of the armor is made with Tamiya's epoxy putty. The sword is made of 0.3mm plastic plate.
Once the epoxy putty hardens, mold it with silicone.
Then duplicate 10 pieces of each in resin, paint the base and the statues, and glue the rest.
We will take a break until the epoxy putty hardens.

SilentMary-36-12.jpg
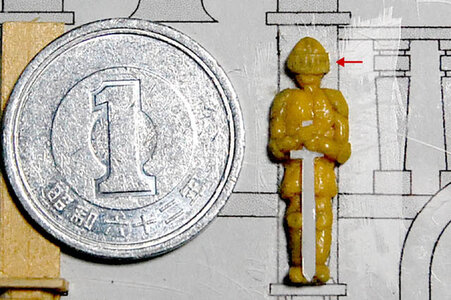
Note the helmet portion of the armor, red arrow.
Visor added.
It's a little big, but I don't mind.
If it looks somewhat like armor, it's OK.
I'm going to leave it overnight to wait for it to fully cure.
Tomorrow I will start molding with silicone.
 
SilentMary-36-13.jpg
Note the red oval!

SilentMary-36-14.jpg
Note the red oval in this image as well!

SilentMary-36-15.jpg
In the two images above, the red oval part of the ornament is a common design.
So I made this ornament before molding it in silicone. They are a little different, but I don't care. As long as they look similar, it's OK.
Put the three together and mold them with silicone.

SilentMary-36-16.jpg
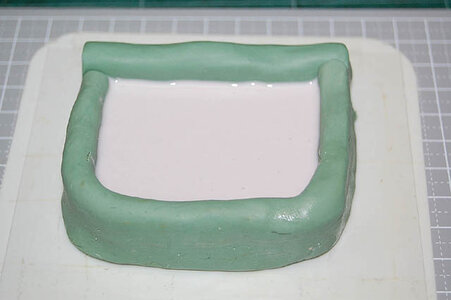
A clay bank was made and silicone was poured. It is enough to mold one side.
All that remains is to wait for the silicon to harden.
 
SilentMary-36-17.jpg
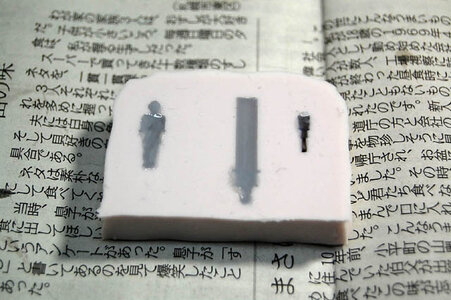
Now that the silicone has hardened, the resin is poured and replicated.

SilentMary-36-18.jpg
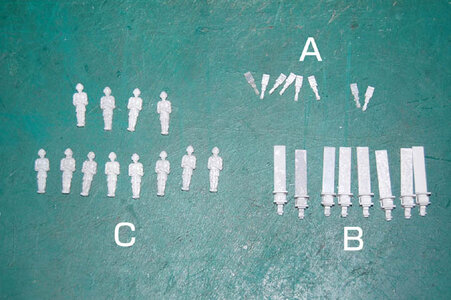
The silicone molds for A and B broke after the 8th one.
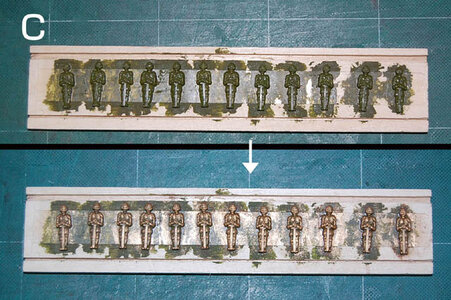
C was able to duplicate about 12 pieces. I will use 10 of them, so 2 of them are spares.

SilentMary-36-19.jpg
C painting.
Brush on olive drab as a base coat, and dry brush with gold after it dries.
After drying, smear Tamiya's smear paint (brown).

SilentMary-36-20.jpg
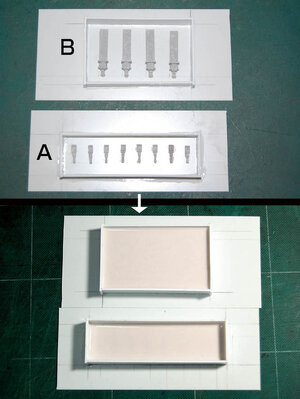
Since B and A are not enough in number, mold them again with silicon.
After gluing each of them to a plastic board with instant adhesives, surround them with plastic boards.
Pour silicone and leave overnight. They will be solidified tomorrow morning.
Tomorrow, I will duplicate with resin again.

SilentMary-36-21.jpg
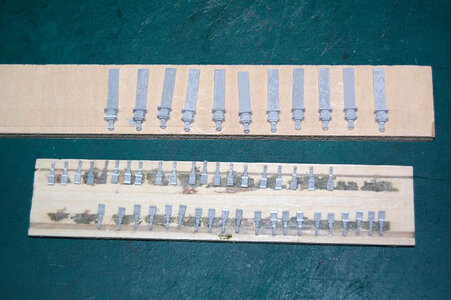
The silicone has hardened, and I duplicated the armor's decorative stand and ornaments, including the spare parts.
This is the preparation for painting the duplicated parts. Double-sided tape was applied to the board and the parts were affixed to it.

SilentMary-36-22.jpg
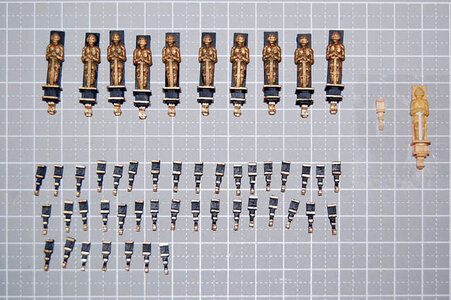
Here is a commemorative photo with the prototype after painting.

SilentMary-36-23.jpg
In the photo above, the parts are small, so I zoomed in and took this photo.
It looks like this.
 
SilentMary-36-24.jpg
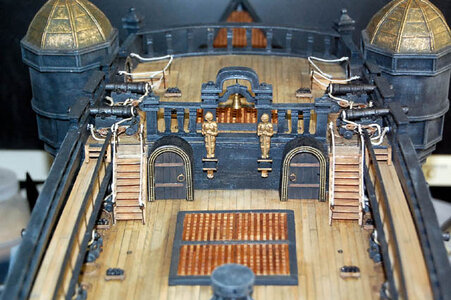
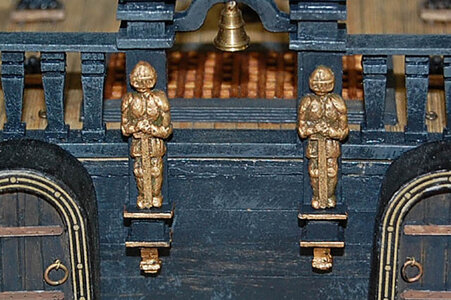
I added armor decorations to both pillars of the bell house.
Temporary assembly with double-sided tape.
It looks good.

SilentMary-36-25.jpg
This is an enlarged image.
It looks like armor.
This is how it should be.

DSC_8251-01.jpg
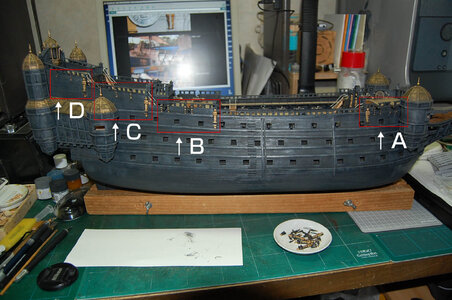
Decorations were affixed to the starboard side of the hull.
I was so tired after plowing the snow and clearing the veranda in the morning today that I took a nap and woke up at 3:00 PM.
I took a nap and woke up at 3:00 PM. I then put up the priesthood on the starboard side, but that was all I could do today.
The port side will be put up tomorrow.

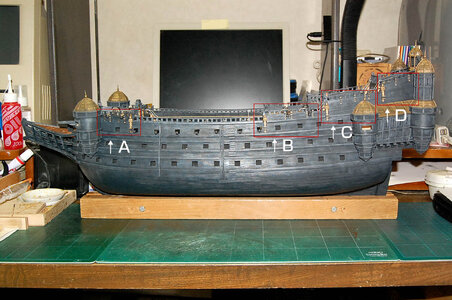
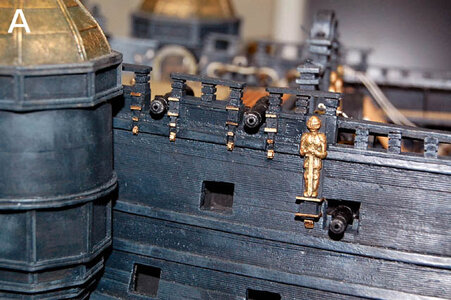
SilentMary-36-27.jpg
Enlarged photo of part A

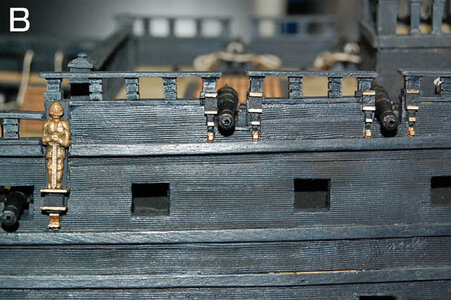
SilentMary-36-28.jpg
Enlarged photo of part B

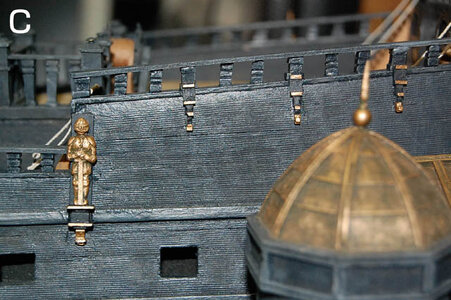
SilentMary-36-29.jpg
Enlarged photo of part C

SilentMary-36-30.jpg
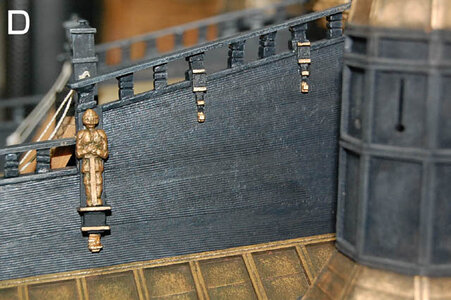
Enlarged photo of part D
 
SilentMary01-05.jpg
I haven't made any sails or anything yet, but I drew a double-headed eagle in Illustrator.

SilentMary-36-36.jpg
I don't make sails or anything yet, but I drew a double-headed eagle in illustrator for future use.
I'll need it when I make the main sul.
I'm going to use this illustration as a rough sketch and trace it with Illustrator.
It will take a long time.

SilentMary-36-37.jpg
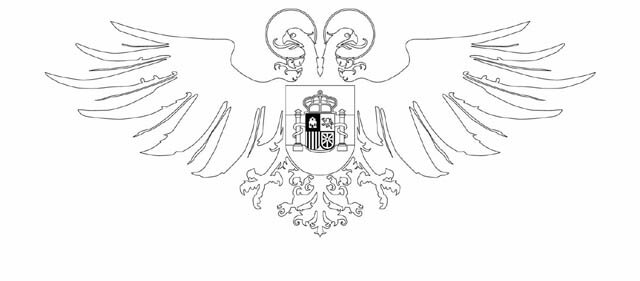
This is an image of a line drawing of an object made into a path in Illustrator.

SilentMary-36-38.jpg
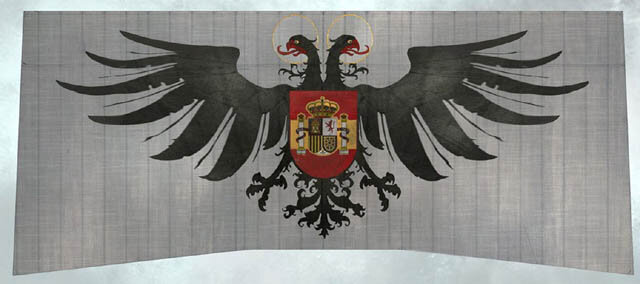
I colored this image in Illustrator.
Some parts are a bit odd, but I don't mind.
It took you a while to make it into an Illustrator path.
But the double-headed eagle was a little easier because I drew half of it and copied it in reverse.
Coloring is easy because it's on a path.
Unlike pixel data, illustrator data doesn't rattle lines even if you enlarge it a lot.
 
SilentMary-36-39.jpg
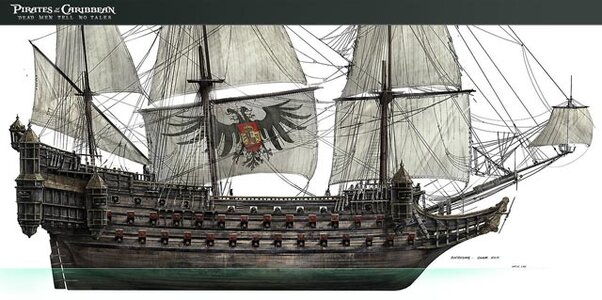
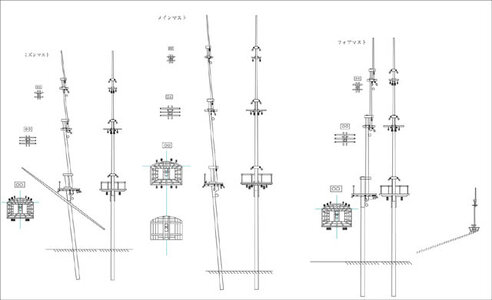
I also drew a drawing of the mast. Since there are no detailed images of the mast in the movie, the drawing is mostly based on my imagination, so it has no documentary value.
It is a drawing that is only good if I can understand it.
If someone else looks at it and says, 'I don't understand, so I'll give you a detailed drawing...,' I will not answer anything.

SilentMary-36-40.jpg
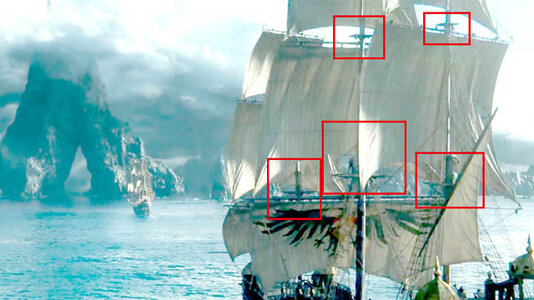
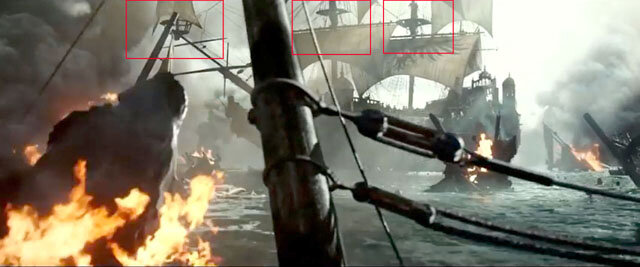
I know you say it's a good drawing, but I do have a picture for reference.
But these are the only two I have.
They are very appropriate.

SilentMary-36-41.jpg
With images like these, you can imagine to some extent.
Were Spanish warships of the time topped like this? I'm not going to say.
They are fictional sailing ships from a movie.
I'm making a sailing ship from a movie, so don't be wild about it. ;)Pirate Flag
 
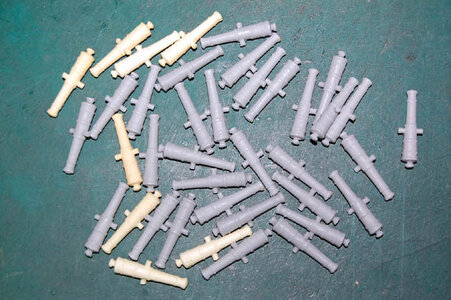
■ Make a dummy barrel ■
SilentMary-36-42.jpg
I was duplicating the barrels in resin to make dummy barrels.
I need to duplicate about 28 more, but I'll do that later.
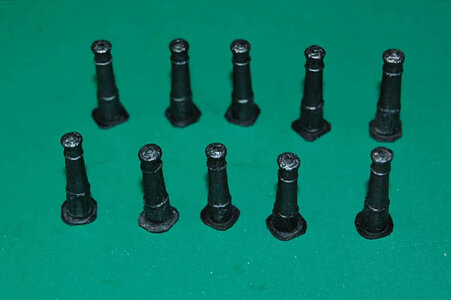
SilentMary-36-43.jpg
For now, I made 10 dummy barrels.

SilentMary-36-44.jpg
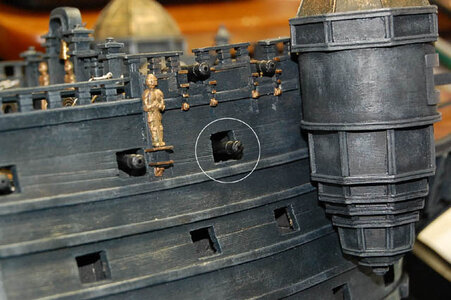
Installed on the port side bow side gunport.
It's the white circle part.
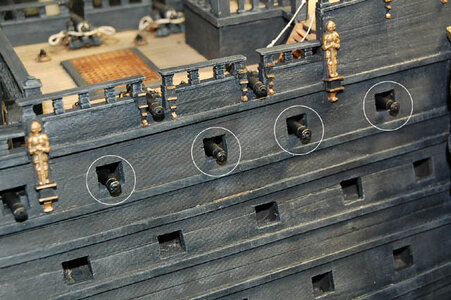
SilentMary-36-45.jpg
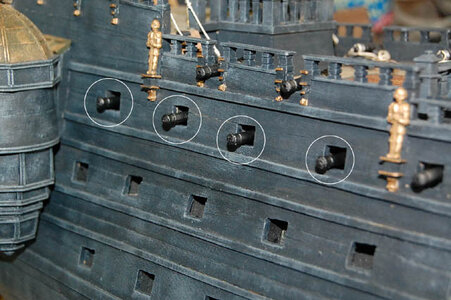
I installed this one on the port side aft of the port side at the four gunports.
SilentMary-36-46.jpg
This one is installed on the starboard bow side gunport.
SilentMary-36-47.jpg
Also installed on the starboard side aft of the boat at the four gun ports.
I did this as an experiment, but I guess this is what it looks like. The barrels are a bit uneven, but I'll be self-satisfied that 'it looks like that'.
Next, I'll make the channel plates, make and assemble the dead eye chains, and then work on the rest of the dummy barrels and gunport lids.
Okay, I'll go with this plan! Let's go with this schedule.

--------------------------------------------------------------------------------------------------------------------------------------------
■About Gunport Rid.■
SilentMary-36-48.jpg
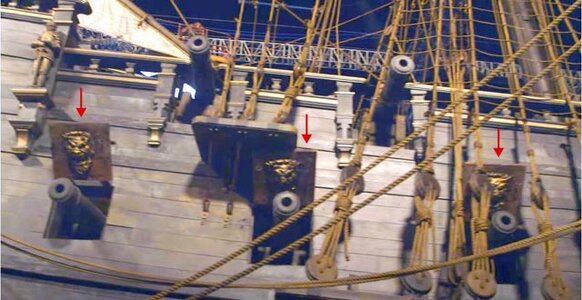
The red arrow is a gunport lid, but it looks like a single piece of wood and flimsy on the set for filming. It has a lion's face on it.
I think I will make the model with this flimsy gunport lid.
It might be easy because it is a single sheet.
I think the board with the lion's face affixed to it is probably painted ...... dark red.
I'm sure it's that kind of brown because of the lighting...and I'm just going to take a wild guess and interpret it that way.

----------------------------------------------------------------------------------------------------------------------------------------------

■Channel plate ■
SilentMary-36-49.jpg
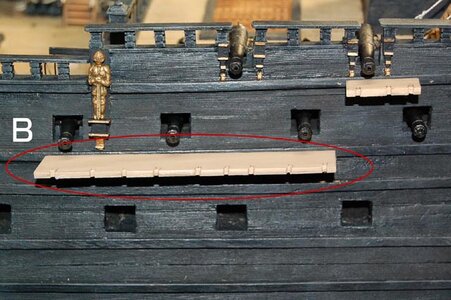
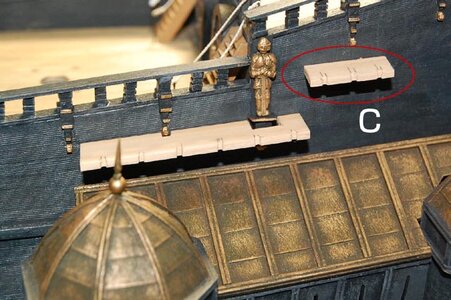
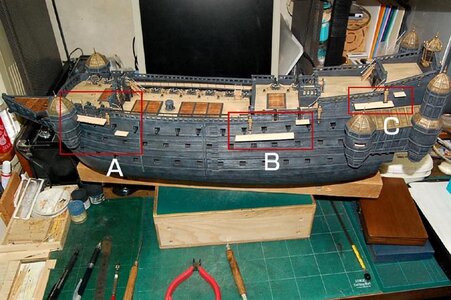
This is the positioning of the channel plate on the port side. The drawing is just for reference, but the drawing is 2-dimensional, and I drew it just as I thought it should be. So, we will decide the position of the channel board in accordance with the three-dimensional hull. Once the port side is decided, the channel board will be placed at the same position on the starboard side, but the starboard side will be constructed later.
Photos of A, B, and C are shown below.
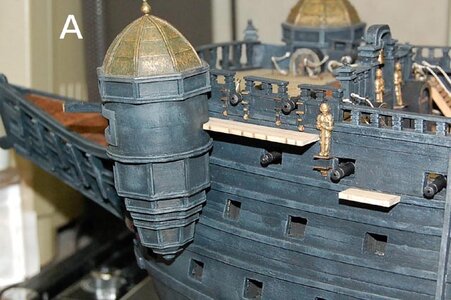
SilentMary-36-50.jpg
The channel plate in part A, the deadeye support plate that tightens the lower end of the foremast shrouds (transverse cables).
There is no image of the channel plate on the bow side of the Silent Mary before she became a ghost ship.
So I have no idea what it looks like.
So, I am taking a wild guess that this is what it would have looked like.
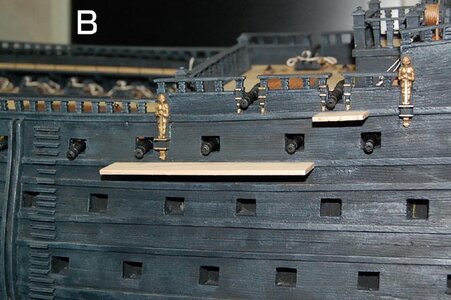
SilentMary-36-51.jpg
The channel plate in part B. The deadeye support plate that tightens the lower end of the main mast shrouds (lateral supports).
It's slightly different from the set for the photo shoot, but I'm not going to worry about that.
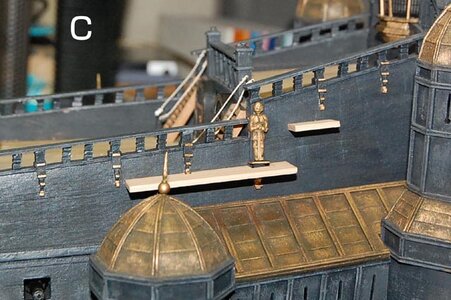
SilentMary-36-52.jpg
Channel plate in part C.
This is a dead eye support plate that tightens the lower end of the mizzen mast shrouds (lateral supports).

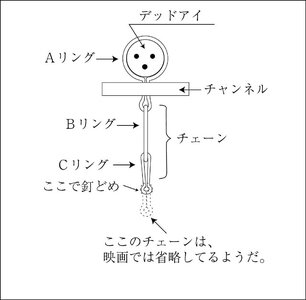
The channel will have a dead eye and a chain.
I will make the chains later...it's a very tricky job.
 
Last edited:
■ Fine-tune the channel board again ■
SilentMary-36-54.jpg
The position of the channel board was decided before, but when the size of the dead eye was adjusted, there were some inconvenient parts, so the position and size were changed.
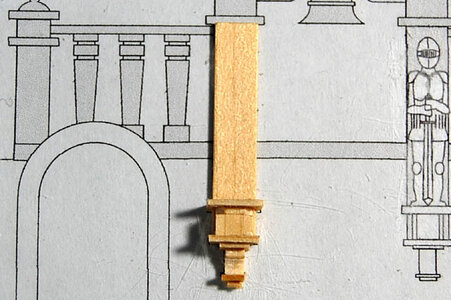
A is longer than before.

SilentMary-36-55.jpg
B is a little shorter than before.

SilentMary-36-56.jpg
I made C a little longer than before.
The channel board on the starboard side will be made to match.

Since the drawings are not quite right, we have to make adjustments in the end by matching the actual product with the drawing. Once the decision is made, it takes time for the dead eye to be adjusted, but there will be some bad points.

The best way to make sure that there is nothing wrong is to make the actual work in person many times.
 
■ Making a dead-eye chain ■
SilentMary-36-57-01.jpg
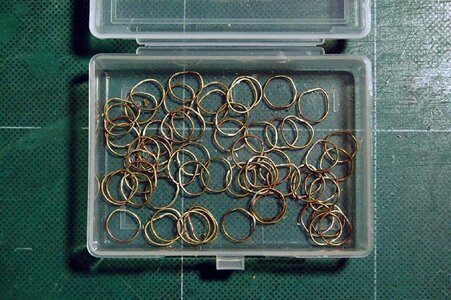
Using 0.5mm brass wire, make a chain for a dead eye. First, make an A-ring that wraps around the dead eye. You will need 60 of these rings.

SilentMary-36-58.jpg
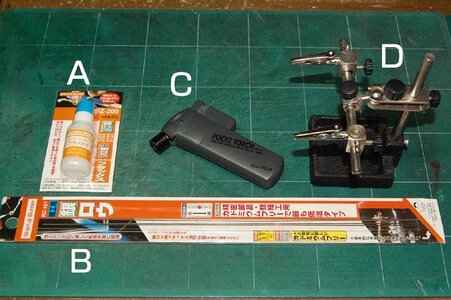
The brass wire rings are made and silver brazed, and can be brazed with the tools in this picture.
A is flux for silver soldering. There are various types of fluxes, so prepare one that can be used to solder brass.
B is silver soldering flux. Prepare one that can solder brass.
C is a poketorch.
D is... a free hand, which is anything that can hold the brass wire in place.

SilentMary-36-57.jpg
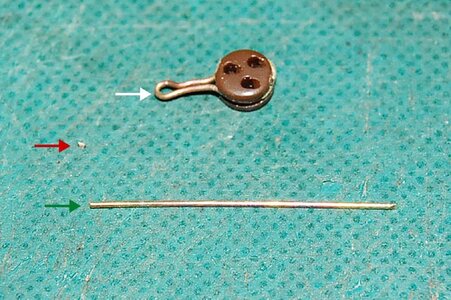
The white arrow makes a brass wire ring, so the red arrow is a piece of silver wax and the green arrow is a 0.5 mm brass wire that makes a ring with this length.

SilentMary-36-59.jpg
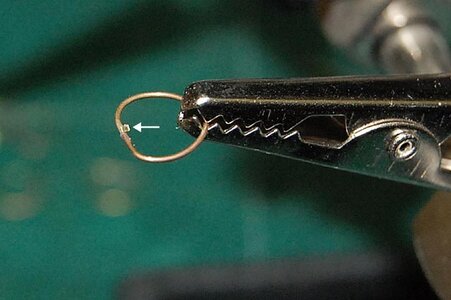
Make a loop with 0.5mm brass wire, hold it with a free hand, apply flux to the joint part, and put a piece of silver wax with a white arrow on it.
The silver wax will not fall off because of the flux.
In this state, burn it with a poker torch until it turns bright red.
The silver solder melts and gets into the joints of the brass wire, and when it cools down, a ring of brass wire is formed.

SilentMary-36-60.jpg
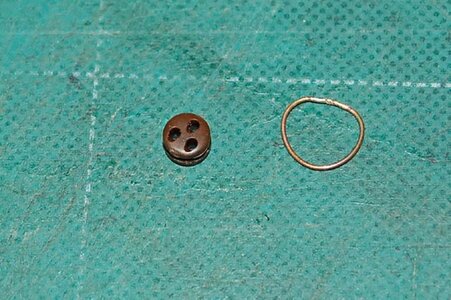
A loop of brass wire has been made.
Insert the dead eye into this loop and tighten it with pliers to make a chain for the dead eye.

SilentMary-36-61.jpg
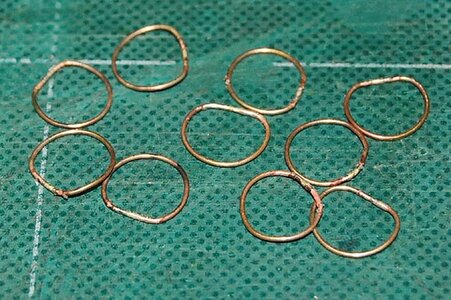
I made about 10 of them.
I need 50 more.
 
SilentMary-36-62.jpg
The remaining 50 A-rings in the chain are ready.
Now we have the required number.
It is quite a tedious brazing process.

Sixty each of the B and C rings are also needed, but they will be made to length according to the hull.


SilentMary-36-63.jpg
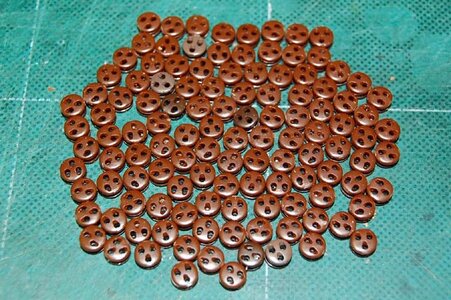
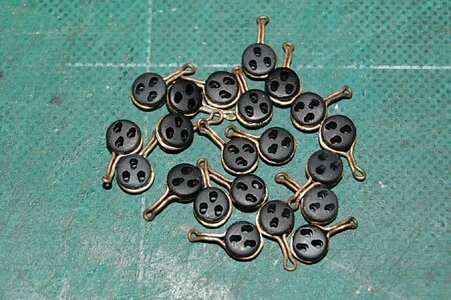
This is a dead eye that is set in the A ring.
A plastic dead eye is used.
The cutout cut from the runner has been cut cleanly.
120 pieces are needed including the ones to be set on the shroud.
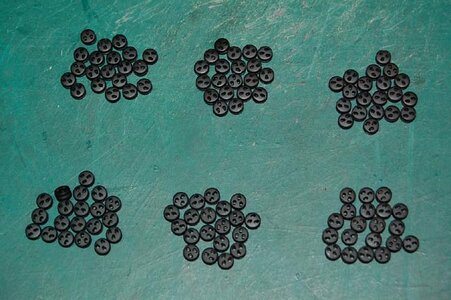
Paint the dead eye in matte black.

SilentMary-36-64.jpg
Finished painting 120 dead eyes in matte black.

SilentMary-36-65.jpg
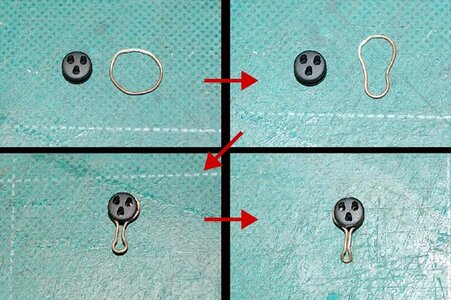
Set the A-ring on the dead eye.
Work the A-ring with pliers in the order of the arrow and tighten it with pliers at the end.

SilentMary-36-66.jpg
At least 21 pieces were made.
I'll report back when the remaining 39 are ready.
 
Back
Top