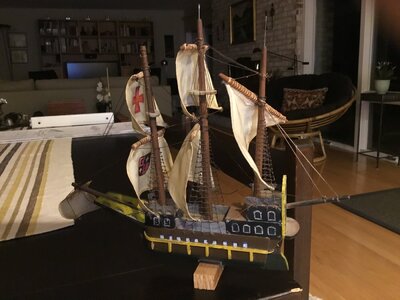
Skonnert Bluenose POF

Joined
Jan 26, 2021
Messages
44
Points
68

I am Finn Brudevold, 74 years old and living in Rhode Island, USA.
(Originally from Norway)
Near Newport, of Americas Cup fame. Herreshof Cup museum down the road.
Long since retired from engineering and about to build my first ship model.
Received my YQ BN a week ago.
Did inventory and started familiarize myself with the kit and the SOS translations.
So far all good. Love CAD design accuracy and drawings.
 
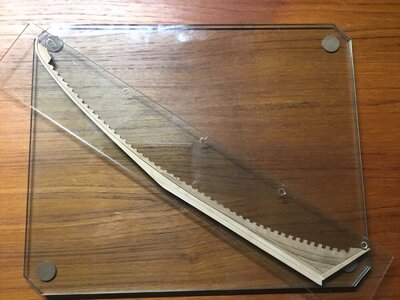
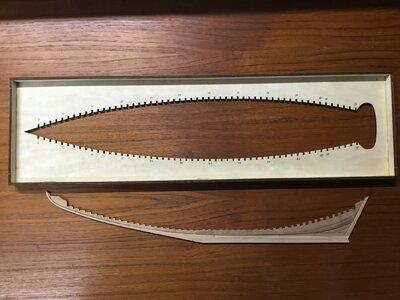
Decided to build the keel first.
A three layer sandwich.
I did the middle layer on a piece of heavy plate glass, and used a second piece to hold the keel flat.
(From a stacking table)
When dry, then added the two outer layers, still using the glass.
It came out perfectly straight.
and you can see if anything drifts.

81B57729-FA74-4D5C-9D29-DAB0C06FDAD4.jpeg17F9174D-189A-43EA-8A43-60BBDD6ADBDE.jpeg
 
Last edited:
Decided to build the keel first.
A three layer sandwich.
I did the middle layer on a piece of heavy plate glass, and used a second piece to hold the keel flat.
(From a stacking table)
When dry, then added the two outer layers, still using the glass.
It came out perfectly straight.
Welcome aboard Finn! Be sure to include pictures of your build progress. And of course share any techniques you use. As this may help others in the future. Looking forward to your build.
 
WELCOME FINN TO THE GROUP GREAT GROUP ALL SO HELPFUL, EVERYONE IS WAY AHEAD OF ME RIGHT NOW, STARTED WITH THE FRAMES NEED 17 MORE WILL BE DOING THOSE ON THE WEEKEND GOD WILLING, THEN ON TO BEVELING UGH, UGH, UGH.OK GOD BLESS STAY SAFE YOU AND YOURS DON
 
Started the ribs. 20 done so far. Find it delightful that the pieces can just be popped out of the sheets.
I have yet to bevel the edges, but the laser trace makes for a good start. I will leave the trace and a hint of the char with a final tweak with a sander after the hull is assembled.
I have found working on three ribs at a time with Titebond II premium glue on a rotating base works:
Pop the 2 center pieces, sand the connecters, glue with binder paper clips, on to next rib.
The first rib is now dry. File the notches, rib and keels, for fit. Next.
Proceed outwards with one piece at a time, always aligning with the paper template.
I have a suggestion for improving the BN kit. I have needed to file both notches in all the ribs as the inner and outer keel did nor fit. The rib slots are 4mm wide, while the inner keel is 4.2 mm thick and the outer keel sandwich is 1.1 + 2.1 + 1.1 = 4.3 to 4.4 mm. Probably not a CAD problem, rather a manufacturing issue.
To fit, the stock need to have a +0 -? tolerance if notched with another piece.
 
Last edited:
BTW, if anybody have plans to visit the Herreshof museum in Bristol, Rhode Island, stop by.
They built a number of the Americas Cup boats in the early 1900s. Think J-boats.
They just built a model of the Reliance in 1:6 scale!!! (yes, it is 30+ feet)
The model just came back from a tour to Europe. Now they need to build a new hall to display it.
With the whole mast, that is. 37 feet tall

 
Last edited:
BTW, if anybody have plans to visit the Herreshof museum in Bristol, Rhode Island, stop by.
They built a number of the Americas Cup boats in the early 1900s. Think J-boats.
They just built a model of the Reliance in 1:6 scale!!! (yes, it is 30+ feet)
The model just came back from a tour to Europe. Now they need to build a new hall to display it.
With the whole mast that is. 37 feet
Sounds very interesting - so we all hope to see once some photos!
Of this huge model and also here in this building log. I am looking forward .....
 
Finn, welcome aboard, you have chosen the best time of all to build the Bluenose. This year on March, 26 is the 100th anniversary. I completed my first build, the Bluenose from Model Shipways last July and must say enjoyed the build very much. Again welcome try posting a few pictures it helps others. I live only three hours away from the Lunenburg NS and look forward to going on a sail on the Bluenose II this summer.
 
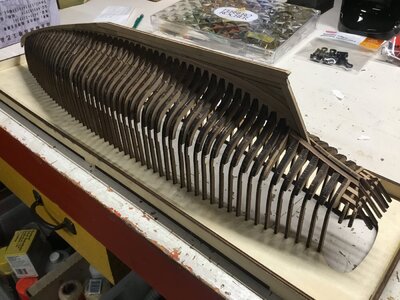
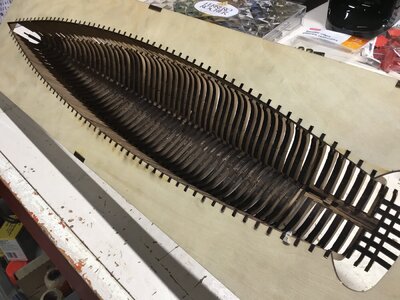
Just finished a dry assembly of the ribs. I will next disassemble it, bevel the ribs, decarbon, and fine tune the notching for consistency to the rabbet. Then fine tune the rib to rib for best graduation before glueing them to the jig.
Any good suggestions on minimizing the excess glue for best linseed oil finish?
And do you use different glues?

39EF8AFE-1FD6-484E-B7C5-4CB2FBB6158A.jpeg

223CBA8B-333C-4843-B3D2-14ECFABEC357.jpeg
 
Last edited by a moderator:
Any good suggestions on minimizing the excess glue for best linseed oil finish?
And do you use different glues?
Hi Finn,
When I apply the wood glue, I divide it with a toothpick over the entire surface. But with such a quantity that a only very little is expressed when pressing. What comes out, I immediately remove with a wet cloth. For difficult corners I also use wet cotton swabs.
I have also CA, but for now on I only used the wood glue.
Regards, Peter
Peter,
Thanks a lot for your good advice. I should have asked earlier!! Love this site.
Do you have trouble with the glue drying before assembly ?
Glue recommendations? I use Titebond II premium.
Regards, Finn
 
Peter,
Thanks a lot for your good advice. I should have asked earlier!! Love this site.
Do you have trouble with the glue drying before assembly ?
Glue recommendations? I use Titebond II premium.
Regards, Finn
Hi Finn,
I used to use Titebond 2 on my previous build. However it dries a yellowish color, which is no good for visible areas. So I switched to Weldbond, and it works very well and dries crystal clear!
I reserve the use of CA glue for metal pieces, or metal to wood. CA will dry and out gas leaving white areas on your model and it also ruins the ability to stain. So use very sparingly when needed.
 
Last edited:
Peter,
Thanks a lot for your good advice. I should have asked earlier!! Love this site.
Do you have trouble with the glue drying before assembly ?
Glue recommendations? I use Titebond II premium.
Regards, Finn
I use BISON Professional Houtlijm (=woodglue). It is cat. D2, superstrong.
Regards, Peter
 
Back
Top