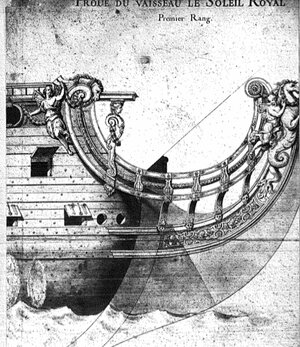
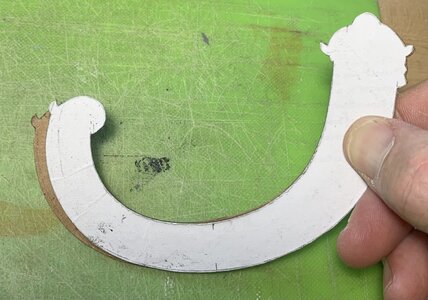
Soleil Royal by Heller - an Extensive Modification and Partial Scratch-Build by Hubac’s Historian

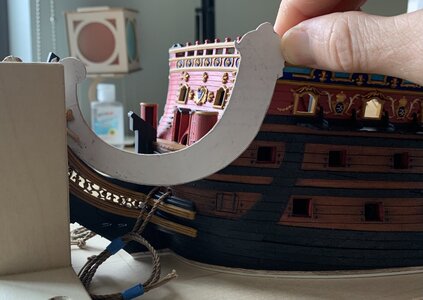
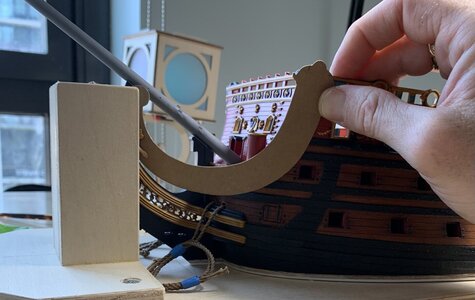
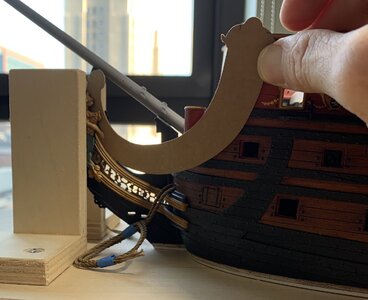
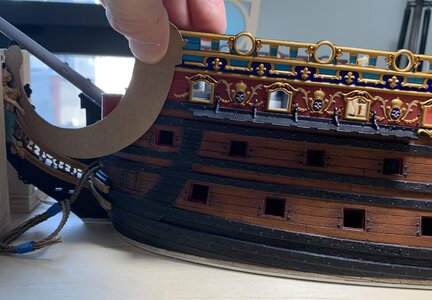
Yes Marc that is a big improvementThumbsupThe narrower arch now gells with the panel below.You could take it even further by reducing the width of the pillar at the top but leaving the arch as is.This would reduce the width of the blue inlay but that would not look out of place given the width of the inlays running below this pillar.

Does the outside edge of the pillar line up with the baluster edge?Hard to tell with the angle of your pic.I would assume the outside edge lines up with the outside edge of the baluster and the scroll at the end of the Acanthus leaf projects proud, given that this would be built around a vertical timber running through the Baluster

Kind Regards

Nigel
 
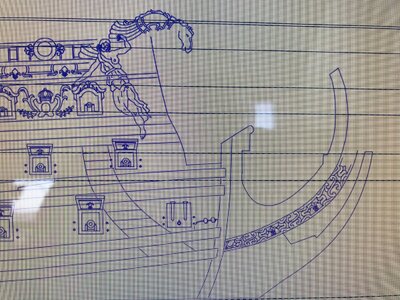
What I did at the top of the pillar was to align the outboard corner with the exact intersection of the arcing canopy, and the inboard pillar corner with where the frieze reveal comes to a point. I see what you are saying about moving the outboard face of the pillar a little further in-board, but that makes the adjacent scroll spur, for lack of anything better to call it, more difficult to draw in a pleasing way. I considered simplifying the design a little, by cutting out this detail, but it serves as a necessary foot-rest for Africa.

I think I will proceed with this revised bracket. The impression of the thing, in three dimensions, will be a good bit different, but I think it will work. I can always go back to the drawing board, if I don’t like it.
 
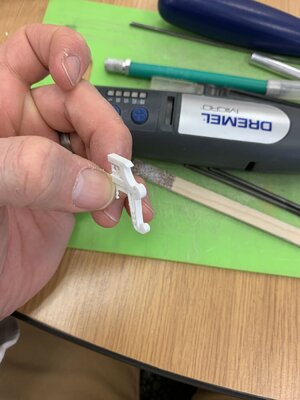
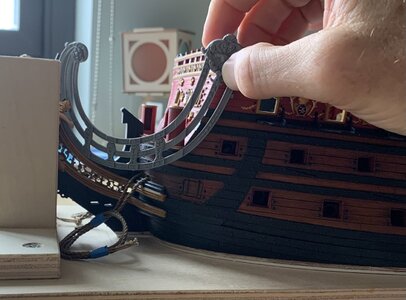
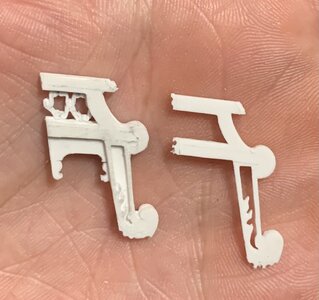
So, the process of making this first starboard bracket has been highly educational! Anytime I’m making a part like this, I am designing a process to arrive at a level of detail with the least amount of difficulty. For these brackets, one of the primary details that I wished to capture is the pierced filigree of the false canopy. This, much like the trailboard at the head, can only be arrived at through careful piercing and paring, from one side to the other and back again.

As always, though, I like cleanly delineated shoulders and panel reliefs, so I thought it would make the most sense to build the bracket up from three primary layers of .028 styrene sheet which, I will show later, gives me just nearly enough part thickness to mount the Four Winds mascaroon. Carving the filigree into a larger supporting lamination is far easier than carving it as an independent insert piece.
CF894CA5-D019-4A49-96FB-5CE762E52348.jpeg

Above, I’ve already carved the filigree and laminated the aft layer to the center. The edge that joins with the hull is also about a 1/32” oversize, to allow for precise scribing to the hull, a little later.

The bottom of the scroll, where it mounts to the bulwark rail, has been left deliberately overlong for final shaping, once the three layers have been laminated together. I was mindful, at this stage, that the back-raking angle of the bracket would necessitate a raking angle for the scrolled foot, as well; were I to shape each lamination to size, before gluing, I would end up with a significant gap, at the forward face of the foot.

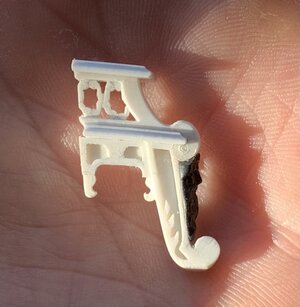
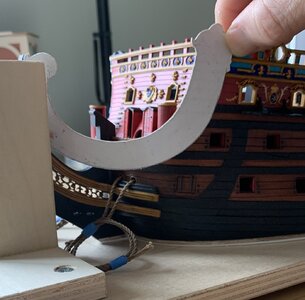
After lamination and initial scribing to the hull and gallery rail, the foot looks like this:
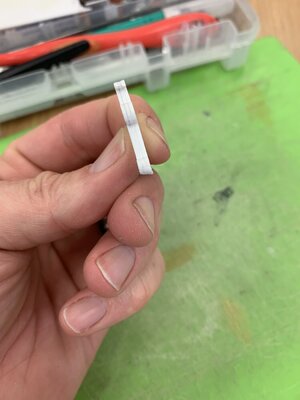
0DB55399-F8D2-46BC-9995-DCD004A013B7.jpeg

With the bottom angle of the foot established, I could proceed with shaping the scroll and fairing the leg to it’s final form. Here is a montage that shows the evolution of this process:
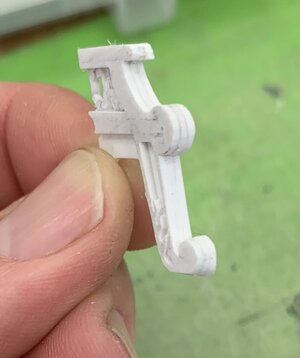
CC0B837E-53D2-41C1-A7AB-8D95646DD232.jpeg

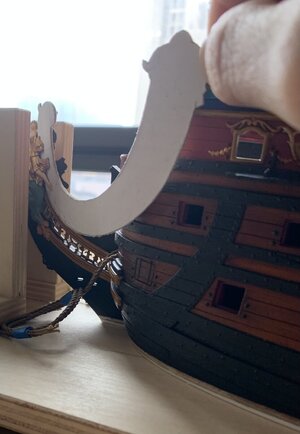
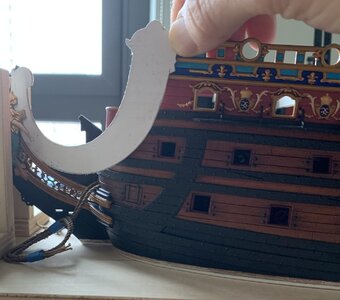
One thing I have found to be true; it is much easier, at times, to “draw” with the tools, than it is with a pencil. I was able, for example, to emphasize an elegant sloping transition into the foot with my files and a sanding stick. Now, when I position the bracket on the model, the negative space of this archway is at a more complementary angle to the adjoining windows than my initial drawing/template.
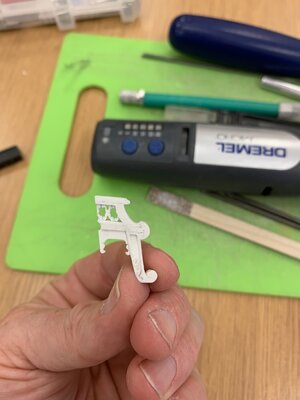
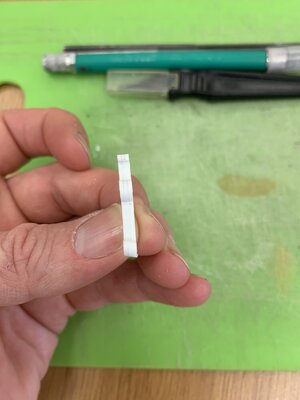
1422D546-7C49-4B43-9C4E-E67E6168F667.jpeg
8E5E7C73-02D9-4F68-BE39-8C8344C0FCE0.jpeg
BD0ADA97-B3A4-41CA-9274-E178313064B1.jpeg
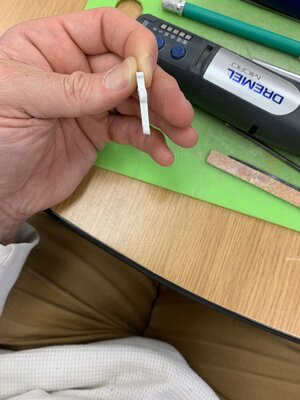
It’s a little hard to read in the following picture, but I have introduced a slight taper to the scroll foot from bottom to top; this is the first step along the detailing path of a scrolled volute. I will show the relief work, in this area, in the next post, after I have attached the acanthus brackets.
13993B1D-6A99-4960-9C86-6D00EAC6257C.jpeg

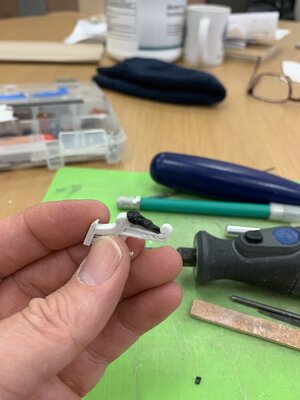
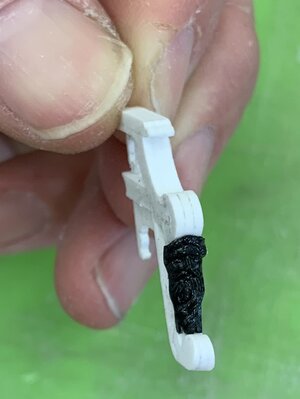
So, with this much established, I could focus on fitting the mascaroon that I had retrieved from the kit quarter gallery. Given the difficulty of carving convincing faces, it is always worthwhile to see whether one can salvage the kit sculptures. The mascaroons are oversize, but I thought I could make it work.
41909F33-F225-4A04-9CA9-C75F0316ABB9.jpeg
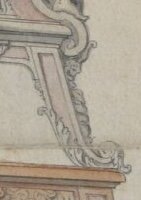
What I am trying to achieve:
199B58F1-865D-4218-9966-685757258490.jpeg
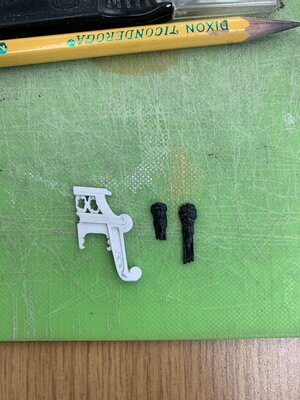
After much fettling, the mascaroon pares down quite a bit from where it began:
12A7D39F-F0EC-4CF0-8B45-7A8B195CD033.jpeg
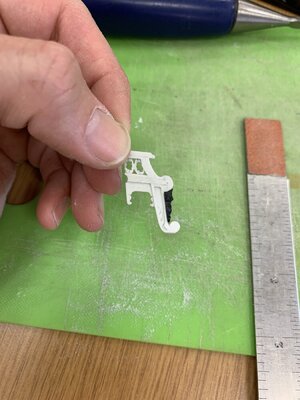
Now - the head is unavoidably wider than the bracket, but I will show a little later how simply softening these hard edges makes the sculpture look more like a deliberately rounded relief. I was able to retain just enough of the headdress, so I consider this sculpture experiment a success!
BA7B80A0-4461-4BCC-B29A-86C515E26D0A.jpeg

C1B4F276-D8E2-4C9F-BA9A-B788C61DD931.jpeg

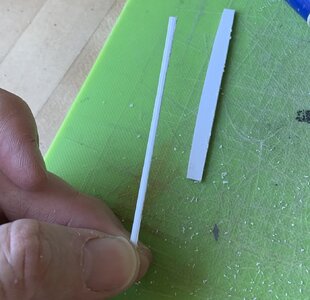
Next, I turned my attention to the mouldings which are really just a continuation of the top and bottom rails of the upper gallery bulwark. My idea was to simply profile a piece of scrap 1/16” styrene and then “rip” the moulding off the blank:
448EE1DC-8B78-4307-8023-2FF3B0F215DC.jpeg

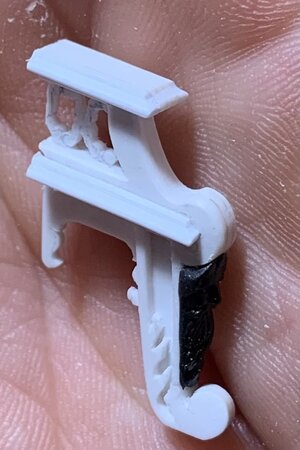
After truing the back edge, it was a simple task to profile the ends and secure them to the bracket:
1A7F4AB5-3178-4A0E-A224-44BADD549FFF.jpeg
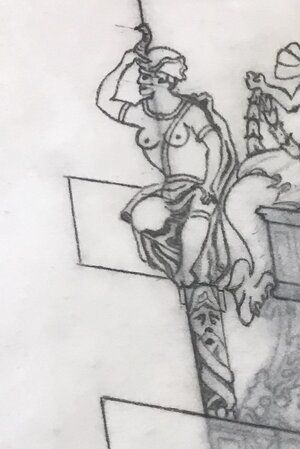
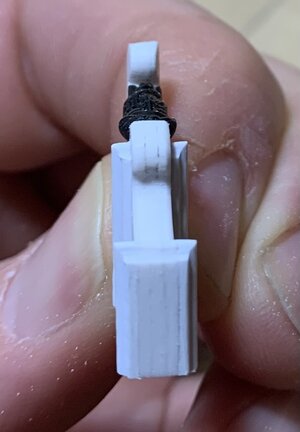
This approach results in a generous perch for the seated figures:
2A94F578-3953-4AE1-86FA-038F8FA992E5.jpeg
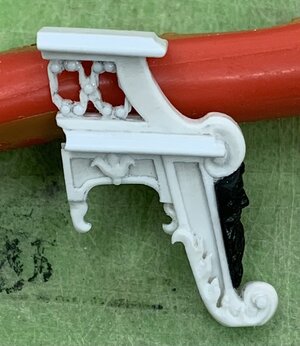
I am currently adding-on the final layer of appliqués: paneled headers, bell flower escutcheons, filigree accents,
and acanthus brackets.

Here you can see how softening hard edges helps turn a shortcoming into an advantage:
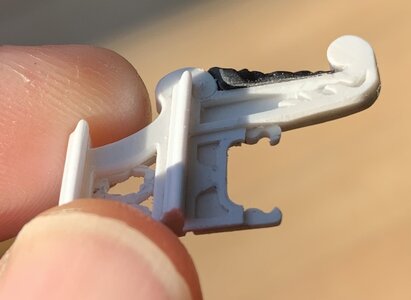
0F4F6555-1BA0-48C8-BA67-EFB2BD0574EB.jpeg
ED3C2F2E-ADA9-4A16-B5A6-22F281BC3170.jpeg

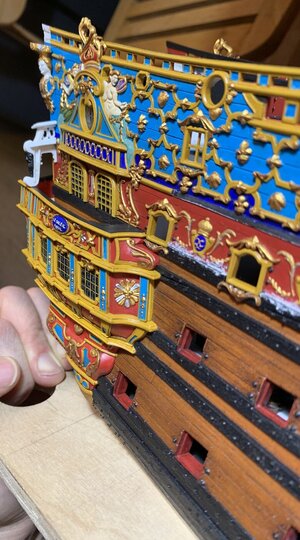
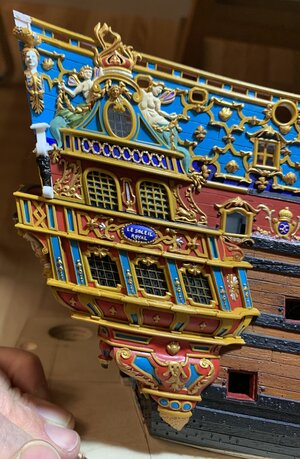
Honestly, I don’t think I can do a better job of satisfying the design and artistic challenges of this complicated part. Nevertheless, it did dawn on me that my approach resulted in a fundamental architectural flaw that would never have found its way onto the actual ship. Can anyone spot it?
DF12E93A-CEB8-471C-91E2-FEEF47957288.jpeg
19EB7D94-0E22-4A9E-BF2B-D26CE64CDE74.jpeg

I’ll give you all a little time to mull it over, and then I’ll explain why it won’t matter for this model, and is not worth the monumental effort of remaking the part. I got lucky, this time, but the insight has only deepened my appreciation for these 17th C. shipwrights who managed to knit the whole structure together seamlessly.

As always, thank you for your support! More to follow..

BONUS PIC of where things stand today, a week after I wrote this post for MSW:
7EE2A820-7DB7-43FD-B4A8-45A695273567.jpeg
 
Last edited:
Superb work Marc.Is your architectural flaw the fact that the pedestal, mouldings and possibly scroll does not line through with the vessels Sheer?This item as small as it is, is a geometric nightmare and in reality would have been built up in many stages on the original, something not so easy in 1/100

Kind Regards

Nigel
 
That is precisely the issue, Nigel. And, you are right that conveying this correctly, to scale, is deceptively difficult. In the end, it won’t matter at all because the vestments of the figures that sit upon these archways, completely cover the seats - as well as most of the detail that I labored to include on the forward faces of the arches. At least I will know it’s there!

2AA1413D-16B1-4FD2-A96A-DEAFAABCBCDB.jpeg
 
Kit bashing at it's finest. Lovely work. Waiting for delivery of my Heller kit. While I don't expect to equal your efforts I will try to emulate the addition of some extra detail, in particular wooden decking. After seeing the potential for trouble I may have to abandon my idea of over-laying the hull with wood. More will come to light after the kit arrives.
 
Kit bashing at it's finest. Lovely work. Waiting for delivery of my Heller kit. While I don't expect to equal your efforts I will try to emulate the addition of some extra detail, in particular wooden decking. After seeing the potential for trouble I may have to abandon my idea of over-laying the hull with wood. More will come to light after the kit arrives.

Hi Derfla - thanks for the kind words and for looking-in. I think it is possible to plank the hull with actual wood, however, I think it would be essential to sand away all raised detail on the hull - including the wales. Doing so may allow you to make some small correction to the forward sheer of the lower main wales (which rises a bit too much above the waterline, however, that adjustment creates problems with the head knees.

When you open one Russian doll, with this kit, there are twenty more nestled inside. I wish you luck and please open a build log.
 
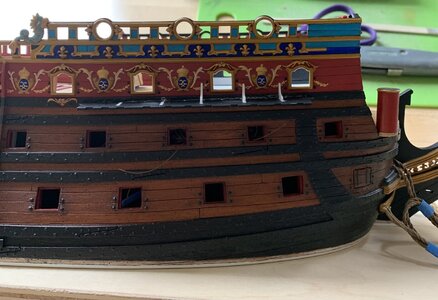
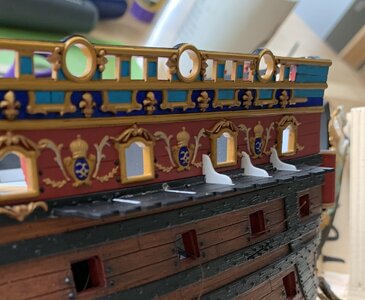
A lot of small odds and ends have been happening. I’ve smoothed-over and re-touched the upper bulwark joint. I painted and installed the starboard spirketting and the quarter deck beam. I’ve fitted and installed the last little piece of the frieze, where it bridges the bulwark joint. I’ve also installed all of the starboard channels.

One aspect that has provided a series of mis-steps is the buttressing knees of the channels. First, I could not locate the card template I had made for the port side, so I made a new template. Then, the first knee I fitted was made from slightly thinner styrene than what I used on the port side. After the second knee, I found my original template! So, even though I will remove the first too-thin knee and replace it, I manually faired the first two knees to the correct profile. The third knee I installed was too tall!

A98CF2EE-A9BC-4720-A58F-E1CAA7FBB23B.jpeg
55664540-4F74-49EC-A2D6-1A87B9C71100.jpeg
I decided to take a break from that frustration, for a moment. The port side gallery bracket is well-underway and coming along nicely.

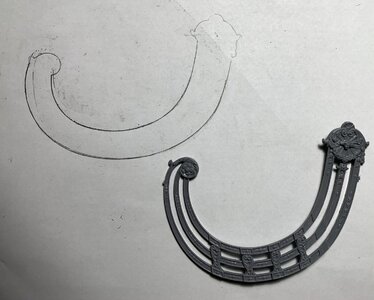
Last night, I was in the mood to take a stab at a pretty challenging re-design. As previously discussed, the kit head rails are now a generous 1/8” too short, after increasing the hull width at the stem. To attempt to use them, anyway, would result in a visual compromise that would only serve to draw heaps of attention to its wrongness.

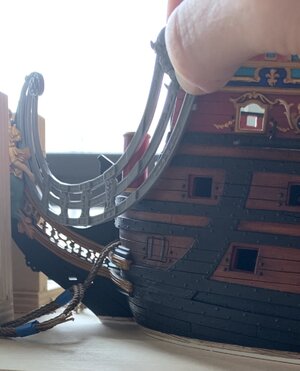
Even on the stock kit, there are numerous problems with the way these rails were designed. Most significantly, the forward escutcheon rises above the level of the sprit-mast, where it becomes an encumbrance to the rigging. Secondly, the low-sweeping arc of the rails makes it very difficult to craft plausible supporting knees, which the kit omits, in the first place.

Since, I have to re-make the rails, I thought I’d try and solve these two additional problems, while also improving the grace of the arc. My plan is to extract the forward and aft medallions, as well as the acanthus stiles that connect the three rails.

The pattern I arrived at, I think, does a reasonably good job on all of these fronts. The three rails taper, gradually, from 3/4” across the rails at the aft medallion, to 1/2” at the forward medallion:
6BCBFBAA-72BB-4530-8FFB-59ED9157D7DF.jpeg
Arriving at this pattern was just a matter of holding the stock part to the model and taking a measurement for the increased length, as well as figuring out the point at which the arc could transition into a slightly more shallow curve (just aft of the cathead support). Then, it’s just a process of drawing and erasing arc segments with a set of French curves.

The stock rails on the model:
255DB1A4-5A9D-4652-B907-69701F71592F.jpeg
The sweep is so low, your supporting knees must be practically flat in profile. The forward medallion is also way too high:
050427A9-FC8A-43F4-8780-09A935781688.jpeg
By contrast:
B4ACE1E0-DD7F-4EF6-B1A8-7558DA7F8FB4.jpeg
There is, now, at least some elevation to create a cyma-curve for these supporting knees.
DE7EB45E-73D9-4446-8B83-BDC113A11DC5.jpeg
I think the curves are more fair now, as well.
37D67397-7D7C-4FEF-9818-CD1F15F53B54.jpeg
ABD747F1-2EBE-48D3-907C-886AC720E535.jpeg
There is a lot of work in these, to bring them to fruition, but I think this is a solid starting place.
 
I had a series of epiphanies in the grocery store. First of all, the exact positioning of the aft medallion matters a great deal, because it determines whether the cathead timbers will clear the headrails.

Last night, when I was positioning the stock headrail to take a measurement at the figurehead, I was looking at it from the outboard perspective; I had failed to consider that one of the modifications I made was to recess the beakhead bulkhead into the upper bulwarks, so that there would be an “actual practice” plank overlay of the beakhead bulkhead.

When I got home, after putting away the groceries, of course, I positioned the stock headrail piece where it actually needs to be. I discovered that the shortage is much closer to 5/16”, rather than the heavy 1/8”th I had previously based my pattern on.

It also dawned on me that I had not even bothered to place the sprit-mast to even see whether the forward medallion was actually now below it. What was I thinking?!

Anyway, these were not difficult alterations to make. Here is headrail pattern 2.0:

64E72338-6F53-45E5-98B5-3C36D58754E5.jpeg
6D2BC03D-2F5F-475E-BDA9-E407F331F8F0.jpeg
The other important consideration is that the beakhead grating has to flow into the headrail on a steady incline, so the top edge of the headrails can’t dip below the line of the grating.

Of course, the next question is whether I will have room for the pixie figure that I drew, just aft of the headrail:

75DED954-323C-4B93-BFC3-13FE7A01C3E6.jpeg
I’m not sure about that:
4B0CDCAE-26C2-4909-8401-85F9EC6DEA3C.jpeg

Although, it could simply be a matter of re-scaling the figure. When I drew her, it still had not dawned on me that the Berain bow drawing does not account for the forecastle deck. The figure I drew is “stretched” in order to accommodate that reality:

A9C72C40-B0D4-454D-AB3D-38D7D1BE35CD.jpeg

Perhaps she can be somewhat reduced in scale to fit comfortably between the headrails and that first port opening. I may, ultimately, need to alter the aft medallion to copy the actual Berain design because the Heller version adds width to this critically tight spot.

That’s a problem for another day. At least I have the length and sweep worked out.

AD5AE0FB-04D6-4E3B-A5BA-A7B87D931326.jpeg
 
Insights? I’ve had a few..

Certain Whole Foods have pretty decent bathrooms

G-train service has made tremendous strides, while the 4/5 line has fallen off

I’m not sure how long construction around the base level of 2 Penn Plaza will continue, but egress from any event at MSG is a little like being trapped in the movie Labyrinth, but without the fun of David Bowie

Strap-hangers, one and all, are mental-health professionals

There’s no end to pizza-wars; Antonio in Australia just told me about yet another Brooklyn spot to pad my middle-age expansion - Di Fara’s!

I haven’t been yet, but I hope to go soon!
I was thinking that maybe certain locations specialized in specific revelations. Maybe the Hudson River would provide help with regard to the galleries. Liberty Park with the galleon. Broadway could be the source of deep insight into making deadeyes. Just thinking out loud here...
 
Back
Top