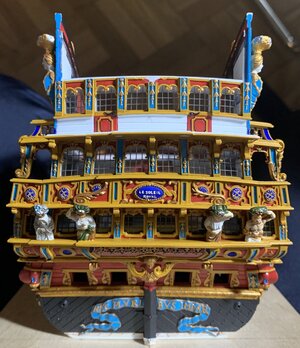
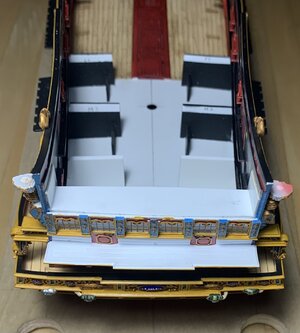
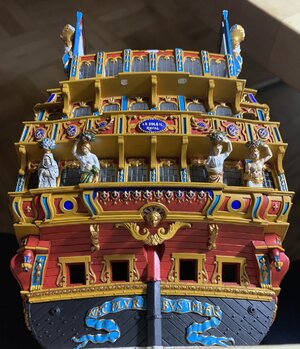
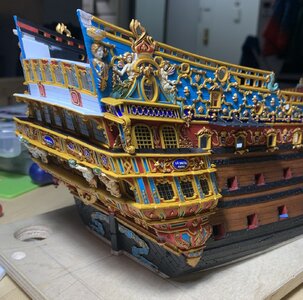
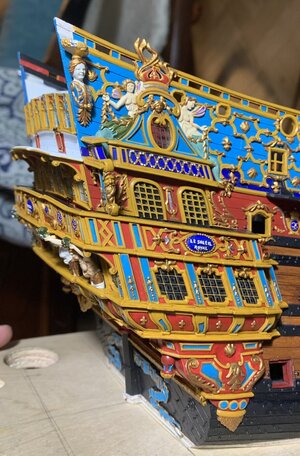
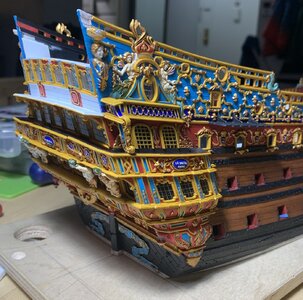
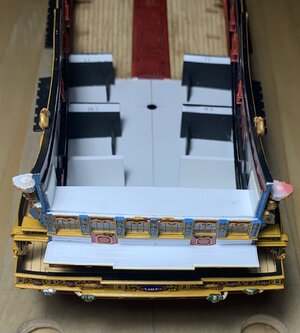
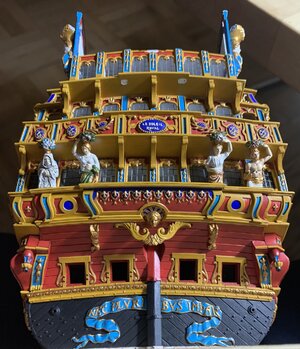
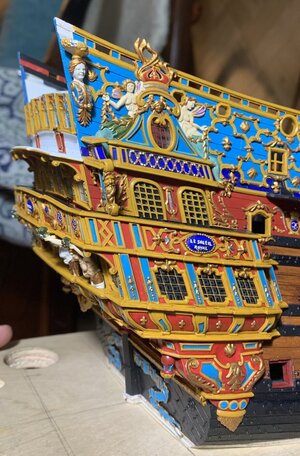
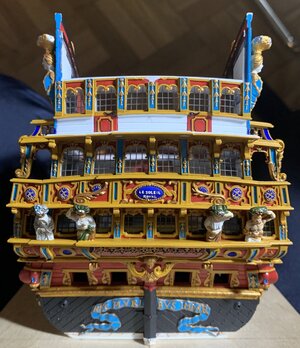
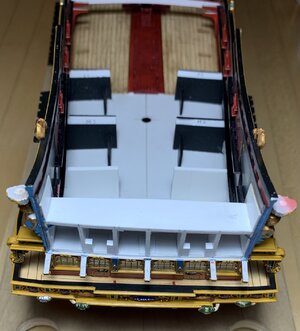
Soleil Royal by Heller - an Extensive Modification and Partial Scratch-Build by Hubac’s Historian

Thank you, guys, for all of the ideas and input.

I took a look at Heller’s on-line part order form, and that all seems very straight-forward. I may, yet, try another more gentle heat approach. I’m leaning toward securing the straight part into a rounded form and submerging in merely very hot, and not boiling water for a period of time.

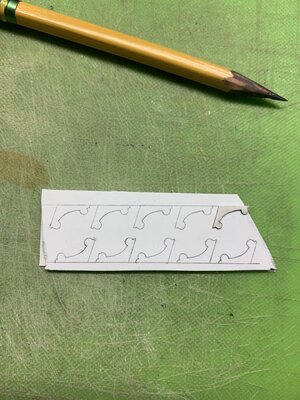
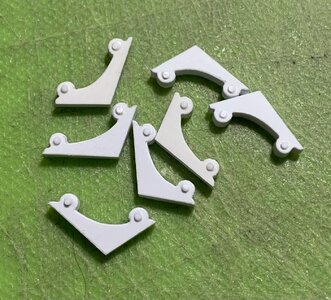
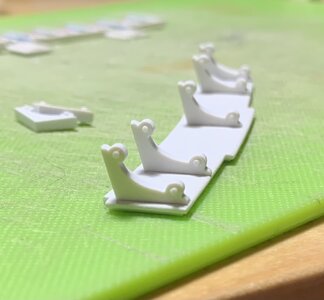
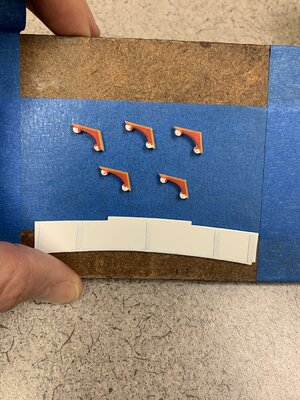
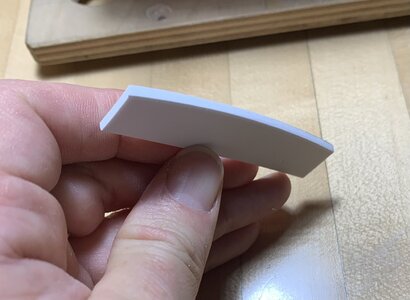
In the meantime, It was necessary to make new corbels for the upper balcony. The stock is made up from a piece of .0625 and a piece of .020 styrene laminated together:

DF7283A9-1EAA-4CDF-9618-484B42589BBA.jpeg
6A2E2FDF-DD0B-4A03-B4FB-220D128C012D.jpeg
11511D2F-1DCC-40C1-B083-57527ABBAE4A.jpeg

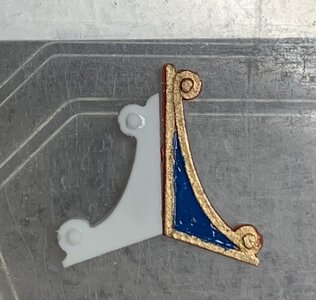
Below is the kit’s stock corbel for this balcony level:

0A6375C6-A015-426D-A156-11B3F3639CC1.jpeg

I ordered my Bitumen of Judea from an Italian vendor, who subsequently emailed to say that he couldn’t ship this small bottle of combustible material. So, then, I tried to order from a UK vendor. We’ll see whether that order sticks.

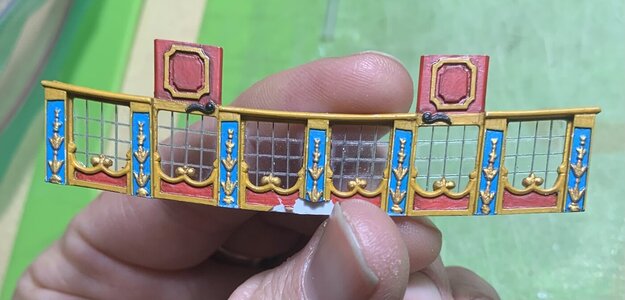
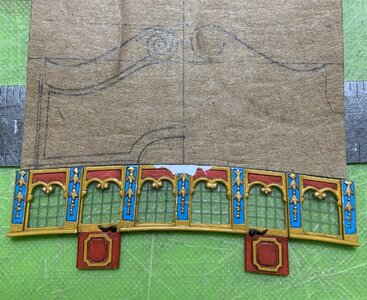
I’ve made the window panels and have begun painting the third-gallery window plate. There’s a whole bunch of stuff that is very nearly ready to go together.

Thank you for your interest, the likes, your comments and suggestions.
 
I catched up because I didn't got notification by mail (I have them on, not sure why I don't get them). Wouldn't the red flags be banned by 1671, I posted a link on that from Neko soleil royal in my threaad too. You can refer to my thread by the way and tomerrow, I might start with the injection pins during a reunion in my modelling club.
 
I wonder, why didn't you filled in the injection mark on the gun carriage? And is it neccesary to add details to the gun carriage on the 2nd and 1st gun battery? I'm not sure if it, seeing pics of the completed model, they don't seem visible so no need for detailing there (beside enlarging the guns).
 
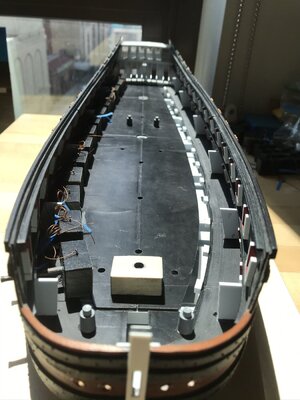
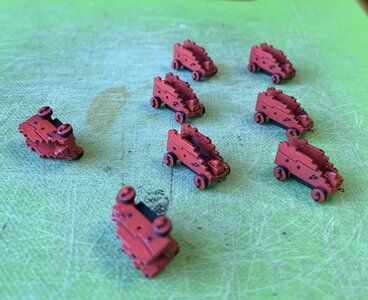
To be honest, Aurelien, I’m not sure what you mean. My lower two batteries are dummy carriages painted black. These enable me to glue the barrels-in at the very end of the build:

EC694FF2-B2A3-455B-A4AD-AF1F6331478B.jpeg

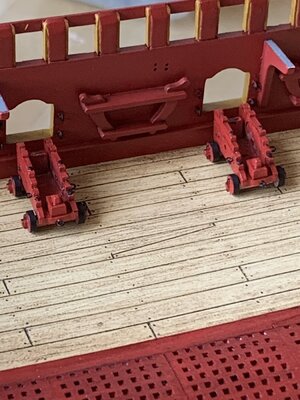
The visible carriages, though, are all perfectly clean on all visible external surfaces:

5C9935F2-8A93-4747-AD93-C2E5D398EBED.jpeg
8C3912AA-5835-43D4-82CF-34FAA6102E78.jpeg

There are injection marks remaining on the inside surfaces of the cheeks, but they will never be seen with the barrels in-place. As a side note, l have since painted away the iron banding on the truck wheels.
 
I won't do like you did on the gun cariages of the 2nd and 3rd battery, I'm planning to use those from the kit, hence my question on the neccessity to detail them when the detail won't be much visible. So the injection mark won't be visible when they're done, ok.
 
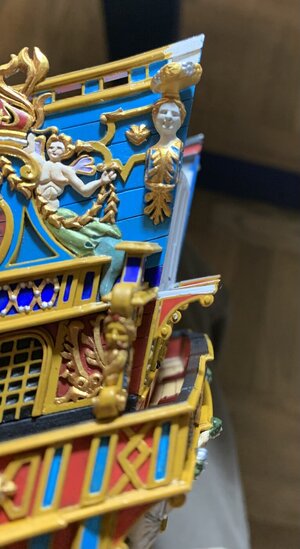
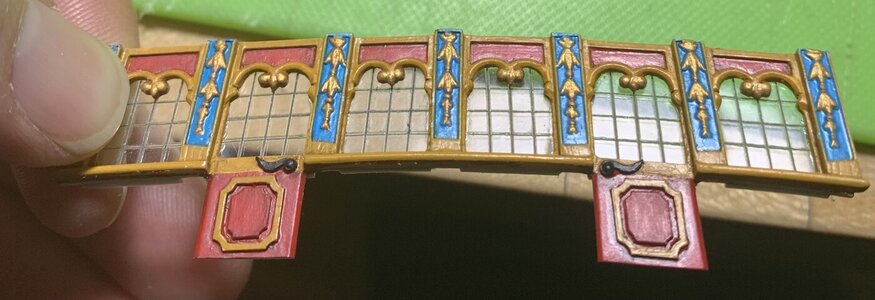
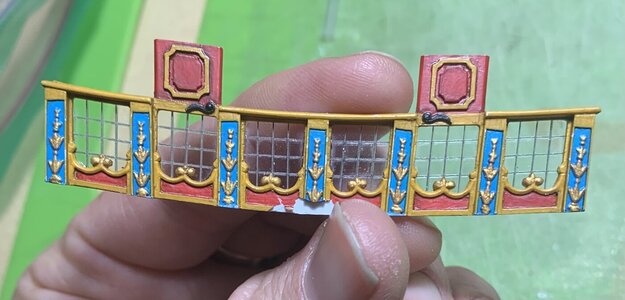
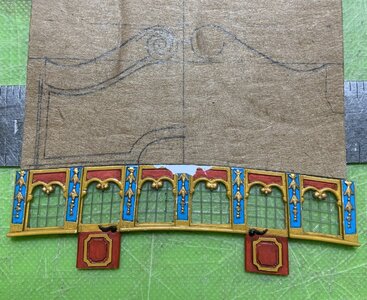
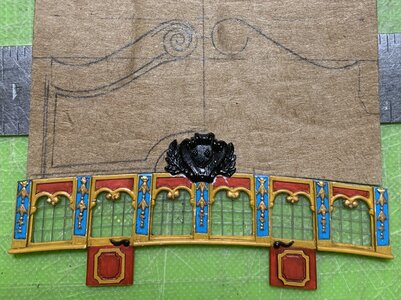
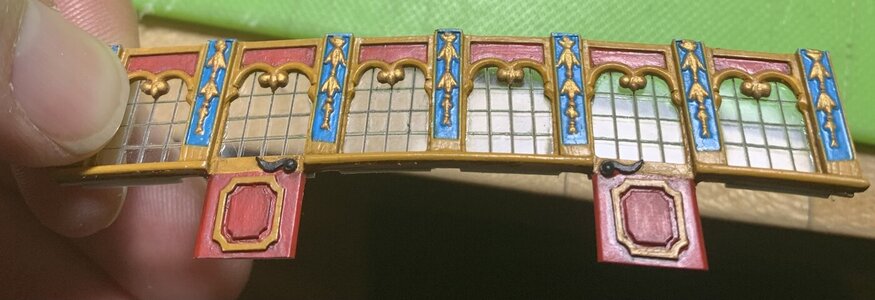
I have painted and distressed the corbels and the upper window tier.

26C84DEB-15BD-4BF4-8DD0-250D02A8616A.jpeg

I found myself swearing early and often, as I repeatedly broke off the doors from the window tier. There isn’t much plastic connecting them, and until they’re glued into the model, they are exceptionally fragile.

0FC1B0C2-9615-48B8-A44F-3AFA45B582A4.jpeg

I appreciate the tip, T_C, but presumably my bitumen is making its long journey across the Atlantic like the swarthy pilgrim it is. As I wait, I continue to construct the stern. I made up and fitted the next transom header, so that I can glue-in the window tier:

D4B6C80D-CBDA-4C53-9A14-51AC35E78728.jpeg

Although the winding out of square continues, it does so marginally and the eye really doesn’t see it:

D9E92C2F-2770-4BB1-8AD7-4FB410A55560.jpeg
514C41FA-B85A-40CF-A66B-8DD3EDBB12ED.jpeg

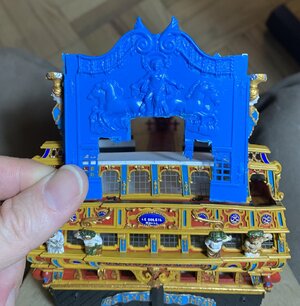
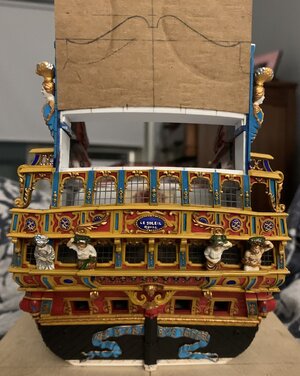
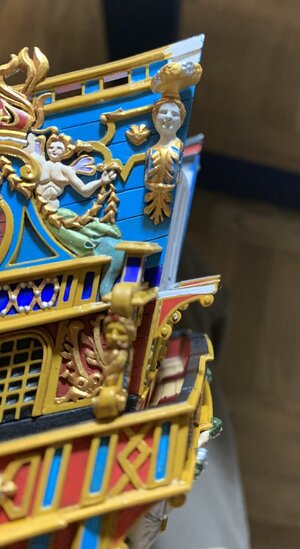
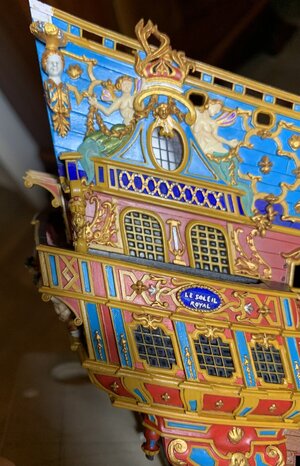
With the header in-place, I could begin to focus on the design of the most challenging aspect of the decor: as the French call it - the Couronnement. It is somewhat hilarious to me that after all of this effort to make the hull wider, the tafferal ends up being only fractionally wider than the stock stern plate:

EC714128-7184-4697-A57D-B82CEAC16A23.jpeg

This development is the result of fashioning the internal gussets that support the aft bulwarks, at an angle that promoted a more realistic tumblehome for the after castle; the stock kit is a little more vertically slab-sided in its approach to this detail. Here, you can see the comparison between the tafferal width I thought I’d have (at the start of the project) and where I ended up:

16778090-8ACD-4362-8988-507EC54EAAA0.jpeg

Despite this not un-satisfactory development, Tanneron and Heller (following suit) chose to represent the backboard (tafferal) as improbably tall for the refit of 1689. So, in other words, I was going to have to re-fashion this area anyway.

Towards that end, much earlier in my modification of the upper bulwarks, I cut away the poop royal sheer-step (5/16”+), only to replace it by 1/2 that height of a more realistic, low, sheer rail that is more reflective of the times:

53C47051-DF83-4463-AE21-EFC1AF2F5425.jpeg

However, the more significant shortening of the tafferal comes from lowering the side support for the outer lanterns, so that they are aligned with the sheer rail, as opposed to above it.

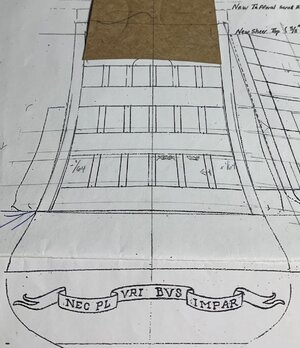
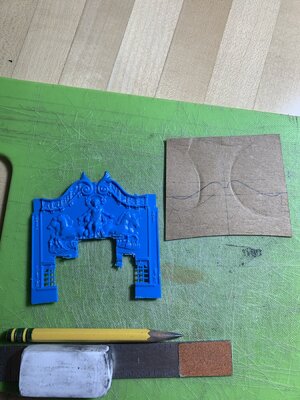
The first step was to re-draw the goose-neck cornice because I never liked Heller’s interpretation of this detail:

1D0B4817-FAD4-4B37-BA7D-6EF8BADC1E30.jpeg

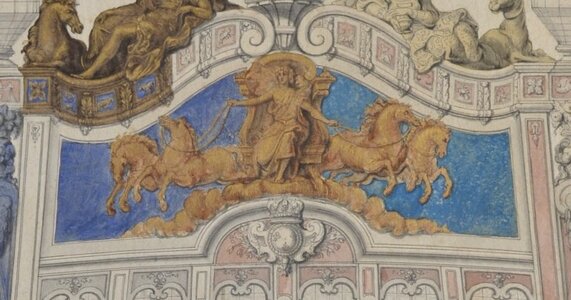
Next, I had to define the field for Apollo and his quadriga, which meant defining the height for the bar of astrological symbols along the top. On the stock kit, these are a continuation of the side lantern supports which I will re-cycle for this build. However, to follow the height of those boxes does not leave me with a large enough field for the main carving, below; see the dotted line proposed in the upper right. So, I decided to cheat that line upward about a 1/16”. It will necessitate hand-painting these astrologic symbols into these tiny paneled recesses, but that is okay.

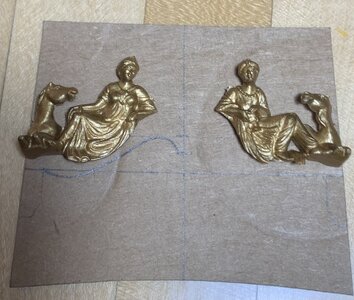
The really good news is that I will be able to re-shape the swagging vestments of Europe and Asia to fit the new cornice shape:

5F9DB0A4-E6F4-49D2-BEE5-D30CA549C832.jpeg

This is really great because, as it is, I have to re-carve The Americas and Africa because the stock figures are too tall and Africa has the wrong posture.

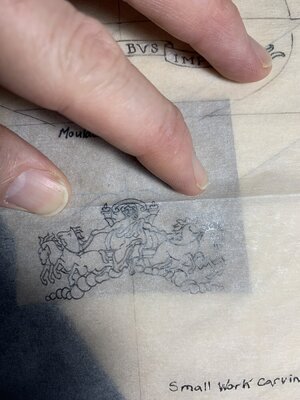
The next task was to see whether my original drawing of Apollo could be reduced enough to reasonably fit my field. Here is the full-size drawing:

A66A0379-C0C4-4693-9BFF-855187CEC30D.jpeg

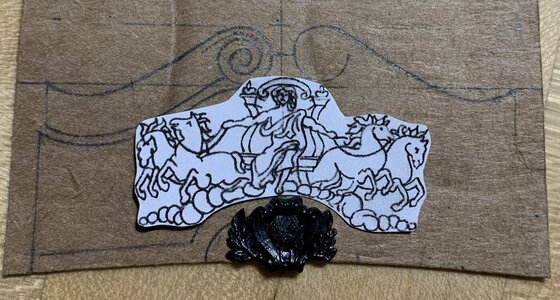
I did a series of reductions, at 50, 60, and 70%. Seventy percent was close:

BF59BA26-C56B-401A-98EA-F9667072BD30.jpeg

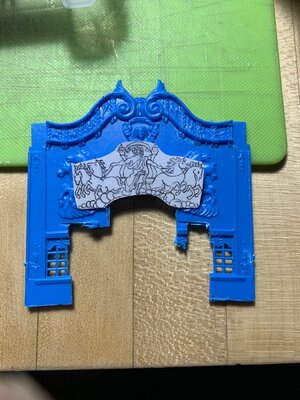
As compared to the kit carving:

B0CDB330-52C0-414C-BFC0-4BA6AFBBA6B4.jpeg

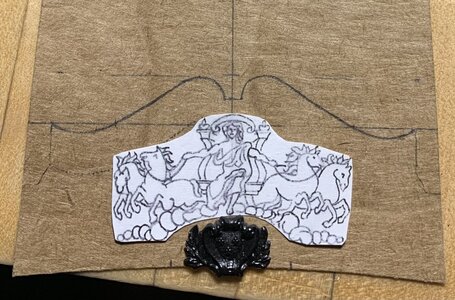
But, I felt it encroached too much on the upper and lower boundaries of the field. I settled on 67%:

B57F7FF8-D2CB-44E6-B0E0-041B2FC9CC8F.jpeg

As compared with Berain’s drawing:

22A1A38E-D772-48BA-BD3B-DF1D9459C7CF.jpeg

I’m not totally satisfied with the scrolled vollute. It’s too big. I’ll have to re-work the clouds to conform more neatly with the lower moulding, but I am happy with the scale of Apollo and his horses.

It is not as wide as Berain drew it, but this will allow me to better create my gradient sky from light cerulean blue to dark azurite, up top. radiating outward in all directions, from behind Apollo will be fine needles of sun-light in gold and silver gilt. Apollo and his horses will be all gold and the clouds will be temperamentally white and grey. Once I am satisfied with the scroll, I can photocopy the drawing and make a reverse copy, so that the port side can be matched to its mirror for a perfectly symmetrical pattern.

My motivation is to have the stern fully framed and perhaps even painted by the time of Joint Clubs on April 30th. I think this would be a satisfying resolution to everything that came below:

F8D25E64-FA2A-45CD-BEEA-76E2FD575F4B.jpeg

In other news and notes, I have made satisfying in-roads into Dassie’s Architecture Navale. I now have a pretty solid understanding of the proportional derivation of the principal elements of a ship, although there is still much translating to do. This essentially amounts to re-typing all relevant passages into Google Translate because the photo capture feature never results in nearly as intelligible a translation as the more tedious path. My French is improving though, as a result, and full transcriptions are becoming less necessary as I develop a vocabulary of French ship nomenclature.

I am simultaneously doing the same translation work on the 1685 Le Have du Grace dimensional survey of what is presumed to be the pre-refit Soleil Royal. It is extremely helpful that this document (which I downloaded from Gallica) has a numbered drawing that details all of the principal parts of a ship and it’s framing.

What is fascinating is that the neither Le Havre du Grace nor Dassie’s prescriptive formulas correspond with what was supposed to be SR’s original length of keel:

As built: 142’
Le Havre du Grace: 140”
Dassie: 136’

I have been applying Dassie’s formulas to SR’s particulars, as I go, and ultimately I will have a more complete comparison with the Le Havre de Grace document. This is all ground previously tread by Michel Saunier, and in-fact, I still have a copy of his exhaustive tabulation of all the dimensions of every aspect of the ship. He emailed this to me years ago. I still think this is a worthwhile exercise, though, to better understand how he arrived at where he did with his model.

Anyway, it keeps me occupied. Thank you for your interest, your likes and your comments. More to follow!
 
On a related tangent, following is a really fascinating look at the Jean Bart project at Gravelines. This is essentially a full interpretation of the 80-gun ship proposed in Album de Colbert, from 1670. The promotional model they made for the project is cartoonishly out of scale and proportion, but the lines plan they have developed for construction looks very good to my eye.

After 20 some years, the builders have framed to just below the lower main wale. This is particularly instructive to me, as the shape and volume of the so-called “live-works” is now quite clear:


Turn on captioning for a reasonable translation of what’s being said. As was the case with the Provincien project, this is an open air construction, necessitated I suppose for the crane to lower futtocks from above. I have my fingers crossed that the backbone of the ship won’t be rotten before the decks are framed and closed-in.
 
I have painted and distressed the corbels and the upper window tier.

View attachment 354241

I found myself swearing early and often, as I repeatedly broke off the doors from the window tier. There isn’t much plastic connecting them, and until they’re glued into the model, they are exceptionally fragile.

View attachment 354245

I appreciate the tip, T_C, but presumably my bitumen is making its long journey across the Atlantic like the swarthy pilgrim it is. As I wait, I continue to construct the stern. I made up and fitted the next transom header, so that I can glue-in the window tier:

View attachment 354240

Although the winding out of square continues, it does so marginally and the eye really doesn’t see it:

View attachment 354239
View attachment 354242

With the header in-place, I could begin to focus on the design of the most challenging aspect of the decor: as the French call it - the Couronnement. It is somewhat hilarious to me that after all of this effort to make the hull wider, the tafferal ends up being only fractionally wider than the stock stern plate:

View attachment 354238

This development is the result of fashioning the internal gussets that support the aft bulwarks, at an angle that promoted a more realistic tumblehome for the after castle; the stock kit is a little more vertically slab-sided in its approach to this detail. Here, you can see the comparison between the tafferal width I thought I’d have (at the start of the project) and where I ended up:

View attachment 354236

Despite this not un-satisfactory development, Tanneron and Heller (following suit) chose to represent the backboard (tafferal) as improbably tall for the refit of 1689. So, in other words, I was going to have to re-fashion this area anyway.

Towards that end, much earlier in my modification of the upper bulwarks, I cut away the poop royal sheer-step (5/16”+), only to replace it by 1/2 that height of a more realistic, low, sheer rail that is more reflective of the times:

View attachment 354243

However, the more significant shortening of the tafferal comes from lowering the side support for the outer lanterns, so that they are aligned with the sheer rail, as opposed to above it.

The first step was to re-draw the goose-neck cornice because I never liked Heller’s interpretation of this detail:

View attachment 354235

Next, I had to define the field for Apollo and his quadriga, which meant defining the height for the bar of astrological symbols along the top. On the stock kit, these are a continuation of the side lantern supports which I will re-cycle for this build. However, to follow the height of those boxes does not leave me with a large enough field for the main carving, below; see the dotted line proposed in the upper right. So, I decided to cheat that line upward about a 1/16”. It will necessitate hand-painting these astrologic symbols into these tiny paneled recesses, but that is okay.

The really good news is that I will be able to re-shape the swagging vestments of Europe and Asia to fit the new cornice shape:

View attachment 354237

This is really great because, as it is, I have to re-carve The Americas and Africa because the stock figures are too tall and Africa has the wrong posture.

The next task was to see whether my original drawing of Apollo could be reduced enough to reasonably fit my field. Here is the full-size drawing:

View attachment 354234

I did a series of reductions, at 50, 60, and 70%. Seventy percent was close:

View attachment 354231

As compared to the kit carving:

View attachment 354232

But, I felt it encroached too much on the upper and lower boundaries of the field. I settled on 67%:

View attachment 354230

As compared with Berain’s drawing:

View attachment 354244

I’m not totally satisfied with the scrolled vollute. It’s too big. I’ll have to re-work the clouds to conform more neatly with the lower moulding, but I am happy with the scale of Apollo and his horses.

It is not as wide as Berain drew it, but this will allow me to better create my gradient sky from light cerulean blue to dark azurite, up top. radiating outward in all directions, from behind Apollo will be fine needles of sun-light in gold and silver gilt. Apollo and his horses will be all gold and the clouds will be temperamentally white and grey. Once I am satisfied with the scroll, I can photocopy the drawing and make a reverse copy, so that the port side can be matched to its mirror for a perfectly symmetrical pattern.

My motivation is to have the stern fully framed and perhaps even painted by the time of Joint Clubs on April 30th. I think this would be a satisfying resolution to everything that came below:

View attachment 354233

In other news and notes, I have made satisfying in-roads into Dassie’s Architecture Navale. I now have a pretty solid understanding of the proportional derivation of the principal elements of a ship, although there is still much translating to do. This essentially amounts to re-typing all relevant passages into Google Translate because the photo capture feature never results in nearly as intelligible a translation as the more tedious path. My French is improving though, as a result, and full transcriptions are becoming less necessary as I develop a vocabulary of French ship nomenclature.

I am simultaneously doing the same translation work on the 1685 Le Have du Grace dimensional survey of what is presumed to be the pre-refit Soleil Royal. It is extremely helpful that this document (which I downloaded from Gallica) has a numbered drawing that details all of the principal parts of a ship and it’s framing.

What is fascinating is that the neither Le Havre du Grace nor Dassie’s prescriptive formulas correspond with what was supposed to be SR’s original length of keel:

As built: 142’
Le Havre du Grace: 140”
Dassie: 136’

I have been applying Dassie’s formulas to SR’s particulars, as I go, and ultimately I will have a more complete comparison with the Le Havre de Grace document. This is all ground previously tread by Michel Saunier, and in-fact, I still have a copy of his exhaustive tabulation of all the dimensions of every aspect of the ship. He emailed this to me years ago. I still think this is a worthwhile exercise, though, to better understand how he arrived at where he did with his model.

Anyway, it keeps me occupied. Thank you for your interest, your likes and your comments. More to follow!
For the briefest of moments I thought I might have been actually tracking with your narrative, but alas it slipped away, and I was once again secure in my blissful place of ignorance. But it was exciting while it lasted...
 
On the pediment, I intend to keep the heller one, tho since I'm basing my stern façade on the "chambre des volontaires" drawing, I'm unsure where to cut on the deck and if I'll need to modify the dimension of the pediment. Nice work on the sculptures, I intend to keep the heller one for my 1669 SR and use the xacto knife to remove the seams.
 
Excellent work Marc. Seeing your drawing of the stern shows just how much tumblehome you have added.

One question, why have you not installed the lower panelling below the windows? This would prevent the doors coming adrift.

Kind Regards

Nigel
 
Thank you, Nigel. The reason for that is that I plank the space below the windows and between the doors with styrene strip; the stern round-up would make it difficult to do it any other way, so it is just easier to first glue-in the window plate and then fill-in below.
 
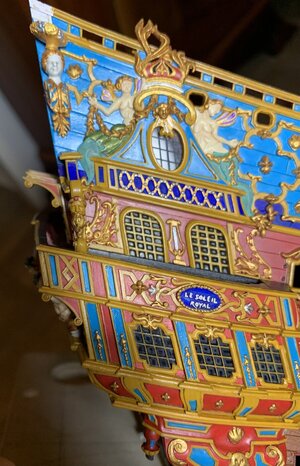
Given that this balcony doesn’t wrap to the quarters the way the middle balcony does, I thought it would be easier to first attach the corbels. Fitting these is a little tricky because they toe-in toward the centerline, a little, and they have to match the raking angle of the quarter gallery, fore and aft, and they have to be beveled athwart-ships to match the camber of the balcony platform.

D05F6EB3-A2BE-467F-A71C-1243D8F94844.jpeg

I thought I had done a pretty good job of matching all the angles, however the outside corbels looked a little droopy:

9A7278A6-84BC-47D5-A132-0FDB96751476.jpeg

Especially the port side:

7E217B31-5FA9-40BC-A23F-C38C17DF8453.jpeg

The solution was to add a piece of .030 styrene to the tops of the outside corbels and re-fair until the angle of the balcony platform matched that of the quarters. The hardest part of this was paring away the glue squeeze-out and repairing the paint.

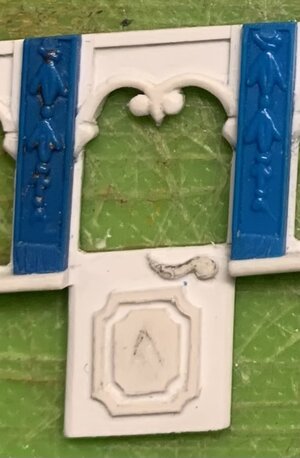
The window plate is probably the thing that gave me the most problems. It is very fragile, and I broke both doors off at different times. Then, when I CA’d the acetate in-place, I developed a little bit of CA frost on several of the window panes:

A78EE1DD-76F7-4659-AB21-98A0E50F97BC.jpeg
45982F5C-F46C-4FE0-A2EC-192C255B55E3.jpeg

I probably could have avoided this problem if I had either used a quick-set CA, or used an accelerant. I like the medium-set CA glues because they give you a small window to make sure the part is correctly positioned.

The frost blooms were not super noticeable, but they were nonetheless disappointing. I kind of wanted to scrap the piece and start over, but that would also necessitate casting new pilasters in resin, as I did not have another scrap stern plate to pull from.

Well, fortunately there’s a simple solution to this problem, and it works like magic. One approach would be to dissolve the CA with gasoline and re-paint/re-built. Or, I could simply paint a little petroleum jelly over the blooms and let them sit for 5-10 minutes. Then, I cover the head of a q-tip with a t-shirt scrap and wipe the PJ off the surface. An un-covered Q-tip gets into the corners. This simple trick worked perfectly!
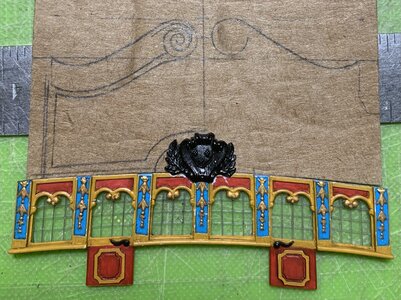
The next hurdle of this window plate was that I had pretty radically underestimated how much needed to be trimmed from the window edges so that they would fit within the transom framing. The only way to trim these, after they had been glued to the plate, was to grind the edges with a diamond-coated bur and sanding sticks. This was tedious, and I managed to dislodge one pane, but I somehow avoided breaking the plate, so I kept going.

The next thing that had to happen was cutting back the center pilaster so that the Arms of France would not intrude into the space for the big tafferal carving:

E32E52F2-3769-4687-9ECB-5A4246D0EBB7.jpeg
1DBC9230-9AD4-45D8-A52D-A1AB7DA06E95.jpeg

Again this is difficult to achieve without breaking the window plate because the blue plastic of the kit window pilasters is, for lack of a better word, chewy.

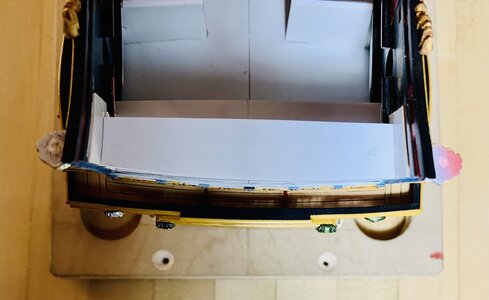
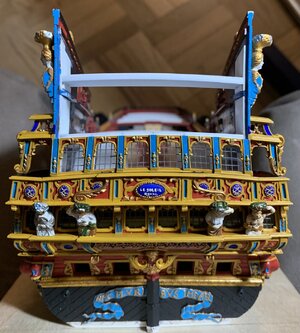
With all of that out of the way, I could finally glue-in the balcony platform, and plank-in the transom bulkhead:

B23C2539-97FB-495C-BD27-5FD81BCE5D56.jpeg
E002F9C1-8D64-49F7-B654-3BE17F238217.jpeg
FAA336F2-DA60-45BE-A7C8-2C5118A371F2.jpeg

There remain a pair of supporting balusters that I have to fit between the middle balcony rail and the upper balcony platform.

DEA5E2DD-8D72-4D69-AC17-BA165B149448.jpeg
780A3006-69E4-4651-975F-B7212BCAB182.jpeg

Now, I can paint the transom planking red and figure out whether I’ll be able to salvage the kit railing, or whether I will have to make one from scratch.

I’ll get all of that together, and then I’ll go back to the head to complete the headrail installation and head grating. That may be all I manage to accomplish before the show, but that will be significant progress, since the last time I showed the model.

Thank you for looking in!

70D1C7C6-BF3C-4850-BDDE-1D8CCBE74393.jpeg

26348446-5863-47E3-A897-E74461EE47B1.jpeg

BD4ACD2A-5E2A-4731-A9F9-15036463941E.jpeg

1F0B1F34-1F83-4EB1-88C2-3CBAB145663B.jpeg

89D2A5CE-3247-43A4-AF64-EB87F06D4C66.jpeg

13DF3086-4DBC-4581-B8C2-E412DF2F37A2.jpeg

3EAF51DB-BB3C-4B02-A42B-1C685938965D.jpeg

36DF1530-E6E8-4844-B5F2-9EE37B5A6103.jpeg

5C0FC799-5A91-4677-8AE9-5FF6DDB99C8A.jpeg

B3CF8881-AE03-4831-819A-D1D599E2B869.jpeg

F2C309D8-38E4-4A6C-B3CD-CA425F659782.jpeg

FCE7DD4F-551B-4952-A1CD-D4E301C1F47A.jpeg
 
Last edited:
Gah this looks great. I'm done reading floating baroque, verry instructive book and found the part on the word meaning interesting as well as how they analysed jean-bérain/françois antoine vassé work. I don't think the balcony will be too hard to expand on my SR (taking a break from it,I prefer to focus on something I can finnish this year).
 
Back
Top