My Google-Fu is more powerful than your Wu Tang Sword.Kurt,
As I mentioned in our PM - your knowledge is that of a sage -very impressive knowledge base...
Cheers,
-

Win a Free Custom Engraved Brass Coin!!!
As a way to introduce our brass coins to the community, we will raffle off a free coin during the month of August. Follow link ABOVE for instructions for entering.
-

PRE-ORDER SHIPS IN SCALE TODAY!
The beloved Ships in Scale Magazine is back and charting a new course for 2026!
Discover new skills, new techniques, and new inspirations in every issue.
NOTE THAT OUR FIRST ISSUE WILL BE JAN/FEB 2026
You are using an out of date browser. It may not display this or other websites correctly.
You should upgrade or use an alternative browser.
You should upgrade or use an alternative browser.
Sovereign of the Seas - Sergal 1:78 (with hopefully many added details)
Hi again,
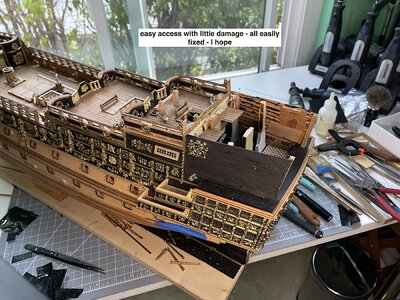
Yikes – who was the “wise guy” who thought that adding outer gallery windows and tiny frames would be a good idea???? ---- Hmmm,
So, posting something that should have been thought of, and planned months ago…I hope that it will be worth it.
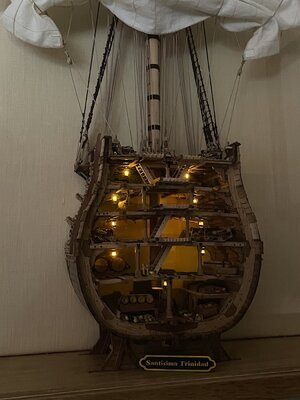
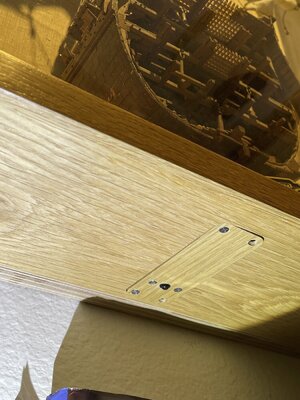
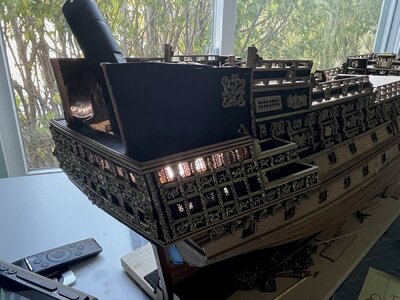
Also plan on adding LED’s to the five stern lanterns along with inside the upper and lower officer’s quarters. I’ve contacted Evandesign re; lights and on/off switch – His company supplied the lighting for the Santisima – last two images note small on/off button under the case -coin battery is also enclosed within – perfect.
Light leaks must also be dealt with
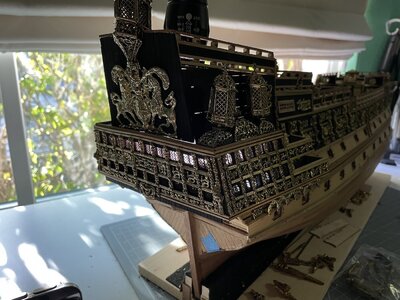
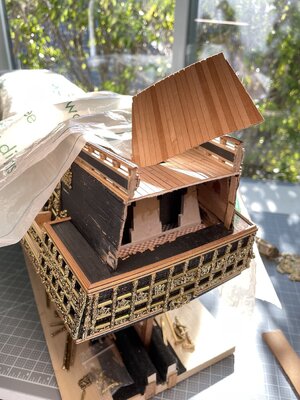
Started adding tape to inner planks.
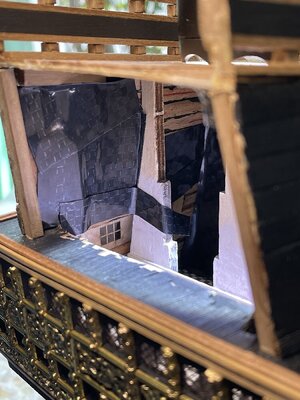
from an earlier image
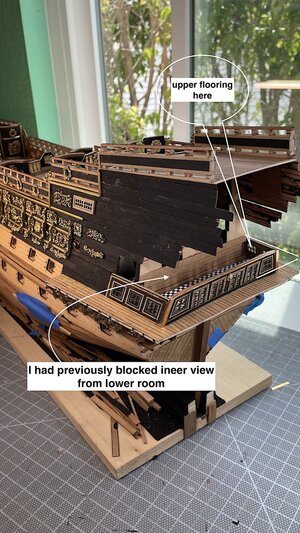
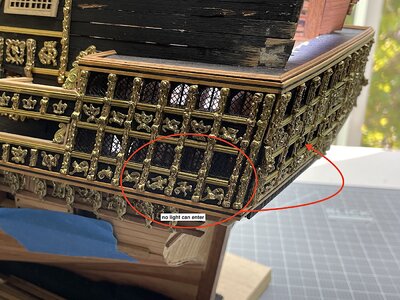
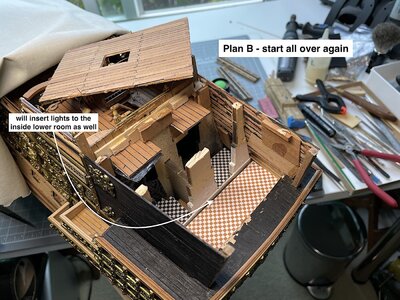
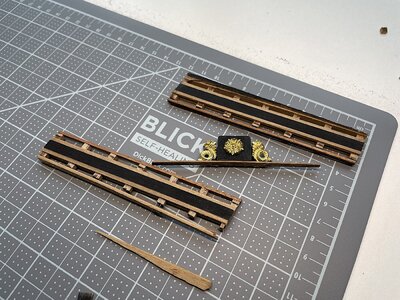
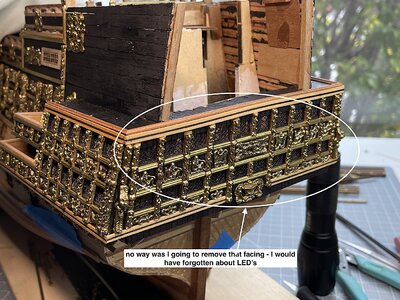
Lights from Evandesign...though scratch built the enclosures
Yikes – who was the “wise guy” who thought that adding outer gallery windows and tiny frames would be a good idea????
So, posting something that should have been thought of, and planned months ago…I hope that it will be worth it.
Also plan on adding LED’s to the five stern lanterns along with inside the upper and lower officer’s quarters. I’ve contacted Evandesign re; lights and on/off switch – His company supplied the lighting for the Santisima – last two images note small on/off button under the case -coin battery is also enclosed within – perfect.
Light leaks must also be dealt with

- Previous image thought that just removing that back panel would be enough

Started adding tape to inner planks.

from an earlier image


Lights from Evandesign...though scratch built the enclosures


"Plan B - Start all over again" is not a sentence I like to read... I was familiar with your perseverance from your Vasa build - but to see it in motion here is inspiring.
Paul,
Posted this as a form of personal "what was I thinking"
Oh yes the Vasa - you were one of the very kind followers of that build over at MSW. Yes now that one - I tore away the entire stern and started over again. She was for-all-intent-and-purposes my first build. As a newbie - followed the Corel instructions verbatim...Then I started actually learning - realizing the the Corel example was (still is) the least accurate of any Vasa (apparently kit was produced before ship's resurrection) - here are a a few images of Plan B hahaha
Thanks for remembering, I think?
Corel Right out of the box
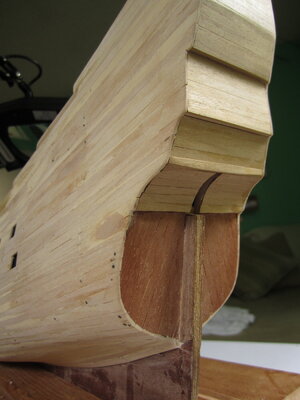
With my still ignorant this - "looks a bit better"
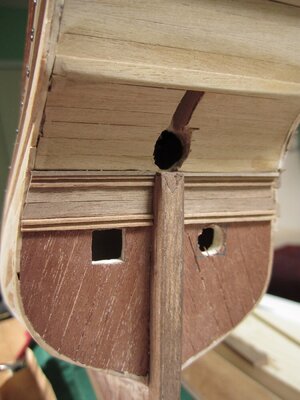
Plan B - start all over again

stern -- Better more in keeping with 1/1s look
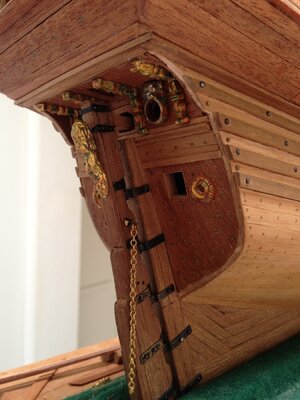
Still not 100% but an improvement - learned a LOT with this project..
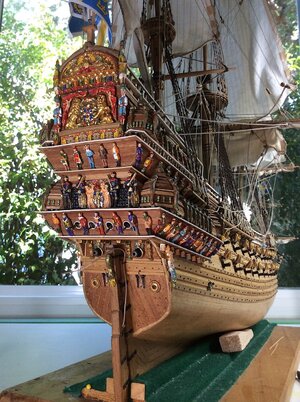
Posted this as a form of personal "what was I thinking"
Oh yes the Vasa - you were one of the very kind followers of that build over at MSW. Yes now that one - I tore away the entire stern and started over again. She was for-all-intent-and-purposes my first build. As a newbie - followed the Corel instructions verbatim...Then I started actually learning - realizing the the Corel example was (still is) the least accurate of any Vasa (apparently kit was produced before ship's resurrection) - here are a a few images of Plan B hahaha
Thanks for remembering, I think?
Corel Right out of the box

With my still ignorant this - "looks a bit better"

Plan B - start all over again

stern -- Better more in keeping with 1/1s look

Still not 100% but an improvement - learned a LOT with this project..

That's GORGEOUS! 

- Joined
- Nov 6, 2022
- Messages
- 243
- Points
- 113

There was no wheel with ropes and pulley running to the tiller. In the early 17th century and before, ships were steered with a whipstaff. The helmsman operated it from under the halfdeck or from a room on a sublevel below the main deck or upper gun deck. The helmsman could often look forward out portals across the main deck to hear orders from officers above, or if the helm is located too deep within the ship, orders were relayed down to the helmsman.
From zu Mondfeld:
View attachment 356550
View attachment 356551
Working whipstaff on model of HMS Sovereign of the Seas. The Sovereign is probably the largest ship capable of being controlled using a whipstaff. The ships wheel has many advantages over the whipstaff, foremost being the ease of which a heavy rudder under great force can be positioned and held. It probably took more than one person to hold the whipstaff with the rudder at extreme angles if heavy seas.
View attachment 356553
The tiller protrudes from the transom, and will be incorporated into the rudder later in the build. The tiller and whipstaff are positioned "hard to larboard".
View attachment 356552
Well bust my buttons! A whipstaff you say. Sounds a little like my first marriage.There was no wheel with ropes and pulley running to the tiller. In the early 17th century and before, ships were steered with a whipstaff. The helmsman operated it from under the halfdeck or from a room on a sublevel below the main deck or upper gun deck. The helmsman could often look forward out portals across the main deck to hear orders from officers above, or if the helm is located too deep within the ship, orders were relayed down to the helmsman.
From zu Mondfeld:
View attachment 356550
View attachment 356551
Working whipstaff on model of HMS Sovereign of the Seas. The Sovereign is probably the largest ship capable of being controlled using a whipstaff. The ships wheel has many advantages over the whipstaff, foremost being the ease of which a heavy rudder under great force can be positioned and held. It probably took more than one person to hold the whipstaff with the rudder at extreme angles if heavy seas.
View attachment 356553
The tiller protrudes from the transom, and will be incorporated into the rudder later in the build. The tiller and whipstaff are positioned "hard to larboard".
View attachment 356552
View attachment 356554
Hello,
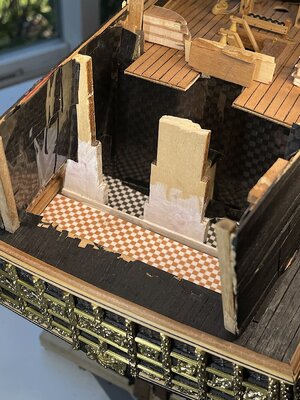
As much as it is hind sighted double the work – also removing the poop deck along with the rear stern facing panel was the right approach. I’ve ordered ten LED’s from Evandesign. In the meantime, worked on sealing the many light leaks that would have become very apparent. Five of the LED’s will be for the lanterns. will experiment where and how to add the other five within the rooms.
-- Ok, I now challenge James Web to aim, and locate any light leaks – come on with your insanely fantastic mirrors – take a look. Hahaha
Will update next after this current fix has been resolved, and lights installed – might be a while -.
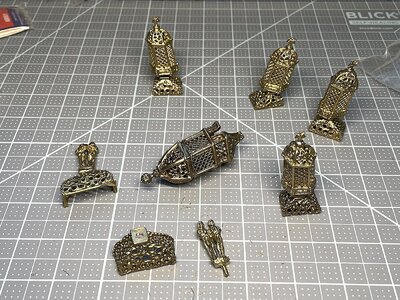
Now also focusing on how to add "glass panels" within the lantern housings - I've tried several different ideas.
All failures so far. For the large stern housing - that one will be easy...the four smaller ones are still in search of a workable solution.
Thanks so much for the many views, likes and always kind and helpful comments..


That's the best technique given you can't access the inside of the castings easily. Better than nothing. You could even stain the glue with colored stain to add a touch of color if you want. What about using fast setting epoxy? Too sticky/messy perhaps?Hi john, we talked about this before I think. Did you ever try Clear Elmers Glue as a small window?
No mater what you do, your devotion to building something extraordinary shows in your willingness to deconstruct and improve things that fall short of your standards, even if it is a major re-work. That's what makes models like this wondrous works of art.
Last edited:
Kurt - you are way too kind - big thanks for your superlative thought So appreciated  yes this is beyond just a simple hobby - you, and many others also keep the flame very bright...Hmmm did not try Epoxy - may give it a try. thanks
Daniel - yes, there is a silver lining with which you very much helped !!
Note that I mostly used the current kit’s lanterns as Guinea pigs, not the vintage kit's housings...
I was lucky enough to have acquired a vintage kit that I purchased from a MSW member, and was gifted the current issue for Father’s Day three years ago…
As I have mentioned before, Nigel and I had discussed the issues with the current kit’s poor quality metal bits. He was very aware of the lower quality of supplied and thankfully informed me!! Reiterating here; the vintage kit included solid 650+ solid bronze parts, whereas the current kit’s issues are white metal, apparently with bronze - that maybe are electroplated? Resulting in gold looking facings. but resulting in less detailed castings.
– again – YIKES – I could have, by some bad luck, received a super badly made example – nonetheless the factory workers that QC product before inserting such into sellable examples were MIA for this kit.
==========================
Ok, here what’s going on with my efforts at adding glass to the lantern housings…. Hey Sergal are you reading out this???? you should be IMO..
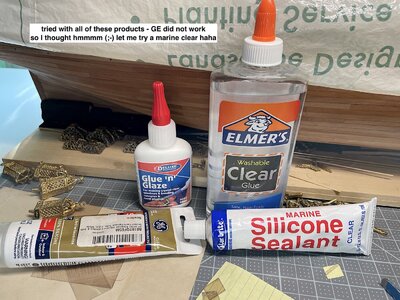
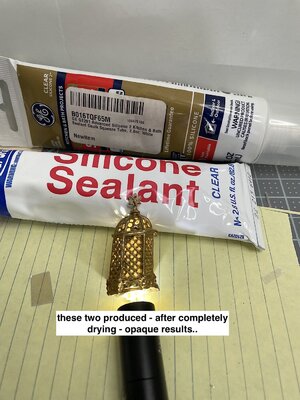
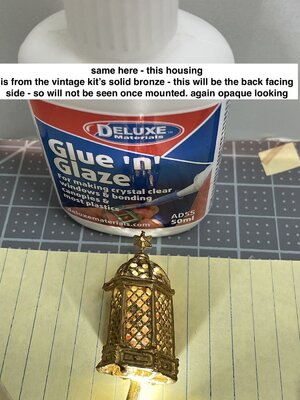
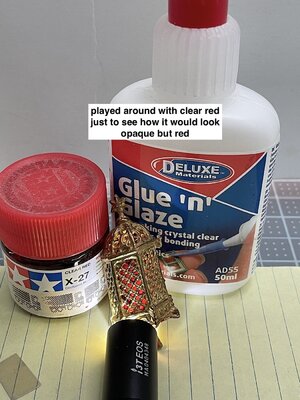
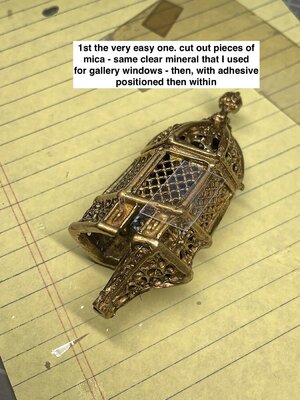
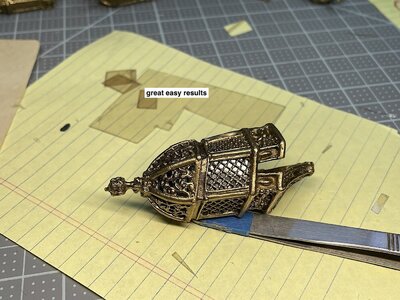
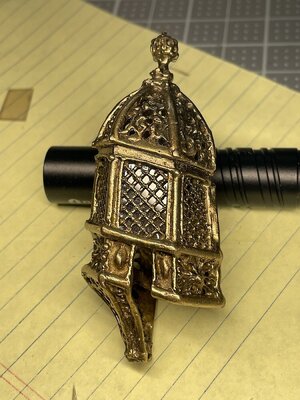
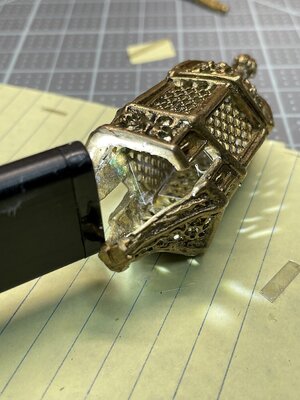
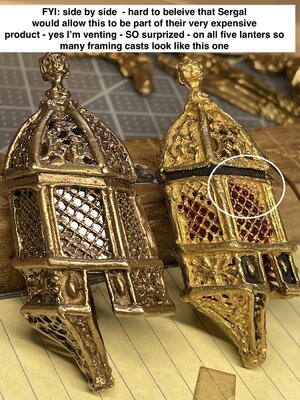
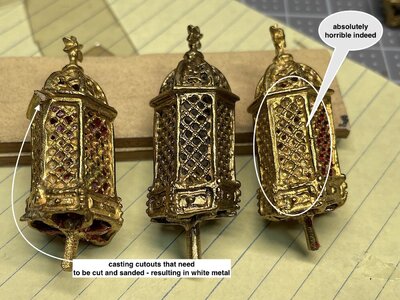
Here Daniel you came to the rescue -- initially Elmer's was also resulting in a too opaque look for me (less so, but still) . Then in last image after brass wheel buffing the bits and then spraying the lacquer clear coat -I think it it may blocked the metal interaction that created an opaque result with Elmer's - this now looks very acceptable - LED's are in transit - I will then decide if I want to add the Elmer's to the four smaller housings. Good call Daniel - thanks - PS: made no difference with the silicone application
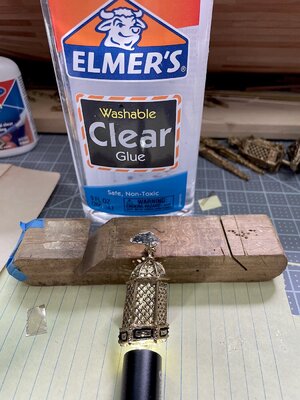
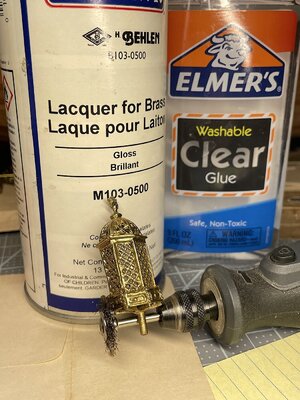
Oops - some spelling issues. too late
Cheers
 yes this is beyond just a simple hobby - you, and many others also keep the flame very bright...Hmmm did not try Epoxy - may give it a try. thanks
Daniel - yes, there is a silver lining with which you very much helped !!
Note that I mostly used the current kit’s lanterns as Guinea pigs, not the vintage kit's housings...
I was lucky enough to have acquired a vintage kit that I purchased from a MSW member, and was gifted the current issue for Father’s Day three years ago…
As I have mentioned before, Nigel and I had discussed the issues with the current kit’s poor quality metal bits. He was very aware of the lower quality of supplied and thankfully informed me!! Reiterating here; the vintage kit included solid 650+ solid bronze parts, whereas the current kit’s issues are white metal, apparently with bronze - that maybe are electroplated? Resulting in gold looking facings. but resulting in less detailed castings.
– again – YIKES – I could have, by some bad luck, received a super badly made example – nonetheless the factory workers that QC product before inserting such into sellable examples were MIA for this kit.
==========================
Ok, here what’s going on with my efforts at adding glass to the lantern housings…. Hey Sergal are you reading out this???? you should be IMO..


Here Daniel you came to the rescue -- initially Elmer's was also resulting in a too opaque look for me (less so, but still) . Then in last image after brass wheel buffing the bits and then spraying the lacquer clear coat -I think it it may blocked the metal interaction that created an opaque result with Elmer's - this now looks very acceptable - LED's are in transit - I will then decide if I want to add the Elmer's to the four smaller housings. Good call Daniel - thanks - PS: made no difference with the silicone application


Oops - some spelling issues. too late
Cheers
Last edited:
I have a sheet of mica for use in the windows of my model later. I thought mica worked well in your lanterns, judging from your photos. In any event, glad you found a solution that you like.
I'm happy that the clear finally worked for you. I would imagine there is a limit to the size of opening where it would work in a practical manor.
Daniel,
Yes that is also a potential issue - the other one has to do with the lantern housing domes - they should mostly be sealed precluding water entering from their tops. Need to address that as well..
Yes that is also a potential issue - the other one has to do with the lantern housing domes - they should mostly be sealed precluding water entering from their tops. Need to address that as well..
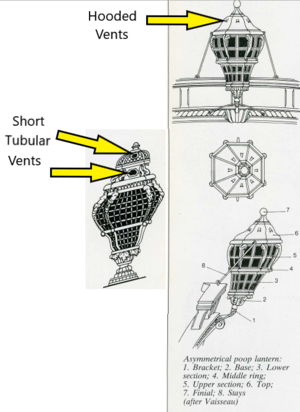
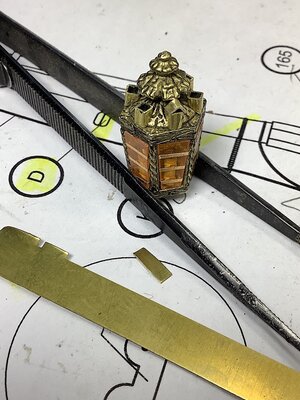
The addition of vents and vent hoods on top of stern lanterns is a detail which may be too small to be worth the effort on a model this size. The windows on the top dome would have glass, and the vents maybe easily spotted like the ones below or be a circumferential slot or slots in the dome that are not easy to spot. In any event, vents are necessary on the top and bottom of each lamp for air flow. Short tubular vents angled downward toward the outside will stop most rain from getting in. Hooded vents obviously have shelter from rain. On the crude Sergal lamp casting a vent could possibly be a circumferential vent under the star ornament at the top.

Kurt,
Thanks for your post and included images - very excellent information !!
I also learned about that when I decided to remove the first lantern that I had installed in the Vasa (aftermarket) . it was much too basic looking for that ship. I looked at images of the Batavia and took hints from that ship. BTW the original Vasa lantern was never recovered - Dr. Fred Hocker, when I spent time with him at the museum also mentioned that it actually may not have been installed for the maiden launch.
In any case, I bought another one and added a lot of scratch additional detailing. This one seems to be more appropriate looking. Oh and Nigel also
helped with a suggestion regarding the upper air vents - resulting in those small louver covers.
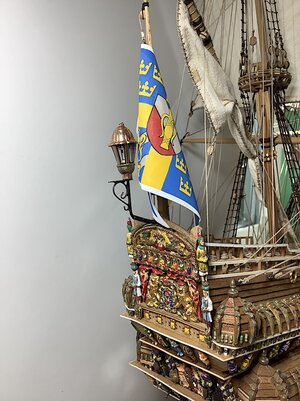
The SoS lantern will be. of course the bronze one that came with the old kit. I'm thinking of what to do with it - well all five actually. I like your idea
On the crude Sergal lamp casting a vent could possibly be a circumferential vent under the star ornament at the top. will explore a how to on that - thanks


Last edited:
Hello,
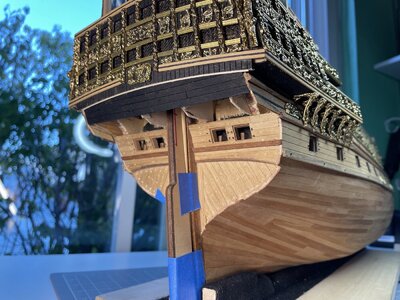
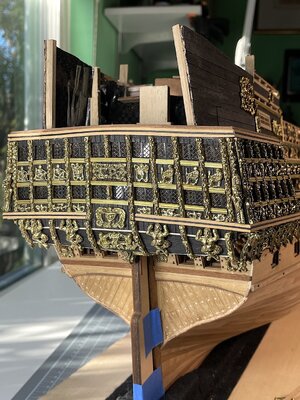
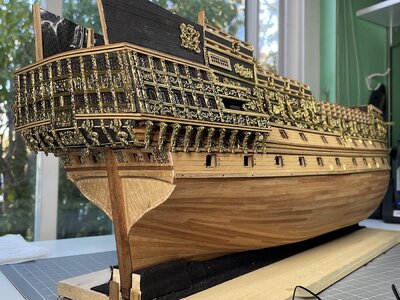
Continuing work with the stern. I now realize that I, much earlier during this build - built-in - a serious proportional error in judgment that is now badly haunting me. I'm trying to figure out a solution without having to, again, tear-out parts of the stern for a proper fix. It won't be an easy fix....Or I might just live with it yikes!!!
in the meantime here are three updated images - (kit rudder used for spacing will scratch build rudder using McKay's images as a guide).
Also I think that I will place a second order for LED's - need a few more --- thanks for dropping by, likes, and comments...
Regards,


- Joined
- Oct 11, 2021
- Messages
- 740
- Points
- 403

Hi John,
I really really really like all the changes you made to her. I am just wondering what the error is at the stern. I don't want to rub salt into open wounds, but just want to learn where the mistake lies, so I won't make it when building this beauty in the future.
Peter
I really really really like all the changes you made to her. I am just wondering what the error is at the stern. I don't want to rub salt into open wounds, but just want to learn where the mistake lies, so I won't make it when building this beauty in the future.
Peter
Peter,
It is entirely "mea culpa". I will post some images and an explanation of what I did not get right, along with more Sea Salt for my wound - haha
IMO it should not be any issue for your future build.
Daniel, as always thanks so much.....
It is entirely "mea culpa". I will post some images and an explanation of what I did not get right, along with more Sea Salt for my wound - haha
IMO it should not be any issue for your future build.
Daniel, as always thanks so much.....
Lots of gingerbread on that model. Fabulous work.


