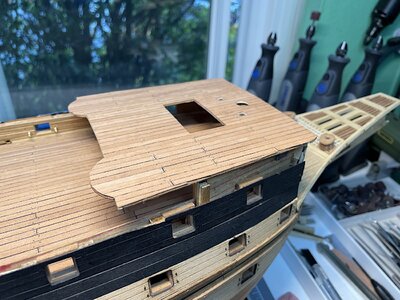
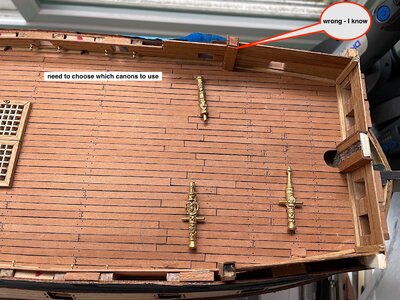
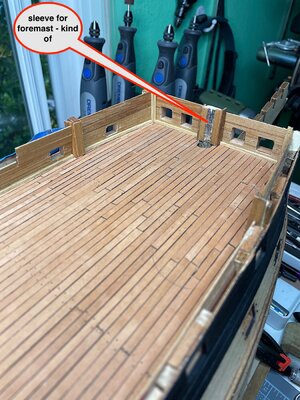
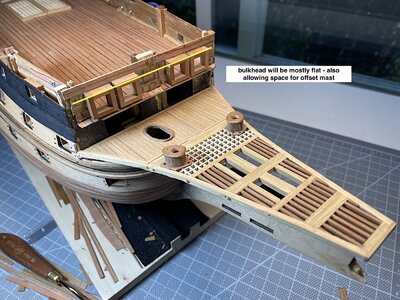
Sovereign of the Seas - Sergal 1:78 (with hopefully many added details)

Paul,
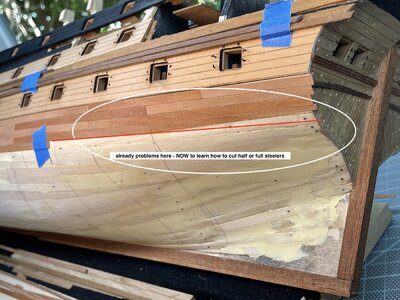
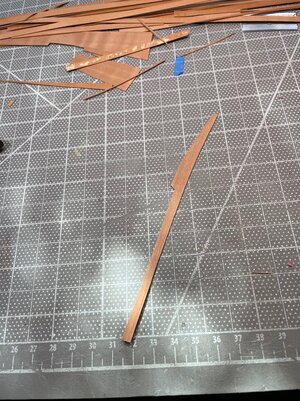
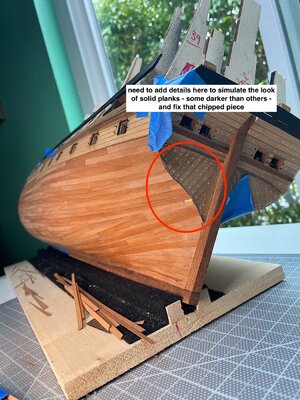
Thanks for your advice - noted - I will prob. have to accept some compromises. Veneer prob not an option in my case in that I want all the planks to be pear. I'll take a look on ebay poss a pear venner option available. Whatever I do just can't have any clinker effect

This is what I used - it is the correct thickness but not a perfect color match. But you are staining some pieces so it might work.
 
Paul:
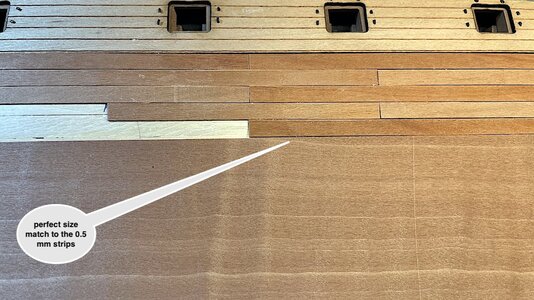
Just got the the veneer sheet that you suggested from this eBay vendor.
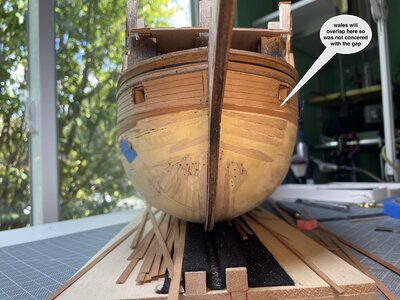
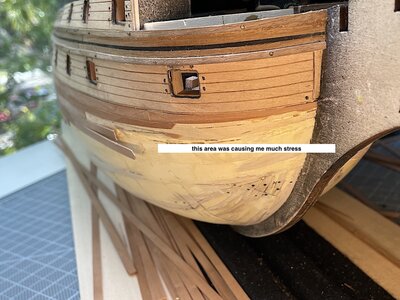
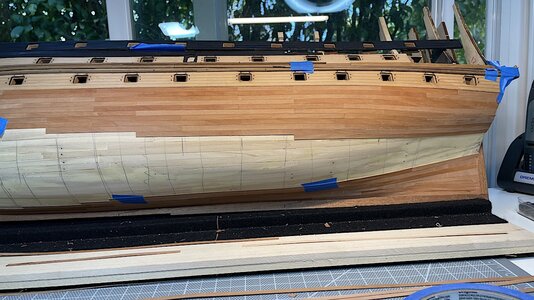
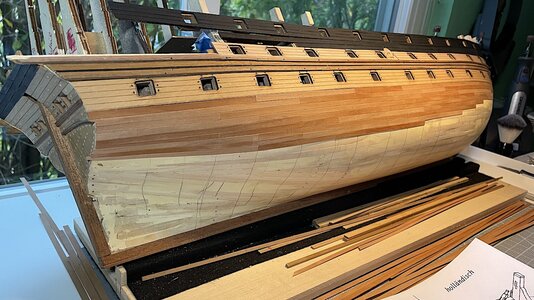
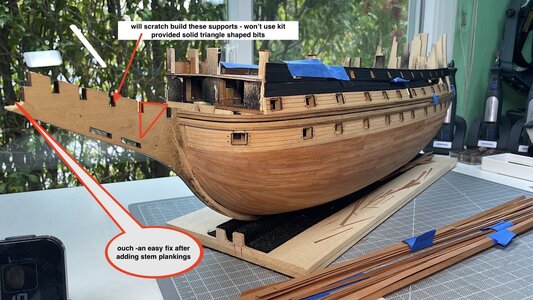
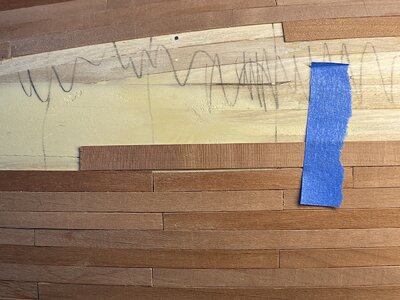
Wow - perfect match!!!. I can't thank you enough for helping me. Your suggestion and advice will help me save the lower hull's quality of work at the bow and stern - it was going to be, well a big visual and incorrect problem.

Oh and now not worried about having to cut several strips to get one to their correct shapes - I have enough for the next 100 builds haha
Again - great Beer Thank You indeed.

1.jpeg


2.jpeg


3.jpeg


4.jpeg
 
Last edited:
What do you use to cut the veneer into perfectly even strips?

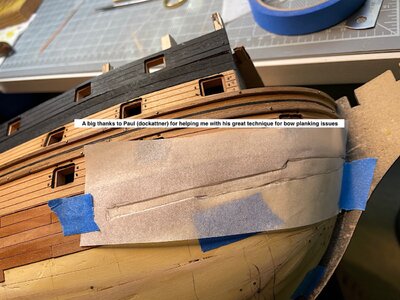
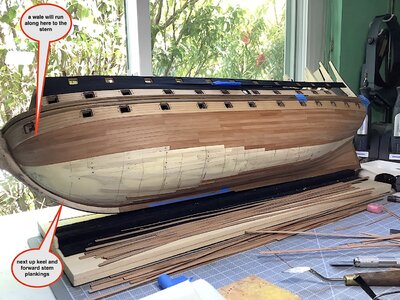
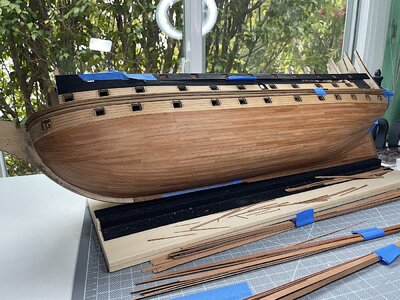
As for the stress of planking a bluff bow, that is perfectly understandable. In order to make sure the planking was not increasing curving in angle, planking was started both at the area above the waterline at the wale, and also from the bottom at the keel, and you close the hole at the point in the middle. It allows you to track the width and shape of the empty hole as the planks approach closure and adjust you plank width before things get too tight at the final layers that close the hole.
 
Kurt,
As always Thanks
noted as well - will follow your sage advice - will take a few days off just to get my bearing, and the do some practicing...as well as re-thinking how to proceed with planking per your technique.

PS: the venner came with advice saying that scissors and Xacto blades are not good choices - A safety razor and straight edge are the best - also making 3-4 passes to sever the wood fibers will produce the best results. and wood glue works very well - Have been using Titebond for years so all good here as well.

The seller also noted that he has a YouTube channel covering the basics (Volpe Woodworks) will check it out - prob not for we ship builders - but certainly some helpful advice may be useful.

Regards,
 
Paul:
Just got the the veneer sheet that you suggested from this eBay vendor.
Wow - perfect match!!!. I can't thank you enough for helping me. Your suggestion and advice will help me save the lower hull's quality of work at the bow and stern - it was going to be, well a big visual and incorrect problem.

Oh and now not worried about having to cut several strips to get one to their correct shapes - I have enough for the next 100 builds haha
Again - great Beer Thank You indeed.

View attachment 221104


View attachment 221105


View attachment 221106


View attachment 221107
John, I have been given SO MUCH help on this forum that I am delighted that I might get to finally contribute to another person's build.

Here is how I created the specially shaped pieces of sheet veneer at the bow:
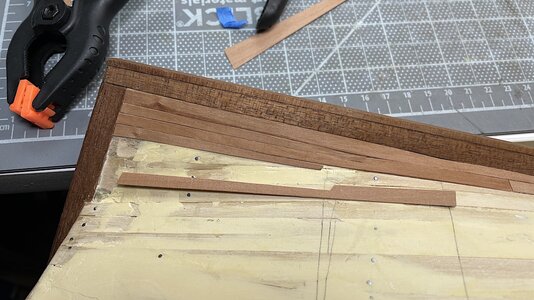
Working down from the wale I used strip material for as long as I could (until the edge bending became more than the material could tolerate). At some point (in my case it was only 2 or 3 strips below the lowest wale) you will notice the material is beginning to 'clinker' - that's when you switch over to the sheet veneer.

1. I would lay a normal strip along the hull of the ship until the piece wanted to start bending up near the curve of the bow...
2. I would terminate the strip at that point and then use a piece of paper to create a template for the shape needed...
3. I found it was helpful to 'imprint' the lower edge of the last successfully placed piece onto the paper by pressing the paper along the bottom edge of the last strip on the ship using my finger or a stick of wood...
4. I then cut along that imprinted crease in the paper (marking it with a pencil first helped me see the crease better)...
5. I would then keep test fitting the paper refining its shape until it was really close...
6. At the place where you join the piece you are making and the strip along the hull it should be 5 mm wide (or whatever your plank width is). I would then draw a pencil line that begins at 5 mm and tapers according to the needs of the narrowing hull. At the stem some pieces were as narrow as 2.5 mm. I would then cut the paper along that tapering line...
7. I then test fit the final paper template one more time refining as needed...
8. I then carefully traced the paper shape onto the veneer keeping the grain of the sheet veneer running in the direction of the strip as much as possible. You will still need to carefully bend the strip into place and it is very fragile across the grain...
9. I chose to cut out the piece using the tip of a very new #11 blade making several passes to cut through the wood... A light hand helped me follow my outline. You can't use a straight edge because the piece you are making will be curved. See this post: https://shipsofscale.com/sosforums/threads/vasa-1-65-deagostini.5904/post-140381
10. I then used a sanding stick to refine the shape test fitting over and over again...
11. I would then accidently break the piece while bending it into place and I would start all over again (always save the paper template!). There may have been a profanity muttered at that point but that's really none of your business...

As you can see I have not done you any favors. This is labor intensive and takes practice. After a bit I got quite adept at the process and then things went more smoothly.

I hope this works for you! I will be cheering you on!
 
11. I would then accidently break the piece while bending it into place and I would start all over again (always save the paper template!). There may have been a profanity muttered at that point but that's really none of your business...
:mad: How disappointing! You could have shared some truly innovative and unique profanity with the rest of us crew! My profanity is all worn out from over-use!
 
John, I have been given SO MUCH help on this forum that I am delighted that I might get to finally contribute to another person's build.

Here is how I created the specially shaped pieces of sheet veneer at the bow:
Working down from the wale I used strip material for as long as I could (until the edge bending became more than the material could tolerate). At some point (in my case it was only 2 or 3 strips below the lowest wale) you will notice the material is beginning to 'clinker' - that's when you switch over to the sheet veneer.

1. I would lay a normal strip along the hull of the ship until the piece wanted to start bending up near the curve of the bow...
2. I would terminate the strip at that point and then use a piece of paper to create a template for the shape needed...
3. I found it was helpful to 'imprint' the lower edge of the last successfully placed piece onto the paper by pressing the paper along the bottom edge of the last strip on the ship using my finger or a stick of wood...
4. I then cut along that imprinted crease in the paper (marking it with a pencil first helped me see the crease better)...
5. I would then keep test fitting the paper refining its shape until it was really close...
6. At the place where you join the piece you are making and the strip along the hull it should be 5 mm wide (or whatever your plank width is). I would then draw a pencil line that begins at 5 mm and tapers according to the needs of the narrowing hull. At the stem some pieces were as narrow as 2.5 mm. I would then cut the paper along that tapering line...
7. I then test fit the final paper template one more time refining as needed...
8. I then carefully traced the paper shape onto the veneer keeping the grain of the sheet veneer running in the direction of the strip as much as possible. You will still need to carefully bend the strip into place and it is very fragile across the grain...
9. I chose to cut out the piece using the tip of a very new #11 blade making several passes to cut through the wood... A light hand helped me follow my outline. You can't use a straight edge because the piece you are making will be curved. See this post: https://shipsofscale.com/sosforums/threads/vasa-1-65-deagostini.5904/post-140381
10. I then used a sanding stick to refine the shape test fitting over and over again...
11. I would then accidently break the piece while bending it into place and I would start all over again (always save the paper template!). There may have been a profanity muttered at that point but that's really none of your business...

As you can see I have not done you any favors. This is labor intensive and takes practice. After a bit I got quite adept at the process and then things went more smoothly.

I hope this works for you! I will be cheering you on!
Paul,

Wow -- thanks SO much for taking the time to step-by-step detail your technique - I have copied and pasted your instructions onto a Google Docs page -
to follow along as I continue planking the bow.
The results that you have achieved with your current Vasa build are so excellent. I had also downloaded several of the images from your log so as to get a "visual" now along with these instructions perfect !! Yes you have helped - I certainly will fill-in my own profanity hahaha - I've also been known to work 10-15 minutes on one bit of wood, and then have it break in my fingers -ggrrrrr.
--- So kind of you thanks again - When I finish this part of the build kudos will be noted as well

Sincerely,
 
Last edited:
Hi,
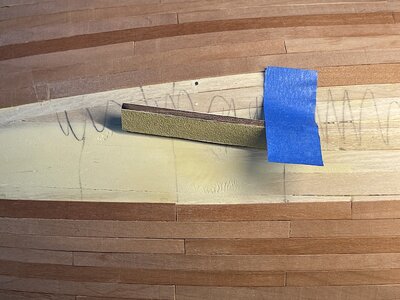
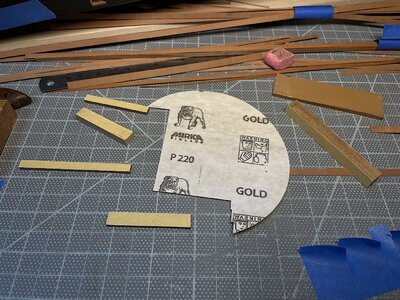
Want to share - I've learned much from other member’s techniques - this is a silly simple idea, but I have found it to be super helpful for many different needs where needed sanding areas are too small or hard to get to; In this case for planking this project -

I occasionally had minor differences in plank widths -and did not pay attention when gluing them into place. It, of course resulted in a larger problem when adding next plank. Also sometimes the plank curve alignment would cause problems for the next plank – these tiny wood sanding blocks were a great help

Have been using this for a long time. I use adhesive backed sanding discs, attach bits to various sizes of wood to create very useful sanding tools of any needed size - In this case 220 grit --- but you get the idea.

Cheers,

IMG_1418.jpeg


IMG_1419.jpeg


IMG_1420.jpeg
 
Hi,
Want to share - I've learned much from other member’s techniques - this is a silly simple idea, but I have found it to be super helpful for many different needs where needed sanding areas are too small or hard to get to; In this case for planking this project -

I occasionally had minor differences in plank widths -and did not pay attention when gluing them into place. It, of course resulted in a larger problem when adding next plank. Also sometimes the plank curve alignment would cause problems for the next plank – these tiny wood sanding blocks were a great help

Have been using this for a long time. I use adhesive backed sanding discs, attach bits to various sizes of wood to create very useful sanding tools of any needed size - In this case 220 grit --- but you get the idea.

Cheers,

View attachment 225874


View attachment 225875


View attachment 225876
You may want to try dry fitting the planks for the sizing check, then sand as needed with rechecks before setting them with glue. Just a suggestion. Rich
 
PT-2

Yes you are correct - this is what I had done for almost all planks, a few got away from me - that said I also just wanted to share the generic idea for small custom made sanding blocks that could have other applications.
 
Paul,

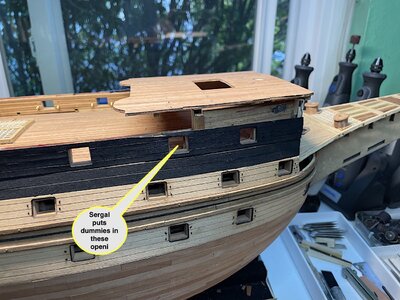
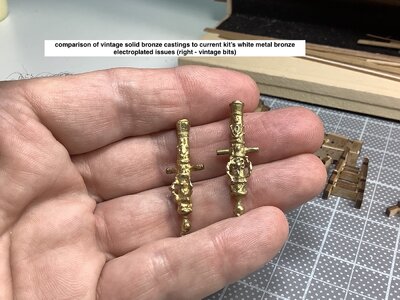
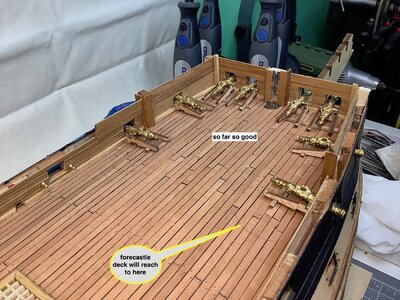
Thanks for dropping by - No I don't plan on tinting these current kit's electroplated guns, and from their location only the barrels will only mostly be visible from the gun ports.
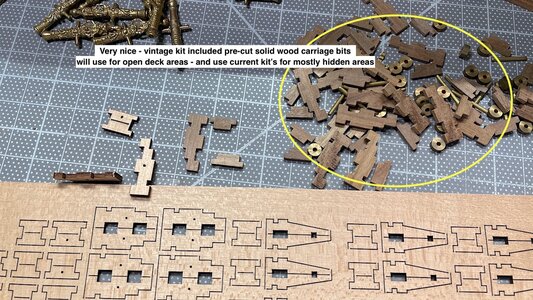
That said I intend on using all of the vintage solid bronze - faded - guns for all of the other visible deck locations. These old 40 year old bronze guns, from their vintage kit look very good faded - will not polish them; So these forward guns need to more-or-less match the look of all others, including the upper and lower dummy 50+ guns as well.
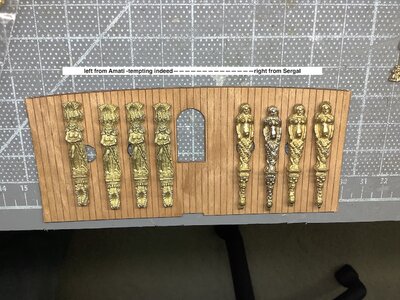
but will polish the other hundreds of bronze decorative bits that adorn this ship however. Using a Dremel brass polishing wheel brings these very old bronze bits to life - been experimenting - here is one image of the great change. Once polished will spray a special clear lacquer to seal-in the gloss. Since this ship was adorned with some much gold leafing, polishing the bronze just looks perfect.

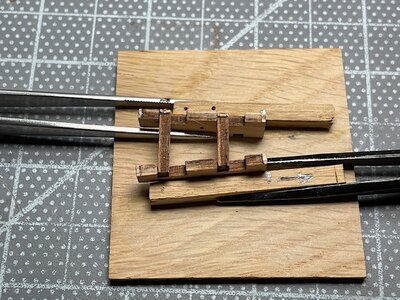
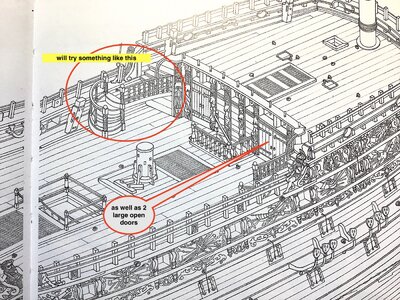
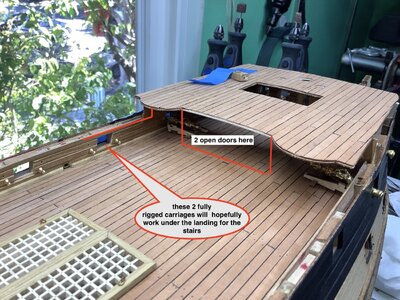
PS: I will not be using those carriages. Update soon - thanks so much for your interest in this build log very much appreciated.

Regards,

Image a bit flat colors are much warmer, especially the polished Sergal figure ---- need to spend time learning how to "really learn" how to use the iPhone 12 camera - not there yet.


IMG_2345.jpg
 
Paul,

Thanks for dropping by - No I don't plan on tinting these current kit's electroplated guns, and from their location only the barrels will only mostly be visible from the gun ports.
That said I intend on using all of the vintage solid bronze - faded - guns for all of the other visible deck locations. These old 40 year old bronze guns, from their vintage kit look very good faded - will not polish them; So these forward guns need to more-or-less match the look of all others, including the upper and lower dummy 50+ guns as well.
but will polish the other hundreds of bronze decorative bits that adorn this ship however. Using a Dremel brass polishing wheel brings these very old bronze bits to life - been experimenting - here is one image of the great change. Once polished will spray a special clear lacquer to seal-in the gloss. Since this ship was adorned with some much gold leafing, polishing the bronze just looks perfect.

PS: I will not be using those carriages. Update soon - thanks so much for your interest in this build log very much appreciated.

Regards,

Image a bit flat colors are much warmer, especially the polished Sergal figure ---- need to spend time learning how to "really learn" how to use the iPhone 12 camera - not there yet.

View attachment 235080
She's gonna be shiny! Love your work!
 
Oldflyer, The changes that need to be made to the Sergal kit to get all the parts in the correct position are pretty frustrating. It's great that you're taking the time to fix all those and make the model better! The hard part is figuring out where things are incorrect and rethinking them before they become inaccessible or require something like reworking deck planks or moving holes. Keep at it. Your ship is looking great!
 
Back
Top