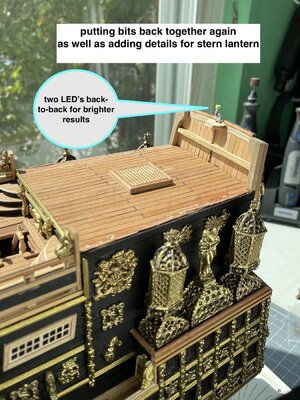
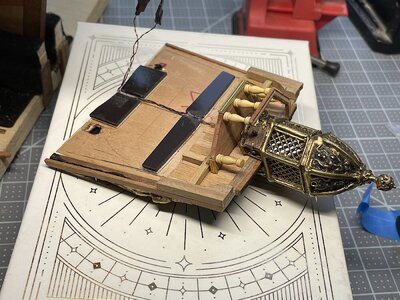
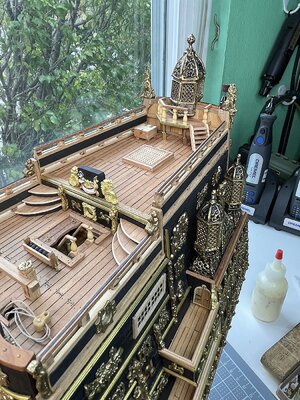
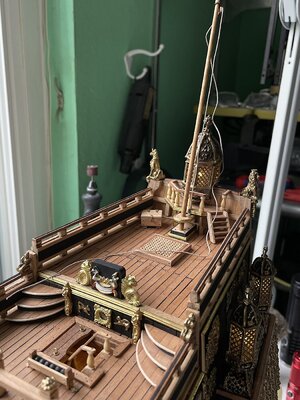
Sovereign of the Seas - Sergal 1:78 (with hopefully many added details)

Nigel,

OH!! you did it again!! – I had not even thought of, or had it occurred to me; your absolutely perfect solution. The lights being an afterthought, and as Kurt (along with his super nice comment - thanks! noted just above – it would have been a mess removing the case just to turn the lights on/off each time, And I was not prepared to go deep into the ship to drill holes for the on/off switches through the keel – or thereabouts.

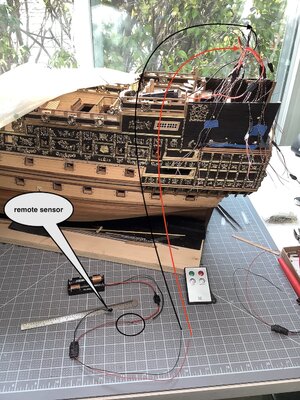
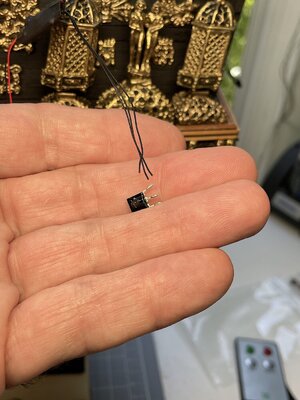
Visited Evan Designs – OF COURSE they have exactly the remote that works with my 3V lights and the two AAA battery packs. “Voila” just ordered the remote and two separate sensors that will be activated by a single remote control.

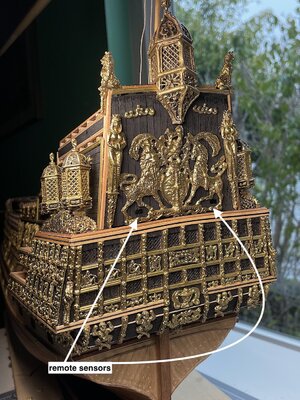
Remote will work through plexiglass - but not through a solid (wood) barrier, so will just need to cut two very tiny slit holes at the stern panel allowing the remote so see the sensor tips.
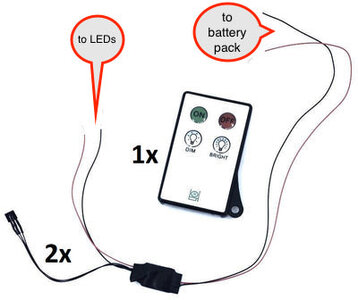
LEDRemoteControlandDimmer-2_Receiver_1024x1024_2x_138a56e5-1c36-42fa-b442-a46673cc2be8_400x copy.jpg

THANKS so much (again) BeerFirst Place Metal

Cheers my friend – of many seasons indeed….
 
Wow. Certainly ambitious John, but looks like you're on top of everything. Sorry if already asked, will you adjust the timing of your flickering light so that they are not all flickering in unison like the USMC drill team?


Unlike these guys, I'd think you'd want to have your lamps flickering un-synched, yes?
 
Hi John

Your illuminated cabins are going to look fantastic when all boxed in. Just a suggestion (yes I am at it againRedface), you can get cheap remote control fobs and switches off Ebay. This isn't something I have looked at in detail but may be an easier and more "flash" option to switch your lights on and off meaning you only need access to replace batteries. Another option is a magnetic reed switch which is activated by placing an item on the deck to activate, for example a barrel with a magnet inside.These are often used by RC modellers to turn the electrics on and off
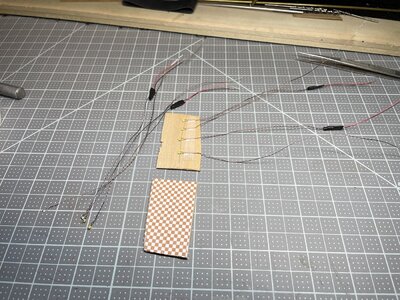
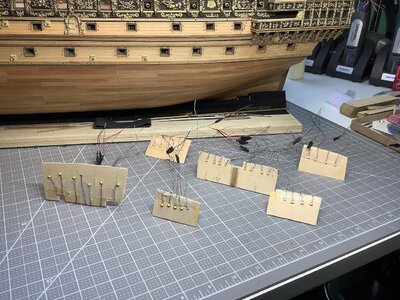
Kind Regards

Nigel
Magnetic switches! GENIUS idea. I'm going to find a way to use that, Nigel!
 
Hoss6262,
Oops – sorry – yes, you had asked that before. Very astute question. Each of the flickering LED’s has its own resistor. As such they will not all flicker in consort.

Had there been only one resistor that attached to all of them; they would flicker in unison – and, as you said certainly not wanted. Re: the flickering effect – these lights do not just turn on and off but stay lit just very briefly dim and then return to full bright – this effect is subtle and very effective looking.
I will also blend some non-flickering LEDs within the same areas so as to “soften-a-bit” the dimming effect. Hopefully making the “look” even more realistic.

Kurt,
FYI – the remote and the two receivers actually work using infrared (as do TV remotes) cheap and effective technology. I spoke with staff at Evan Designs – their remotes will work from a distance of up to 30 feet (9.5 meters).

It also needs to be noted that with the battery packs on/off button left in the ON positions – a very small trickle is always being drained from the AAAs as they wait for instructions from the remote. To preclude this the on/off switches need to be OFF in between uses.

Not an issue for me - may have to change out the batteries just a bit more often…but the advantage of the remote (for me) far out ways that minor inconvenience.
Had I added lights much earlier in the build – then on/off buttons would have been incorporated with the case base, as I did for the Santisima Cross Section.

Regards,
 
Hoss6262,
Oops – sorry – yes, you had asked that before. Very astute question. Each of the flickering LED’s has its own resistor. As such they will not all flicker in consort.

Had there been only one resistor that attached to all of them; they would flicker in unison – and, as you said certainly not wanted. Re: the flickering effect – these lights do not just turn on and off but stay lit just very briefly dim and then return to full bright – this effect is subtle and very effective looking.
I will also blend some non-flickering LEDs within the same areas so as to “soften-a-bit” the dimming effect. Hopefully making the “look” even more realistic.

Kurt,
FYI – the remote and the two receivers actually work using infrared (as do TV remotes) cheap and effective technology. I spoke with staff at Evan Designs – their remotes will work from a distance of up to 30 feet (9.5 meters).

It also needs to be noted that with the battery packs on/off button left in the ON positions – a very small trickle is always being drained from the AAAs as they wait for instructions from the remote. To preclude this the on/off switches need to be OFF in between uses.

Not an issue for me - may have to change out the batteries just a bit more often…but the advantage of the remote (for me) far out ways that minor inconvenience.
Had I added lights much earlier in the build – then on/off buttons would have been incorporated with the case base, as I did for the Santisima Cross Section.

Regards,
Since the batteries have to go inside the ship, why not go with A/C powered option, running a line down through the bottom the cabinet, so you don't have to take the glass off to change batteries? Also, if the batteries get too old, they dump acid inside your precious model!
 
Hello,

Actually, I’ve been very tempted to keep this one as a hull only model. Truncating the masts, resulting in a much smaller footprint. Having finished very similar back-to-back rigging work for the Vasa, and for the Santisima, I’m not super motivated to again revisit those very similar parts of a project. TBD….

So, Kurt to your suggestion – yes, your points are well taken, but AAAs will stay within stern. At this stage of the build, it’s really too late to reinvent other solutions. The remote seems the best solution at this time. And with a hull only model its plexiglass case will be small, light, as well as easily removable.


LEDs update PS: Evan Designs ROCKS!!!

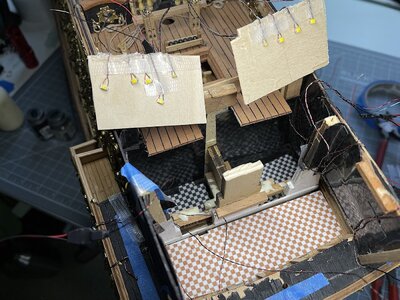
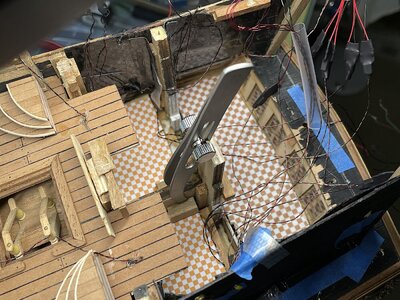
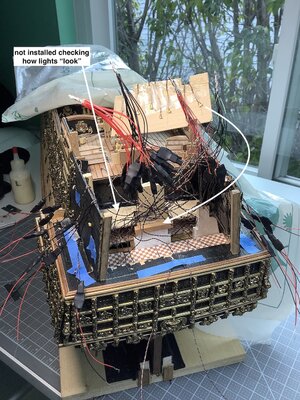
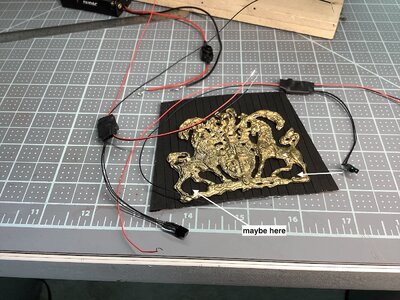
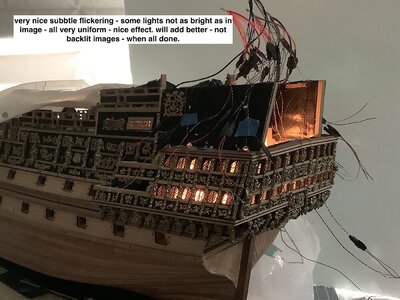
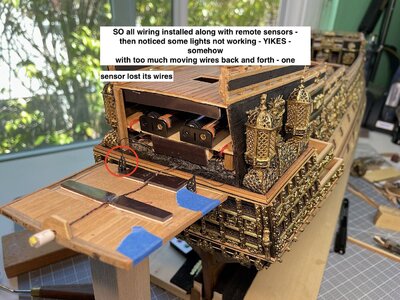
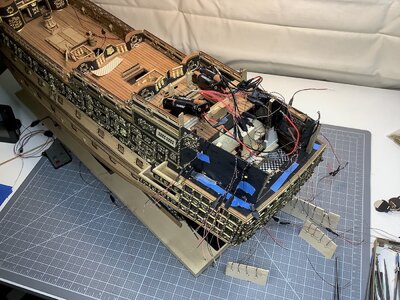
Lots of hours installing, so far, 29 LEDs some with flickering as well as some static (all warm white)

Eighteen others have been added to needed locations (balcony walkways, and for lanterns) but all need to be secured and positioned into their proper places. It’s also important to aim the LEDs for best visual effect.

Still to do….

•install upper rear quarters ceiling into place (that’s next)

•attach its wiring looms for the seven lights,

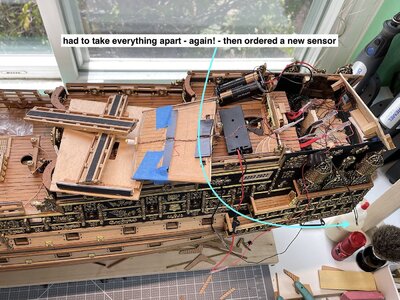
•clean up the wiring jungle to make room for both AAA battery packs

•connect remote sensors to all lights and battery packs,

•attach two battery packs, to their permanent locations.

•make “candle looking” cylinders for the five stern lanterns,

•seal any light leaks to the outside,

•re-attach poop deck,

•cut two very small openings in rear facing stern upper panel for the remote sensors,

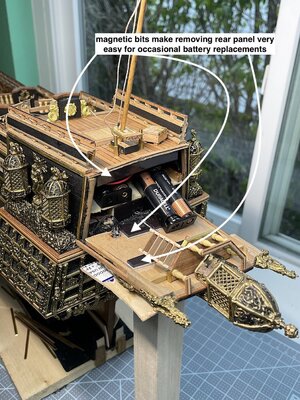
•make a magnetic connector to that rear panel as well (for easy access to batteries)

I'm repeating myself this would have been SO much easier had I intended on lights much earlier in this project hahaha


Thanks for dropping by, likes and comments all much appreciated.

1.jpeg2.JPG3.JPG4.jpeg5.jpeg6.JPG7.JPG8.JPG9.JPG
 
Well John, all the wiring, batteries temp display boards look intimidating as all get out. However, I imagine the backside of a 747's instrument panel would make this look like a grade schoolers science project. I'm looking forward to the final effect.
 
I admire your strategic thinking. So many individual tasks/events to consider, some dependent on others. The more individual elements the more realistic and impressive the display. Of course the more individual elements the more complex the design and potential points of failure. Planning, contingency planning and redundant design. It seems you have invested the time to consider all of the critical aspects. I aspire to, one day, reach your level of ambition. Seeing what you've achieved in your SoS build, I have no doubt you will achieve your goal of producing a very impressive SoS experience. Really well done John!
 
Daniel20 – looks can be deceiving – It’s all basic segregating all the + red wires to each other then all the blacks together. Though I’m segregating the flickering from the non into separate black/red harnesses. Though I cannot exceed thirty lights to a single battery pack, so may have to do some last-minute rearranging for the two AAA packs.


Hoss6262 thanks for your always very encouraging post. Hopefully the results will be worth the extra time, the removing of pre-installed sections, as well as the extra costs involved adding lights. I am enjoying the challenge that this has created - so far..

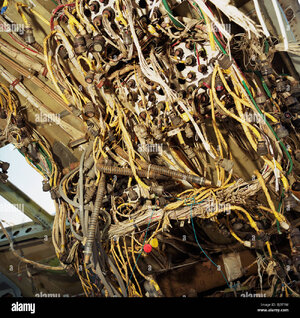
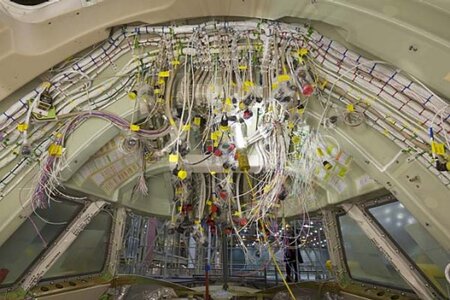
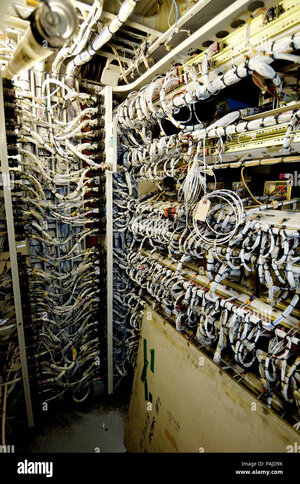
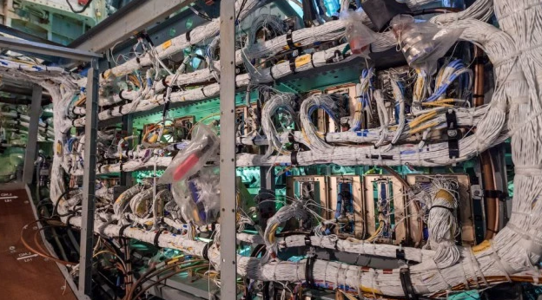
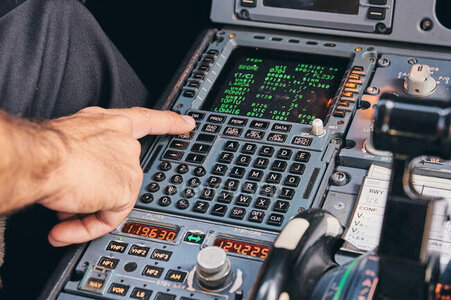
And Daniel to your liked comparison here are some images of 747s partial wiring hahaha….

images 1 and 2 – flight deck
images 3 and 4 are from under the flight deck.

Adding the fuselage and wings in the aggregate 747s have 171 (275km) miles of wiring, weighing 3,500 lbs. (1,587 kilos) (aluminum wiring predominant for weight reduction compared to copper) 5 miles of tubing (8km) and 100s of wiring harnesses as well.

747-400 has six million parts half of which are fasteners.

PS: Airbus A350 has 330 miles of wiring (531 km)

PS2: the absolute genius of all of this are the engineers that have such superlative and esoteric skill sets, as to be able to understand how to create these machines.
Driving them by comparison, is sort of child's play IMO - as for anything - once one knows how to - its an easy accomplishment. Especially today with the massive onboard computer backups that tell crews what to do throughout the operation of these machines from cold start (what is known as a dark cockpit), to later landings, and if crews make mistakes flightdeck computers won't allow most mistakes to occur during flight operations .....


Cheers,

in-the-dust-of-the-arid-sonoran-desert-are-the-boeing-747-cockpit-BJ3T1M.jpg1412043219039.jpgbundles-of-electrical-wires-in-avionics-bay-below-the-main-deck-during-an-inspection-at-basco-...jpg587ddf799dc83stryimg.png
 
Last edited:
Daniel20 – looks can be deceiving – It’s all basic segregating all the + red wires to each other then all the blacks together. Though I’m segregating the flickering from the non into separate black/red harnesses. Though I cannot exceed thirty lights to a single battery pack, so may have to do some last-minute rearranging for the two AAA packs.


Hoss6262 thanks for your always very encouraging post. Hopefully the results will be worth the extra time, the removing of pre-installed sections, as well as the extra costs involved adding lights. I am enjoying the challenge that this has created - so far..

And Daniel to your liked comparison here are some images of 747s partial wiring hahaha….

images 1 and 2 – flight deck
images 3 and 4 are from under the flight deck.

Adding the fuselage and wings in the aggregate 747s have 171 (275km) miles of wiring, weighing 3,500 lbs. (1,587 kilos) (aluminum wiring predominant for weight reduction compared to copper) 5 miles of tubing (8km) and 100s of wiring harnesses as well.

747-400 has six million parts half of which are fasteners.

PS: Airbus A350 has 330 miles of wiring (531 km)

PS2: the absolute genius of all of this are the engineers that have such superlative and esoteric skill sets, as to be able to understand how to create these machines.
Driving them by comparison, is sort of child's play IMO - as for anything - once one knows how to - its an easy accomplishment. Especially today with the massive onboard computer backups that tell crews what to do throughout the operation of these machines from cold start (what is known as a dark cockpit), to later landings, and if crews make mistakes flightdeck computers won't allow most mistakes to occur during flight operations .....


Cheers,

View attachment 367255View attachment 367256View attachment 367257View attachment 367258
Thank you for these awesome pictures, John.
 
Daniel20 – looks can be deceiving – It’s all basic segregating all the + red wires to each other then all the blacks together. Though I’m segregating the flickering from the non into separate black/red harnesses. Though I cannot exceed thirty lights to a single battery pack, so may have to do some last-minute rearranging for the two AAA packs.


Hoss6262 thanks for your always very encouraging post. Hopefully the results will be worth the extra time, the removing of pre-installed sections, as well as the extra costs involved adding lights. I am enjoying the challenge that this has created - so far..

And Daniel to your liked comparison here are some images of 747s partial wiring hahaha….

images 1 and 2 – flight deck
images 3 and 4 are from under the flight deck.

Adding the fuselage and wings in the aggregate 747s have 171 (275km) miles of wiring, weighing 3,500 lbs. (1,587 kilos) (aluminum wiring predominant for weight reduction compared to copper) 5 miles of tubing (8km) and 100s of wiring harnesses as well.

747-400 has six million parts half of which are fasteners.

PS: Airbus A350 has 330 miles of wiring (531 km)

PS2: the absolute genius of all of this are the engineers that have such superlative and esoteric skill sets, as to be able to understand how to create these machines.
Driving them by comparison, is sort of child's play IMO - as for anything - once one knows how to - its an easy accomplishment. Especially today with the massive onboard computer backups that tell crews what to do throughout the operation of these machines from cold start (what is known as a dark cockpit), to later landings, and if crews make mistakes flightdeck computers won't allow most mistakes to occur during flight operations .....


Cheers,

View attachment 367255View attachment 367256View attachment 367257View attachment 367258
Good morning John. I'm never going to fly again.....:p. Cheers Grant
 
One last - off topic - thought - An issue that has become a worldwide industry problem (not with any American carriers* ) has to do with certain lack of experience of young first officers with very little time "in seat" (relatively speaking)- many are trained at an airline's ground school or farmed out to Flight Safety in USA)
They are mostly taught to understand the computer systems and how to interact with them and understand conflicts that may arise during flights. Many have minimal actual flight experience - SO in the event of having to completely manually fly the machine the lack of time in seat and experience could have negative impacts. They must however still pass appropriate simulator tests. Then when active on-line learning continues sitting in right seat with senior captains... I've seen videos of "kids" with three shoulder stripes sitting in the right seats of A380s - Yikes I think???

Currently after retracting the gears - a flip of an other switch transfers all flight operation to computers including through later landings if wanted by crews. That is assuming that ATC does not alter what was keyed into the flight management system keys before take-off for a given flight cycle. Some airlines require crews to keep autopilots ON almost to the flair at landing. (that was the Asiana problem at SFO - auto pilot needed to be turned off for that landing at SFO - crews were not up-to-snuff- with setting all manual switches for hands on landing.

That said, travelling by air is still the safest form of transportation worldwide.


*All USA registered airlines require new applicants to have at least 1,500 hours of flight experience to apply for a job - up from 250 minimum hours some years ago.

Sorry - I tend to go off topic a bit too often - need to resist the urge

focused_373000702-stock-photo-crop-anonymous-male-pilot-using.jpg
 
Terry,

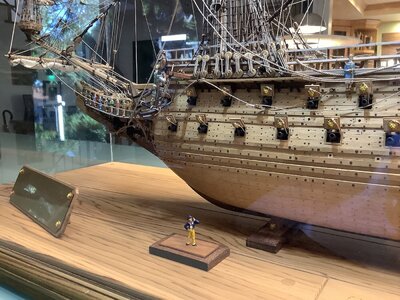
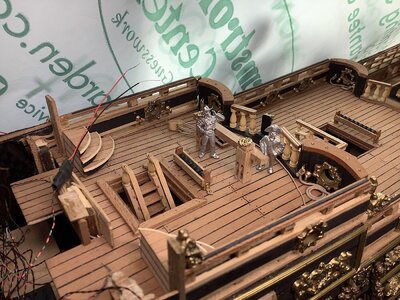
Thanks so much for your very kind and much appreciated comment. To your question, I have also seen excellent logs in which builders also add human
figures - That can be indeed a great addition for extra detailing!!!.

For me I am satisfied with only adding one figure to allow for scale reference purposes to the ship - as I did with the Vasa, and as I will do with this project.
Finding correct scale figures can be an issue.
PS: The Vasa figure is actually about 1.5mm too short. - I have a replacement but need to eventually paint and change that sailor.

For the Sovereign figure's scale is correct - got lucky.

IMG_2842.JPGIMG_2846.JPG
 
Last edited:
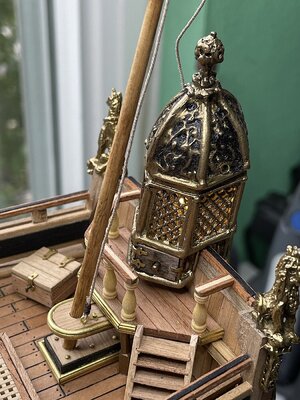
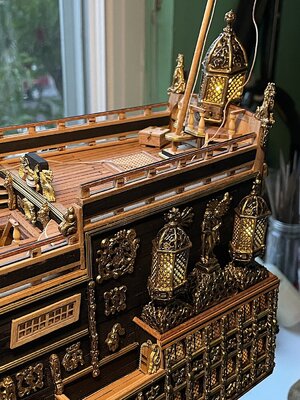
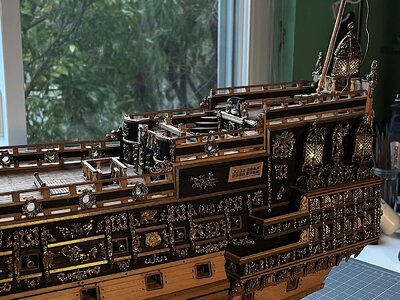
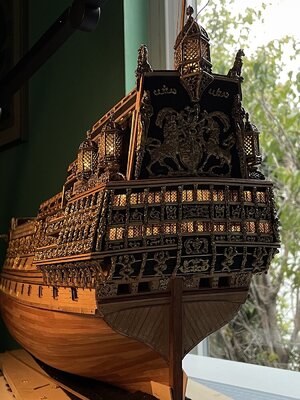
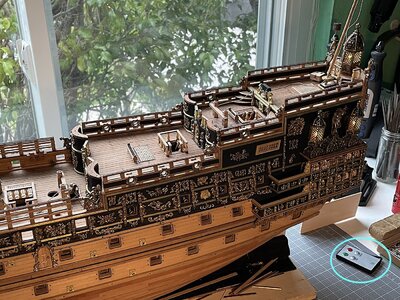
Lighting and stern updates

Finished up this section of the project - not without its it's "7 words that you can't say on TV" - used only three hahaha

Images do the talking - PS: need to record a quick video that highlight the great subtle flickering effect of these LED's
50 all together all purchased at Evan's Design along with battery packs, remote sensors and its control. Will start another youtube channel - the one that I now have is only related to aviation - don't want to mix that one up. Once the video is up I will copy/paste the link for those who may be interested....Now onto the weather deck gun carriages -

Thanks for dropping by much appreciated.

1.jpeg2.jpeg3.jpeg4.jpeg5.jpeg6.jpeg7.jpeg8.jpeg9.jpeg10.jpeg11.jpeg12.jpeg13.jpeg14.jpeg
 
Last edited:
Lighting and stern updates

Finished up this section of the project - not without its it's "7 words that you can't say on TV" - used only three hahaha

Images do the talking - PS: need to record a quick video that highlight the great subtle flickering effect of these LED's
50 all together all purchased at Evan's Design along with battery packs, remote sensors and its control. Will start another youtube channel - the one that I now have is only related to aviation - don't want to mix that one up. Once the video is up I will copy/paste the link for those who may be interested....

Now onto the weather deck gun carriages - received two orders from Drydock - Awesome single and double blocks !!!! along with other bits....

Thanks for dropping by much appreciated.

View attachment 375214View attachment 375215View attachment 375216View attachment 375217View attachment 375218View attachment 375219View attachment 375220View attachment 375221View attachment 375222View attachment 375223View attachment 375224View attachment 375225View attachment 375226View attachment 375227
Masterful rework! The magnetic strips to hold the transom and allow access are genius. The model look gorgeous, John.
 
Lighting and stern updates

Finished up this section of the project - not without its it's "7 words that you can't say on TV" - used only three hahaha

Images do the talking - PS: need to record a quick video that highlight the great subtle flickering effect of these LED's
50 all together all purchased at Evan's Design along with battery packs, remote sensors and its control. Will start another youtube channel - the one that I now have is only related to aviation - don't want to mix that one up. Once the video is up I will copy/paste the link for those who may be interested....

Now onto the weather deck gun carriages - received two orders from Drydock - Awesome single and double blocks !!!! along with other bits....

Thanks for dropping by much appreciated.

View attachment 375214View attachment 375215View attachment 375216View attachment 375217View attachment 375218View attachment 375219View attachment 375220View attachment 375221View attachment 375222View attachment 375223View attachment 375224View attachment 375225View attachment 375226View attachment 375227
Good morning John. You have owned this. Without blowing your trumpet too much ;), you deserve the accolades like ingenious, perseverance, talent etc. This is impressive . Cheers Grant
 
Back
Top