With your saw blade options and this machine you can schedule a saw dust part at any time.While I was on ebay I also came across these little saw blades, I used to buy them from Mitre 10 hardware store but they stopped selling them, they are slightly smaller than the proxxon blades, the proxxon are 85mm x 1.7 mm, these are 76 mm x 1.2mm, they cut beautifully,
View attachment 261109
The Worx 76mm x 1.2mm blade.
View attachment 261111
and the worx blade laid over the top of the 85mm blade,
View attachment 261112
I bought four of them for AUD $40 including postage,
View attachment 261113
and my other Hyuda saw waiting for a new switch,
thanks for looking, hope this helps someone out,
best regards john,
-

Win a Free Custom Engraved Brass Coin!!!
As a way to introduce our brass coins to the community, we will raffle off a free coin during the month of August. Follow link ABOVE for instructions for entering.
-

PRE-ORDER SHIPS IN SCALE TODAY!
The beloved Ships in Scale Magazine is back and charting a new course for 2026!
Discover new skills, new techniques, and new inspirations in every issue.
NOTE THAT OUR FIRST ISSUE WILL BE JAN/FEB 2026
You are using an out of date browser. It may not display this or other websites correctly.
You should upgrade or use an alternative browser.
You should upgrade or use an alternative browser.
Steam powered wooden Drifter trawler, Formidable LT100, 1/20 scale by neptune
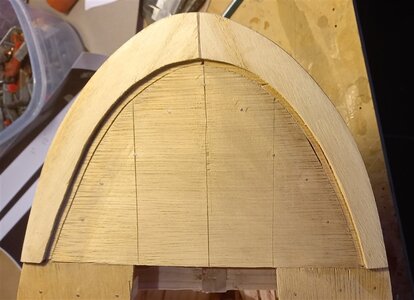
Just coming to the stage of adding the covering boards, there is a part on the top corner of one of the sheets of plans which shows the covering boards that go around the stern, these cover boards are 100mm thick and at 1/20 scale they are 5mm thick, compared to the boards that run from the bow to where the stern rounds off, these side boards are 63mm thick so they are 3.15mm thick at 1/20 scale, I had left the sub deck 4.5mm - 5mm below the deck level, so I can use some timber 5mm thick for around the stern area boards, and I have some timber boards that are 3.2mm thick that I can use for the side cover boards, but first I will have to raise the sub deck for the side cover boards by approx just under 2mm, I will cut the timber as required and to the sizes needed so that everything will flow, or Sink, Lol,
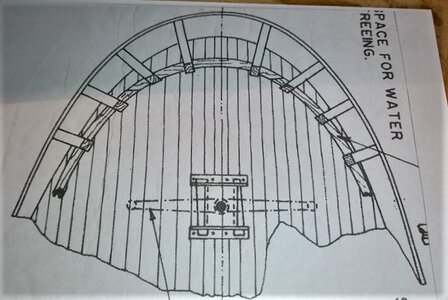
So I photo copied the plan of the stern area, which I thought came out OK,
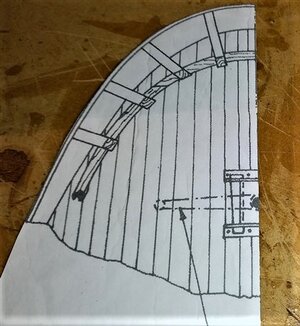
next I folded it in half down the middle line and cut it to the outside line,
so that when it is opened up you should have an exact copy of each side,
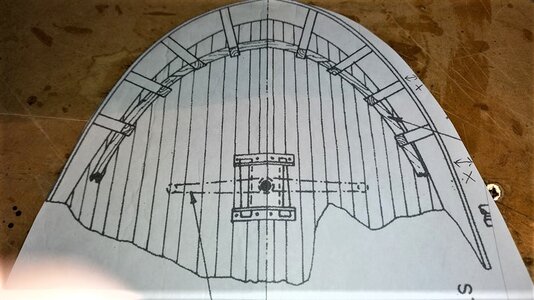
But when I opened it up this is what i had, you can see on the right side that it does not match the left side see where the X's are, so be careful
when using these plans, you can also see the planks on the deck are different widths,
thanks for looking,
best regards John.
,

So I photo copied the plan of the stern area, which I thought came out OK,

next I folded it in half down the middle line and cut it to the outside line,
so that when it is opened up you should have an exact copy of each side,

But when I opened it up this is what i had, you can see on the right side that it does not match the left side see where the X's are, so be careful
when using these plans, you can also see the planks on the deck are different widths,
thanks for looking,
best regards John.
,
Last edited:
You are quite right John,Just coming to the stage of adding the covering boards, there is a part on the top corner of one of the sheets of plans which shows the covering boards that go around the stern, these cover boards are 100mm thick and at 1/20 scale they are 5mm thick, compared to the boards that run from the bow to where the stern rounds off, these side boards are 63mm thick so they are 3.15mm thick at 1/20 scale, I had left the sub deck 4.5mm - 5mm below the deck level, so I can use some timber 5mm thick for around the stern area boards, and I have some timber boards that are 3.2mm thick that I can use for the side cover boards, but first I will have to raise the sub deck for the side cover boards by approx just under 2mm, I will cut the timber as required and to the sizes needed so that everything will flow, or Sink, Lol,
View attachment 270393
So I photo copied the plan of the stern area, which I thought came out OK,
View attachment 270396
next I folded it in half down the middle line and cut it to the outside line,
so that when it is opened up you should have an exact copy of each side,
View attachment 270397
But when I opened it up this is what i had, you can see on the right side that it does not match the left side see where the X's are, so be careful
when using these plans, you can also see the planks on the deck are different widths,
thanks for looking,
best regards John.
,
Great to see an update.
I have also found a few errors in the drawings, check and check again.
Trouble is I then get confused.
Cheers,
Stephen.

Building up the sub deck to the right height for the side cover boards,
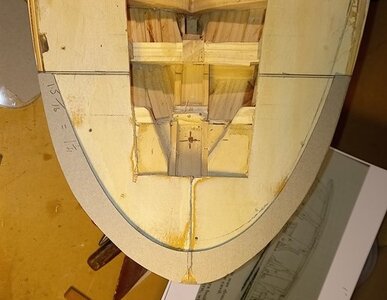
Making the template for the thicker stern cover boards,
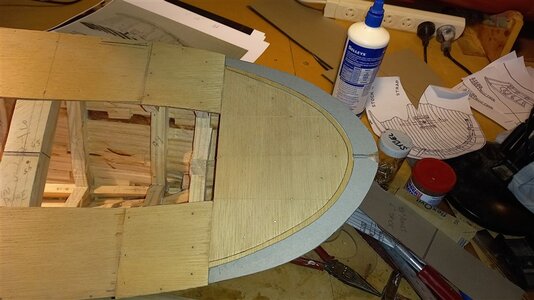
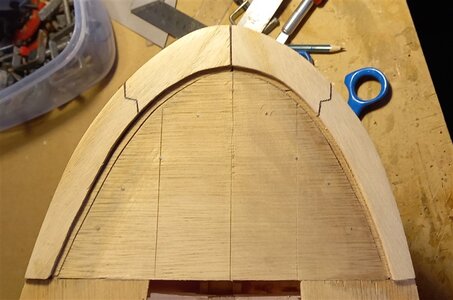
thats all the sub deck raised including the infill between the stern cover boards,
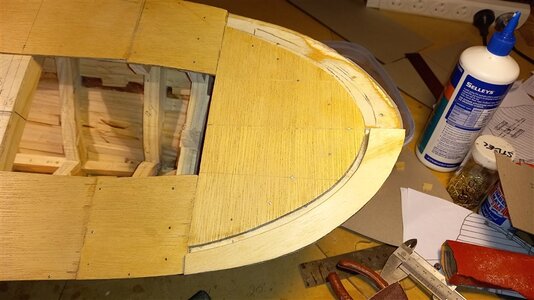
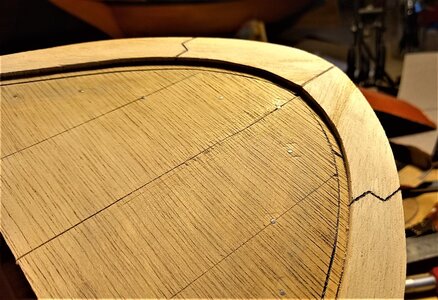
and checking for fit the port side cover board, stupid me was so interested in getting them made to fit right that I
forgot that they were made in three parts and scarfed together, luckily there is a stern knee that hopefully will sit
over the center join and i will cut the scarfs where they should go, to much speed and not enough thinking,
.
Great progress John.
Cheers,
Stephen.
Cheers,
Stephen.
- Joined
- Apr 10, 2020
- Messages
- 654
- Points
- 353

Looking good ,John
What section had your keel at 1/20 scale?
After seeing the build thread again I got an ideea to resolve my problem with Janet,I will make the keel with a 10x10 mm walnut strip with a groove of 6 mm x 3mm where to insert the plywood used initially for keel in my build.That way I can make the bond with the model and have a straight line for rudder just as in your build
Kind regards
Daniel
This steamer is getting more exciting to envision a completed working vessel. Rich (PT-2)Looking good ,John
What section had your keel at 1/20 scale?
After seeing the build thread again I got an ideea to resolve my problem with Janet,I will make the keel with a 10x10 mm walnut strip with a groove of 6 mm x 3mm where to insert the plywood used initially for keel in my build.That way I can make the bond with the model and have a straight line for rudder just as in your build
Kind regards
Daniel
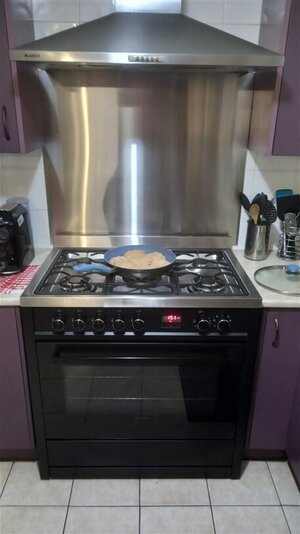
Yesterday I had a bit of a cook up, Tuna cakes, it gave me a bit of a chance to try out the new cooker,
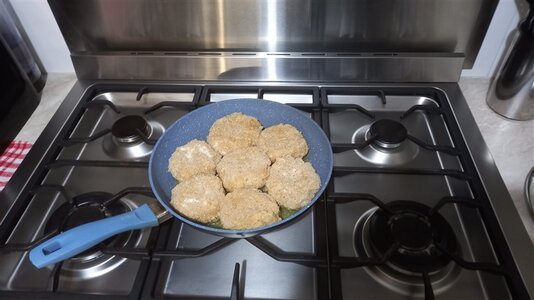
They are made from mashed potato, sliced onion and canned Tuna, you just mix all of the ingredients together and
form the cakes, then they are coated with flour, dipped in egg and then covered with bread crumbs, this is the first
batch just gone in the pan,

and after cooking on one side for awhile they are turned over, I ended up making sixteen of them, froze most
of them down, they make for a fast enjoyable lunch,
best regards john,
.
Next up are the Bin Irons or as in my case the Bin Woods, lol,
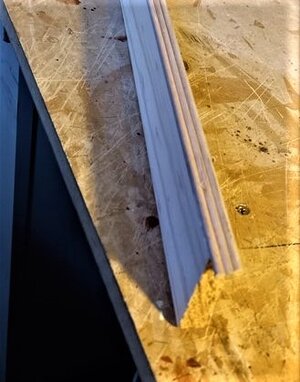
I couldn't find any half round brass strips and the brass rods were way to expensive for me
so I used 4mm dia wood dowell, I was hoping to be able to get 3mm dia but was out of luck,
to cut them in half I glued three of them to the side of a nice square piece of wood 1.2 meteres long
which was the length of the dowells,
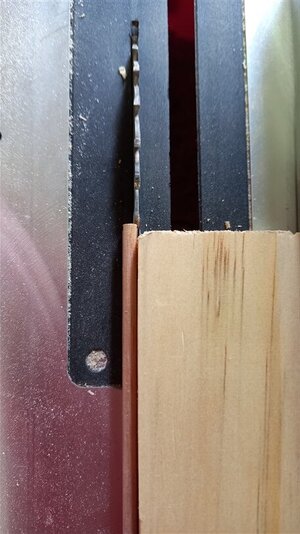
then I ran them through my little Hyuda table saw, the piece of wood that I had glued them to
was set up for the saw blade to run along the side of it, but to only cut through the dowells, the
blade is 1.7mm width so that left the dowells being approx 2.2mm thick,
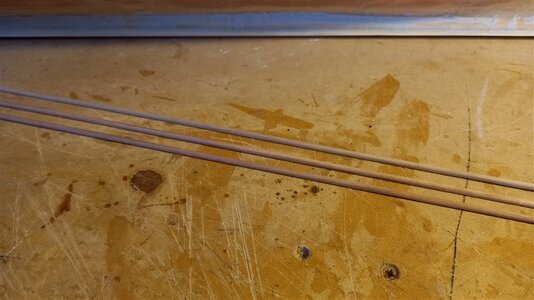
Three of the dowells after cutting,
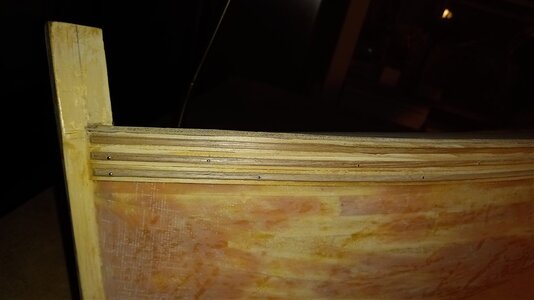
and in the process of being fitted on the model, I bought 8 dowells and they cost$17, so not too bad,
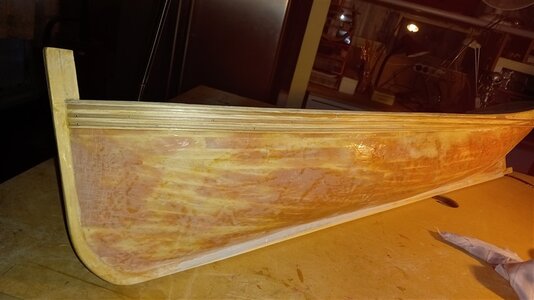
and another couple of views, I just wish they had been 3mm instead of 4mm,
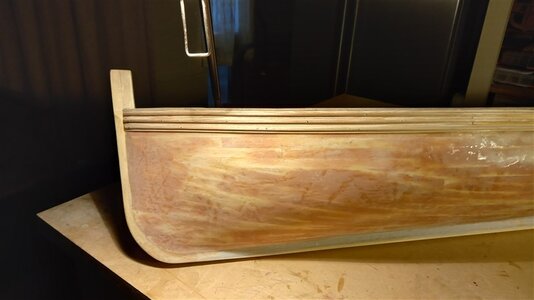
Thanks for looking in,
best regards john,
.

I couldn't find any half round brass strips and the brass rods were way to expensive for me
so I used 4mm dia wood dowell, I was hoping to be able to get 3mm dia but was out of luck,
to cut them in half I glued three of them to the side of a nice square piece of wood 1.2 meteres long
which was the length of the dowells,

then I ran them through my little Hyuda table saw, the piece of wood that I had glued them to
was set up for the saw blade to run along the side of it, but to only cut through the dowells, the
blade is 1.7mm width so that left the dowells being approx 2.2mm thick,

Three of the dowells after cutting,

and in the process of being fitted on the model, I bought 8 dowells and they cost$17, so not too bad,

and another couple of views, I just wish they had been 3mm instead of 4mm,

Thanks for looking in,
best regards john,
.
Very clever production John. Well done!
Very nice, indeed!
NIce tight scarf joints and well cut and placed dowels. Your progress is very good to watch. RichNext up are the Bin Irons or as in my case the Bin Woods, lol,
View attachment 271022
I couldn't find any half round brass strips and the brass rods were way to expensive for me
so I used 4mm dia wood dowell, I was hoping to be able to get 3mm dia but was out of luck,
to cut them in half I glued three of them to the side of a nice square piece of wood 1.2 meteres long
which was the length of the dowells,
View attachment 271028
then I ran them through my little Hyuda table saw, the piece of wood that I had glued them to
was set up for the saw blade to run along the side of it, but to only cut through the dowells, the
blade is 1.7mm width so that left the dowells being approx 2.2mm thick,
View attachment 271029
Three of the dowells after cutting,
View attachment 271030
and in the process of being fitted on the model, I bought 8 dowells and they cost$17, so not too bad,
View attachment 271031
and another couple of views, I just wish they had been 3mm instead of 4mm,
View attachment 271032
Thanks for looking in,
best regards john,
.
Thank you all for the nice comments and the likes,they are very encouraging,
Best regards John,
Best regards John,
Last edited:
G'day daniel, sorry for the late reply, my keel section is 18mm deep and 13mm wide, hope everything turns out OK for your Janet,Looking good ,John
What section had your keel at 1/20 scale?
After seeing the build thread again I got an ideea to resolve my problem with Janet,I will make the keel with a 10x10 mm walnut strip with a groove of 6 mm x 3mm where to insert the plywood used initially for keel in my build.That way I can make the bond with the model and have a straight line for rudder just as in your build
Kind regards
Daniel
best regards john.
- Joined
- Apr 10, 2020
- Messages
- 654
- Points
- 353

Thank you John ,for the reply
I have the 10 mm wide keel ( 6mm plywood and 2 mm on other side obechi strips)
I have commanded 2 strips of 1 meter lenght of 10 x 10 mm walnut and 2 of 5 x 10 mm strips
with the help of ted frost book hope to make a better bow and keel of Janet
Kind regards,Daniel
I have the 10 mm wide keel ( 6mm plywood and 2 mm on other side obechi strips)
I have commanded 2 strips of 1 meter lenght of 10 x 10 mm walnut and 2 of 5 x 10 mm strips
with the help of ted frost book hope to make a better bow and keel of Janet
Kind regards,Daniel
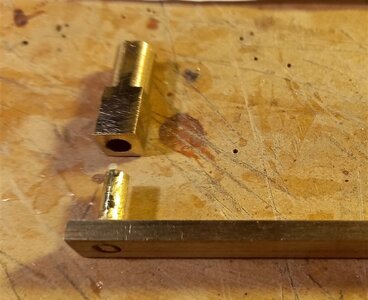
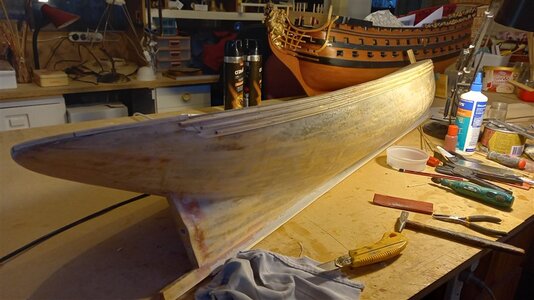
I'm thinking of doing a simplified version of the stern post rudder, what you see in these pics
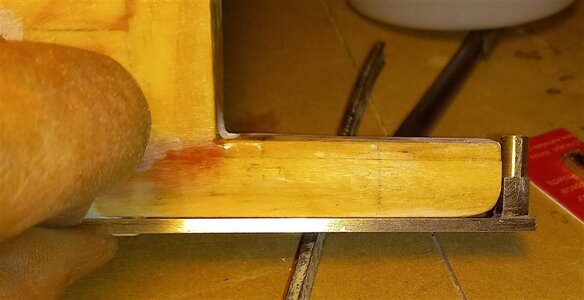
it makes it a lot easier to just undo three screws under the Skeg and drop the rudder post and rudder out for any repairs,
i haven't decided yet, will have to make up my mind in the next couple of days,
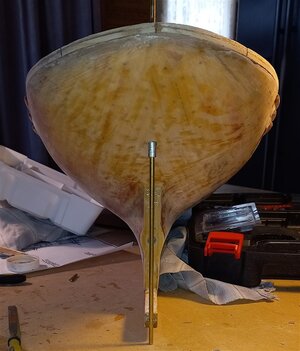
This shows the rudder post tube being glued in place,
thanks for looking in,
best regards john,
,
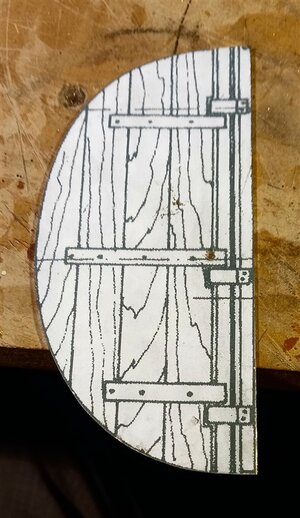
I decided to use a piece of brass plate for the basis of the rudder, mainly for the extra strength,
I also made the rudder just a little bit wider, I cut out and glued the rudder drawing onto the
brass plate, this is the rudder after being cut and sanded to shape,
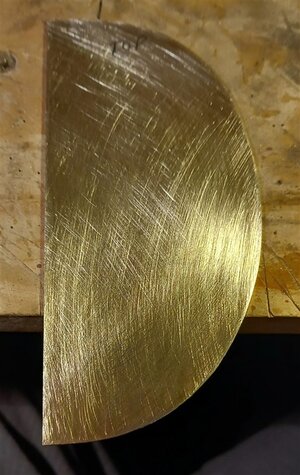
and with the drawing removed,
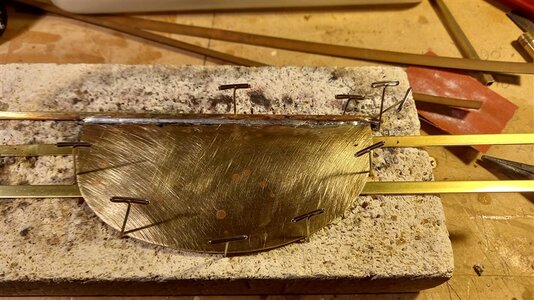
Set up for soldering, I'm no good at soldering,
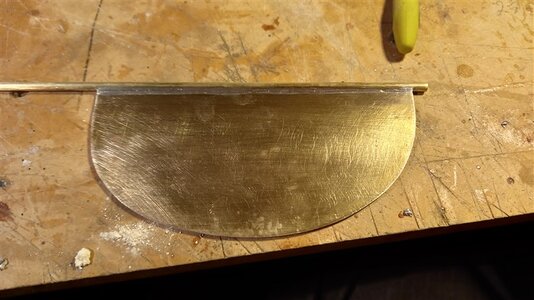
and after cleaning up the joint,
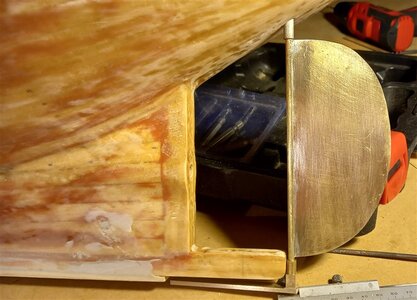
and more or less where it will sit in place, just need a couple of small adjustments yet, i might abandon this lower
part of the set up and go for a strap around the round part like in the original drawing, I'm trying to work out a way
that I can include the stern post in front of the rudder, but have it so it can all come away as one piece, and I will
be planking over the brass rudder and attaching the straps,
Well thats it for now, goodnight,
best regards John.
- Joined
- Jan 9, 2020
- Messages
- 10,566
- Points
- 938

John you have been a busy man. What I find fascinating is the diversity in your builds -from historic and static-display warships to functioning, steam-powered trawlers. You seem to switch seamlessly between these subjects - truly the mark of a great builder.


