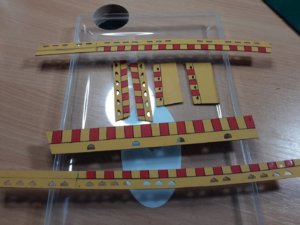
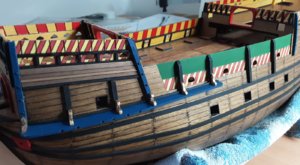
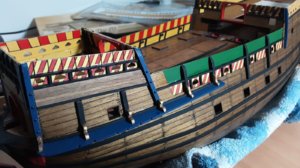
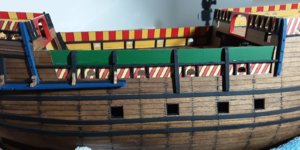
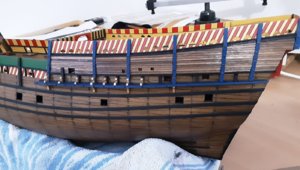
Great looking ship awesome build
-

Win a Free Custom Engraved Brass Coin!!!
As a way to introduce our brass coins to the community, we will raffle off a free coin during the month of August. Follow link ABOVE for instructions for entering.
-

PRE-ORDER SHIPS IN SCALE TODAY!
The beloved Ships in Scale Magazine is back and charting a new course for 2026!
Discover new skills, new techniques, and new inspirations in every issue.
NOTE THAT OUR FIRST ISSUE WILL BE JAN/FEB 2026
You are using an out of date browser. It may not display this or other websites correctly.
You should upgrade or use an alternative browser.
You should upgrade or use an alternative browser.
The Mary Rose
- Thread starter Graham
- Start date
- Watchers 53
-
- Tags
- caldercraft mary rose
Lining the gunports. Not only are the ports on the real ship lined, but I will line those on my model because the colour difference between the first planking (limewood) and the second planking (walnut) is quite obvious.
I used 0.5mm thick strip. A fiddly job so in the end I used a blob of bluetack on a cocktail stick -
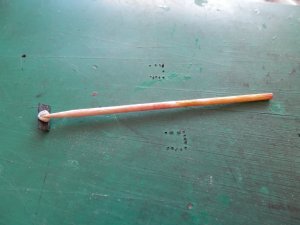
and when sized properly CA'd them in place -
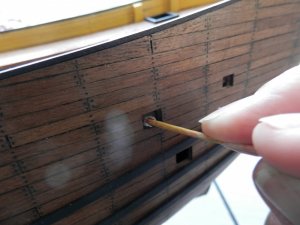
Finished -
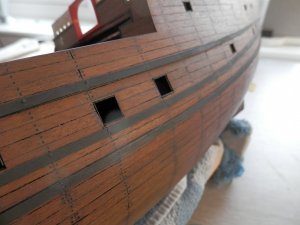
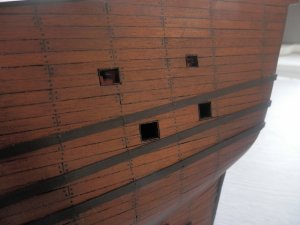
It is here that you find out whether the holes you cut are actually square; some slight fettling was required on a couple. I am quite pleased with the result, but I am glad she's not a 100 gunner!
I used 0.5mm thick strip. A fiddly job so in the end I used a blob of bluetack on a cocktail stick -

and when sized properly CA'd them in place -

Finished -


It is here that you find out whether the holes you cut are actually square; some slight fettling was required on a couple. I am quite pleased with the result, but I am glad she's not a 100 gunner!
Very good way and trick using the blob at the stick
Wow! What pleasure it's been to read this thread. The actual build is fascinating and the history comments are the frosting on the cake. So what actually happened to this ship? Why would so many men be in just a few places after the ship went down? Maybe the ship was overwhelmed by pirates or the French or the Spaniards or the Italians. Henry did P--- off the Pope about that time. The crew was locked up, the ship pillaged and then sunk with all the crew still locked up. Sounds like Spain to me. A very good build I'll say.
Back on the build after a few different projects. I like the series Forged in Fire and recently had an experience day at a forge. I made a Viking seax and this is what I brought home -
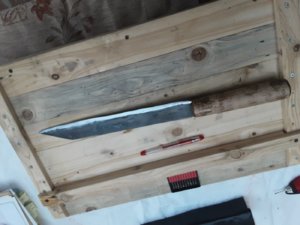
Apologies, but no matter what I do the above picture insists on loading upside down. Once home I started work on the handle which I carved with an open knot design -
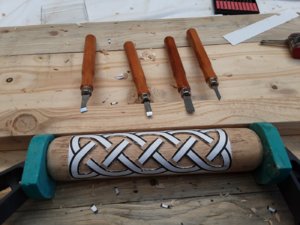 -
-
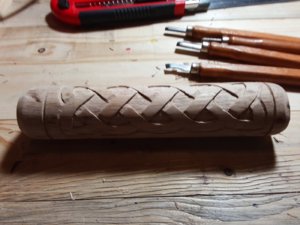
and inlaid some copper wire for a bit of a contrast -
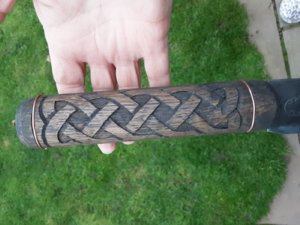
Next, on to the blade which is two entwined dragons - I drew the template, stuck it on the blade and engraved through it. There are six recognised styles of Viking art and this is the Mammen style which came into being around 950AD.
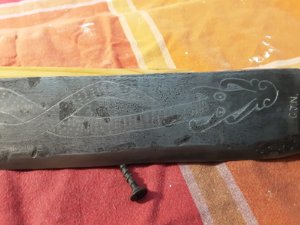
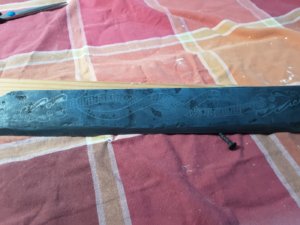
Finally, quite a bit of work with the whetstones to improve the plunge angle of the cutting edge -
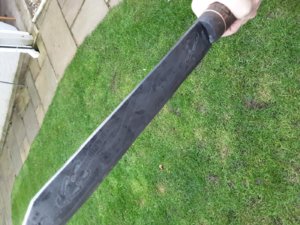
I enjoyed the build and that's me all prepped for the Zombie Apocalypse.
Anyway, you're here to look at ship builds and not listen to me waffling on about a knife. I used Powerpoint to generate designs I want to use on the bulwarks of the Mary Rose and printed it on waterslip paper in order to make transfers. Three light coats of lacquer are then applied and you're good to go -
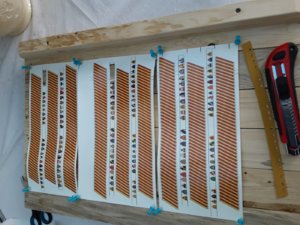
About a 30 second soak and they slide off very easily and can be applied. You end up with a very thin plastic film which I found much more robust than those transfers you get in plastic kits. Having let them dry for a couple of hours I applied a coat of matt enamel lacquer just to make them a bit stronger when cutting through for the gun ports. Here's the dry fit -
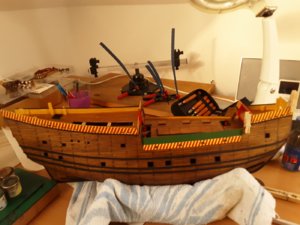
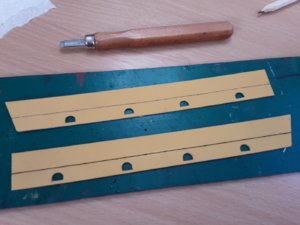
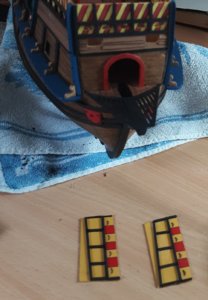
I can't fix them in place yet as there is more work to do on the inner faces. On the actual ship the archaeology shows that the upper part of the waist rails consisted of a number of panels, some fixed in place and some removable. The reason for this, certainly in the early days of the ship's life, was that it enabled archers to remove panels and shoot at the enemy whilst sheltering behind the fixed ones. There were also three standards along each waist rail and the drawing in the Anthony Roll (see earlier post) bears this out. Looks like I will have to get my head around making some standards, but that's not today's job. To replicate the bottom edge of the panels I tried several methods but in the end settled on carving a groove with a small chisel and gluing some rigging thread in place as this seemed to give the best definition. Here's one grooved and one fitted with thread -
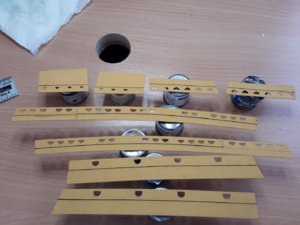
There is no evidence that the other bulwarks on the ship had similar panels because they have been swept away. So, I'm going to take a leap of logic and assume that they were (Why would you limit your firepower? Why were 250 bows listed on the inventory, but only used to shoot from the waist position) and so will treat all bulwarks the same -
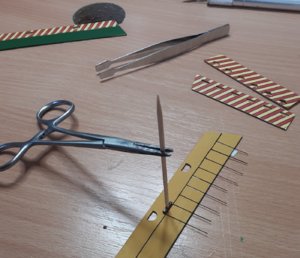
Now I need to define the vertical lines. I read that the waist rail had 21 panels in total, giving a scale width of 7.85mm. I cut a small strip to this size and made a little jig to help with the measuring, the lines are achieved by using bristles from a black paintbrush and CA'ing them in place -
All done and a coat of matt lacquer applied to help fix the bristles a bit more firmly -
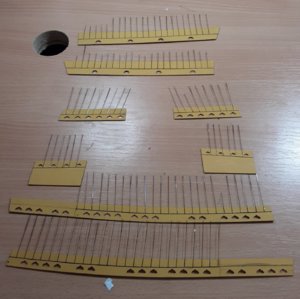
The bottom two do not have bristles fitted to the end as I will be scratch building an additional castle deck, both fore and aft, and this part will not be seen.

Apologies, but no matter what I do the above picture insists on loading upside down. Once home I started work on the handle which I carved with an open knot design -
 -
-
and inlaid some copper wire for a bit of a contrast -

Next, on to the blade which is two entwined dragons - I drew the template, stuck it on the blade and engraved through it. There are six recognised styles of Viking art and this is the Mammen style which came into being around 950AD.


Finally, quite a bit of work with the whetstones to improve the plunge angle of the cutting edge -

I enjoyed the build and that's me all prepped for the Zombie Apocalypse.
Anyway, you're here to look at ship builds and not listen to me waffling on about a knife. I used Powerpoint to generate designs I want to use on the bulwarks of the Mary Rose and printed it on waterslip paper in order to make transfers. Three light coats of lacquer are then applied and you're good to go -

About a 30 second soak and they slide off very easily and can be applied. You end up with a very thin plastic film which I found much more robust than those transfers you get in plastic kits. Having let them dry for a couple of hours I applied a coat of matt enamel lacquer just to make them a bit stronger when cutting through for the gun ports. Here's the dry fit -

I can't fix them in place yet as there is more work to do on the inner faces. On the actual ship the archaeology shows that the upper part of the waist rails consisted of a number of panels, some fixed in place and some removable. The reason for this, certainly in the early days of the ship's life, was that it enabled archers to remove panels and shoot at the enemy whilst sheltering behind the fixed ones. There were also three standards along each waist rail and the drawing in the Anthony Roll (see earlier post) bears this out. Looks like I will have to get my head around making some standards, but that's not today's job. To replicate the bottom edge of the panels I tried several methods but in the end settled on carving a groove with a small chisel and gluing some rigging thread in place as this seemed to give the best definition. Here's one grooved and one fitted with thread -

There is no evidence that the other bulwarks on the ship had similar panels because they have been swept away. So, I'm going to take a leap of logic and assume that they were (Why would you limit your firepower? Why were 250 bows listed on the inventory, but only used to shoot from the waist position) and so will treat all bulwarks the same -

Now I need to define the vertical lines. I read that the waist rail had 21 panels in total, giving a scale width of 7.85mm. I cut a small strip to this size and made a little jig to help with the measuring, the lines are achieved by using bristles from a black paintbrush and CA'ing them in place -

All done and a coat of matt lacquer applied to help fix the bristles a bit more firmly -

The bottom two do not have bristles fitted to the end as I will be scratch building an additional castle deck, both fore and aft, and this part will not be seen.
Last edited:
Time to begin sticking some bits on and getting into the detail. Starting at the bow, there are two vertical fenders to fit - the blue parts. These butt up against the channel, so it was necessary to trim some off the rearmost fender before finally fixing in place in order to get the channel horizontal. The channel is temporarily Bluetacked in place while fitting the fenders and I won't fix them until later in the build so that I don't accidentally knock them off while handling the hull. The two black horizontals then fitted -
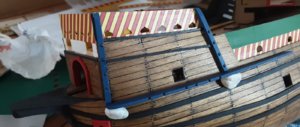
Further bits added. You can see some slight 'misting' of the transfer here, but luckily this disappeared when lacquer was later applied. -
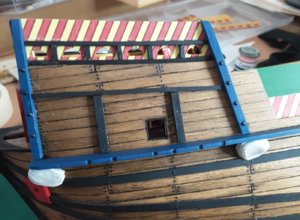
Next there is some clinker planking (0.5mm) to add. This is done from the bottom up in order to achieve the overlap and in order to get the first plank to kick out I added a thin strip -
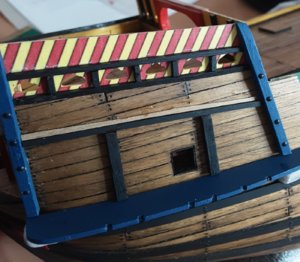
The planks can then be added -
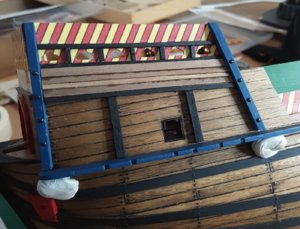
Then the bristles are glued in place to define the upper removable panels, same process as described earlier -
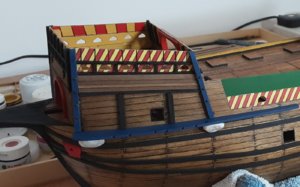
.... and the forward bulkhead is a combination of the aforementioned processes, but no removable panels on this section -
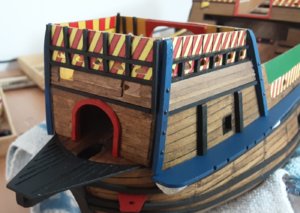
I pre-painted the black strip and used a black Sharpie to dab over the cut ends; saves a lot of time dabbing on matt black paint, waiting for it to dry and continually washing brushes. My wife and I share a room for our hobbies and another top tip is not to get caught with her dressmaking scissors on my workbench; it was a near death experience, I can tell you.
The remainder of the work on the exterior is pretty much as described here, and now that I have got in the groove it should go a bit more swiftly - famous last words.

Further bits added. You can see some slight 'misting' of the transfer here, but luckily this disappeared when lacquer was later applied. -

Next there is some clinker planking (0.5mm) to add. This is done from the bottom up in order to achieve the overlap and in order to get the first plank to kick out I added a thin strip -

The planks can then be added -

Then the bristles are glued in place to define the upper removable panels, same process as described earlier -

.... and the forward bulkhead is a combination of the aforementioned processes, but no removable panels on this section -

I pre-painted the black strip and used a black Sharpie to dab over the cut ends; saves a lot of time dabbing on matt black paint, waiting for it to dry and continually washing brushes. My wife and I share a room for our hobbies and another top tip is not to get caught with her dressmaking scissors on my workbench; it was a near death experience, I can tell you.
The remainder of the work on the exterior is pretty much as described here, and now that I have got in the groove it should go a bit more swiftly - famous last words.
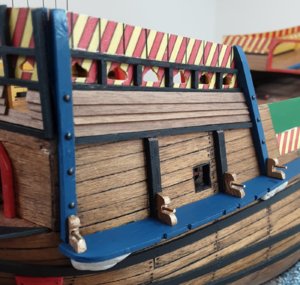
It is now obvious that I will have to fit the channels because there are a couple of bits of bracing to add to the waist bulwark which butt up to the channel. So, belaying rail carriers (gold parts) CA'd in place. To add strength I will also pin them and here you see the pins ready to drive home -
Both sides done and now the bracing on the interior side of the waist bulwark -
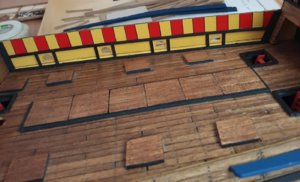
You can see here the problem of adding cannon to a ship that was not initially designed for the type and size of guns it ended up carrying. I can almost hear the curses of the gunners echoing across the ages as they tripped over hatch covers and tried to avoid falling down the open hatches.

Both sides done and now the bracing on the interior side of the waist bulwark -

You can see here the problem of adding cannon to a ship that was not initially designed for the type and size of guns it ended up carrying. I can almost hear the curses of the gunners echoing across the ages as they tripped over hatch covers and tried to avoid falling down the open hatches.
Both sides of the waist done and moving towards the stern. More frames to fit, so the two end ones fitted first. This then allows me to temporarily mount the chain plate after some slight fettling to more closely follow the fwd/aft curvature of the hull -
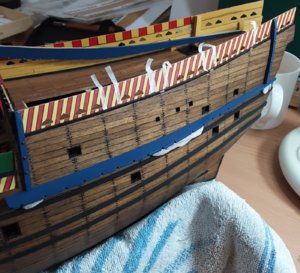
The tapes show the locations of the remaining frames. The inner tape edges are also the edge lines of the panels on the other side of the bulwark as I need to carry this across. The four frames can then be shaped and cut to length -
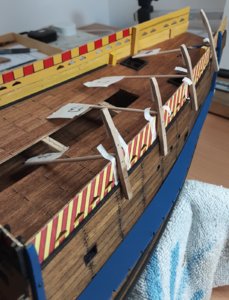
Because I fitted a narrow 1mm strip to help alignment of all bulwarks (and hide the bottom edge) I had to make packers to fill the gap and this is easily done with balsa - you will see the white wedge-shaped pieces at the top of the frames in the above photo. Balsa is very easy to work but, of course, can only be used if you intend to paint that part. For painting parts like this I drill a small hole on the back side and then CA a cocktail stick into it; this makes it easier to hold and paint the entire piece in one go - sorry if I am teaching anyone to suck eggs!

The tapes show the locations of the remaining frames. The inner tape edges are also the edge lines of the panels on the other side of the bulwark as I need to carry this across. The four frames can then be shaped and cut to length -

Because I fitted a narrow 1mm strip to help alignment of all bulwarks (and hide the bottom edge) I had to make packers to fill the gap and this is easily done with balsa - you will see the white wedge-shaped pieces at the top of the frames in the above photo. Balsa is very easy to work but, of course, can only be used if you intend to paint that part. For painting parts like this I drill a small hole on the back side and then CA a cocktail stick into it; this makes it easier to hold and paint the entire piece in one go - sorry if I am teaching anyone to suck eggs!
Frames are painted, time to stick some bits on. Here is the blank hull -
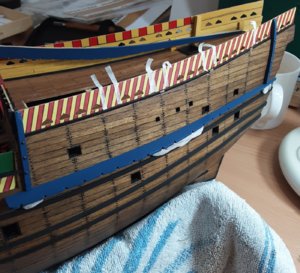
Frames, bracketing and belaying rail parts being added -
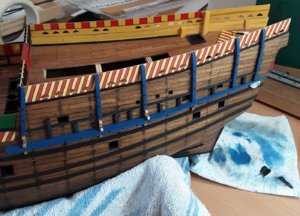
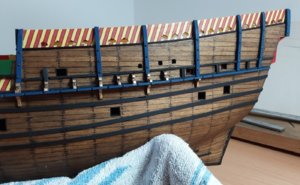
That is this side done for the framing. I still need to do the other side, but before that I fancy a change and so have started the clinker planking (2.0mm x 0.5mm). First two strips added, quite a few more to go -
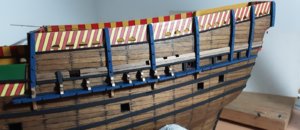

Frames, bracketing and belaying rail parts being added -


That is this side done for the framing. I still need to do the other side, but before that I fancy a change and so have started the clinker planking (2.0mm x 0.5mm). First two strips added, quite a few more to go -

Last edited:
Thanks for your kind comment, Heinrich.
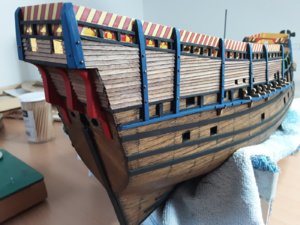
The stern and rear stbd quarter are now complete -
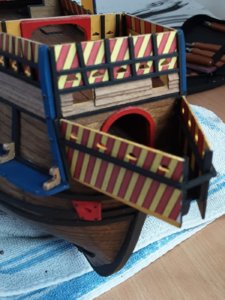
Moving on to the front bulwarks, interior bracing done before fitting -
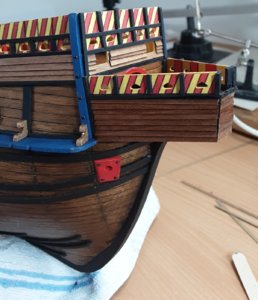
And on we go -
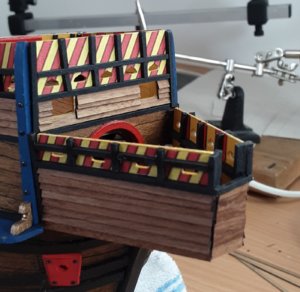
I now need to do the additional decks I want to add; archaeologists all agree that she had additional castle decks and this is also verified by the illustration in the Anthony Roll (see earlier post). First things first is a template for the bulkhead -
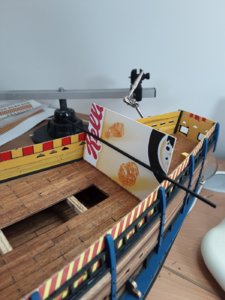
Sorry about the product placement! Rest assured that I did first seek the approval to use the box from She Who Must Be Obeyed - don't want to have to have that argument again. I was going to transfer the shape to 0.5mm ply, but sticking 0.5mm planking on the card gives the same result, so -
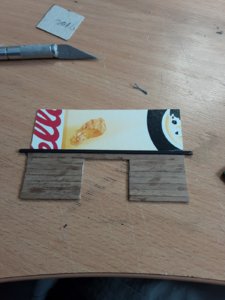
Framing added and dry fit -
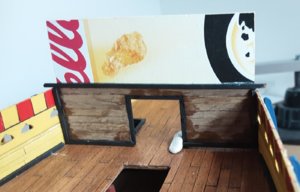
Henry VIII is probably turning in his grave at what I am using to build 'Your noblest shippe'. I am in scratch build territory here, so any thoughts/ideas are most welcome.
I have just noticed that I have now been a member of this site for four years, so let me take this opportunity to thank the Admin guys for their continued hard work in ensuring that this continues to be the best and friendliest site on the web.
The stern and rear stbd quarter are now complete -

Moving on to the front bulwarks, interior bracing done before fitting -

And on we go -


I now need to do the additional decks I want to add; archaeologists all agree that she had additional castle decks and this is also verified by the illustration in the Anthony Roll (see earlier post). First things first is a template for the bulkhead -

Sorry about the product placement! Rest assured that I did first seek the approval to use the box from She Who Must Be Obeyed - don't want to have to have that argument again. I was going to transfer the shape to 0.5mm ply, but sticking 0.5mm planking on the card gives the same result, so -

Framing added and dry fit -

Henry VIII is probably turning in his grave at what I am using to build 'Your noblest shippe'. I am in scratch build territory here, so any thoughts/ideas are most welcome.
I have just noticed that I have now been a member of this site for four years, so let me take this opportunity to thank the Admin guys for their continued hard work in ensuring that this continues to be the best and friendliest site on the web.
Happy Aniversary, Graham!!!
Great work Graham, but dont make Henry angree. Guess you know what happened to his wifes.


