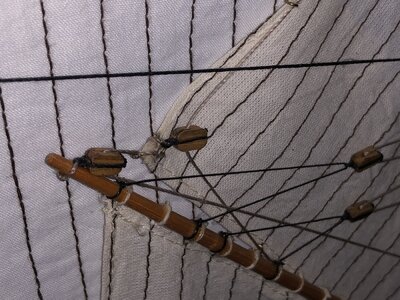
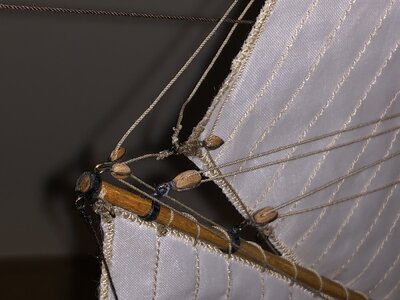
Hello, Johan. If I am allowed my opinion, I do like the photo-etched stropes most. They look more to scale.
-

Win a Free Custom Engraved Brass Coin!!!
As a way to introduce our brass coins to the community, we will raffle off a free coin during the month of August. Follow link ABOVE for instructions for entering.
-

PRE-ORDER SHIPS IN SCALE TODAY!
The beloved Ships in Scale Magazine is back and charting a new course for 2026!
Discover new skills, new techniques, and new inspirations in every issue.
NOTE THAT OUR FIRST ISSUE WILL BE JAN/FEB 2026
- Home
- Forums
- Ships of Scale Group Builds and Projects
- Bluenose PoF Group Build
- Bluenose Group Build Logs
You are using an out of date browser. It may not display this or other websites correctly.
You should upgrade or use an alternative browser.
You should upgrade or use an alternative browser.
The Schooner Bluenose 1921, POF Yuanqing Models 1:72 [COMPLETED BUILD]
First of all, a re-do is good for your own peace of mind. And we as viewers have our own opinions.Good afternoon, everyone. I have been obsessing somewhat with the color scheme of the fittings on the crosstrees. All the brass I was using started to look like some kind of jewelry, so I first switched everything below the crosstrees to my steel silver gray which was some improvement.
View attachment 395266View attachment 395267
There was still a disconnect between the brass and silver as well as the twisted wire hooks which never really set well with me. After several experiments with the stropping and hooks I went a 24 ga silver wire which I think you all can see which one looks the best.
View attachment 395268
So, after choosing the block on the upper right the following is the results. See what you think.
View attachment 395269View attachment 395270
View attachment 395271
I would actually prefer internally stropped blocks with black iron hooks, but I could not find them in the small size needed. I think this look is the best and now I can move on.
I do welcome all opinions as its always serves to expand my ideas.
The silver/gray version looks much better in my opinion. The BN was not a bling-bling yacht, she was a hard worker.
Regards, Peter
Of course, your right Peter, I keep blending over into the BN II which has a much more polished look to it.The BN was not a bling-bling yacht, she was a hard worker.
Cannot be said ever better, Peter! We all have different acceptance levels.First of all, a re-do is good for your own peace of mind. And we as viewers have our own opinions.
Good morning Daniel. I’ve been away so played some catch up with your progress. There has been a load of work done and looking good. Your block strips are way better redone. Brass is always an issue and while we can get away with it on many ships not on the BN. Your silver/aluminium/grey colour is way better. The mast bands are so good and definitely looks way better in the silver/grey.
Cheers Grant
Cheers Grant
Thank you, Grant. Your opinion is much appreciated.Good morning Daniel. I’ve been away so played some catch up with your progress. There has been a load of work done and looking good. Your block strips are way better redone. Brass is always an issue and while we can get away with it on many ships not on the BN. Your silver/aluminium/grey colour is way better. The mast bands are so good and definitely looks way better in the silver/grey.
Cheers Grant
- Joined
- Sep 3, 2021
- Messages
- 5,198
- Points
- 738

You're always allowed your own opinion, JimHello, Johan. If I am allowed my opinion, I do like the photo-etched stropes most. They look more to scale.
The photo-etched blocks are exactly what I'm now using on my build and to me it's gold; looking so good: https://shipsofscale.com/sosforums/threads/yq-bluenose-by-johan.8304/post-328044
Last edited:
Before and after?
Well @GrantTyler, Grants darn rabbit has me jumping up and down on my deck. I have begun preparing my shroud lines. You can see the served and painted ends that will wrap around the upper dead eyes. I've made a small jig to set the dead eyes at the same distance above the lower dead eyes. I cannot seem to find any close-up shots of real-life Bluenose shroud attachments at the crosstrees. I'm curious about the need for serving on their steel cables around the upper mast. I can only imagine there is a need for protection of the upper mast from steel rubbing on wood. At any rate I have served the wrap around portion. Here's a few shots from the shipyard.
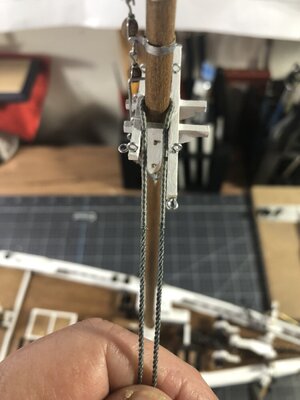
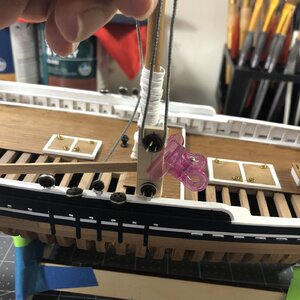
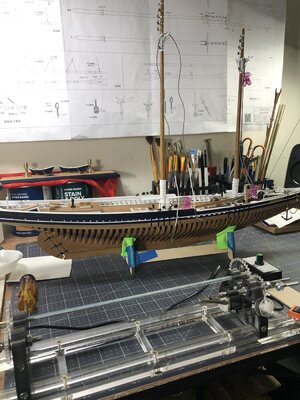
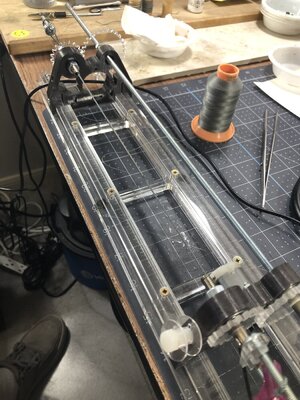
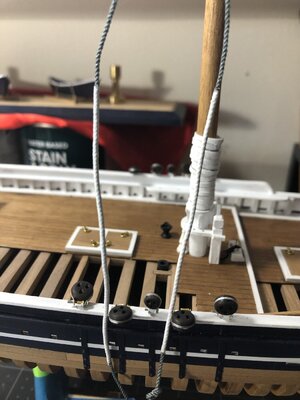
I've purchased my sail and stitching material and am looking forward to trying out my ideas for this part of the build.
I am quite satisfied with the gray/silver hardware theme with handmade stropping on the blocks. Before long I'll be making some test runs on the sails, so I will certainly need to brush up on the sewing machine.
Hope you enjoy.
Good morning DanielWell @GrantTyler, Grants darn rabbit has me jumping up and down on my deck. I have begun preparing my shroud lines. You can see the served and painted ends that will wrap around the upper dead eyes. I've made a small jig to set the dead eyes at the same distance above the lower dead eyes. I cannot seem to find any close-up shots of real-life Bluenose shroud attachments at the crosstrees. I'm curious about the need for serving on their steel cables around the upper mast. I can only imagine there is a need for protection of the upper mast from steel rubbing on wood. At any rate I have served the wrap around portion. Here's a few shots from the shipyard.
View attachment 396014View attachment 396015View attachment 396016View attachment 396017View attachment 396018
I've purchased my sail and stitching material and am looking forward to trying out my ideas for this part of the build.
I am quite satisfied with the gray/silver hardware theme with handmade stropping on the blocks. Before long I'll be making some test runs on the sails, so I will certainly need to brush up on the sewing machine.
Hope you enjoy.
Grants darn rabbit has me jumping up and down on my deck.

Wow your serving is perfect. What size thread are you using for the shroud and serving? On my Victory I always thought my serving line was too thin? I love the painted part of the shroud - I have never seen this before. I’m not sure if this will be overpowering (visually) once all the shrouds are done but looks so good at present.
Cheers Grant
Thanks Grant. I made the shroud lines out of a Amann Group 'Tex 70' which is a rather heavy-duty thread and spun it using a 2x3 configuration. That amounts to twisting 6 strands of thread into one right lay rope. The result is a 1.1mm diameter rope which is about 3 times larger than the ships scale calls for, but I like the visual so far. The serving thread is a Gutermann 'Tera 80' much thinner than the 'Tex 70'. I have never really tried to measure the diameter of the individual threads; they are all sub millimeter though. Over time you learn the different diameters of rope you can get by using various thread sizes and configurations. As far as the white paint on the served ends go here is what I'm trying to emulate.Good morning Daniel
Wow your serving is perfect. What size thread are you using for the shroud and serving? On my Victory I always thought my serving line was too thin? I love the painted part of the shroud - I have never seen this before. I’m not sure if this will be overpowering (visually) once all the shrouds are done but looks so good at present.
Cheers Grant
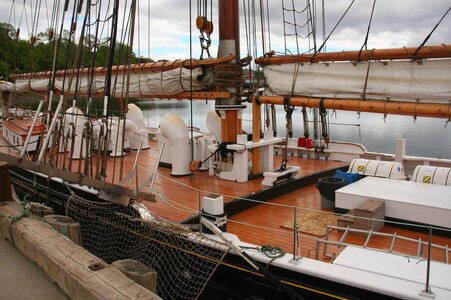
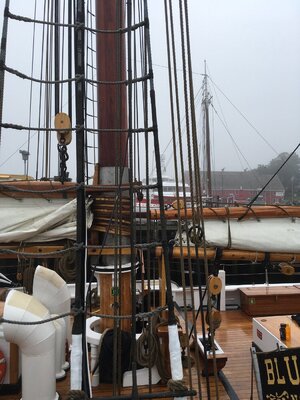
The real shrouds are 26mm dia. steel cable, and the rat lines are 10mm dia. poly rope. So, my ratlines will be 1.1/2.6=0.42mm dia. which I can make by using a Tera 80 thread in a 1x3 configuration. Probably more than you ever wanted to know
- Joined
- Sep 3, 2021
- Messages
- 5,198
- Points
- 738

Here you lost me:The real shrouds are 26mm dia. steel cable, and the rat lines are 10mm dia. poly rope. So, my ratlines will be 1.1/2.6=0.42mm dia. which I can make by using a Tera 80 thread in a 1x3 configuration.
Shrouds 26mm, in 1:72 that equals to 0,36mm.
Ratlines 10mm, again in 1:72 that equals to 0,13mm.
Where you start dividing 1.1 by 2.6, I don't understand where the number 1.1 is coming from, nor do I understand the rest of your explanation. Maybe self explanatory for the well educated, but I'm lost.
Hi Johan,Here you lost me:
1.1 is the millimeter size in diameter of my shroud lines. This will put me approximately 3 times bigger than the correct scale of 0,36mm.
The ratio of real-life size 26mm shrouds and 10mm rats is 26/10=2.6 to 1 or the shrouds are 2.6 times bigger than the rats in real life.
So, at my particular scale I want to keep the same relationship. My shrouds being 1.1mm/2.6mm=0.42mm or my shrouds are 2.6 times bigger than my rats.
Since I am completely busting the scale of the shrouds, the least I could do would be trying to maintain the size relationship of the two.
- Joined
- Sep 3, 2021
- Messages
- 5,198
- Points
- 738

Got it, thanks so much, Dan!Hi Johan,
1.1 is the millimeter size in diameter of my shroud lines. This will put me approximately 3 times bigger than the correct scale of 0,36mm.
The ratio of real-life size 26mm shrouds and 10mm rats is 26/10=2.6 to 1 or the shrouds are 2.6 times bigger than the rats in real life.
So, at my particular scale I want to keep the same relationship. My shrouds being 1.1mm/2.6mm=0.42mm or my shrouds are 2.6 times bigger than my rats.
Since I am completely busting the scale of the shrouds, the least I could do would be trying to maintain the size relationship of the two.
I went for smaller sized shrouds and ratlines, so I didn't consider another option, like you do.
Last edited:
Good morning Daniel.True storyProbably more than you ever wanted to knowbut there you have it.
 .Rope making is not on my agenda….Thanks anyway tho. I enjoy the reference pictures as you mentioned the BN2 (admiralty) approach before and I see the difference in approach to other guys BN….e.g. I now get where you got the white around the deadeyes. Your work and detail is brilliant Daniel. Cheers Grant
- Joined
- Sep 3, 2021
- Messages
- 5,198
- Points
- 738

Sorry, I hijacked your blog...Before and after?
The top picture is of my father's restored BN, the lower picture is of the same detail from my current attempt to build a BN myself, to highlight the differences between the two builds.
Wow Johan, I think I understand how very special your fathers BN is, my father got me started building models as a young boy and helped me build my first balsawood airplane. How cool to have one of your dads' models. Thanks for the hijack!The top picture is of my father's restored BN,
Good afternoon once again.
I have worked on the lower shrouds and finally have achieved the look I'm after. The first couple shots are temporary fit up where I could determine the amount of trim and painting needed. I had to over serve the lower ends knowing I would need to trim them out.
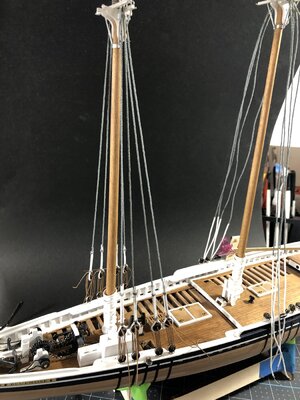
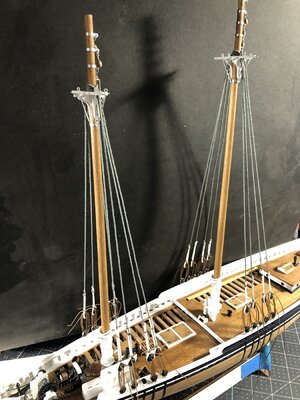
Next was the finishing trim and paint work. I still need to final tension and tie off the ends. This look is patterned after (as close as I could get) of the BN2.
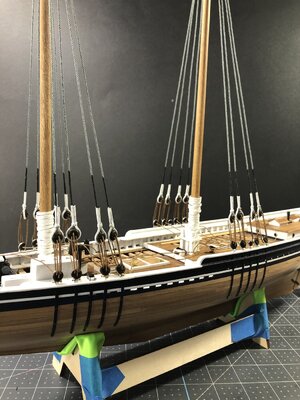
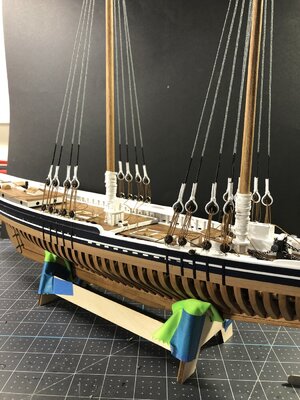
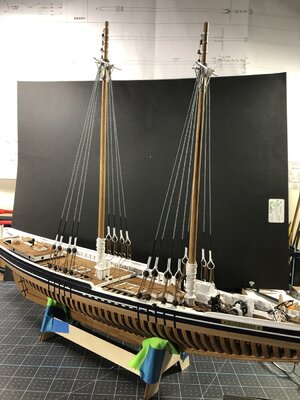
At this point I can hear some of you saying where in the world did you get the idea of using brown lanyard lines. Well, that's what the BN 2 uses. All photos of BN1 are black and white and most likely they were black lanyards. Look at my post #792 to see for yourself. I will be changing the anchors to the club design when my order gets here. Hope you enjoy the photos.
I have worked on the lower shrouds and finally have achieved the look I'm after. The first couple shots are temporary fit up where I could determine the amount of trim and painting needed. I had to over serve the lower ends knowing I would need to trim them out.


Next was the finishing trim and paint work. I still need to final tension and tie off the ends. This look is patterned after (as close as I could get) of the BN2.


At this point I can hear some of you saying where in the world did you get the idea of using brown lanyard lines. Well, that's what the BN 2 uses. All photos of BN1 are black and white and most likely they were black lanyards. Look at my post #792 to see for yourself. I will be changing the anchors to the club design when my order gets here. Hope you enjoy the photos.


