-

Win a Free Custom Engraved Brass Coin!!!
As a way to introduce our brass coins to the community, we will raffle off a free coin during the month of August. Follow link ABOVE for instructions for entering.
-

PRE-ORDER SHIPS IN SCALE TODAY!
The beloved Ships in Scale Magazine is back and charting a new course for 2026!
Discover new skills, new techniques, and new inspirations in every issue.
NOTE THAT OUR FIRST ISSUE WILL BE JAN/FEB 2026
- Home
- Forums
- Ships of Scale Group Builds and Projects
- Bluenose PoF Group Build
- Bluenose Group Build Logs
You are using an out of date browser. It may not display this or other websites correctly.
You should upgrade or use an alternative browser.
You should upgrade or use an alternative browser.
The Schooner Bluenose 1921, POF Yuanqing Models 1:72 [COMPLETED BUILD]
Great progress Daniel. I love the shroud lines! 
Thank you Shota!Dear Daniel
great progress it's looks beautiful, I liked the combination of the black and white with steel cables

Thank you, Dean, your build has been a great source of inspiration for me.Great progress Daniel. I love the shroud lines!
Yes, I wanted to set the shroud lines first. I have already fabricated straight bars to fit, just need to glue them in and paint.From my build log…maybe a little late, but you can see the curved bars, etc.
View attachment 398148View attachment 398149
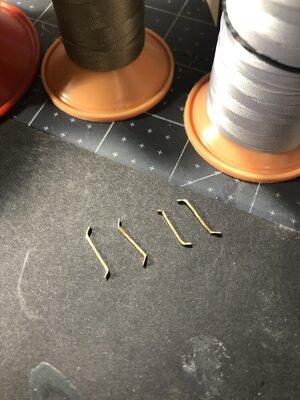
Hello Heinrich, no cocoons or diesel engines on this ship Ha. Full sails and just the wind at her back.Hi Daniel. The black shroud lines and overall look of the shrouds are offset beautifully by the white. It adds to an overall crisp look! So, are we going to see a Caterpillar'd Bluenose?
Good afternoon Daniel. Very good call IMHO. Cheers GrantGood Saturday evening all.
My lower shrouds are screwed, glued and nailed so to speak. I know I've given a little too much exposure on this, but I made some small adjustments with the tie off by lowering them as close as I could get the horizontal shear pole. Strictly an appearance thing. The first photo is a closeup of the special tie off knot (one of those knots that I struggle with for some reason), in its loose position for clarity.
View attachment 397703
Next is my method of holding the shear pole in position just prior to tying in and gluing.
View attachment 397704
Next are various views of the finished result. I will use white touchup paint on the brass chain straps just below the lower dead eyes.
View attachment 397706View attachment 397707View attachment 397708
Thanks for looking in.
One observation, the sheer pole is located higher up in the reference picture of the BN.Ok made my final decision, black it is. Here are a few pictures.
View attachment 397447View attachment 397448View attachment 397449
There is a much better continuity and eye flow with black.
Till next time Happy Modeling!
One observation, the sheer pole is located higher up in the reference picture of the BN.
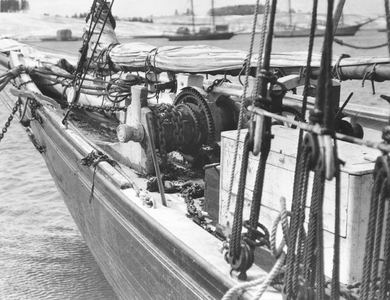
Hi Dean, you are correct with respect to the BN2. This photo of the BN1 has them right on top of the dead eyes with the lanyard tie off on top.
While I do have an amalgamation of BN2 and BN1, I saw an advantage of the pole being where I have it in that you know how dead eyes sometimes have a tendency to twist, well the shroud line affords two ropes coming off the top of the dead eyes giving me a surface if you will to flatten against the pole thus holding each dead eye parallel with the pole.
Looks like a good analogy and approach.View attachment 398409
Hi Dean, you are correct with respect to the BN2. This photo of the BN1 has them right on top of the dead eyes with the lanyard tie off on top.
While I do have an amalgamation of BN2 and BN1, I saw an advantage of the pole being where I have it in that you know how dead eyes sometimes have a tendency to twist, well the shroud line affords two ropes coming off the top of the dead eyes giving me a surface if you will to flatten against the pole thus holding each dead eye parallel with the pole.
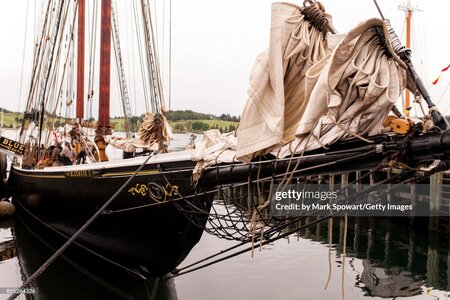
Another good morning to everyone. I decided it was time to jump back to the bow sprit and finish up the shrouds associated with it. Following the BN2 configuration which has the best pictures, I set the shrouds which have the turnbuckles attached at the hull and seized at the sprit tip. Here is my reference photo.
Following is my version with rat lines installed. I am leaving out the foot rope, it would just be too cluttered, I think. While not completely satisfied with the ratline look, I think it is close enough to convey its purpose.
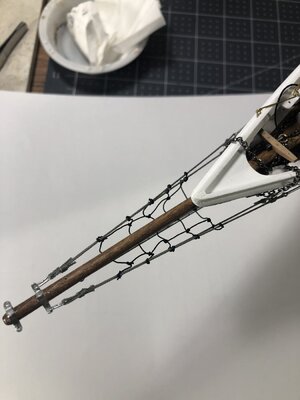
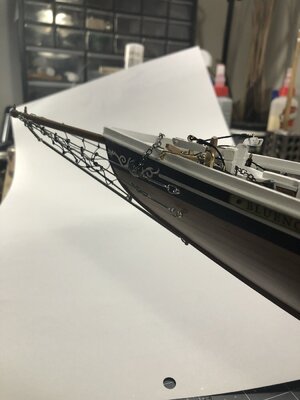
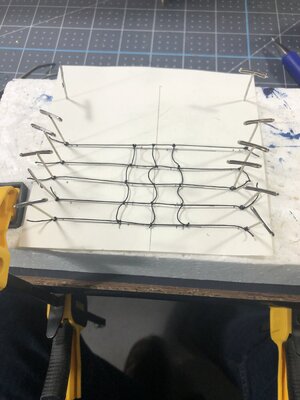
I decided to construct the ratline system off ship then tie it on in place in lieu of trying to tie all the knots on and under the bow sprit. Some may find this to be a practical method.
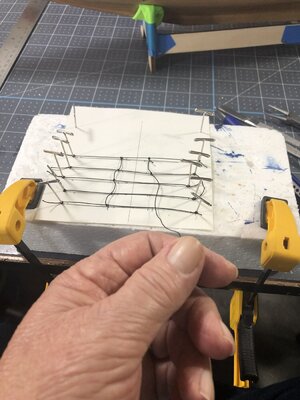
I wanted to leave slack for adjustments but ended leaving a little too much slack. I may redo this just don't know yet.
For now, the anchors are just stacked on the deck. I'm going to replace them, one of them actually broke when I bumped it.
Hope you enjoy.

Following is my version with rat lines installed. I am leaving out the foot rope, it would just be too cluttered, I think. While not completely satisfied with the ratline look, I think it is close enough to convey its purpose.


I decided to construct the ratline system off ship then tie it on in place in lieu of trying to tie all the knots on and under the bow sprit. Some may find this to be a practical method.


I wanted to leave slack for adjustments but ended leaving a little too much slack. I may redo this just don't know yet.
For now, the anchors are just stacked on the deck. I'm going to replace them, one of them actually broke when I bumped it.
Hope you enjoy.
Nice to see your approach of making the bowsprit ratlines, Daniel. with a nice outcom!Another good morning to everyone. I decided it was time to jump back to the bow sprit and finish up the shrouds associated with it. Following the BN2 configuration which has the best pictures, I set the shrouds which have the turnbuckles attached at the hull and seized at the sprit tip. Here is my reference photo.
View attachment 398450
Following is my version with rat lines installed. I am leaving out the foot rope, it would just be too cluttered, I think. While not completely satisfied with the ratline look, I think it is close enough to convey its purpose.
View attachment 398453View attachment 398455
I decided to construct the ratline system off ship then tie it on in place in lieu of trying to tie all the knots on and under the bow sprit. Some may find this to be a practical method.
View attachment 398456View attachment 398457
I wanted to leave slack for adjustments but ended leaving a little too much slack. I may redo this just don't know yet.
For now, the anchors are just stacked on the deck. I'm going to replace them, one of them actually broke when I bumped it.
Hope you enjoy.
Regards, Peter
Thank you Peter.Nice to see your approach of making the bowsprit ratlines, Daniel. with a nice outcom!
Regards, Peter
Hello Johan, for now, my desire to move on ahead is greater than attempting a redo on something I think has a low probability for improvement.Hey Dan,
That's quite an effort on those ratlines underneath the bowsprit.
I did those as well, including the footropes. I couldn't get it any better than I did, but, as you so nicely put it, it "conveys it's purpose".
Good afternoon Daniel. Nope, I think they look great. Certainly serve their purpose and then some. Cheers GrantAnother good morning to everyone. I decided it was time to jump back to the bow sprit and finish up the shrouds associated with it. Following the BN2 configuration which has the best pictures, I set the shrouds which have the turnbuckles attached at the hull and seized at the sprit tip. Here is my reference photo.
View attachment 398450
Following is my version with rat lines installed. I am leaving out the foot rope, it would just be too cluttered, I think. While not completely satisfied with the ratline look, I think it is close enough to convey its purpose.
View attachment 398453View attachment 398455
I decided to construct the ratline system off ship then tie it on in place in lieu of trying to tie all the knots on and under the bow sprit. Some may find this to be a practical method.
View attachment 398456View attachment 398457
I wanted to leave slack for adjustments but ended leaving a little too much slack. I may redo this just don't know yet.
For now, the anchors are just stacked on the deck. I'm going to replace them, one of them actually broke when I bumped it.
Hope you enjoy.
Hey, thanks for the input, Grant.
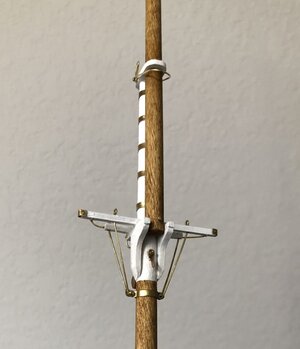
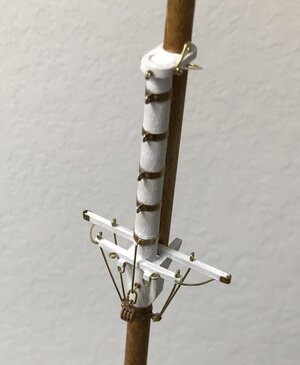
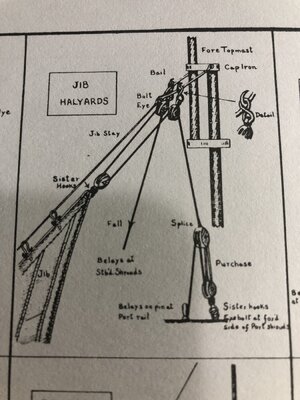
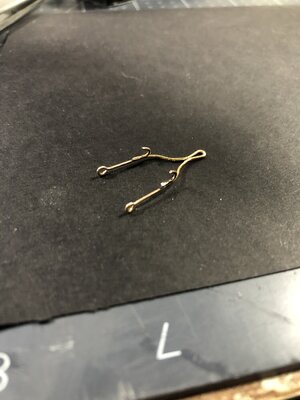
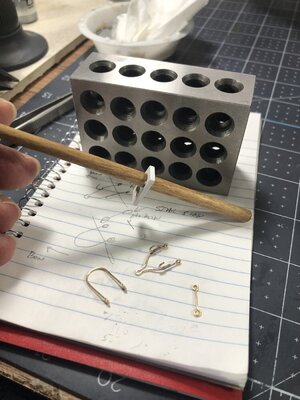
Sunday evening and the first nice cool front of fall has finally arrived. Not a big update but an interesting one for me. I have formed what they call 'bails', not unlike the bail you might find on a spinning reel. The first one goes on the top bracket that connects the fore main and fore topmast. There are two hooks that I braised to the bail as per the Jenson drawing shown and it was surprisingly easy to accomplish once I figured out how to hold the pieces and apply heat.
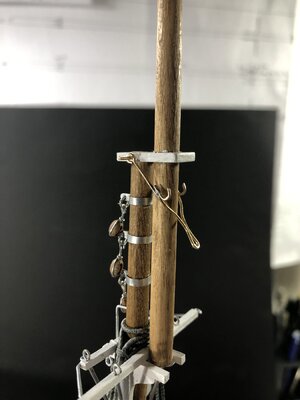
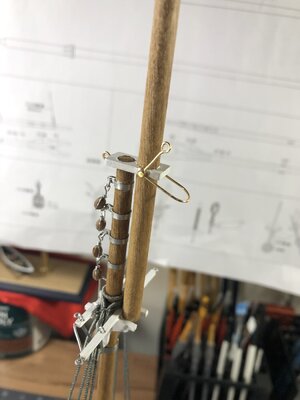
Next up is the bail at the main mast main top connection. There is a curious starboard side ring that everybody has (I do not know what it is for yet) but have included it.
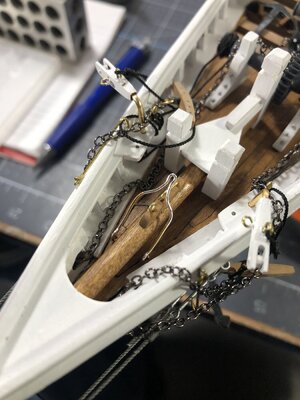
And lastly, I have a forestay bail located in the bow over the bow sprit. Everything is dry fit for now, still need to paint and make sure I am ready to permanently install. I study Jenson, and the other masters who have placed sails on their ships until I'm blue in the face and I know there will be some important hard to get to fitting I'll leave off that a sail needs to have. I've already found two eyes to install on the underside of the fore mast trestle tree for the Jumbo sail halyard. now I have to drill upside down into the trestletree.
Hope you enjoy and thanks for looking in.


Next up is the bail at the main mast main top connection. There is a curious starboard side ring that everybody has (I do not know what it is for yet) but have included it.


And lastly, I have a forestay bail located in the bow over the bow sprit. Everything is dry fit for now, still need to paint and make sure I am ready to permanently install. I study Jenson, and the other masters who have placed sails on their ships until I'm blue in the face and I know there will be some important hard to get to fitting I'll leave off that a sail needs to have. I've already found two eyes to install on the underside of the fore mast trestle tree for the Jumbo sail halyard. now I have to drill upside down into the trestletree.

Hope you enjoy and thanks for looking in.


