Good morning Daniel. Following the other BN builds I notice this build has a ton of small metal work. Just in your main gaff there is more bending and shaping tiny gauge wire than in most completed ship builds. Brilliant work doing this (not in my skill set yet). The sheaves, blocks, nails and rope work are wonderful. Cute puppy BTW. Cheers Grant
-

Win a Free Custom Engraved Brass Coin!!!
As a way to introduce our brass coins to the community, we will raffle off a free coin during the month of August. Follow link ABOVE for instructions for entering.
-

PRE-ORDER SHIPS IN SCALE TODAY!
The beloved Ships in Scale Magazine is back and charting a new course for 2026!
Discover new skills, new techniques, and new inspirations in every issue.
NOTE THAT OUR FIRST ISSUE WILL BE JAN/FEB 2026
- Home
- Forums
- Ships of Scale Group Builds and Projects
- Bluenose PoF Group Build
- Bluenose Group Build Logs
You are using an out of date browser. It may not display this or other websites correctly.
You should upgrade or use an alternative browser.
You should upgrade or use an alternative browser.
The Schooner Bluenose 1921, POF Yuanqing Models 1:72 [COMPLETED BUILD]
Thank you, Grant. This particular kit was never designed to carry and display sails. You will not find its sails mentioned anywhere in the plans or instructions. So in order to scratch in these sails one has to research all the required hardware found on the original BM or its offspring the BN2, which happens to be quite a bit of hardware. Fortunately, I follow in the footsteps of some of the top Bluenose builders who have done the heavy lifting in the research department as well as my own research. Interestingly, all the shroud and standing rigging on the real BN were made of wire rope cable. Most all the blocks were internally stropped with black steel and hooks or rings.Good morning Daniel. Following the other BN builds I notice this build has a ton of small metal work. Just in your main gaff there is more bending and shaping tiny gauge wire than in most completed ship builds. Brilliant work doing this (not in my skill set yet). The sheaves, blocks, nails and rope work are wonderful. Cute puppy BTW. Cheers Grant
Good afternoon, all. I finally finished all the pre fitting of hardware on all the booms and gaffs. This is not a lot of progress as I started this portion of the build almost a month ago. I want to give Peter @Peter Voogt, a big thank you for sharing his work from his build, I used his photos as the basis for placement of my fitting's location. Take a look see.
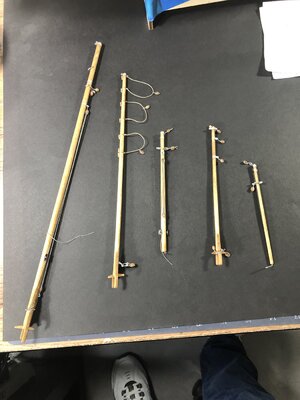
So now it is time to begin fabricating the sails and attach them to the appropriate mast and booms along with the rest of the standing rigging.
I plan on setting the rat lines last purely for easier access to sail attachment on the mast.
Thanks for looking in and as always, happy modeling.

So now it is time to begin fabricating the sails and attach them to the appropriate mast and booms along with the rest of the standing rigging.
I plan on setting the rat lines last purely for easier access to sail attachment on the mast.
Thanks for looking in and as always, happy modeling.
They are looking very nice, Daniel.Good afternoon, all. I finally finished all the pre fitting of hardware on all the booms and gaffs. This is not a lot of progress as I started this portion of the build almost a month ago. I want to give Peter @Peter Voogt, a big thank you for sharing his work from his build, I used his photos as the basis for placement of my fitting's location. Take a look see.
View attachment 407428
So now it is time to begin fabricating the sails and attach them to the appropriate mast and booms along with the rest of the standing rigging.
I plan on setting the rat lines last purely for easier access to sail attachment on the mast.
Thanks for looking in and as always, happy modeling.
I'm glad my build-log was helpful.
Now it’s time for some major chapters: making your sails and all of the rigging.
Enough ‘fuel’ for various updates in your log.
Regards, Peter
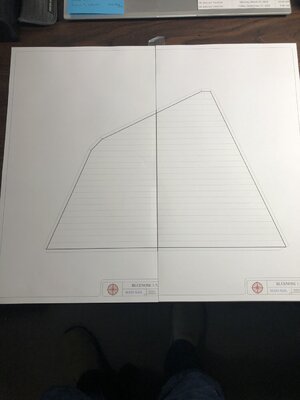
A short update highlighting my method of attack on making sails. First another thanks to Johan @RDN1954 for sending me his sail templates, they offered me an excellent starting point. I carefully measured his hand drawn patterns and converted them to a CAD format. I wanted to change the spacing of the stitch lines from 8mm c-c to 10mm c-c to help cut down on the puckering inherent with such heavy stitching in a confined area. Being able to do this on my computer and print out a 1:1 copy at scale is the benefit of the CAD drawings. So first are my print outs on 11x17 paper. The main sail was so big I had to use 2 sheets.
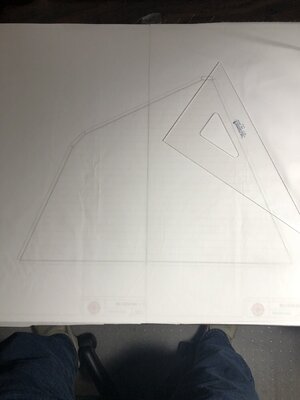
Next, I cut out material the size of two sheets and taped it down over the template then traced the image onto the material.
By extending the stitch lines beyond the sail edges, allows me to start and stop sewing outside the boundaries.
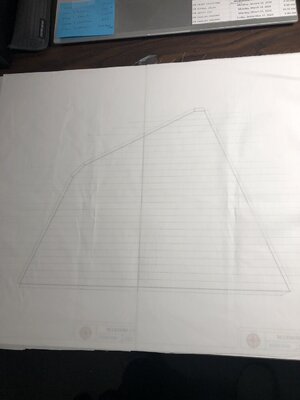
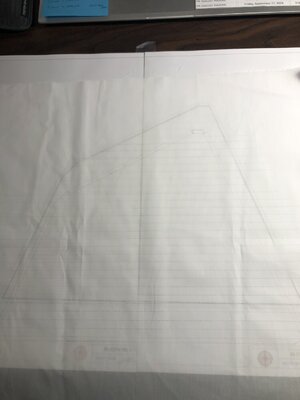
The result before hemming. I also ironed this thing after every 3 to 4 rows of stitching to help keep out the puckers.
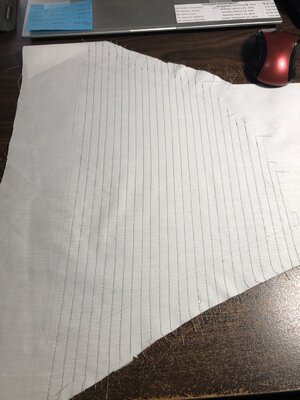
I am waiting on a wider 'rolled hem foot' for my machine because the one I have created too narrow a hem to accommodate the grommets I'll be using.
So, I might as well show what my warmup and test pieces looked like, they were not very encouraging to me but gave me a great deal of information on how to proceed.
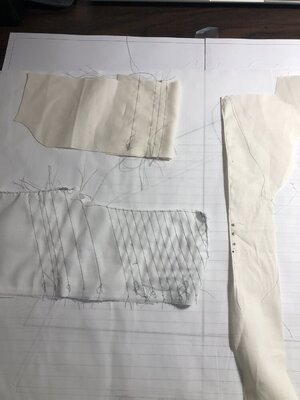
Thanks for watching on this project, hope there is some useful info here.
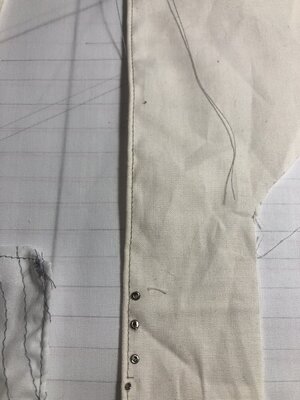

Next, I cut out material the size of two sheets and taped it down over the template then traced the image onto the material.
By extending the stitch lines beyond the sail edges, allows me to start and stop sewing outside the boundaries.


The result before hemming. I also ironed this thing after every 3 to 4 rows of stitching to help keep out the puckers.

I am waiting on a wider 'rolled hem foot' for my machine because the one I have created too narrow a hem to accommodate the grommets I'll be using.
So, I might as well show what my warmup and test pieces looked like, they were not very encouraging to me but gave me a great deal of information on how to proceed.

Thanks for watching on this project, hope there is some useful info here.

Good morning Daniel. Plenty, plenty detail there Daniel. The way to go. Awesome. Every time I see you guys making sails it changes my mind to “No sails” again……Good afternoon, all. I finally finished all the pre fitting of hardware on all the booms and gaffs. This is not a lot of progress as I started this portion of the build almost a month ago. I want to give Peter @Peter Voogt, a big thank you for sharing his work from his build, I used his photos as the basis for placement of my fitting's location. Take a look see.
View attachment 407428
So now it is time to begin fabricating the sails and attach them to the appropriate mast and booms along with the rest of the standing rigging.
I plan on setting the rat lines last purely for easier access to sail attachment on the mast.
Thanks for looking in and as always, happy modeling.
I have another breakthrough concerning bolt ropes and grommets on the sails. The following two photos of the BN2 show internal bolt ropes on the main sail attachment at the mast and boom. I have also seen exterior bolt ropes there as well. Notice the grommets in between the rows of stitching.
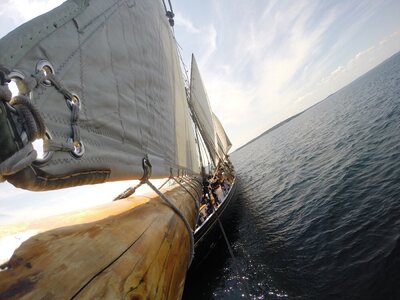
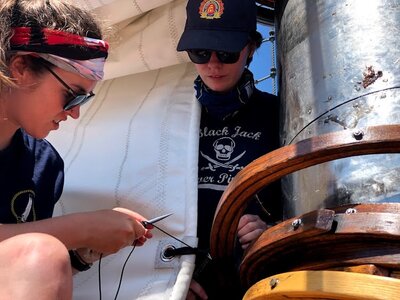
Here an example of exterior bolt ropes.
Well, there you go, I elected to go with all enclosed bolt ropes so no glueing or sewing of the ropes. I have produced after much trial and error my version of this type of sail construction. The following are my test strips with notes. The grommets will be a challenge to install uniformly, use a little too much pressure and they flatten out into ugly shapes.
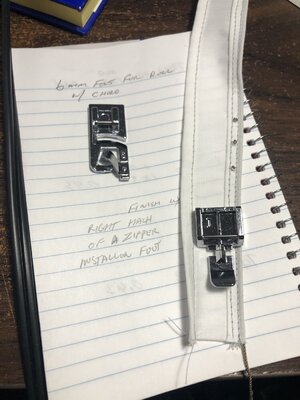
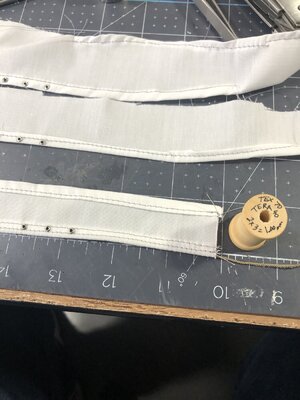
The bolt rope is my 1mm diameter test piece from my Vasa. I am going for visual effectiveness here at the high cost of scale so in keeping with a much earlier statement I made, when I finally get the installation completed and this all looks horribly out of scale, I shall have a major redo on my hands. Of course, I realize this ship is an amalgam of both Bluenoses and as such is no way a purebred model of the BN1. When I'm done hopefully, she will be a beauty.
See what you think so far and thanks again for checking in.


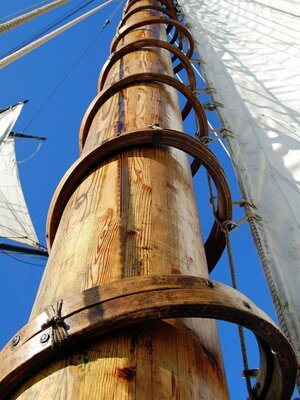
Here an example of exterior bolt ropes.

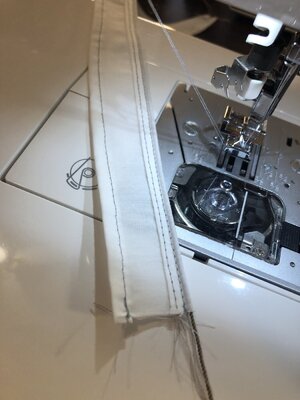
Well, there you go, I elected to go with all enclosed bolt ropes so no glueing or sewing of the ropes. I have produced after much trial and error my version of this type of sail construction. The following are my test strips with notes. The grommets will be a challenge to install uniformly, use a little too much pressure and they flatten out into ugly shapes.


The bolt rope is my 1mm diameter test piece from my Vasa. I am going for visual effectiveness here at the high cost of scale so in keeping with a much earlier statement I made, when I finally get the installation completed and this all looks horribly out of scale, I shall have a major redo on my hands. Of course, I realize this ship is an amalgam of both Bluenoses and as such is no way a purebred model of the BN1. When I'm done hopefully, she will be a beauty.
See what you think so far and thanks again for checking in.
Very clever Daniel! You have turned into quite the seamstress, haven't you?
- Joined
- Sep 4, 2022
- Messages
- 127
- Points
- 113

Folks, look at the third photo, the mast with hoops. Look at all the "laminations" that are bonded together to make that pole. Note that they are pretty much of several widths, no pattern to their widths. Fascinating.I have another breakthrough concerning bolt ropes and grommets on the sails. The following two photos of the BN2 show internal bolt ropes on the main sail attachment at the mast and boom. I have also seen exterior bolt ropes there as well. Notice the grommets in between the rows of stitching.
View attachment 408324View attachment 408325
Here an example of exterior bolt ropes.
View attachment 408328
Well, there you go, I elected to go with all enclosed bolt ropes so no glueing or sewing of the ropes. I have produced after much trial and error my version of this type of sail construction. The following are my test strips with notes. The grommets will be a challenge to install uniformly, use a little too much pressure and they flatten out into ugly shapes.
View attachment 408330View attachment 408331View attachment 408332
The bolt rope is my 1mm diameter test piece from my Vasa. I am going for visual effectiveness here at the high cost of scale so in keeping with a much earlier statement I made, when I finally get the installation completed and this all looks horribly out of scale, I shall have a major redo on my hands. Of course, I realize this ship is an amalgam of both Bluenoses and as such is no way a purebred model of the BN1. When I'm done hopefully, she will be a beauty.
See what you think so far and thanks again for checking in.
- Joined
- Sep 3, 2021
- Messages
- 5,198
- Points
- 738

This is exactly the reason I quite heavily compromised with the sail construction.I am going for visual effectiveness here at the high cost of scale
Eagerly awaiting the results of this exercise.
It looks very promising, Daniel. But also a challenge to get the details (a bit) at scale.I have another breakthrough concerning bolt ropes and grommets on the sails. The following two photos of the BN2 show internal bolt ropes on the main sail attachment at the mast and boom. I have also seen exterior bolt ropes there as well. Notice the grommets in between the rows of stitching.
View attachment 408324View attachment 408325
Here an example of exterior bolt ropes.
View attachment 408328
Well, there you go, I elected to go with all enclosed bolt ropes so no glueing or sewing of the ropes. I have produced after much trial and error my version of this type of sail construction. The following are my test strips with notes. The grommets will be a challenge to install uniformly, use a little too much pressure and they flatten out into ugly shapes.
View attachment 408330View attachment 408331View attachment 408332
The bolt rope is my 1mm diameter test piece from my Vasa. I am going for visual effectiveness here at the high cost of scale so in keeping with a much earlier statement I made, when I finally get the installation completed and this all looks horribly out of scale, I shall have a major redo on my hands. Of course, I realize this ship is an amalgam of both Bluenoses and as such is no way a purebred model of the BN1. When I'm done hopefully, she will be a beauty.
See what you think so far and thanks again for checking in.
Regards, Peter
Good morning Daniel. When you carry that quality into the actual sails they are going to be stunning. Scale vs Visual presentation.....always that fine balance. I know you have gone through all the variables so some beautiful sails are coming.....Cheers GrantI have another breakthrough concerning bolt ropes and grommets on the sails. The following two photos of the BN2 show internal bolt ropes on the main sail attachment at the mast and boom. I have also seen exterior bolt ropes there as well. Notice the grommets in between the rows of stitching.
View attachment 408324View attachment 408325
Here an example of exterior bolt ropes.
View attachment 408328
Well, there you go, I elected to go with all enclosed bolt ropes so no glueing or sewing of the ropes. I have produced after much trial and error my version of this type of sail construction. The following are my test strips with notes. The grommets will be a challenge to install uniformly, use a little too much pressure and they flatten out into ugly shapes.
View attachment 408330View attachment 408331View attachment 408332
The bolt rope is my 1mm diameter test piece from my Vasa. I am going for visual effectiveness here at the high cost of scale so in keeping with a much earlier statement I made, when I finally get the installation completed and this all looks horribly out of scale, I shall have a major redo on my hands. Of course, I realize this ship is an amalgam of both Bluenoses and as such is no way a purebred model of the BN1. When I'm done hopefully, she will be a beauty.
See what you think so far and thanks again for checking in.
Hello Paul, how about amateur seamster. It's a little more gender specificVery clever Daniel! You have turned into quite the seamstress, haven't you?


Good eye Alf. They must use the world's strongest wood glue for that!Folks, look at the third photo, the mast with hoops. Look at all the "laminations" that are bonded together to make that pole. Note that they are pretty much of several widths, no pattern to their widths. Fascinating.
Thanks Johan, I'm not sure yet if I can get away with steel grommets on the jib sails, haven't quite thought that one thru yet.This is exactly the reason I quite heavily compromised with the sail construction.
Eagerly awaiting the results of this exercise.
Indeed Peter, balancing scale with appearance is always a challenge for me.But also a challenge to get the details (a bit) at scale.
Thanks Grant, I always like to lean on your encouragement.Good morning Daniel. When you carry that quality into the actual sails they are going to be stunning. Scale vs Visual presentation.....always that fine balance. I know you have gone through all the variables so some beautiful sails are coming.....Cheers Grant
Good afternoon everyone. For those who celebrate Thanksgiving I hope you had a great one.
I finished sewing all 8 sails for my BN2. I must say I regret having posted my post #909 as I was not able to produce the look I was after in any consistent way. I could get good results for a few inches then the hem would go haywire leaving no practical way to recover thus destroying the look of the complete sail. The results while trying netted 2 redos of the Main Sail, 1 each Jib and Jib Topsail and one Jumbo. I also conducted several more test runs like the ones in my post#909 each with more or less the same results. So, at this point I resorted to the same method I used on my Vasa also the 1mm grommets have been deleted from my design. Below are the completed group of eight which I have every confidence will present well on the finished model.
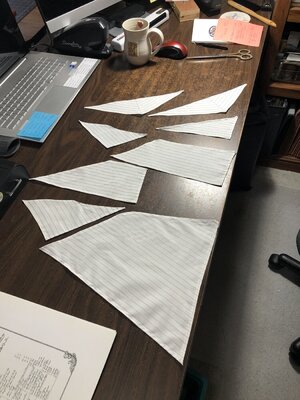
I sure thank you all for joining in on this build.
I finished sewing all 8 sails for my BN2. I must say I regret having posted my post #909 as I was not able to produce the look I was after in any consistent way. I could get good results for a few inches then the hem would go haywire leaving no practical way to recover thus destroying the look of the complete sail. The results while trying netted 2 redos of the Main Sail, 1 each Jib and Jib Topsail and one Jumbo. I also conducted several more test runs like the ones in my post#909 each with more or less the same results. So, at this point I resorted to the same method I used on my Vasa also the 1mm grommets have been deleted from my design. Below are the completed group of eight which I have every confidence will present well on the finished model.

I sure thank you all for joining in on this build.


