The Schooner Bluenose 1921, POF Yuanqing Models 1:72 [COMPLETED BUILD]

Thanks Grant, Ha! now I'm seriously considering just a polyurethane coating if I can find some that's just darkened a little, say like an Oak shade.

On my Sopwith Camel build, I used a mix of golden oak stain with polyurethane clear coat, both water based. I got away from oil based products due to fumes indoors. So you can mix stain in with clear to get the desired tint, but be sure to use a mixing cup and mix it in parts, say 5/1, so you can duplicate it on other areas if needed.
 
On my Sopwith Camel build, I used a mix of golden oak stain with polyurethane clear coat, both water based. I got away from oil based products due to fumes indoors. So you can mix stain in with clear to get the desired tint, but be sure to use a mixing cup and mix it in parts, say 5/1, so you can duplicate it on other areas if needed.
Dean, I believe you just solved my dilemma. I have a water based clear polyurethane but could not find one with a colorant. So, you just gave me the solution, many thanks my friend. I will use your volumetric approach as well.
 
Good Monday morning all.
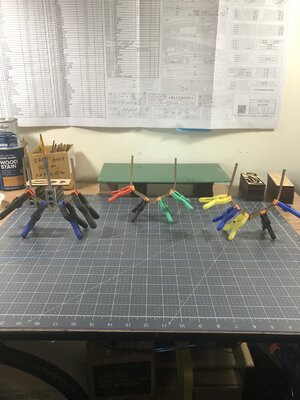
I do not have anything new of significance except to show a little progress with the frames. Here a couple of creative displays. You can see I'm up to frame #26 which is about halfway. I will still need to finish sand with 320 grit on the fore and aft faces of all of them then coat the same faces and the interior surface before placing onto the keel. Once all in place and glued in I can finish sanding in the exposed faring side and seal it off.

IMG_2409.jpgIMG_2412.jpg

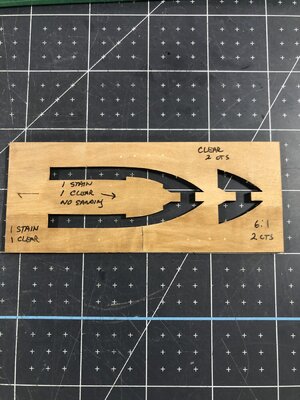
I have decided to mix mat finish polyeurathane with some golden oak stain (both water based) for my surface finishes. Below are some samples I prepared.
I do appreciate the fact I dont have to worry about glueing anything onto this type of surface at least in theory anyway.
IMG_2413.jpg
IMG_2414.jpg

What's interesting is it doesn't seem to matter if I mix a 6:1 or 1:1, the result looks identical to me.

Thanks for dropping by and happy modeling.
 
Hi Daniel. Will you be leaving the interior framing exposed/visible in places? Will you need to also fair the interior face of the frames?
Thats a great question Paul. I have already sanded them down to the faring lines. I will determine if more is needed when I start dry fitting some of the longitudinal bracing and cross beams. There is no interior planking to deal with so if it looks like it will be needed I certainly will but just not sure at this time.
 
Thats a great question Paul. I have already sanded them down to the faring lines. I will determine if more is needed when I start dry fitting some of the longitudinal bracing and cross beams. There is no interior planking to deal with so if it looks like it will be needed I certainly will but just not sure at this time.
I only asked because of your comment about applying finish to the interior surface of the frames - I'm not sure what would happen if some places got sanded down and had stain/poly reapplied? I guess it would all match? Or?
 
Dear Daniel,
Just found your log on this part of the site. Sry to response so very late in the process. I would like, correction, I would love to pull a chair and perhaps find a seat in the last row. I'll be there looking what you are doing with this kit. I'll make the time to catch up and dive into your build.

regards,
Peter
 
I only asked because of your comment about applying finish to the interior surface of the frames - I'm not sure what would happen if some places got sanded down and had stain/poly reapplied? I guess it would all match? Or?
Well, that's another good point Paul, I will sand out part of my samples and reapply the mixture and check the results. It just occurred to me, I need to glue a couple of drop offs together, sand the edge down and check to see how the end grain takes the poly mixture. Typically end grain stains much darker. Thanks for the discussion, Paul. I'm hoping some answers will show up during the dry fit.
 
Dear Daniel,
Just found your log on this part of the site. Sry to response so very late in the process. I would like, correction, I would love to pull a chair and perhaps find a seat in the last row. I'll be there looking what you are doing with this kit. I'll make the time to catch up and dive into your build.

regards,
Peter
Hey Peter, welcome aboard! I'm so glad you found my log. This type of build is very new to me.
 
Hey Peter, welcome aboard! I'm so glad you found my log. This type of build is very new to me.
Thanks for having me onboard. I never build a POF and I do like the BlueNose schooner very much. Your building skills are great so I'm sure it will be a perfect example for others to follow and inspire on. :)
Like so many others before you like Dean, Peter, Johan, Heinrich and many more I'm sure you have all the great help a man needs on this task.
 
Thats a great question Paul. I have already sanded them down to the faring lines. I will determine if more is needed when I start dry fitting some of the longitudinal bracing and cross beams. There is no interior planking to deal with so if it looks like it will be needed I certainly will but just not sure at this time.
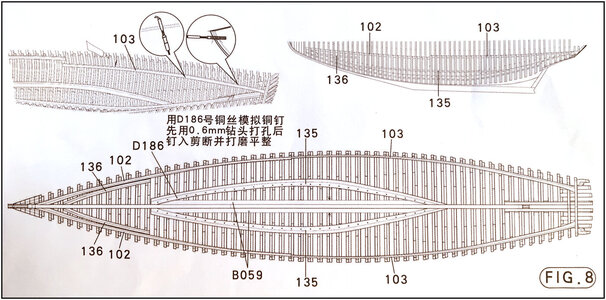
There are some longitudinal internal beams: 102/103 and 135/136.
CA62F61F-3533-475D-BB3B-201F5491DACA.jpeg
But sanding the insides for the nice fit of them is well possible when you have installed the frames. So, no hurry, Daniel.
Regards, Peter
 
If you take some time to

There are some longitudinal internal beams: 102/103 and 135/136.
But sanding the insides for the nice fit of them is well possible when you have installed the frames. So, no hurry, Danial.
Regards, Peter
I appreciate the advice, Peter. It probably would behoove me to hold off on the poly on the inboard side of the frames until I get a good idea (after glue up) of the amount of internal fairing required, access won't be a problem but only on the fore/aft sides of the frames.
 
I appreciate the advice, Peter. It probably would behoove me to hold off on the poly on the inboard side of the frames until I get a good idea (after glue up) of the amount of internal fairing required, access won't be a problem but only on the fore/aft sides of the frames.
As long as it doesn't penetrate deep into the wood and flow out to the sides, like with linseed oil, then it shouldn't be a problem.
The advice is: if you have to wait for the glued frames to harden, take the drawings and look the steps ahead with regard to the whole construction of the hull, including deck beams. Then you will not be faced with surprises. :)
But that is standard model-building procedure….. ;)
Regards, Peter
Yes sir, planning ahead is indeed the secret to a successful build, and studying others build logs like yours.
 
I see the containers of stain and polyurethane clear coat, but can you tell us what the full names and brands are for others to try.
Sure Kurt.
Behr Premium Fast Drying Water-Based Wood Stain (Golden Oak) .... The Behr brand is carried at 'Home Depot'.
Varathane Ultimate Polyurethane Water-Based (Crystal Clear Matte) ... Also found at 'Home Depot'.
 
Looking good Daniel. You will want to do some internal fairing after the frames are glued to the keel and the jig. That way you have full adhesion of deck supports and sister keelson, etc. Not much sanding is needed. ;)
Also I coated all internal frames and beams after assembly and prior to adding the deck beams.
And…the clear coat will not change your ability to glue anything together, regardless of the order you do it.
 
Back
Top