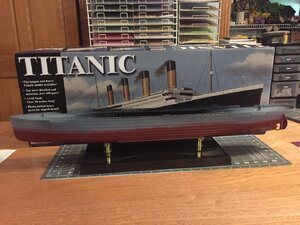
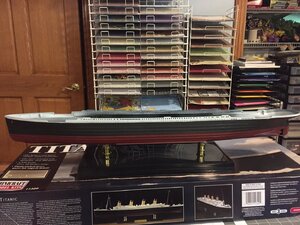
Titanic 1/350 MiniCraft Kit build

Joined
Aug 1, 2020
Messages
105
Points
88

The first thing I noticed when opening the box was the "heavy handed" plate detail on the hull. Someone please talk me out of trying to "fix" that. The builds I have reviewed on this look great as far as I can tell from the photos. Wondering if anyone has tried to make the plating look better.

Titanic box.JPGTitanic hull.JPG
 
I'm going to leave the plating as is. I am in the process of drilling out the port holes. I normally build WWII aircraft. The same skills/processes but with ships you do everything 50-100 times!
 
I left my portholes intact.
Glad you mentioned that. I am going to experiment with leaving the portholes intact and filling with Future to simulate glass. I read on another build site where the guy drilled them out then filled with Krystal Klear. This has the potential of giving same effect w/o the drilling
 
Last edited:
I'm going to leave the plating as is. I am in the process of drilling out the port holes. I normally build WWII aircraft. The same skills/processes but with ships you do everything 50-100 times!
Yeah that's the thing with ships, a lot of repetition. The lifeboats and davits for instance. If you make photo etch benches that is pretty boring too.
 
Glad you mentioned that. I am going to experiment with leaving the portholes intact and filling with Future to simulate glass. I read on another build site where the guy drilled them out then filled with Krystal Klear. This has the potential of giving same effect w/o the drilling
I drilled mine out, and used Model Master glue/window maker to "make" the windows. It works well.
 
I drilled mine out, and used Model Master glue/window maker to "make" the windows. It works well.
That's good to hear. I have some of the same stuff and have been experimenting with it. Did you drill out all the small port holes? Also the instructions say to "open the hawse pipes with a small file". Do they mean to cut out the area inside that raised oval? I haven't been able to find any photos clearly showing that area. thanks
 
Yes, I drilled out all of the port holes. I drilled out the hawse pipe holes in the center (use a punch so your drill bit doesn't wander) then filed them to size. I used my model files, a half round did the job.
If you drill out the port holes it makes it easier to light as you wish using leds later on. Not all of the port holes would be lit so you can blacken the ones you want dark.
If you want to go for broke (literally), Scale Decks offers a wood deck overlay and I believe it's $85.00.
 
ChrisSC sent me the link for the Scale Decks. Looked great on his build. I am going to try to use the decks as is. If not satisfied with the results I might have to bite the bullet and go for the upgrade deck.
 
Gorilla glue works well on those deck, as it gives you a little time for positioning.. When you do the captains quarters, stop at the bulkhead to the quarters as the thickness of the decking, though slight, will affect the spar deck fit over the captain's quarters. After the bulkheads are in, cut the scale deck to fit the interior of the quarters if you wish.
 
I've been experimenting with "glass" for port holes. I tried Model Master Window Maker but am not satisfied with the results. It dries clear but not smooth. I had much better results with Elmer's glue. It levels out nicely. It is more opaque but adding some "Future" over it made it nice and shiny. Since I am not planning to add lighting that should not be an issue ( I don't think it would be an issue anyway since there is no interior detail to see). I drilled out the large port holes on the port side. I will fill those with the Elmers/Future combo. I plan to just use Future on the starboard side. I left all the small port holes intact and will treat them with Future only. I will post photo(s) once I get the hull painted. So far it is just primer.
 
I finally got the hull painted except for the sheer stripe. I painted the antifouling section a "mineral red" and the mid area is a mixture of flat black and gun metal. The upper part is a semi-gloss white. The kit supplies decals for the sheer stripe but I can't imagine trying to apply then over those two rows of rivets. I will try painting first.hull.JPGpainted hull.JPG
 
Back
Top