To victory and beyond ...

A litte bit late from my side, but nevertheless a very deep hearted Thank You!

As I did never found the time to pick up the retrospoective about my main build of the Victory, here a small diversion into one of my many side projects of this build, trying to get a feeling for this great vessel and its history: To Victory and beyond!

XXXDAn
 
It started with the usual destruction on the ship yard aka: "Ouops, I did it again" ...

oups_220109_1158.jpg


XXXDAn
 
There always needs to be hammer on cliché pictures of model ship builders.

Even when they're rigging.

They're not that far off.

Or to paraphrase Schiller, "What wilt thou with a hammer, speak!"

Victory1010-windows-211210_0739.jpg


Victory1010-windows-211210_0741.jpg


XXXDAn
 
A short look back:

More than 5 years ago I started a 1910 Victory.

Victory-1910-hull_0953.jpg


The starboard side was already prepared, the test piece was already made, but then a slow full stop: it didn't work the way I wanted ...

Victory-1910-hull_1092.jpg

I wanted to glue the whole hull with 0.3 mm sheet plastic and engrave the plank edges.


Victory1010-windows-211212_0750.jpg


But the thin sheet becomes so wavy because of the glue that it had to be taken off again. I also wanted to make the decorative strip out of brass, but that didn't work either ...

When I was building the cutaway sections, I also noticed that it is elementary for the whole appearance that the windows are properly aligned and the crosses are neatly mounted, both of which could only be done with extreme effort at that time.

Victory-1920-190407_3056.jpg


Aim was for that the rest should look as neat as this.

So go back to start ...

In good german tradition: Take a hammer, chisel and a rough file and start over again!


XXXDAn
 
Thank you Pete!

With the possibility of printed parts I finally saw the chance to mass-produce the window crosses in a neat ship shape fashion. To get the vertical alignment of the window panes, I had the idea to link opposite windows over a wooden rod. Therefore I constructed a window frame with an adapter behind it, so that you can pull out the stick trough one side and cover the hole with the square window pane in front.

Victory1010-windows-211219_0780.jpg


Inside it looks like this ...

Victory1010-windows-211219_0786.jpg


... and outside like that :)

Victory1010-windows-211219_0781.jpg


Rods pulled out, gaps of the frame filled and trimmed, it looks good for now.

Victory1010-windows-211215_0770.jpg


Instead of the polysterol sheet I used 300 gram paper cut in single planks. That could look like this.

Victory1010-windows-211219_0775.jpg


You can also see that the window crosses are difficult to paint. The window panes are also still intransparent black.

But above all, the windows are difficult to align at an horizontal angle.

Therefore a new system. Window frame with cross on a "carriage" that stands on the deck and thus guarantees height and angle. The window pane can then be added from behind and be secured by a small frame.

Victory1010-windows-211220_0790.jpg


Since these windows were square, and the decorative strip had to sit exactly at the top and bottom of the window, I put a piece of round rod in to align the decorative moulding.

Victory1010-windows-211222_0793.jpg


And it looks very cute :)

Victory1010-windows-211224_0794.jpg


Victory1010-windows-211224_0795.jpg


XXXDAn
 
Pictures from 1900 show exactly that all the whales had been removed.

Vic-hull-1910.JPG


The middle middle whales of the kit can be easily filled up, only the lower ones stick out. So out the coarse file :)

Victory1010-windows-211226_0826.jpg


The black sharpie line above and below the whale is for height control. The copper plates are protected with duct tape.

Victory1010-windows-211226_0829.jpg


Then make a notch with the edge of the file to the required depth, i.e. to the black. If the notch is nice and even, then you have a nice depth control. And then the next notch next to it. And then blacken the notches and sand away the ridges between the notches and ...

Victory1010-windows-211227_0832.jpg


... smooth as a child's bottom.

After filling in the spaces in between the whales, I did another installation test. Gluing in parts from the inside ...

Victory1010-windows-211229_0838.jpg


... then trimm with a little excess. You need fast and sharp cutting disc, because the resin is quite brittle.

The excess material makes it easy to fill in and doesn't mess up the inside.

Victory1010-windows-211229_0847.jpg


Cleaned up with the sanding tool and primed, it's already close to what I want.

Victory1010-windows-220104_1126.jpg


And to make the whole thing easier to paint, now printed in white resin ;-)

Victory1010-windows-220104_1133.jpg


The matching frames for the window pane holders are also included and you can see the "gun carriage" well :)

XXXDAn
 
And then, once again, came catastrophies, confusion and bewilderment.

In some places the filling of the whales had come loose, so large-scale surgery.

Victory1010-windows-220104_1144.jpg


But it got even more irritating when I only wanted to check if the front and back port windows were parallelogramming like the corresponding old gun ports. Only to find that the windows are not square at all ...

... mot de Cambronne ...

... and that they did not even sit on the top and bottom of the moulding as I believed before.

So I measured the different windows again and checked different ratios, as a model maker has to have reasonably reproducible measurements for the planks later. This attempt was too flat ...

Victory1010-windows-211229_0836.jpg


... after another attempt, the size for the lower deck was finally better defined.
 
And then finally I was able to start. Open the gun port ...

Victory1010-windows-220104_1140.jpg


... check from the outside that the width of the frame fits ...

Victory1010-windows-220104_1141.jpg


... from the inside, that the height at the top is correct ...

Victory1010-windows-220104_1142.jpg


... and finally clear the lower edge. The frame should touch the hull only on one side, the other side and top and bottom must have a minimum of clearance, otherwise the frame body will bend quickly.

Victory1010-windows-220104_1143.jpg


Then the whole appearence looks even.

Victory1010-windows-220104_1145.jpg


When glueing in the frames, you could also see nicely on the inside of the hull if the long "carriages" are properly aligned.

Victory1010-windows-220104_1147.jpg


Then cut the outside to the right length with a bit of excess ...

Victory1010-windows-220104_1148.jpg


... fill ...

Victory1010-windows-220104_1149.jpg


... neaten ...

Victory1910-windows_220109_1160.jpg


... and that's how I had imagined it :)

Victory-1910-Windows_220109_1162.jpg


Now just find the right window pane.

XXXDAn
 
Many Thanks for showing us your amazing work on this / these models - Great work my friend
 
Then came the window panes. PVC film and matt transparent sellotape on the back ...

Victory1910-windows_220115_1199.jpg


... gives exactly the right opacity against inside view while ...

Victory1910-windows_220115_1207.jpg


... the outside reflects well, to be seen on both pictures on the right side window.

Victory1910-windows_220115_1211.jpg


And then the special windows for the four old Trafalgar guns on the middle deck.

Victory1910-windows_220115_1191.jpg


Victory1910-windows_220115_1193.jpg


Victory1910-windows_220115_1215.jpg


The guns sit almost on the bottom edge of the port, an indication that the windows sat higher than the former gun ports. The interior view is also funny :)

Victory1910-windows_220115_1236.jpg


Then one of the 6 signal guns for saluting.

Victory1910-windows_220115_1222.jpg


But I still have to do some work on both of them, the half ring above the old gun and the middle window bars on the signal guns are too narrow.

The "chasing" windows at the stern are also in now, ...

Victory1910-windows_220115_1240.jpg


Victory1910-windows_220115_1244.jpg


... and even better with paint.

Victory1910-windows_220115_1258.jpg


XXXDAn
 
Come to the dark side. You want it too! Do you feel the force getting stronger?

The more you look at the windows, the more you notice how unevenly the sizes are distributed. At the beginning, I assumed a standard size - limited by the profile bar at the top and bottom - but the variety has become greater and greater.

Victory1010-windows.jpg


Nice to see here in the midship area. The two historic Trafalgar guns have distinctly different widths. The lower deck windows are the largest and reasonably uniform, in the middle deck I have been able to reduce it to 3 sizes but with 3 types of window frames, in the upper deck there are again 3 sizes with 2 types of frames and below the hut deck another size, these are the smallest windows. I have made an excel sheet to help me get through it ...

Pfortenlayout.gif


... and had the sizes printed on the window inserts and the corresponding pane holders :)

Victory1910-windows_1271.jpg


Victory1910-windows_1278.jpg


Type height approx. 2 papillary strips*** ;-)

XXXDAn


*** Also called dpi: dafi papillary strip index
 
Somehow I still have some sanding to do and somehow I'm afraid that I'll get a lot of dirt behind the windows ...

That's why I temporarily put in the decks ...

Victory1910-windows_220123_1288.jpg


... and opened all the window ports so that the inserts fit well.

The front 2 gates are also being closed right now, because ...

Victory1910-windows_220123_1291.jpg


... around 1922 they were also closed :)

Victory_1922_Hull.jpg


A wonderful picture*** from 1922! You can see how the Victory was still lying on the water shortly before :-0

The bolts in the holes and especially the detail I'm looking forward to building the most: the support of the chimney pipe!

The port/window at the very front was still open for many years, but judging by the sequence of photographs it was planked over sometime between 1900 and 1920.

Best regards, DAniel

PS***: The historical picture is mirrored to match my construction pictures.
 
Since I have to print with black resin paint at the moment and thus can't easily put my white parts in between, here is a bit of preparation for the next steps. Sometime around 1860 to 1880 the Victory got a small booth on the poop deck.

This probably served as a shelter for the watch and was small in the early years ...

Victory-Poop-Booth-1.jpg


... but was quite quickly converted to a more comfortable size.

Victory-Poop-Booth-2.jpg


Therefore, here is the determination of the approximate dimensions and position based on the available photographs.

Measures-Poop-2.jpg


Here is the approximate relationship between the distance between the mizzen mast, the booth and the stern. It was easy to measure in some of the pictures and the values were always approximately the same. You have to compensate a little for the perspective shift, but the basic dimensions seem to be right.

Measures-Poop-1.jpg


On this view you can determine the width of the booth at its aft end, this point was already defined in the first step. Practically, the width of the booth is equal to its height. The two flag lockers could also be determined by the iron supports at the bulwark.

With this I have been able to draw a plan of the quarterdeck that is good enough for my purposes.
The measurements are 1:100.

Measures-Poop-3.jpg


And the height of the bulwark could also be roughly determined via the sailor's belly button. On the outside view I could also determine the foreward end of the bulwark by means of a port.

So far it fits.

XXXDAn
 
While the printer was finally processing white resin again, some more planning and work preparation went on. The bulwarks of the open decks will have to be built. This has to be placed on top of the plastic hull shells, so construction, positioning and stability are a challenge. That's why I first filed gaps in the deck support for supports of the bulwarks.

Victory1910-windows_220123_1290.jpg


Then the supports are glued in place and a 2 mm polysterol plate is put on top.

Victory1910-windows_220125_1293.jpg


Clamps to press the plate to the support and wire to press the plate down to the hull.

Victory1910-windows_220125_1292.jpgs


Then in the deck, slots for the supports were cut ...

Victory1910-windows_220125_1294.jpg


... and the interior panelling added.

Victory1910-windows_220125_1296.jpg


But it looked too thick compared to the photos. That's why I removed the panelling and the supports and it still holds perfectly.

Victory1910-windows_220125_1300.jpg


I sanded the cut edge again to get an even gluing surface. Since all my big files have a very distinct convexity, I took a stable piece of wood and glued it on with sandpaper :)

XXXDAn
 
Thank you Jim!

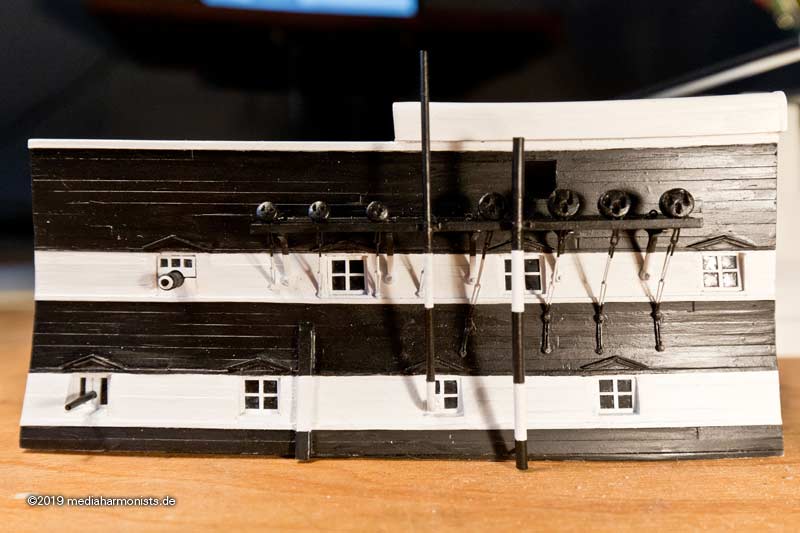
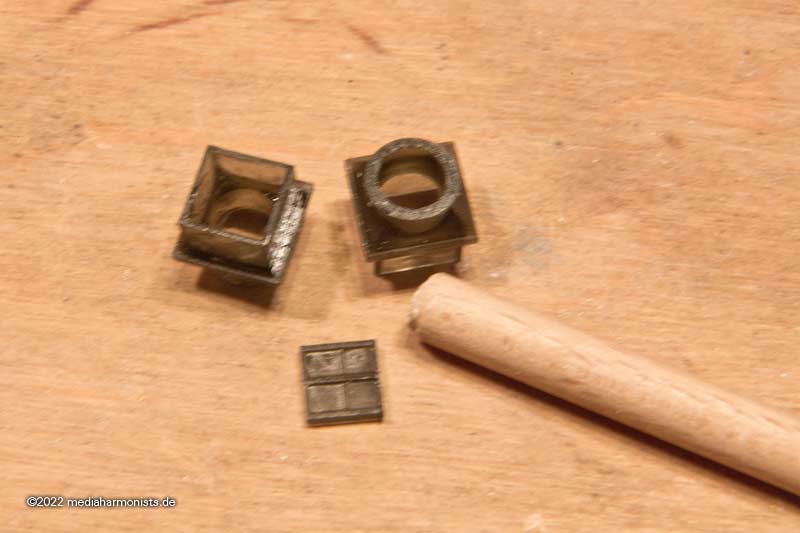
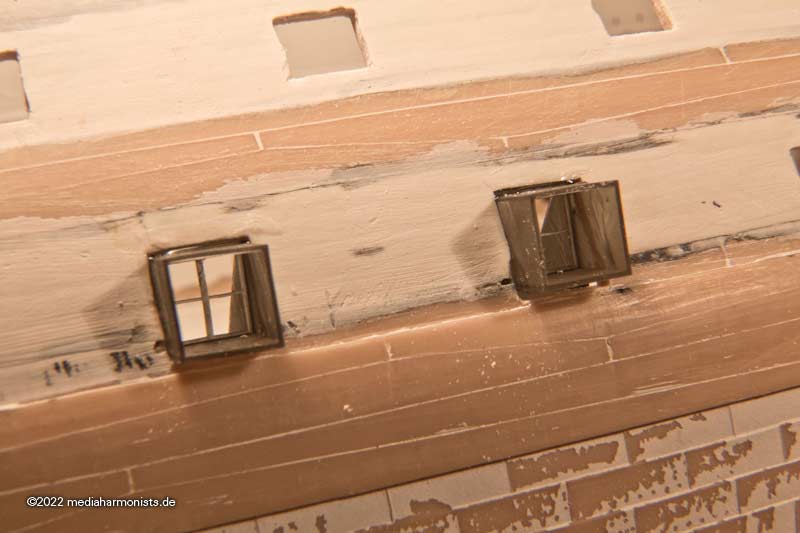
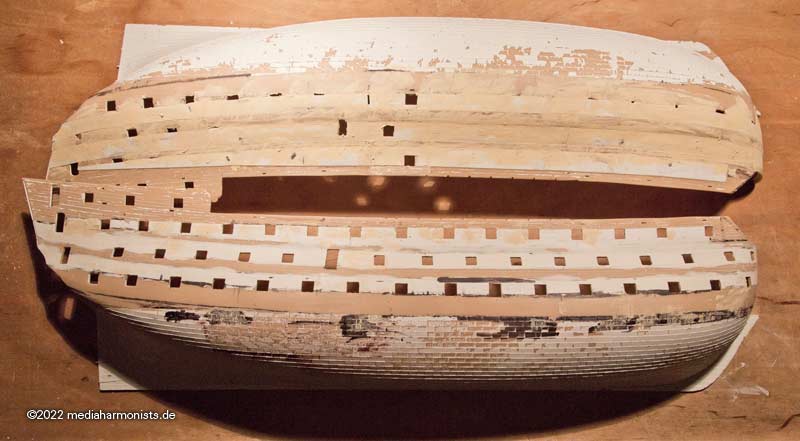
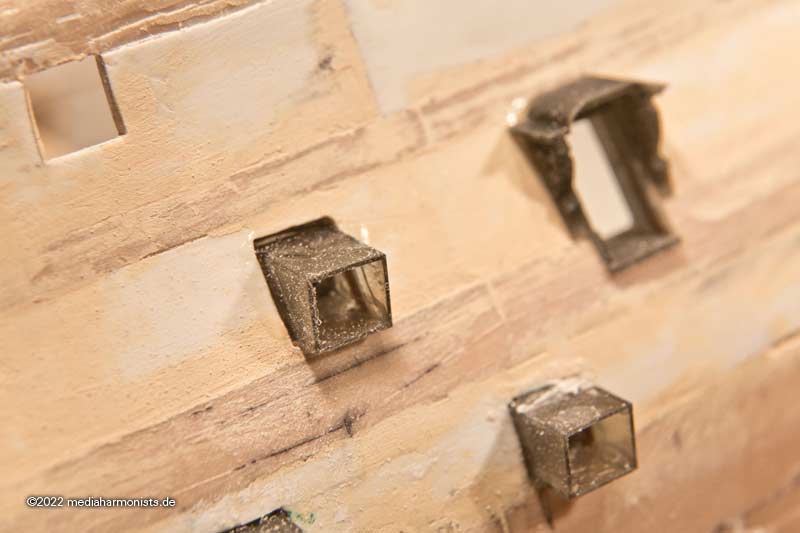
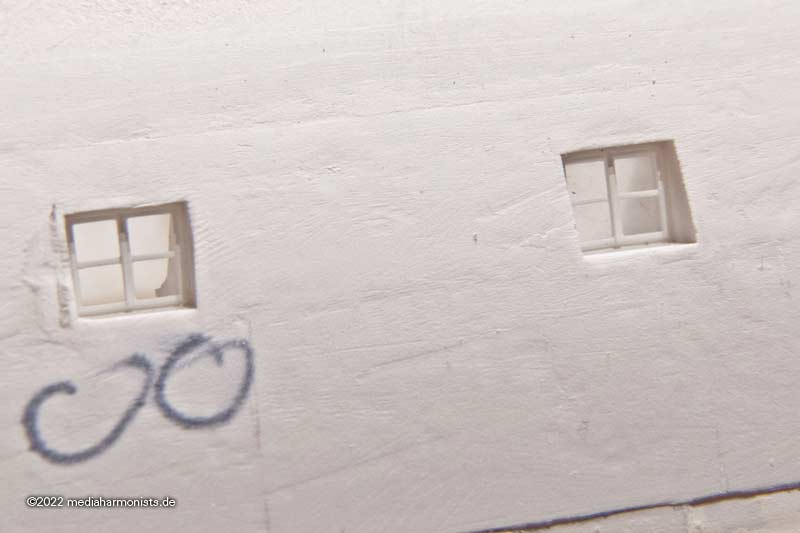
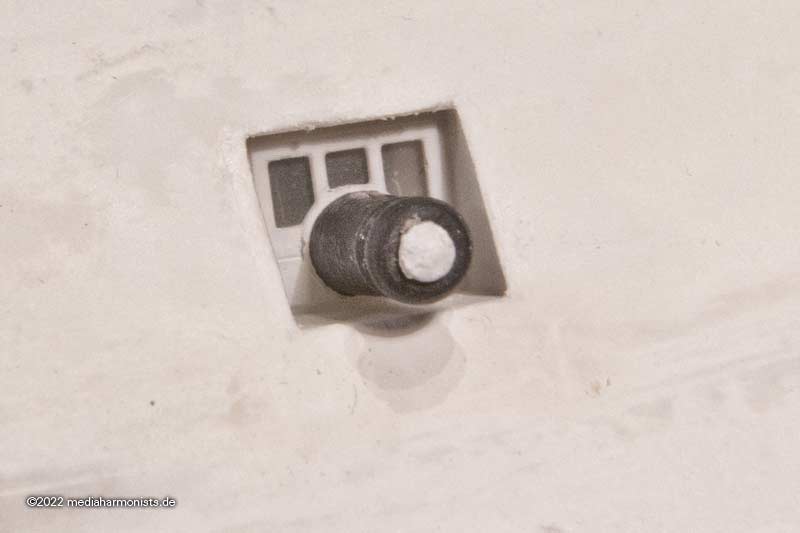
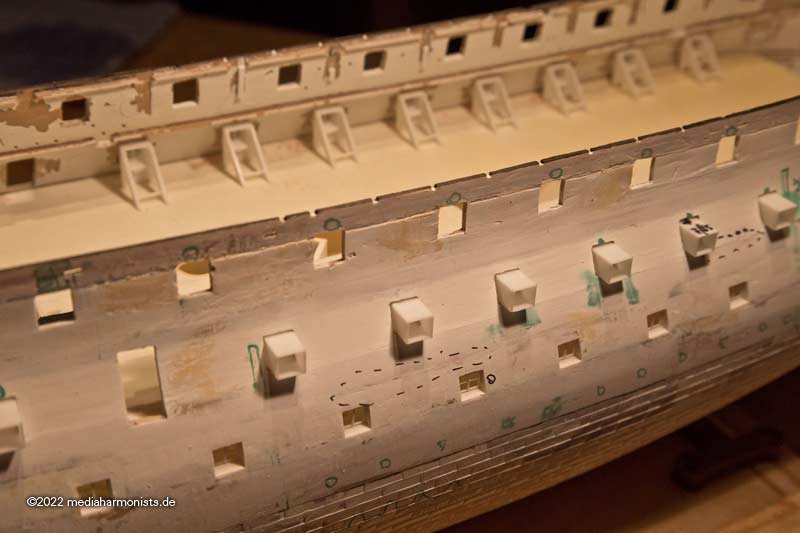
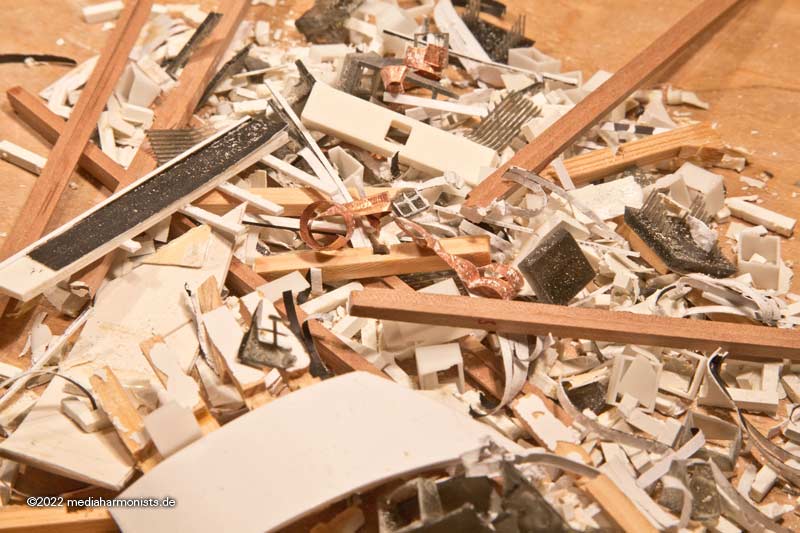
In the meantime, the white parts are also finished. And always these brain pictures. These were the two Trafalgar guns in the first attempt ...

Victory1910-windows_1273.jpg


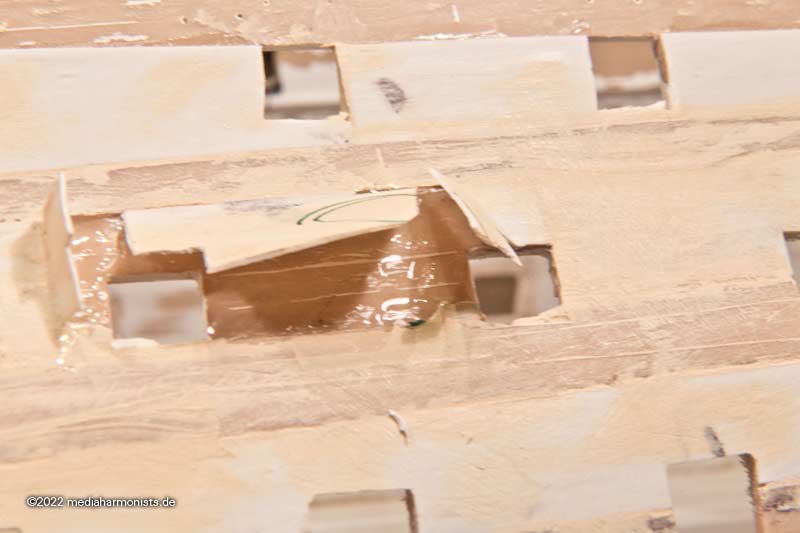
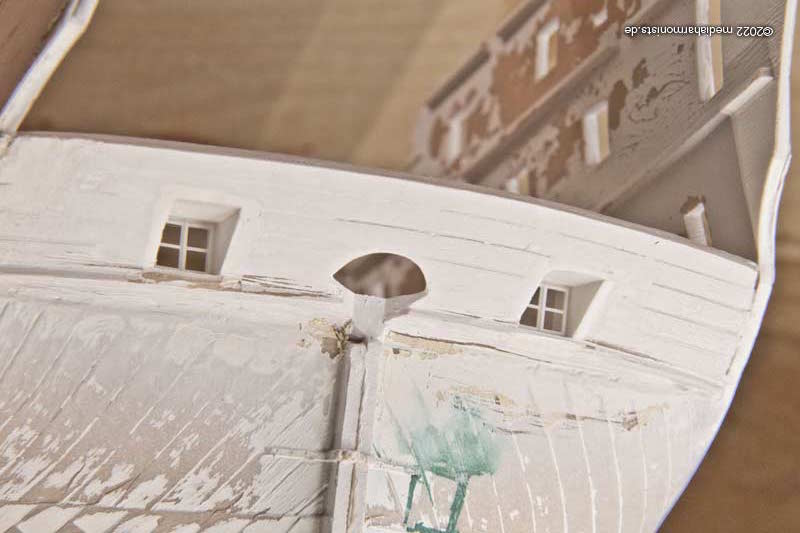
... but when I checked the window dimensions again ...

Victory1910-windows_220130_1305.jpg


... crap, the panes only have two parts. Three parts were at the guns in the upper deck.

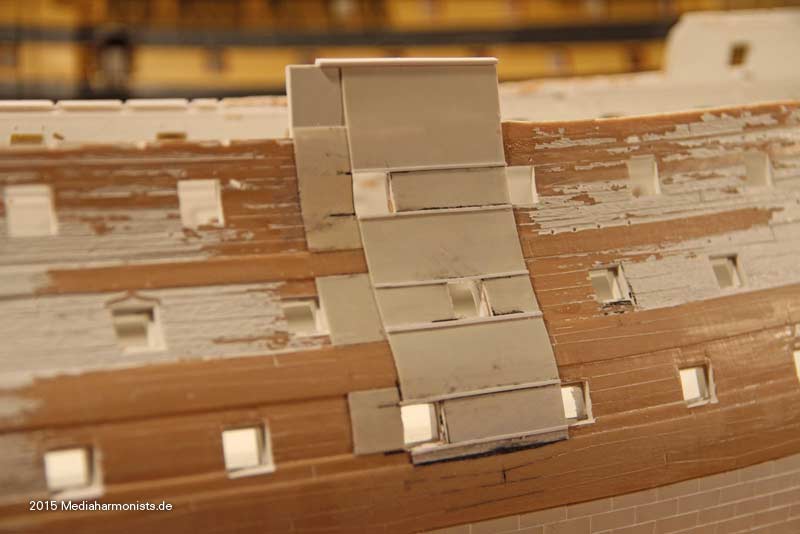
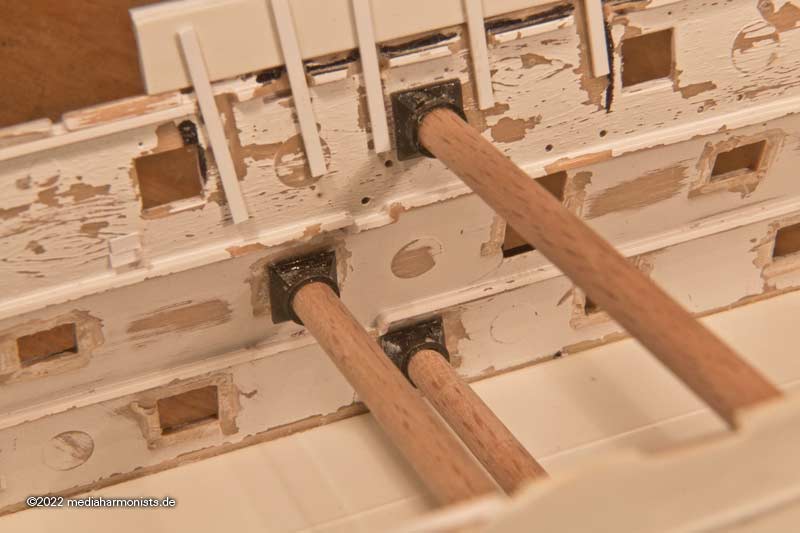
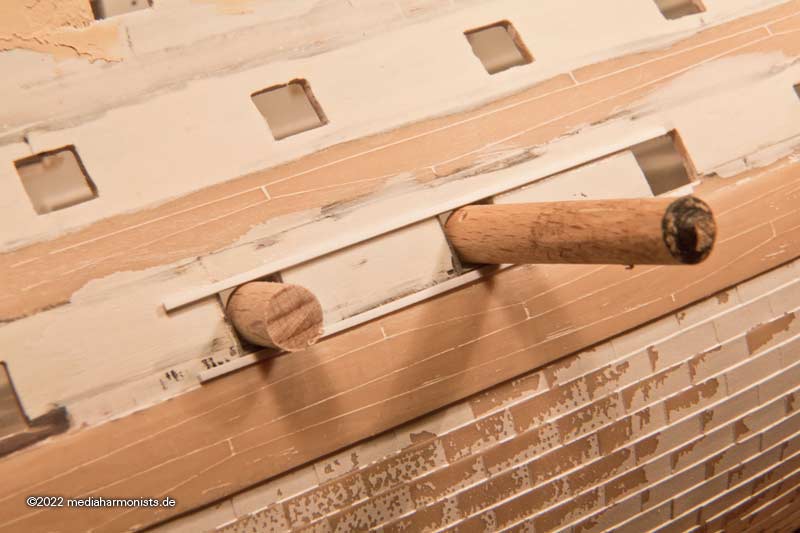
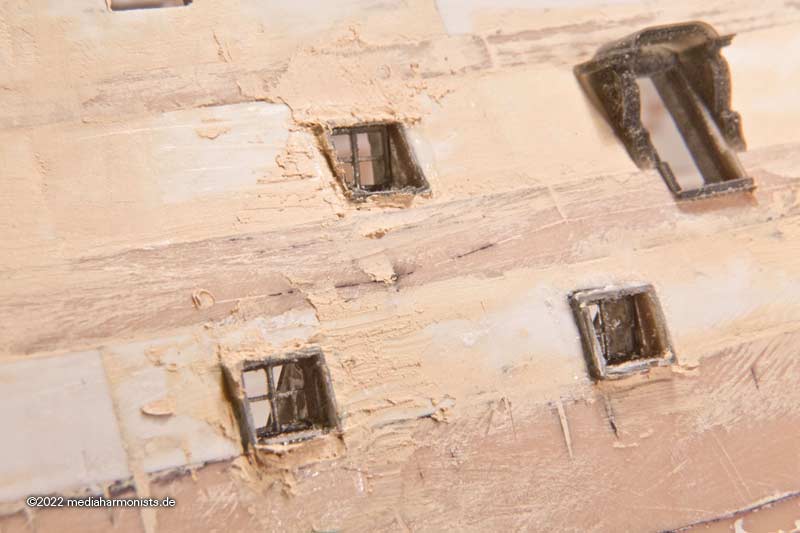
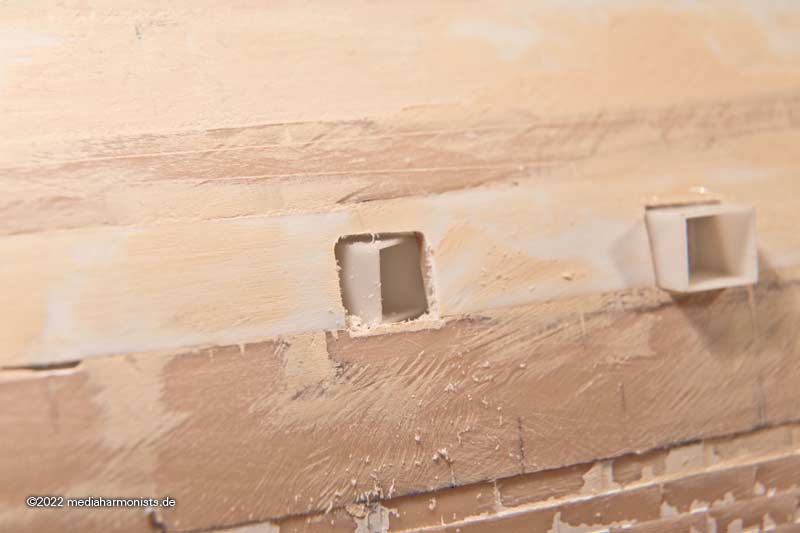
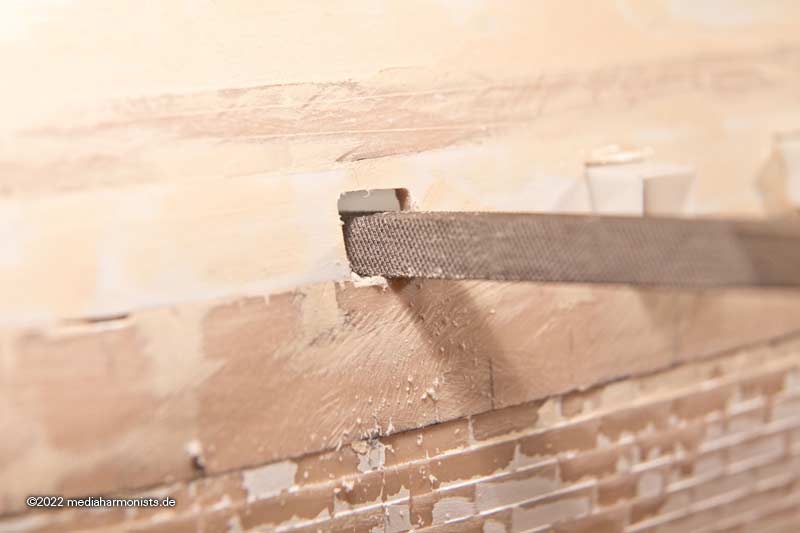
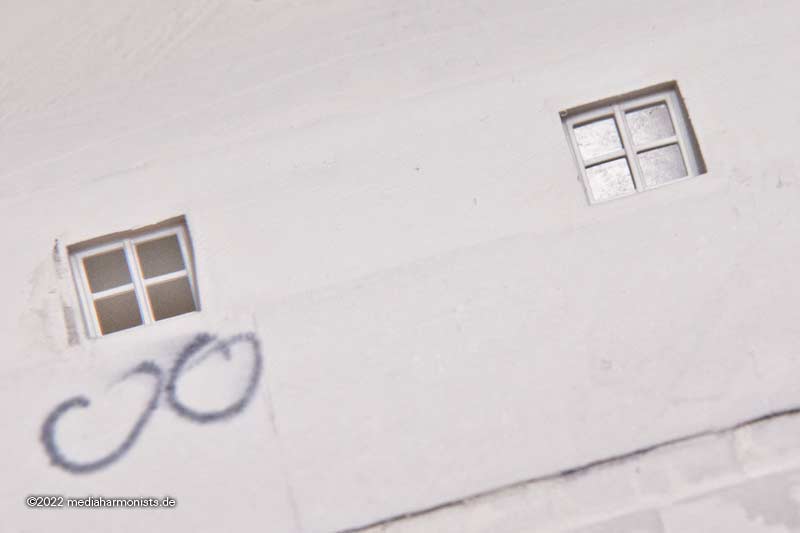
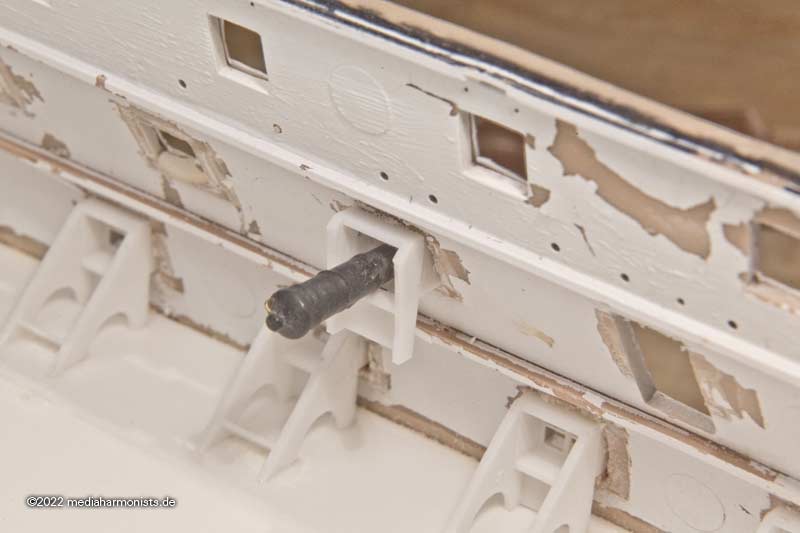
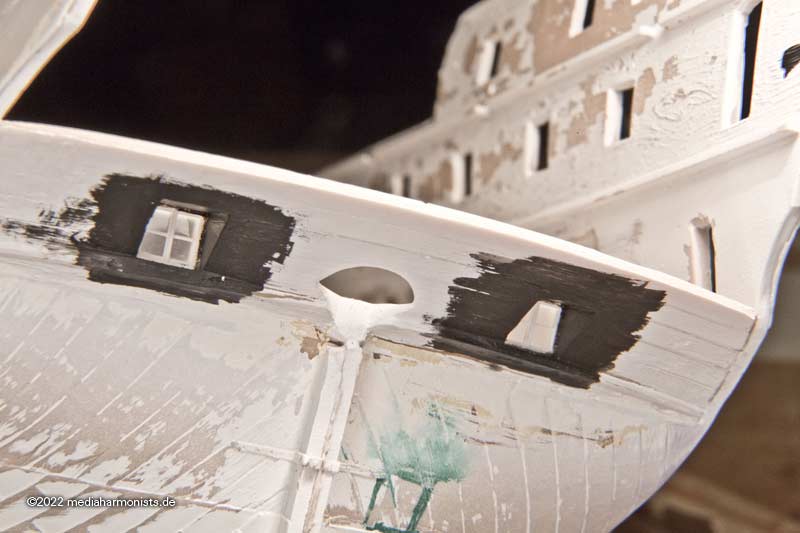
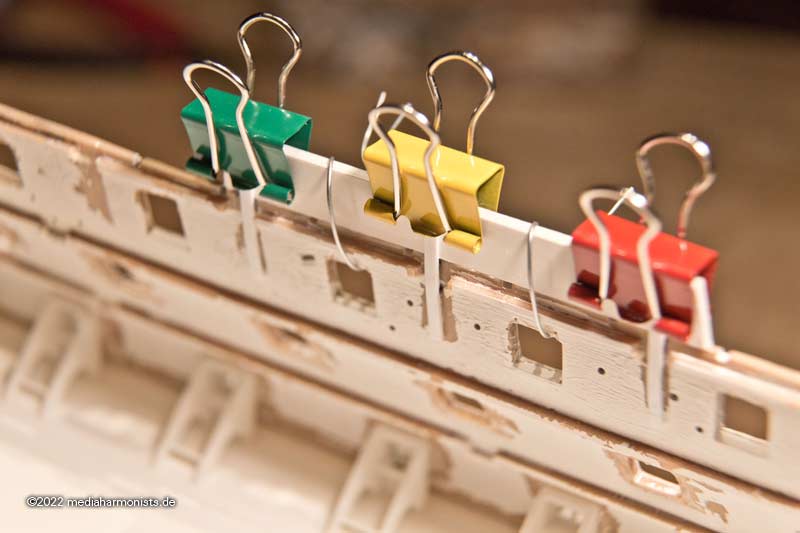
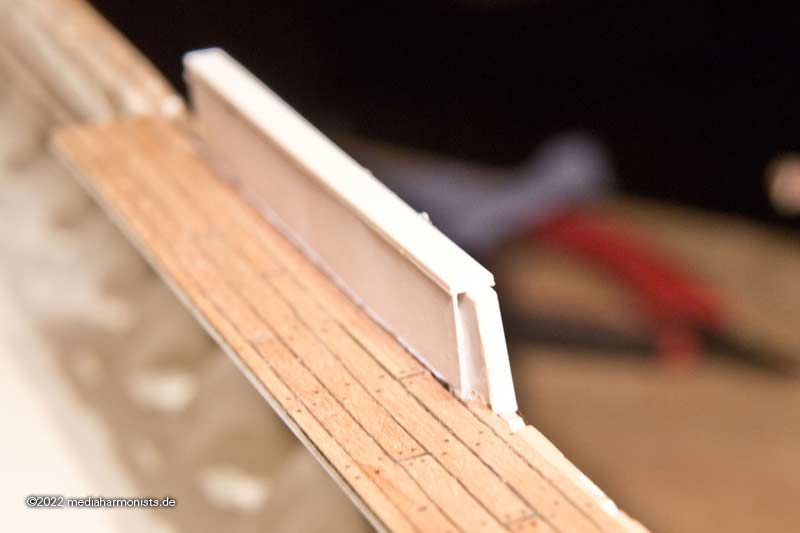
Then glued in the frame as before ...

Victory1910-windows_220130_1307.jpg


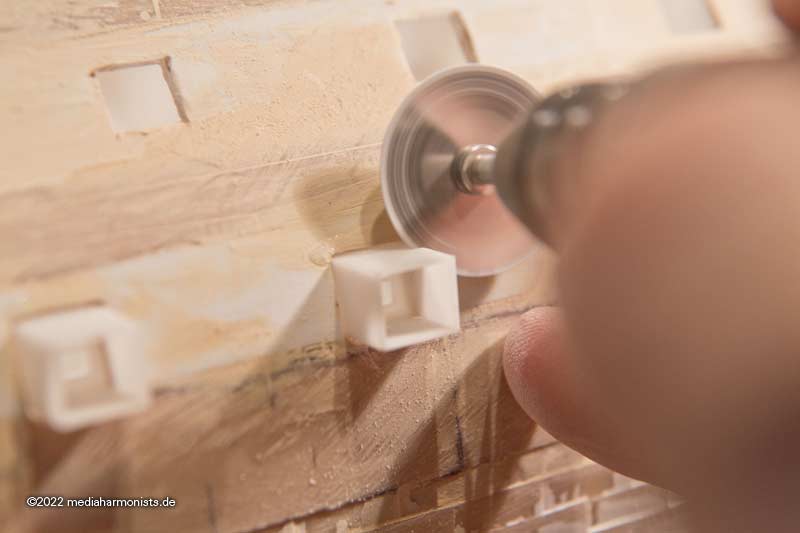
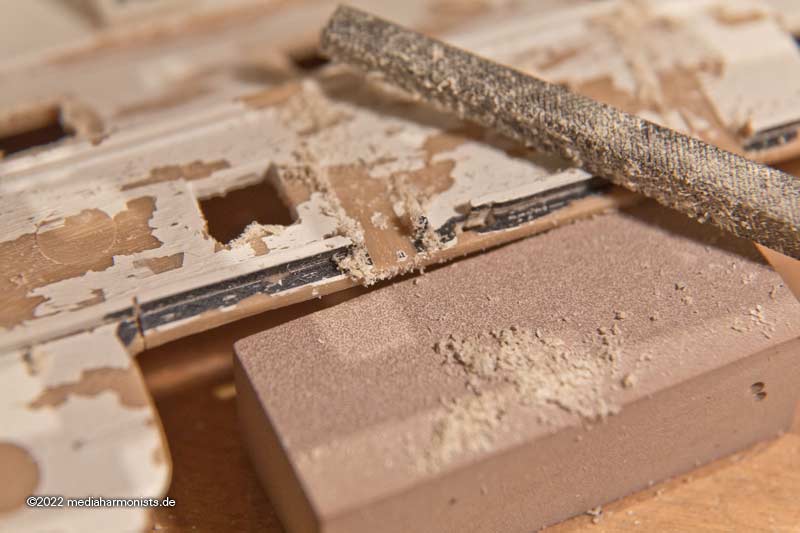
... filler pieces glued in for better support ...

Victory1910-windows_220130_1320.jpg


... and filled with putty:)
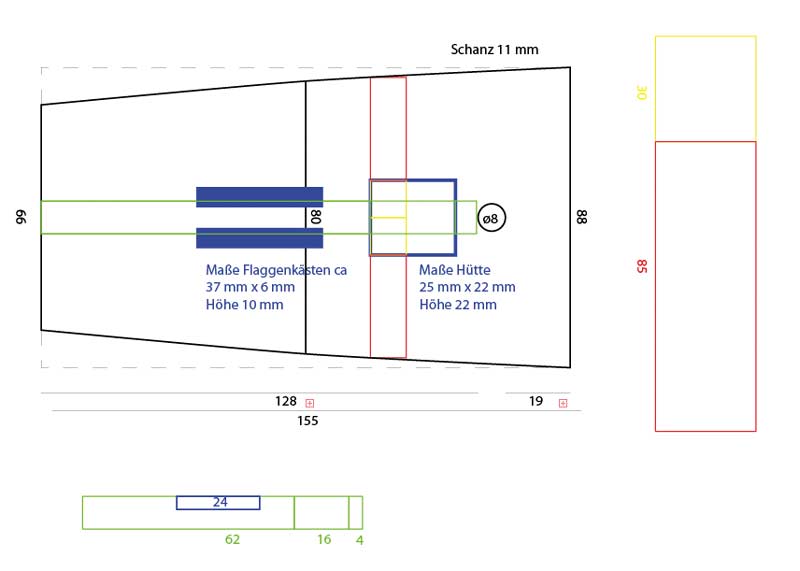
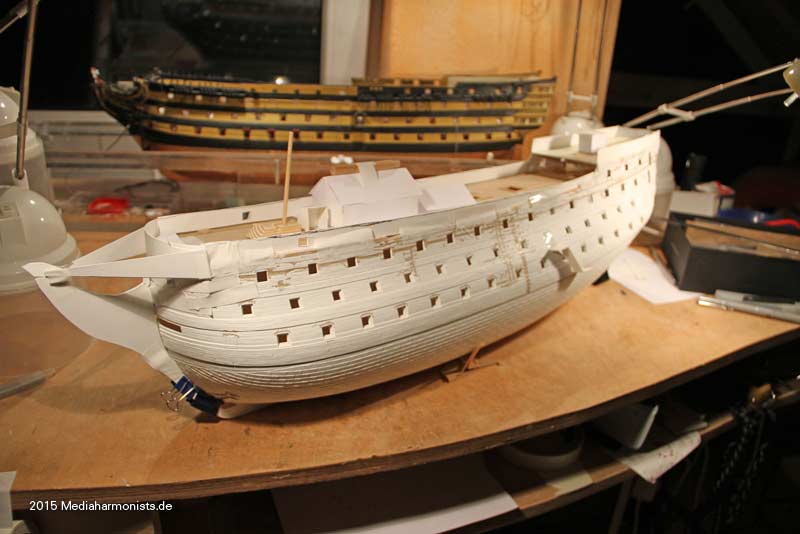
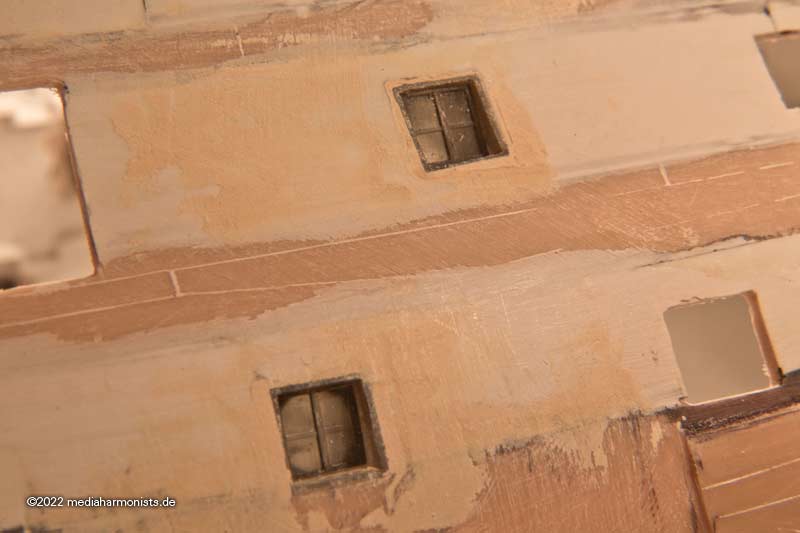
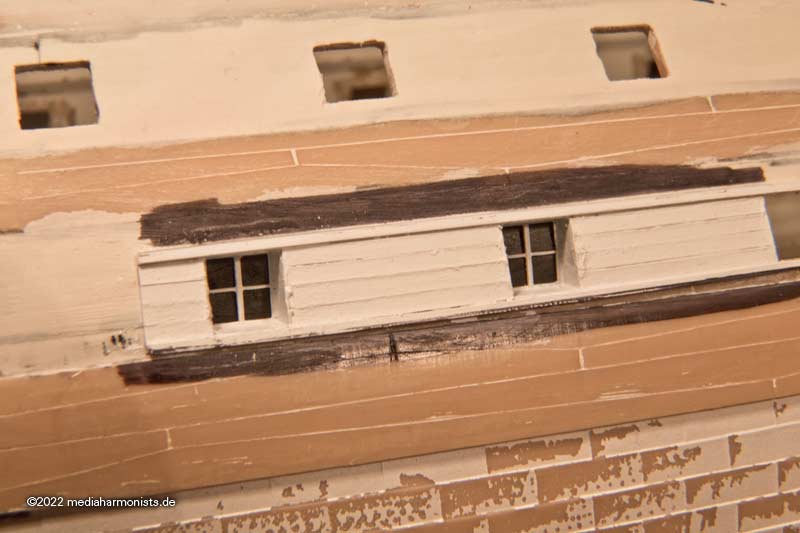
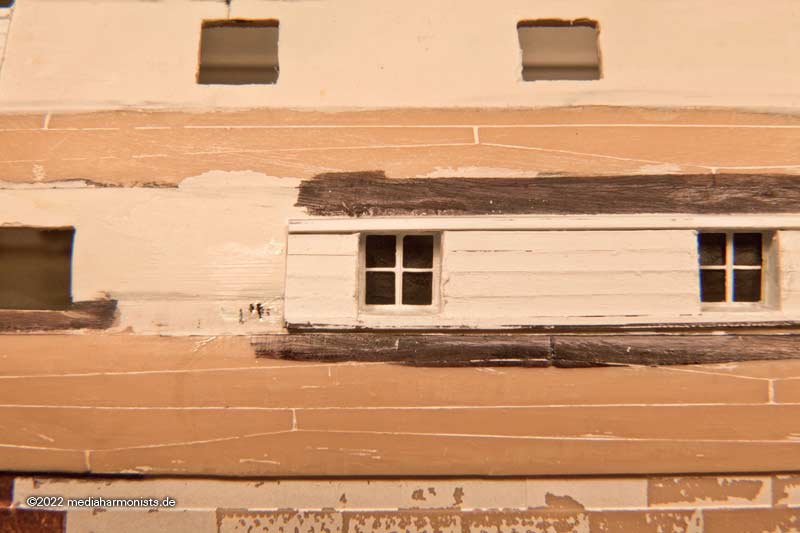
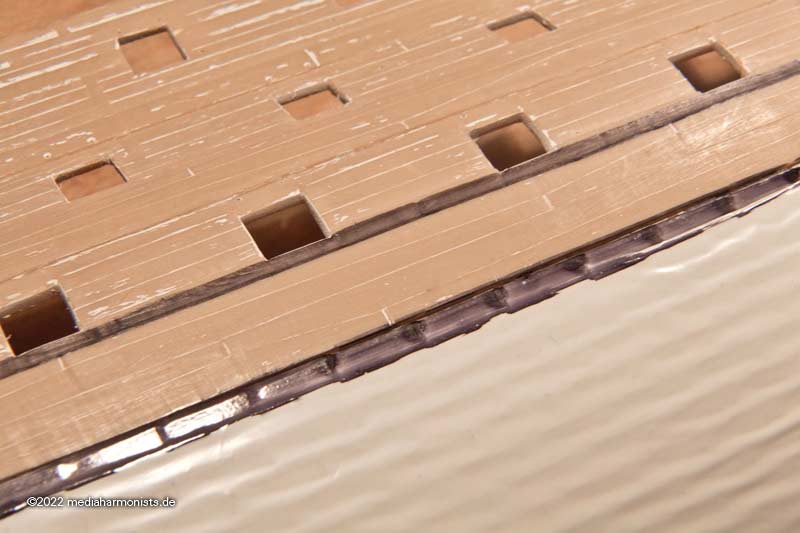
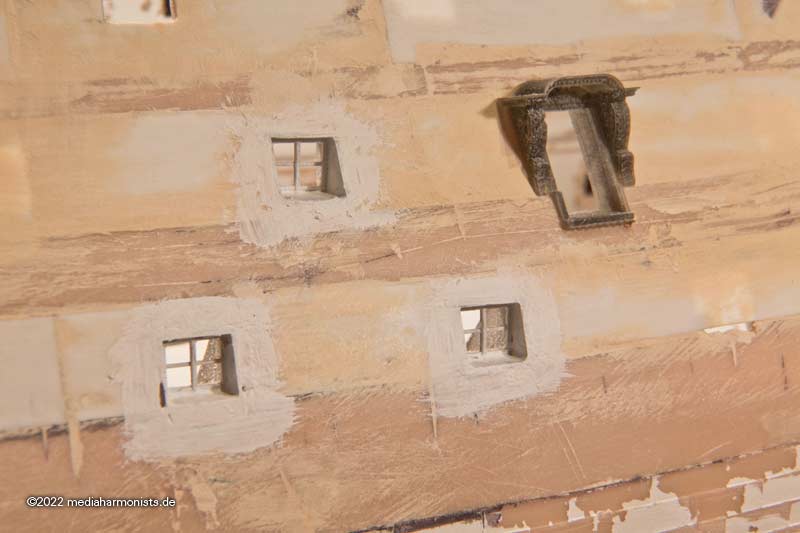
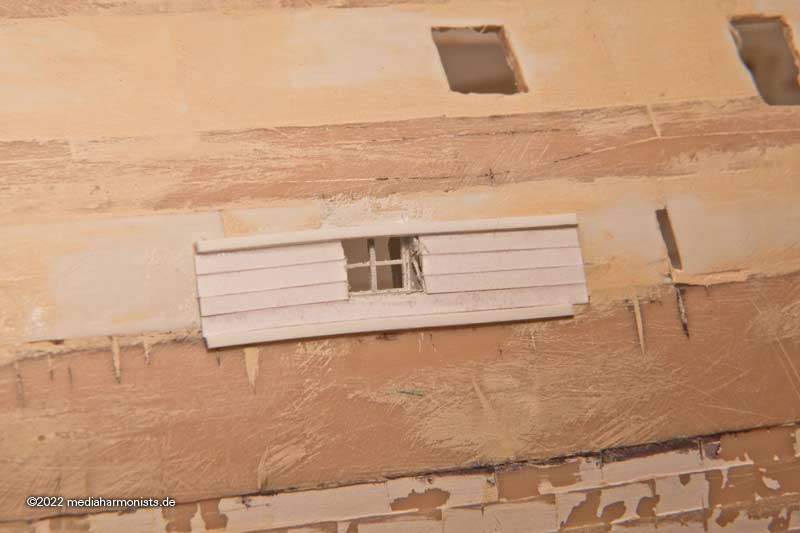
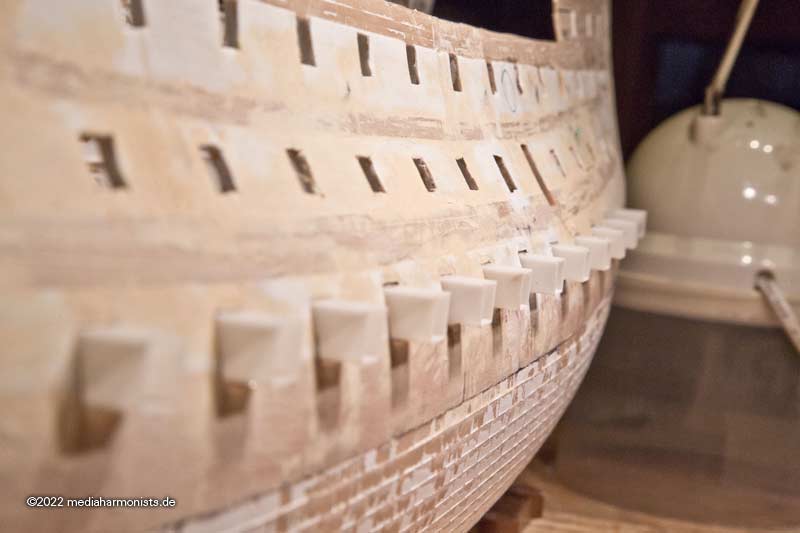
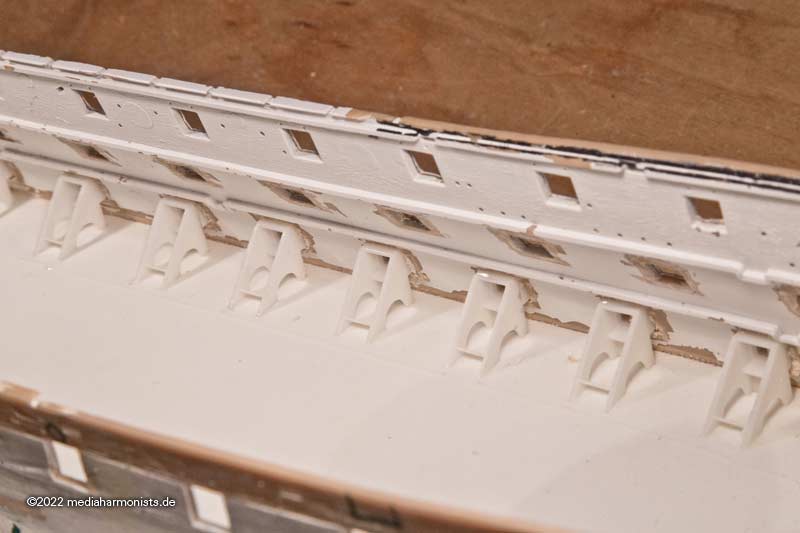
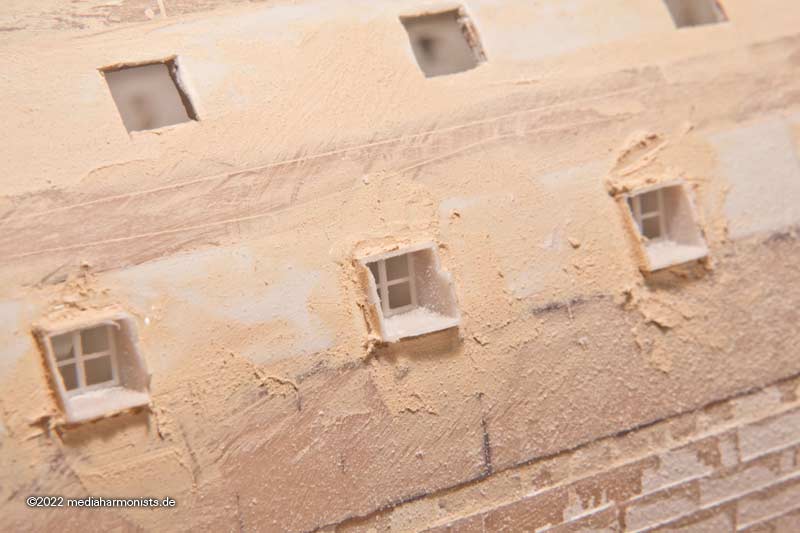
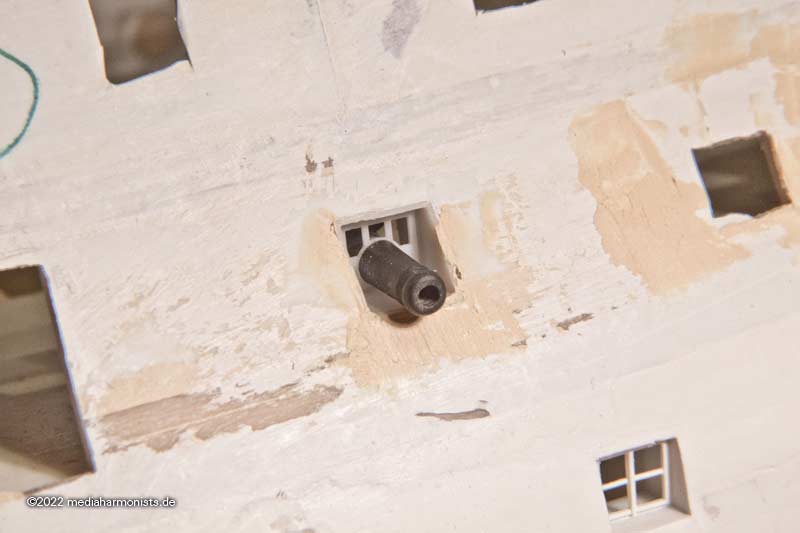
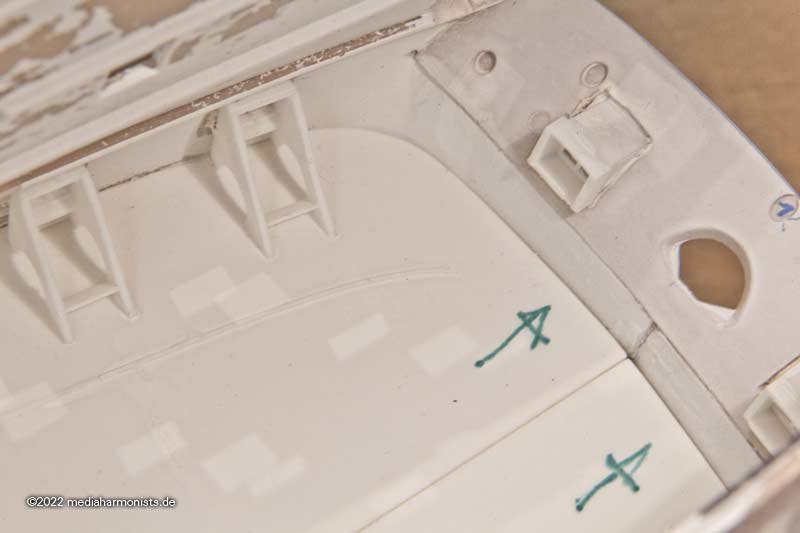
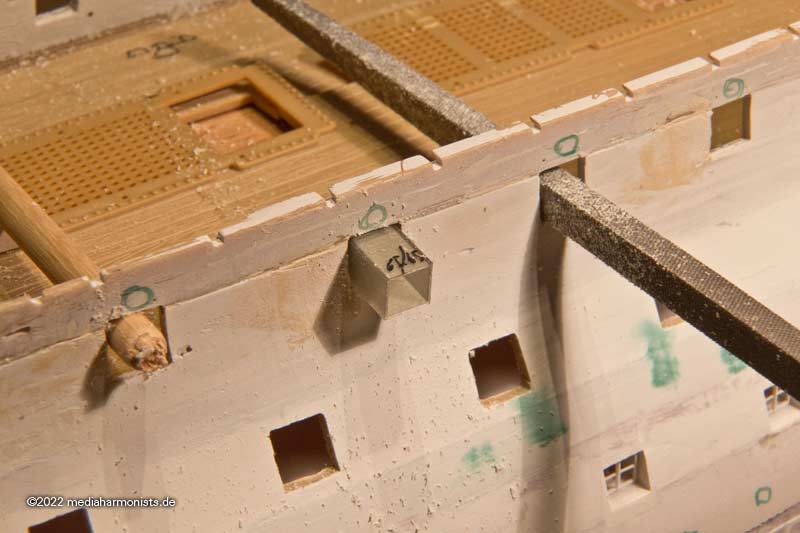
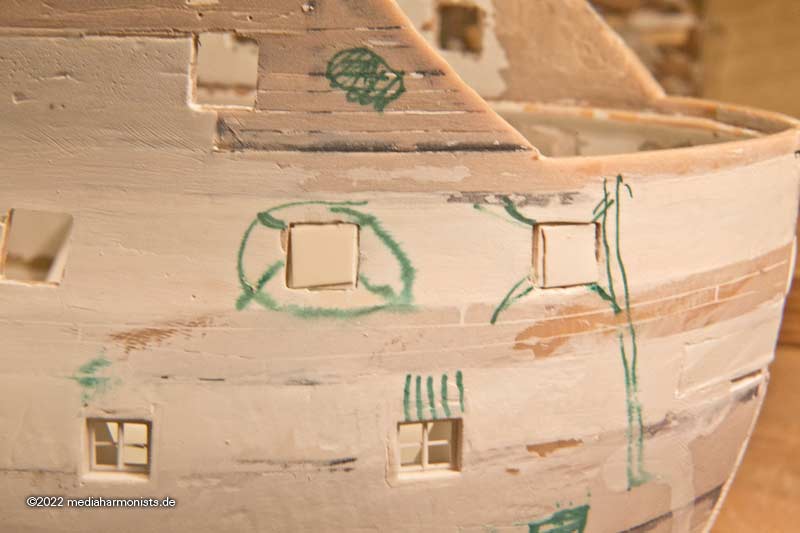
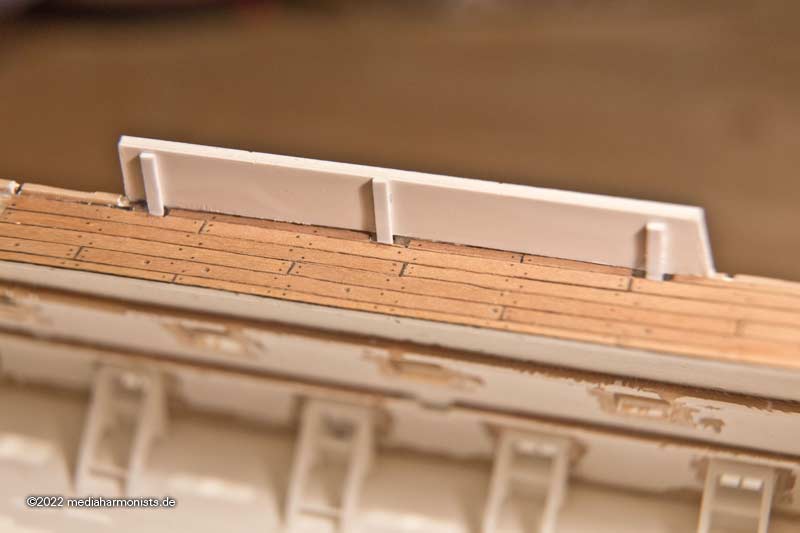
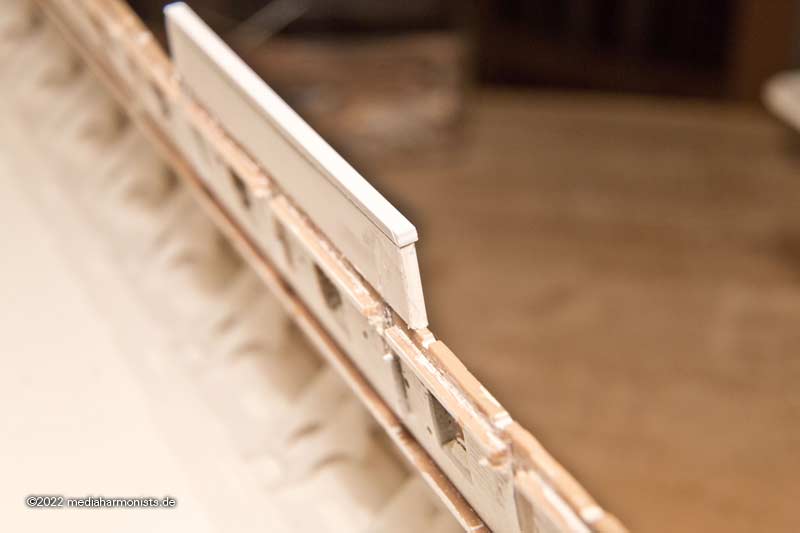
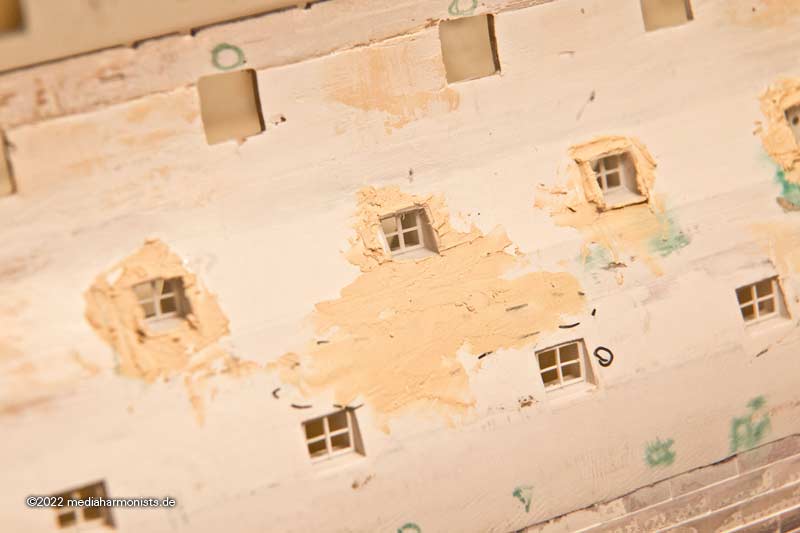
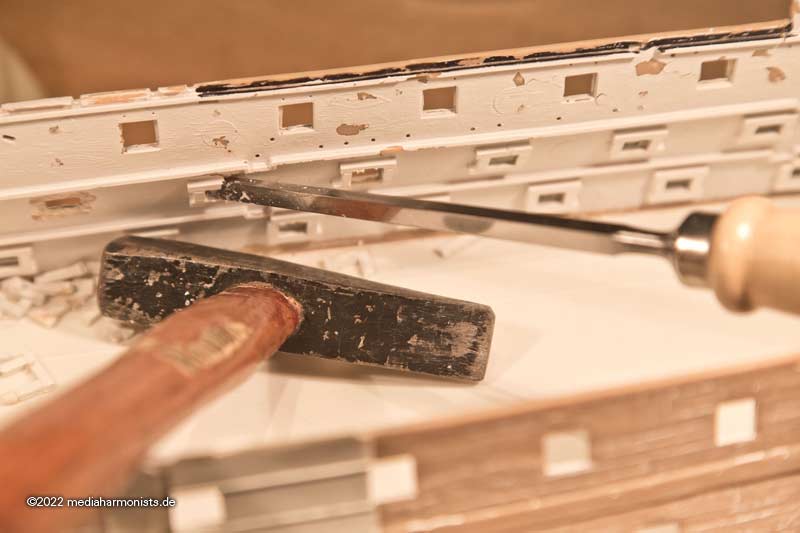
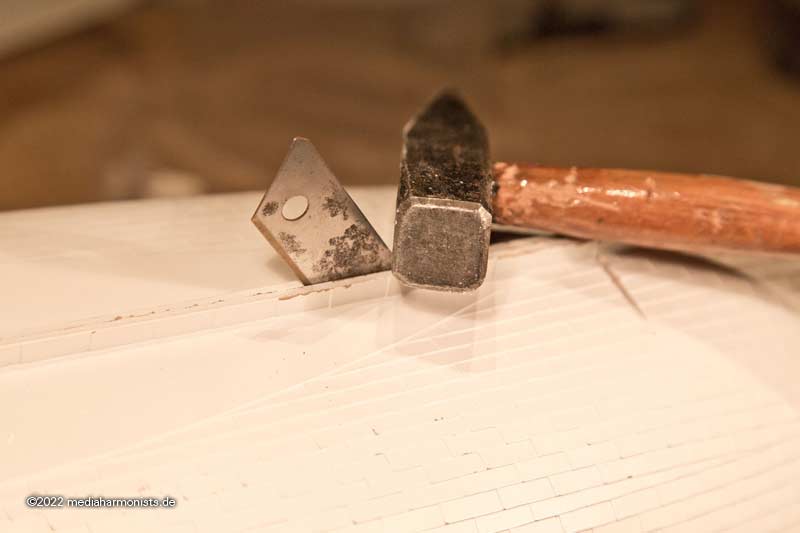
This deck is also only inlaid, because I will have to to take it out again and work on the inside later to put the window panes into the frames. For this I will trim back the carriages. That's why I made the new triangular cut-outs on the frontside of the carriage.

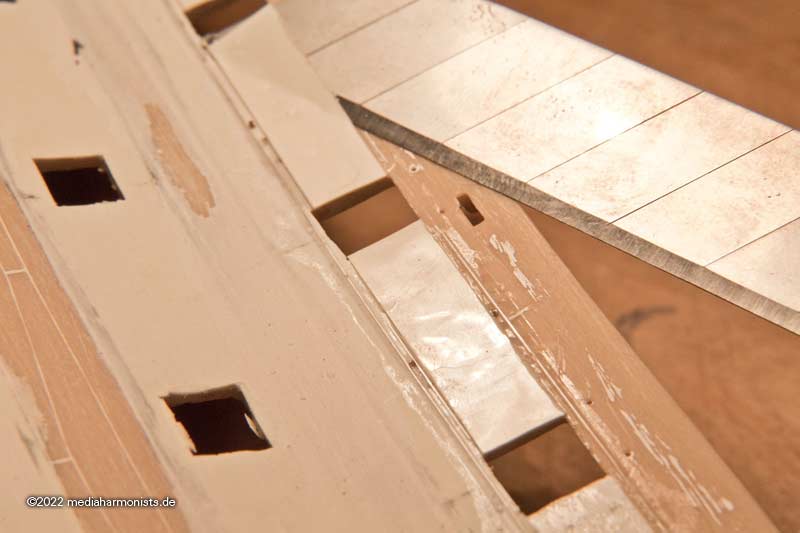
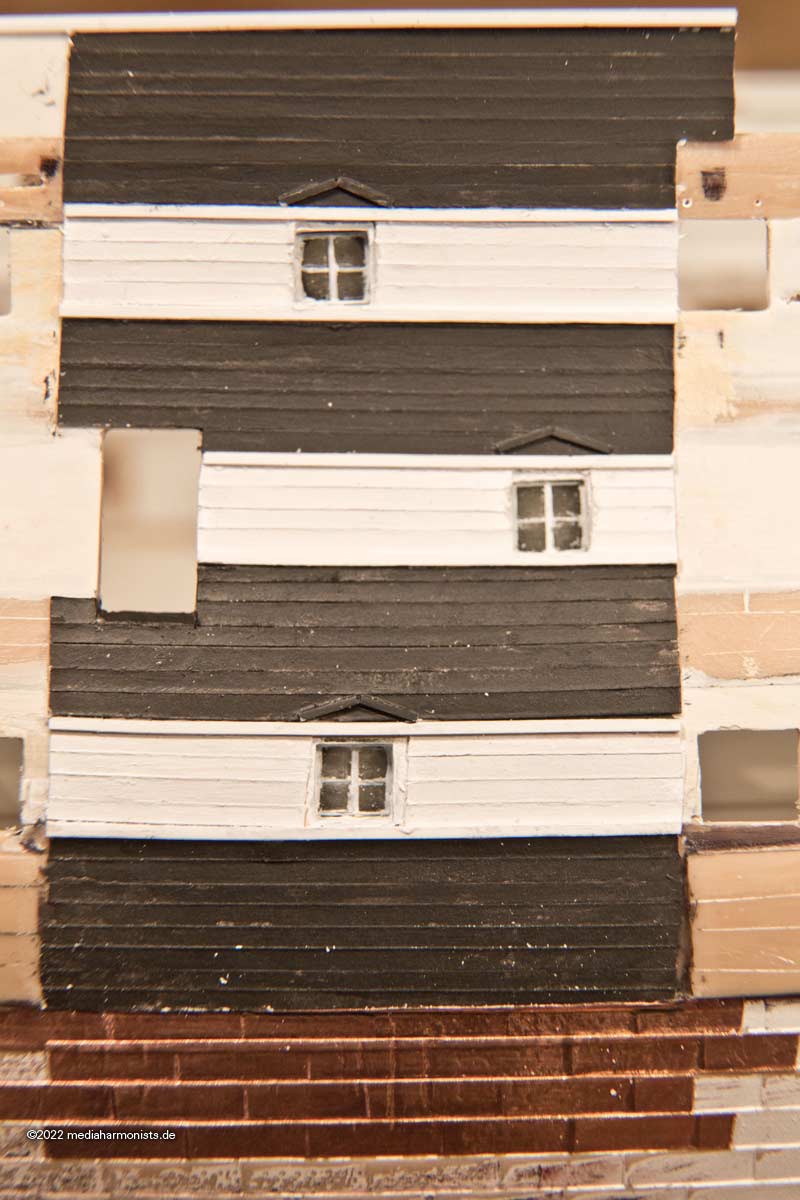
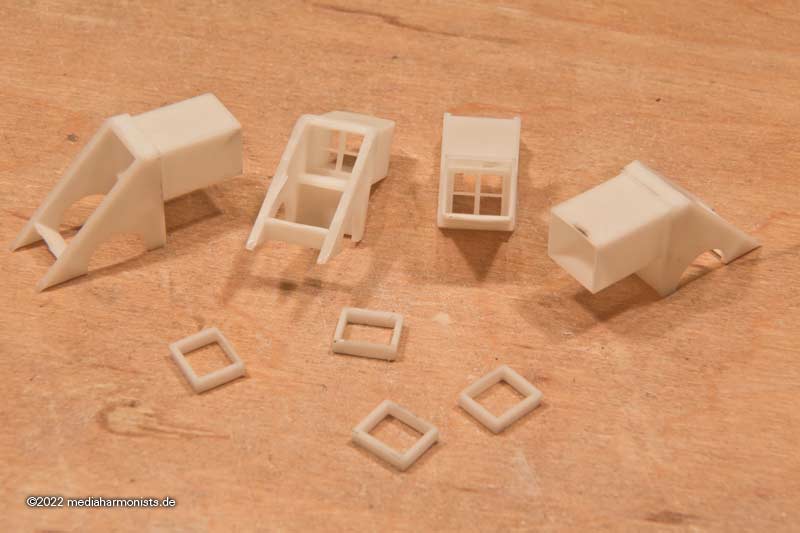
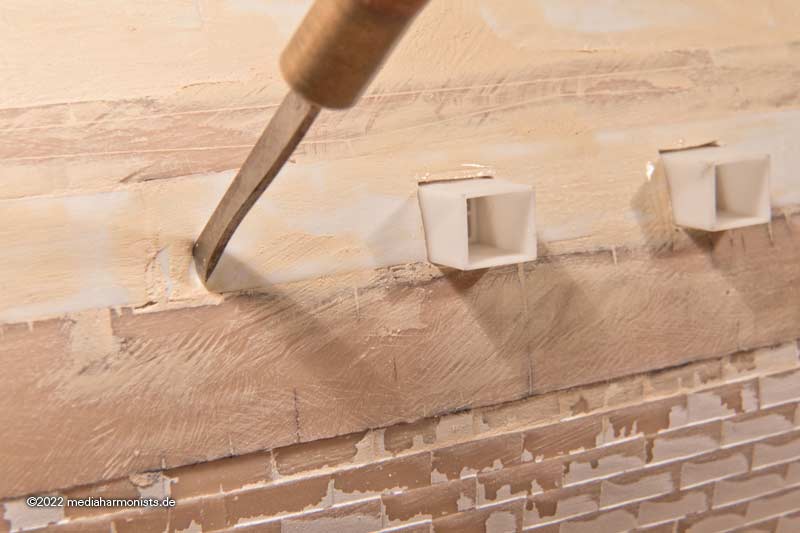
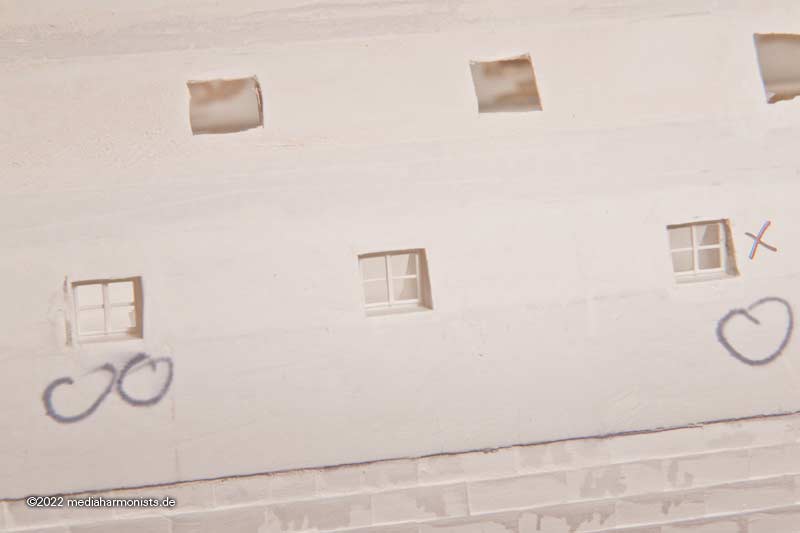
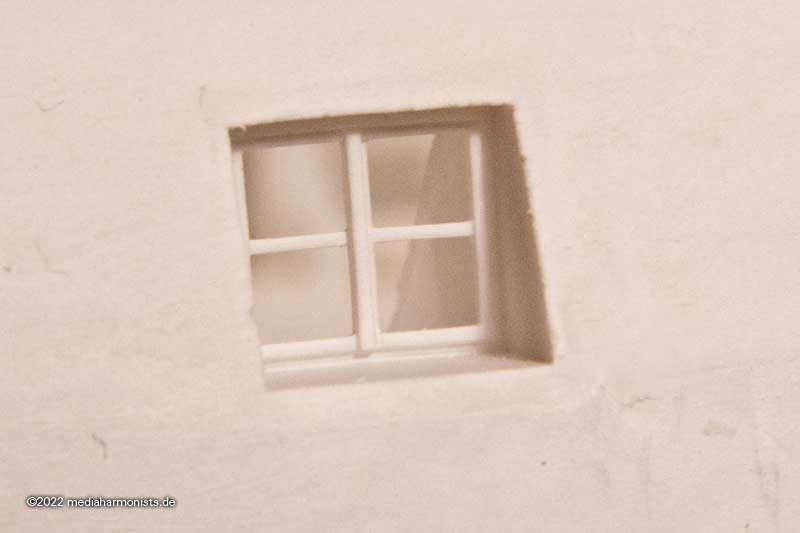
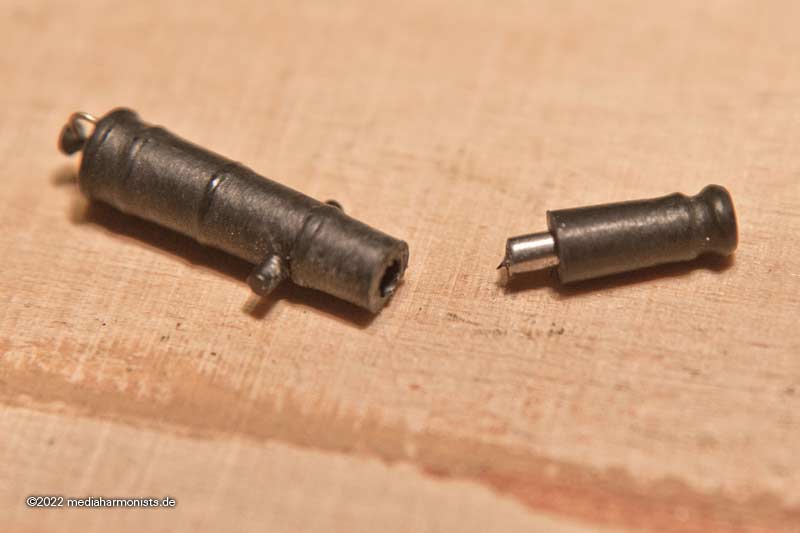
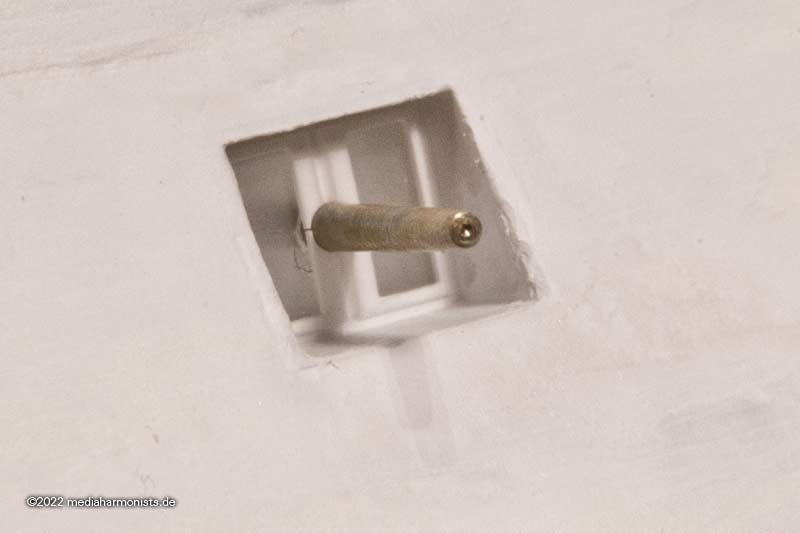
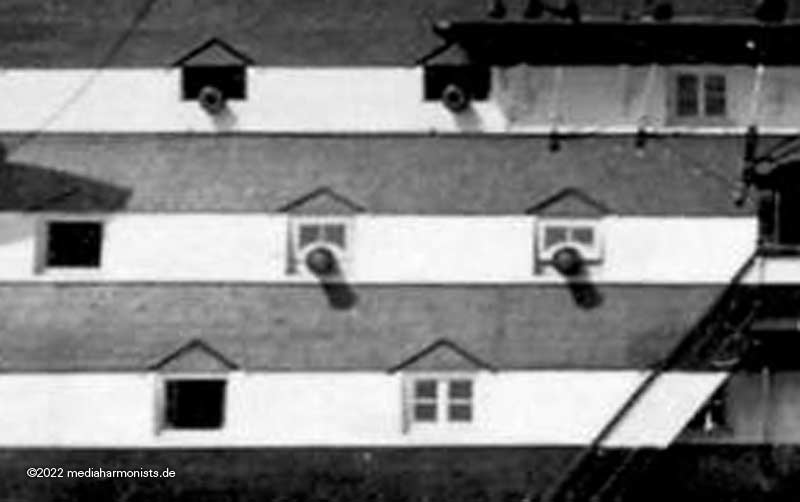
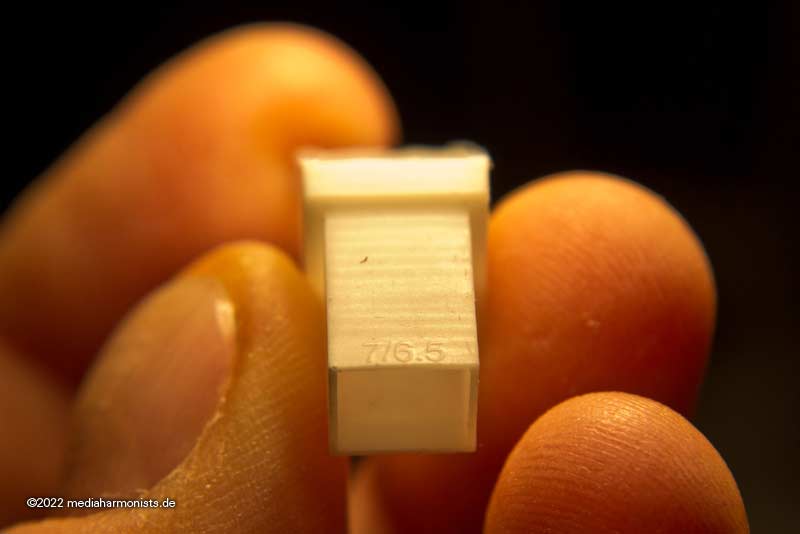
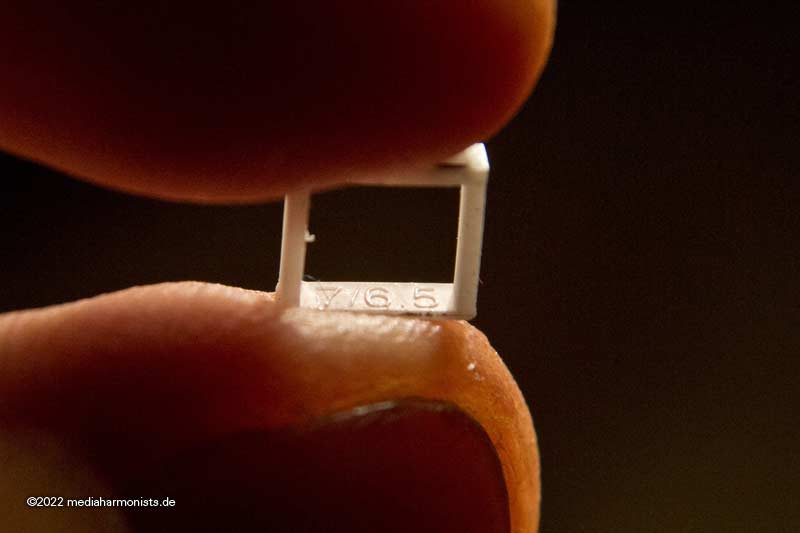
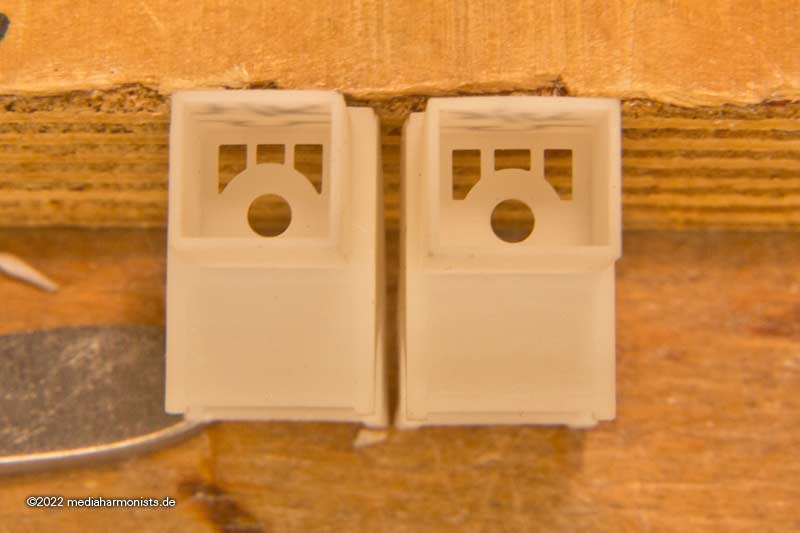
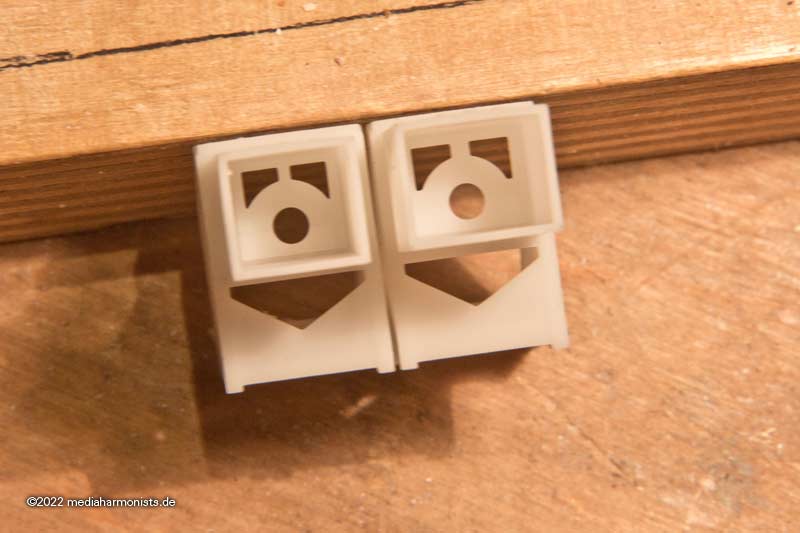
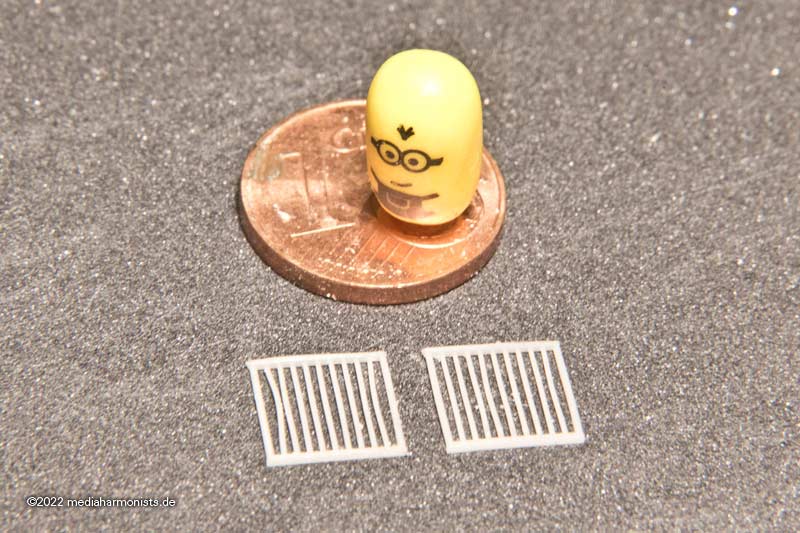
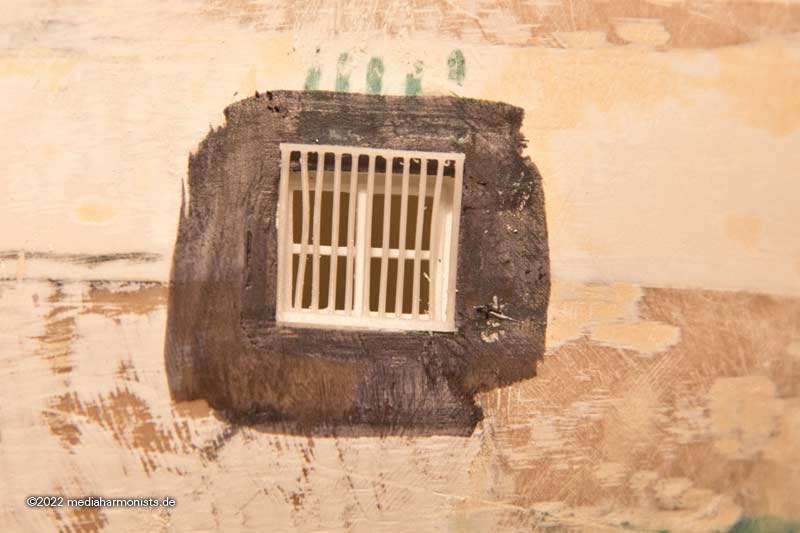
And I also did a test print. The foremost window in the lower deck had window bars. These are very fine.

Victory1910-windows_220130_1310.jpg


And they are to be fitted into the already fixed frames. You can see, however, that they are so fine that slight distortions occur when printing - since no supports can be used. Since the frame has too little undersize for its hole, this is of course exacerbated.

Victory1910-windows_220130_1311.jpg


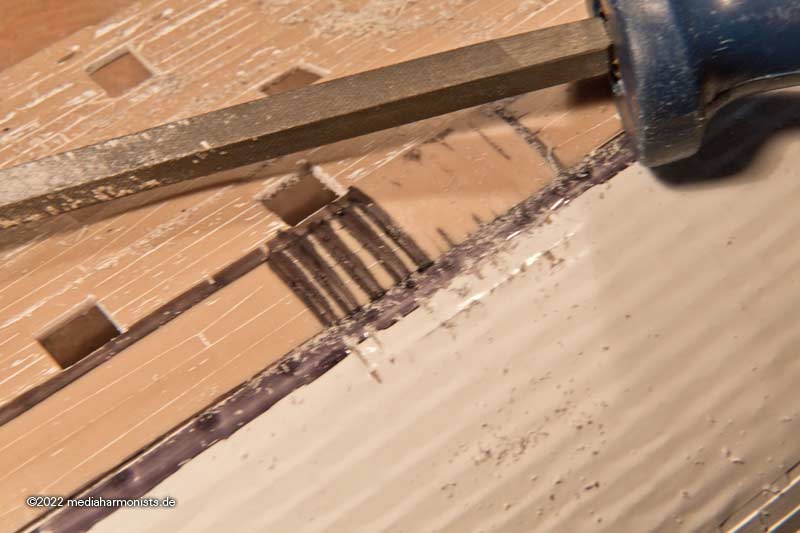
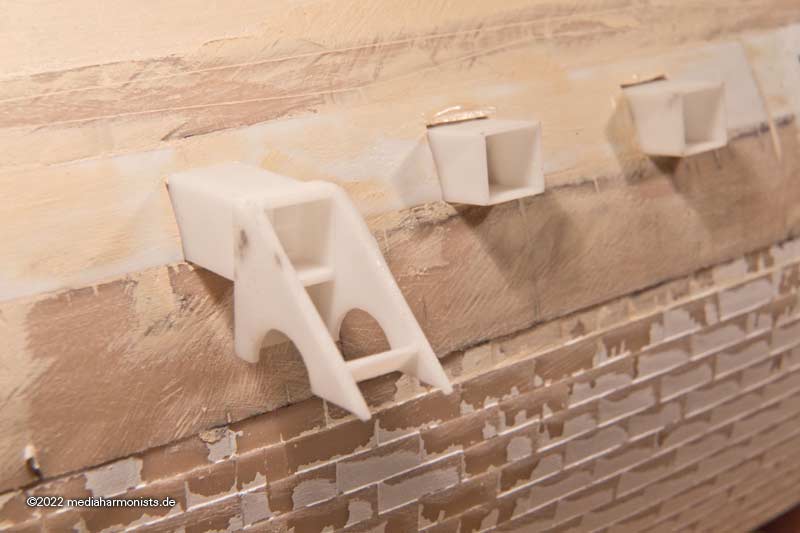
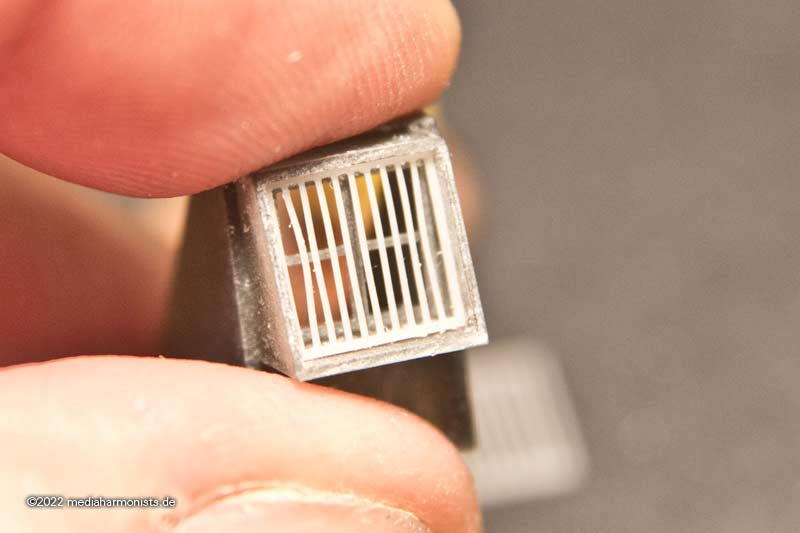
And then again AAAAARGHH! With the dimensions of this bit, I got the first rectangular version and not the frames with a lower height that were used in the end ...

Victory1910-windows_220130_1314.jpg


... ok, can be corrected with the next print, maybe the distortion will be better too.

XXXDAn
 
Back
Top