To victory and beyond ...

...hihihihihi...

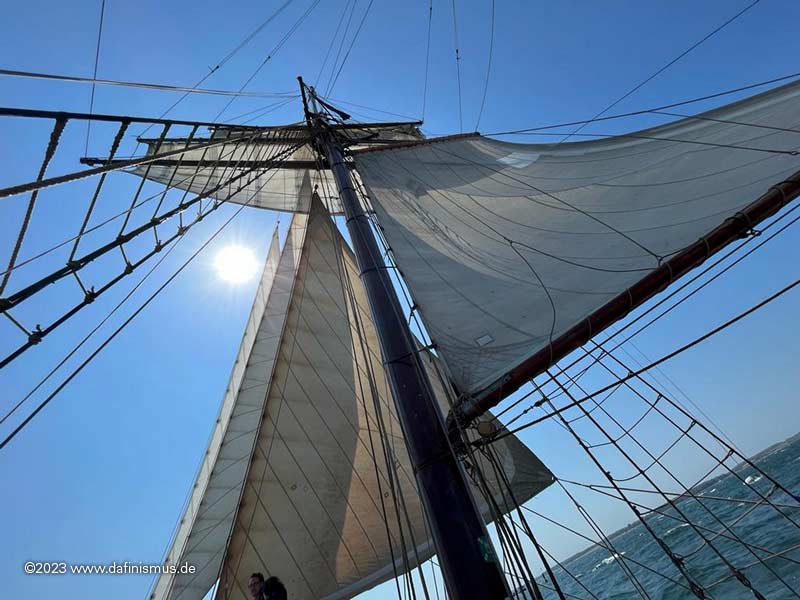
YES, the view from up there is gigantic!

h3.jpg


Downwards too :)

h2.jpg


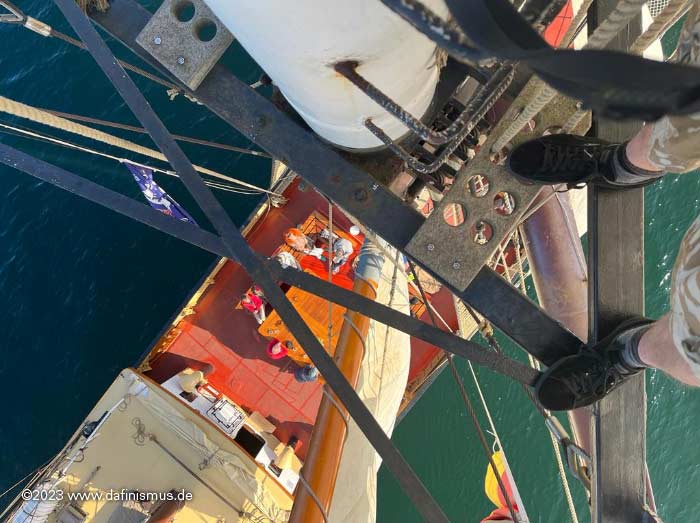
But most of the crew were just looking up ;-)

h8.jpg


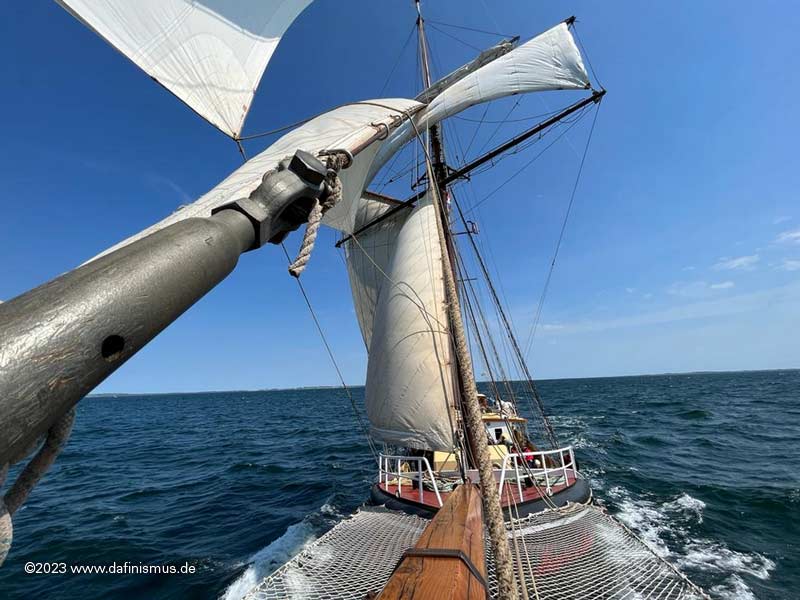
But there in front it is not bad either.

h1.jpg


Especially when the Bonnie has gone into the net with you - nice play on words :)

h4.jpg


Because it's homey there too, the waves dance below you and you can see the whole ship.

h7.jpg


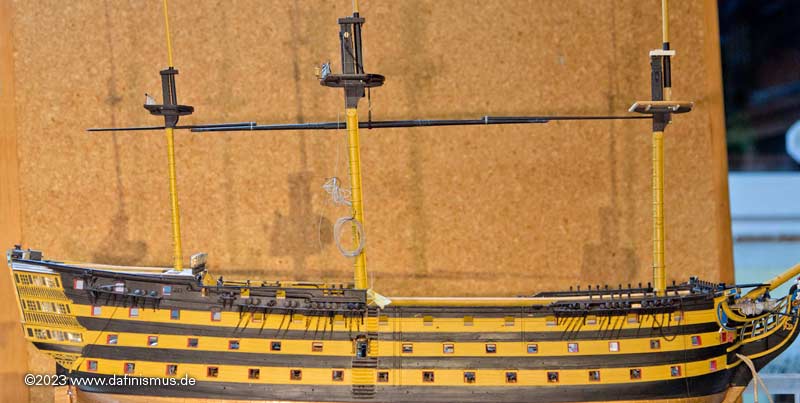
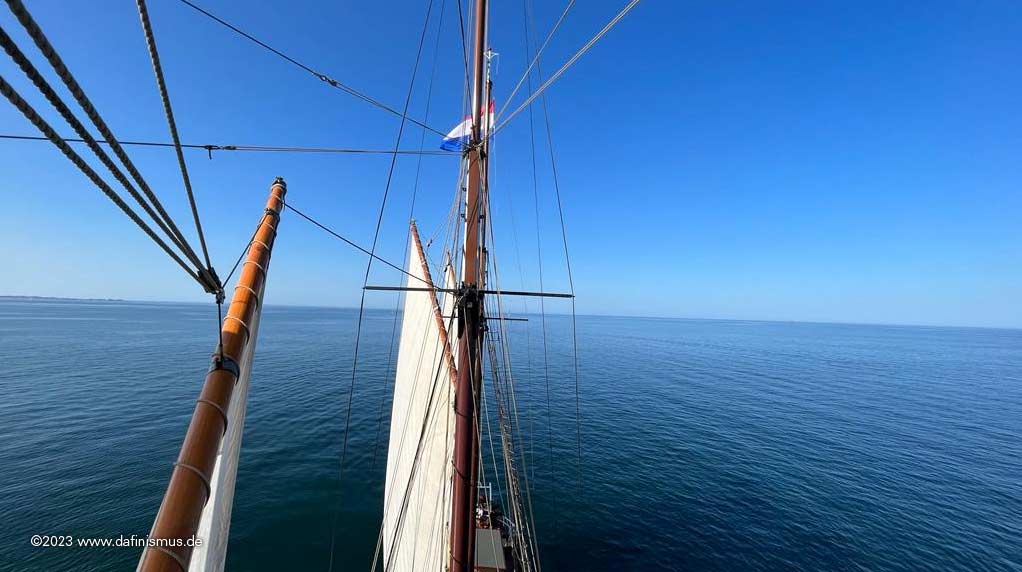
By the way, this is the old lady we were on.

h5.jpg


Ostersegeln%20190427%20Hendrika%20Bartelds_4146.jpg


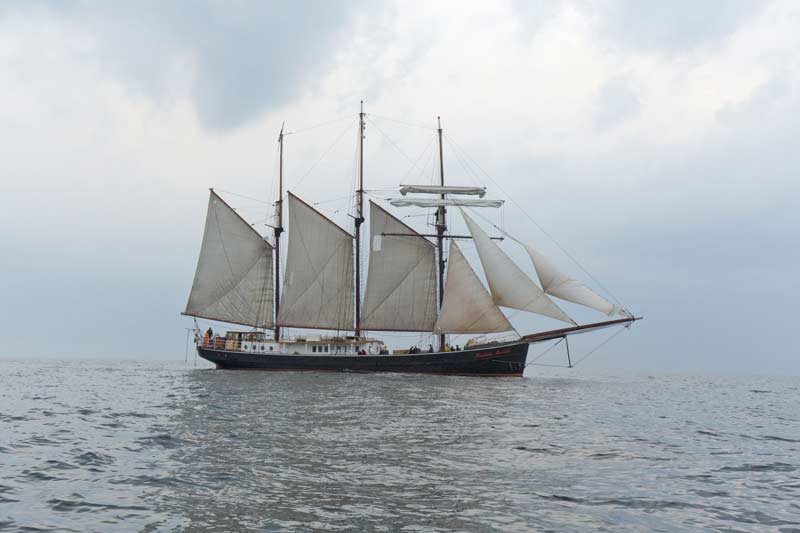
And when I say "we", I mean us 8 mates from our german forum Segelschiffsmodellbau.com ...

h9.jpg


... and we had 3 of our wives with us as well, so a third of the crew came from modelers' stock :)

Dear greetings, Daniel
 
Brief review:

21 November 1805: Nelson falls in an encounter with the French, famously off Trafalgar

Nelson-Hardy-150815_2379.jpg


21 November 2018: Nelson falls again at an encounter with the French, this time at Rochefort, falling into the hands of an unknown man who pressed him to an unknown destination. Here is the last picture just before the loss.

Rochefort-181017-Ankunftsrundgang_9813.jpg


But first things first. This was the last stand of the too small steering wheel planking ;-)

Victory-spill-230528_3252.jpg


In the meantime, a larger piece of planking had already been built. Also more deck beams were already in place. But the beam to which the steering tackle is attached was pressed down a bit by the planks and the tackle became slack as a result. So once again entering deep into the guts ...

Victory_Ruder_reep_5432.jpg


... and fixed the tackle so that I could be tightend after gluing the planking into place.

Victory_rudder_tackle_5462.jpg


I even shortened a brush to be able to put the paint in the right place :)
The stub is there as the tackle doesn't run parallel due to the rudder drum.

Victory_short_brush_5429.jpg


And now it's time to be strong. It was the turn of Nelson and Hardy's new build. Nelson is a cross-dresser, as you can see. Surgically altered a bit, as they say.

Nelson-2307224_6041.jpg


The other guys have also arrived, the lieutenant with his speaking trumpet and the two helmsmen, dressed a little more formally than the rest of the crew. As we have very calm seas right now there are only 2 present.

Nelson-2307224_6045.jpg


And then they were already allowed onto their playfield.

Nelson-2307224_6072.jpg


Nelson-2307224_6075.jpg


Nelson-2307224_6078.jpg


Nelson-2307224_6067.jpg


Nelson-2307224_6066.jpg


Nelson-2307224_6077.jpg


And this time he came to stay, brave little Horatio!

XXXDAn
 
Last edited:
Brief review:

21 November 1805: Nelson falls in an encounter with the French, famously off Trafalgar

Nelson-Hardy-150815_2379.jpg


21 November 2018: Nelson falls again at an encounter with the French, this time at Rochefort, falling into the hands of an unknown man who pressed him to an unknown destination. Here is the last picture just before the loss.

Rochefort-181017-Ankunftsrundgang_9813.jpg


But first things first. This was the last stand of the too small steering wheel planking ;-)

Victory-spill-230528_3252.jpg


In the meantime, a larger piece of planking had already been built. Also more deck beams were already in place. But the beam to which the steering tackle is attached was pressed down a bit by the planks and the tackle became slack as a result. So once again entering deep into the guts ...

Victory_Ruder_reep_5432.jpg


... and fixed the tackle so that I could be tightend after gluing the planking into place.

Victory_rudder_tackle_5462.jpg


I even shortened a brush to be able to put the paint in the right place :)
The stub is there as the tackle doesn't run parallel due to the rudder drum.

Victory_short_brush_5429.jpg


And now it's time to be strong. It was the turn of Nelson and Hardy's new build. Nelson is a cross-dresser, as you can see. Surgically altered a bit, as they say.

Nelson-2307224_6041.jpg


The other guys have also arrived, the lieutenant with his speaking trumpet and the two helmsmen, dressed a little more formally than the rest of the crew. As we have very calm seas right now there are only 2 present.

Nelson-2307224_6045.jpg


And then they were already allowed onto their playfield.

Nelson-2307224_6072.jpg


Nelson-2307224_6075.jpg


Nelson-2307224_6078.jpg


Nelson-2307224_6067.jpg


Nelson-2307224_6066.jpg


Nelson-2307224_6077.jpg


And this time he came to stay, brave little Horatio!

XXXDAn
Wow, it's looks beautiful and realistic Thumbsup :)
 
It's been a long time, in 2016 I had already discovered the axionometer on the 1765 model of the Victory with the help of my forum colleagues.

Since the display can also be discovered on Turner's afterdeck view and can also be seen on other contemporary models, I had already installed the display on two of my models back then.

Victory-helm-indicator_9933.jpg


Victory-161227_2766.jpg


Now that Nelson has arrived on his Victory, it was time for me to take care of it again.

If you look at the contemporary models with axionometer, only a version with a rope transmission comes into question. In the front area of the rudder wheels, there is no additional drum visible on English ships, so I put it in the back. The rope transmission is analogous to French systems, from which the system was originally copied.

I have calculated the diameter of the drum and it kindly agrees with the French systems. For simplicity, I took a virgin steering wheel for pre-assembly. The display with its markings was also quickly built.

Victory-Axionomter-230729_4429.jpg


For the rope guidance I misused the wheel holder of my carronades.

Victory-Axionomter-230729_4435.jpg


So that the sheave also has air for the rope, I made a spacer from 0.3 mm wire.

Victory-Axionomter-230729_4436.jpg


Some paint on it and the rollers were finished

Victory-Axionomter-230729_4437-Kopie.jpg


Then as usual put my cotton pad underneath so dirt and parts don't disappear into the depths.

Victory-Axionomter-230729_4445.jpg


But I should have packed the whole room in absorbent cotton, because one of those dark 1 cubic millimeter pieces jumped away, of course, because I took the wrong tweezers with flexible jaws.

With a flashlight held flat, I was actually able to quickly retrieve the part. All the well-meaning gods involved were praised and lauded!

The ends still properly trimmed and everything is ready :)

Victory-Axionomter-230729_4451.jpg


Victory-Axionomter-230729_4462.jpg


Victory-Axionomter-230729_4458.jpg


Victory-Axionomter-230729_4468.jpg


XXXDAn
 
I love it - this great detail in scale 1:100 -> WOW
Now I can hope, that the rudder blade is also in the correct angle - means in moment straight
If not, than you have to adjust your axionometer ......
Bravo my friend
 
Just found a photo of the HMS Warrior steering wheel

Is that in principle the same indicator, only the transfer via a gear box?

Screenshot 2023-08-01 143901.png wheel-stearing-gear-on-the-iron-clad-warship-hms-warrior-in-port-peter-noyce.jpg

On the actual HMS Victory version there is no indicator shown like on your model - so it was only installed during a certain period, I guess?
 
Thanx Uwe,

this type of axionometer is shown on the 1765 model and the model of Royal George (1756). The latest I discovered was on the Turner drawing of the quarter deck, which he made after the return to England. There only the display to is be seen, as the original wheel was shot away early in the battle. First photographies in the 1880´s already show a changed poop deck with no hints for this kind of axinometer. The then installed steering wheel shows some kind of adapter on the axis, perhaps meant for something like Warrior´s one. This repalcement wheel can still be seen in a museum (Portsmouth?).

Thank you for Warrior´s wheel, on one of the lower decks is a fall back steering wheel with the same indicator.

Bildschirmfoto 2023-08-01 um 15.11.42.png

XXXDAn
 
Last edited:
As always, thank you very much, ladies (?) and gentlemen, for your answers and the likes!

And it was time for the next deck.

A long time ago I had already prepared a poop deck. Even then I had reported the phenomenon that the decks slowly warped over months, always concave in relation to the wood, virtually hogging at deck level. Theoretically this is certainly appearing, but it was too much of a problem.

Victory-Poopdeck-230729_4475.jpg


This has happened to me three times now. Each time the original Heller part with superglue and 0.4 mm planks. And the thick plastic decks can only be straightened with extreme force. When trying to help with heat, the bending radius shifted to the middle of the plastic, which then led to bulges in the wood. Conclusion: (original) plastic decks that have been covered this way must be glued in immediately and really well, possibly secured on top in a different way. The other method is to mount the new parquet on a carrier medium and glue it down. I have often used paper or cardboard for this purpose, which can also be critical, as this carrier material has already split in its core, i.e. half adhered well to the subfloor and the other half well to the planks, just with a little distance to the original fixing point ...

It wasn't so tragic after all, as this deck would have covered too much of the inside views anyway. So I built a new deck cut-out.

Victory-Axionomter-230729_4433.jpg


A long time ago I had also made the railing of the cabin deck to look like Turner's drawings. Now it can finally be installed :)

Victory-Poop-230730_4515.jpg


Victory-Poop-230730_4513.jpg


Here are a few test hammocks, the real hammocks are still to come, the ones folded in the middle should fit in.

Victory-Poopdeck-230729_4486.jpg


And then the rear end, everything was already there :)

The stern can be removed via magnets for a better view.

Victory-Poopdeck-230729_4479.jpg


Victory-Poopdeck-230729_4488.jpg


Victory-Poopdeck-230729_4490.jpg


Something done again!

XXXDAn
 
Step by step - and every time very good work - especially in 1:100
I realized a detail, but can not 100% be sure, what I see there
Are these one or two ? - OK, Nelson and Hardy are on deck.......
Victory-Poopdeck-230729_4486.jpg
 
Nowadays at the Vic in P., the rudder pendant goes up to the mizzen chains and is secured there with a toggle.

Victory-emergency-steering-230803_4551.jpg


Victory-emergency-steering-230803_4554.jpg


There is an interesting detail on the contemporary model SLR0512 of the Victory: The rudder pendant goes up through the channel board to the poop deck, is routed aft at deck level, and is tied to a cleat further aft. This way, in an emergency, the line is quickly ready for use and does not have to be extended as it is today. A detail I wanted to install for a long time, now it was finally done :)

Victory-emergency-steering-230803_4564.jpg


Victory-emergency-steering-230803_4568.jpg


Victory-emergency-steering-230803_4574.jpg


Victory-emergency-steering-230803_4576.jpg


XXXDAn
 
Very interesting detail - and good research

I just took a look at the mentioned contemporary model


l2449_003.jpg

l2449_005.jpg

You installed the mentioned rudder pendant to the chain, which is securing the rudder against lost - this chain is fixed on your model with three eyebolts on each side at the stern.
Aren´t these cables or ropes, which are going on the SLR0512 model and on your model for security, if the rudder mechanism like the steering wheel or tiller is broken, so that the seamen can hardly manouver the ship with pulling at the pendants. with fixed on three eyebolts this would be not possible.

When I look closer (as good as possible) - on the model the thin chain is hanging free and connected aft at the rudder - here I can imagine, that a rudder blade could move when you pull the pendant....

l2449_003a.jpg

I am not a specialist on this technical detail, it is just brain storming about this detail
 
scrolling foward there is another photo of the model which I overlooked until now

l2449_010.jpg

Here we can see very good where the cable is changed and connected to the chain - the hull is touched only by the cable / rope
 
You can see vicely that the chain would drain in the water like this. There are plenty of models in NMM and also paintings and drawings, where on each side the chain is bound 2 to 3 times onto the counter.


More research to be found here:

XXXDAn

PS: This model of Royal George 1756 is another model showing the helm indicator / axinometer :)
 
Last edited:
It went meanwhile to the hammock tinkering.

I rolled the hammocks as already seen of my cut versions with spacers out of Fimo into the right diameter and rolled in the structure with a rake, folded and baked them.

Victory-hammocks-230811_4637.jpg


A little color ...

Victory-hammocks-230811_4638.jpg


... and shading ...

Victory-hammocks-230812_4650.jpg


and whoopee into the hammock cranes ...

Victory-hammocks-230812_4652.jpg


... and ready it is.

Victory-hammocks-230812_4714.jpg


From the quarterdeck it looks like this.

Victory-Quarter-Deck-Nelson-230812_4755.jpg


Victory-Quarter-Deck-Nelson-230812_4763.jpg


Maybe I'll send the guys to wash the hammocks some more, the washing is a bit heavy, but how clean were the mats actually back then, so before the days of washing machines and chlorine bleach?

XXXDAn
 
Last edited:
In the meantime, Lieutenant John Pasco and his assistant have also arrived at their workplace on the poop deck. The canvas curtains in front of the flag lockers have been drawn back ...

Victory-flag-locker-230807_4585.jpg


... but oh horror, they are all empty!

Victory-flag-locker-230807_4588.jpg


So quickly placed a bulk order of the current signal flags, 64 pieces, carved from 1.5 x 1.5 mm plastic strip, about 2 mm long, in the colors of the 1803 signal flags.

Victory-flag-locker-Lt-Pasco-230812_4641.jpg


Then covered the hull so no one would get hit by falling flags in the gunroom ...

Victory-flag-locker-Lt-Pasco-230812_4644.jpg


... and generously assisted him in filling it.

One more brief inspection of the result ...

Victory-flag-locker-Lt-Pasco-230812_4691.jpg


... the flags at the top of the locker secured with weight bags to prevent them from flying away ...

Victory-flag-locker-Lt-Pasco-230812_4679.jpg


... and he can prepare his flags well ...

Victory-flag-locker-Lt-Pasco-230812_4675.jpg


Victory-flag-locker-Lt-Pasco-230812_4730.jpg


... for, after all, it will be him who will translate Nelson's pre-battle greetings to his fleet into usable signals:

"England expects that every man will do his duty."

XXXDAn
 
Do not forget, Lt. Pasco does not know that he will become famous as of this message in some months. So hush, do not tell him yet, do not spoil the surprise ;-)

In our German forum there was a serious reference to the uniforms of the two gentlemen. Both gentlemen without headgear? A "Ça ne va pas" as the Italian would say. The headgear was an integral part of the uniform and could officially only be removed indoors. And the laps of the uniform were too short, or the slit not high enough.

Well, let's make Lt. Pasco happy :)

In the meantime, I've had enough practice building those little hats.

Victory-Lt-Pasco-230816__4770.jpg


Then I extended the laps upwards, removed the white border at the bottom and both men are well behated.

Instead of the detached hat on the flag box, a flagbook or notebook ended up there.

Victory-Lt-Pasco-230816__4780.jpg


Victory-Lt-Pasco-230816__4776.jpg


Victory-Lt-Pasco-230816__4776.jpg


Victory-Lt-Pasco-230816_4781.jpg


I hope that Lieutenant Pasco can now go about his duties with peace of mind ;-)

XXXDAn
 
Last edited:
A completely different construction project that I've been sneaking around for a long time: I finally got to work on the main yard.

Victory-Stunsail-230428_9410.jpg


All fittings were better articulated ...

Victory-Stunsail-230428_9412.jpg


... the lunettes for the stun´sail spar comes from my etched parts set ...

Victory-Stunsail-230428_9413.jpg


... and as always: The colour makes the difference :)

Victory-Fighting-to-and-yard-230729_4503.jpg


According to Lee, in wartime the rope hangers were replaced by a chain. I think 1803 to 1805 might count as wartime.

Victory-Mainsail-230428_9430.jpg


I still made the chain hanger the right length and added a shackle to make it easy to hook and unhook the yard.

Victory-Fighting-to-and-yard-230729_4506.jpg


And only in the sideways position you can really see what a big hulk it was :-0

Victory-Fighting-to-and-yard-230730_4520.jpg


Our little dreamy midshipman has also returned to his favourite spot.

Victory-Fighting-to-and-yard-230730_4535.jpg


XXXDAn
 
Back
Top