Tony’s Blandford build log [COMPLETED BUILD]

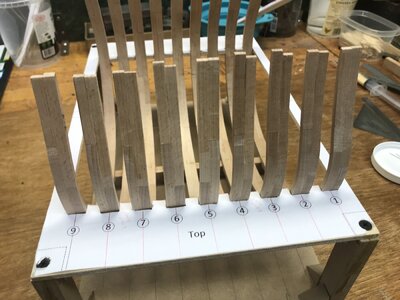
Hi Tony, you sanded the bottom piece a little too much, but remember this is a learning exercise not a competition, using a sanding drum in a Dremel with a light touch will fix the problem. You are doing fine, there are places in the build where you will have to trim pieces to fit your build, everyone’s a little different it is all part of the learning process.

Mike
 
Your framing work is looking very good - very good start in this new field of scratch building Thumbsup

When you already think about making some parts new, take also one look at the top frame you show in your photo.
Especially when this is the first or last frame of the section, this frame will be visible from the side.
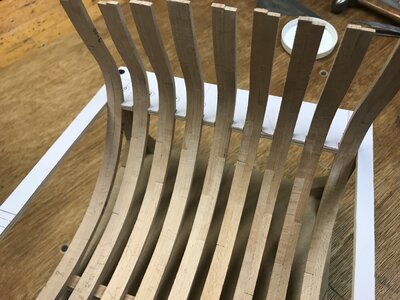
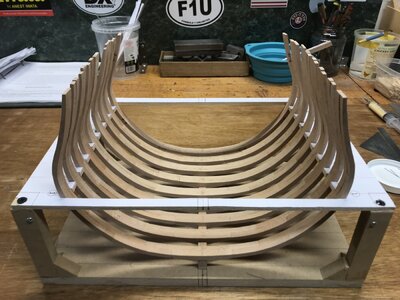
Here it seems, that the floor timber is thinner than the first futtock - with sanding you will reduce the thickness only of the futtock.....
I am afraid, that this small difference of the width will be still visible, also after planking inside and outside. maybe you check this also
View attachment 241593
Yes understood. I will only sand barely enough to take the ends of the futtocks equal whatever point that may be. I may end up when getting close stacking the frames and sanding them all at once then they might end up slightly too thin in spots but they’ll be equal. The 5 that are equal that is. The picture makes it look worse than it actually is. Over the weekend I’ll take my time and get to sanding. Thanks
 
Hi Tony, you sanded the bottom piece a little too much, but remember this is a learning exercise not a competition, using a sanding drum in a Dremel with a light touch will fix the problem. You are doing fine, there are places in the build where you will have to trim pieces to fit your build, everyone’s a little different it is all part of the learning process.

Mike
Thanks Mike, Oh yes for me it’s a huge experiment. First scratch wood project. If I’m 90% satisfied in my eyes in the end I’ll be happy. I have several sizes of drums for the drill press. I prefer that over the Dremel as Dremel drums are very small and the risk is there to make hollows. Is there a reason you say use the Dremel ?
I’m thinking regardless of the slight thicker or thinner issue I may have if they’re all equal and fair I’ll be ok. Once these frames are sanded down I’ll do the bolts, treenails and get on the rabbet, figure that out. Then a lot of thinking and reading the logs for the next steps. Always looking forward.
 
Hi Tony, I use a Dremel with a flex-shaft for small detail work, for larger stuff I have an oscillating sander, belt, and disk sanders. There are several rotary tools that are as good as or better than Dremel it is just a brand name. It does not make any difference what tool you use for sanding if you are comfortable with it.
 
Yes agreed. I have about every tool under the sun just have to use them for wooden ships now ! I’m thinking about getting a Proxxon with the drill stand and X/Y table sooner or later instead of a mill. My B&D motor tool is over 20 yrs old and on its last legs.
 
Yes, I have the smaller table saw. It’s weak but for thin material it’s fine. They do get great reviews. You think the Proxxon motor tool with drill stand and x/y can handle the milling ? It’s only wood. My lathe can mill heavier if need be. A bit awkward as the work is held in the vertical and tool horizontal but it works.
 
You think the Proxxon motor tool with drill stand and x/y can handle the milling ? It’s only wood.
You are correct, Tony. This setup: Drill stand, X, Y table, and Mototool (grinder) is really for light milling of wood. Even for wood, you will not get the best, but rather acceptable results. I believe you have Taig lathe\mill combination, it is much better than the setup in question.
 
You are correct, Tony. This setup: Drill stand, X, Y table, and Mototool (grinder) is really for light milling of wood. Even for wood, you will not get the best, but rather acceptable results. I believe you have Taig lathe\mill combination, it is much better than the setup in question.
Yes the Taig but it’s a lathe with the milling attachment. Doing the keel was the first time I milled with it with just the cutters I have. I’ll get deeper into it in time as far as milling goes. The tool, stand and X/Y to be represents several tools in one where as the mill is just that just a mill. We shall see what I choose, no rush. Thanks
 
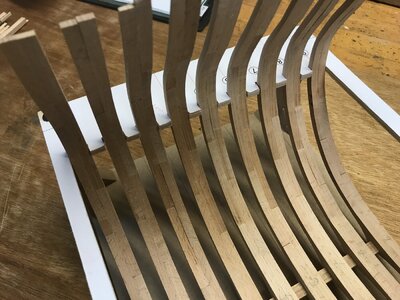
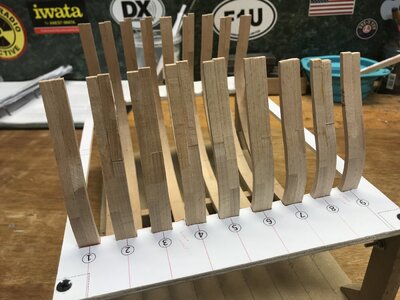
Managed to sand the frames and I did end up making two new top pieces for the one frame that ran quite short. I want to keep my bolts, treenails at .020 the toothpicks really don’t fit well enough and the dye although dry just gets everywhere on the test piece I did. I’ll let them dry further and test again. I have .020 brass rod and may go with that this way I can drill all the way through the frame and the pins will actually be structural. I also have 030 steel rod but that diameter is quite large for the job I think. I’ll still do some hand sanding after the bolts, treenails are in. We’ll see.

0947C969-FAEE-4FFF-982D-B0791F741841.jpegD1E8A408-9284-40B2-9F71-32FEB0EA24AE.jpeg16D978F9-94C4-43D2-BBBD-C2A36F74F288.jpeg53CC0F1A-921C-429D-BC66-FD865CCF3EE4.jpeg7754EC5B-EE0B-4672-87BD-5C64D7B9C08F.jpeg
 
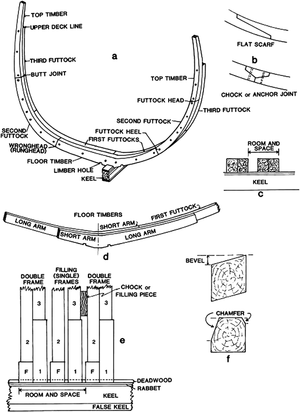
Thanks Uwe. I have another question for all those in the know. I'm thinking the frames should be bolted throughout their length. a bolt every few feet not just at the ends of the individual futtocks. Is this correct ?
 
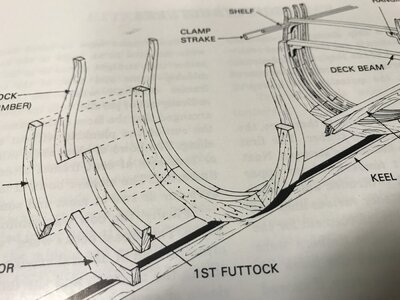
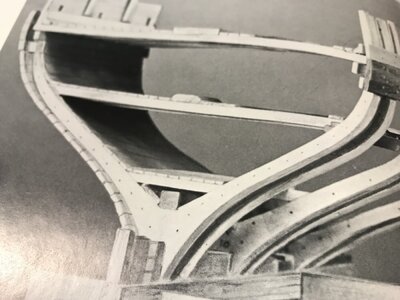
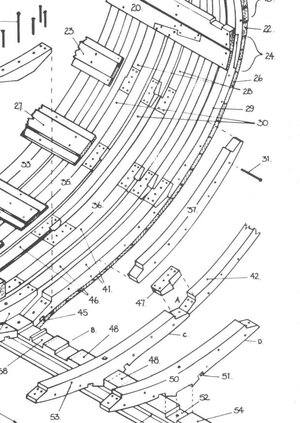
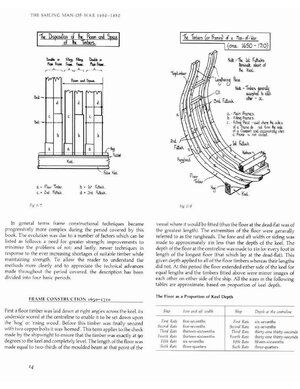
Keep in mind, though, that Mike designed the frames to be all double frames for ease of construction. Stylized, not historically accurate. Uwe’s first photo is from the AOTS book on Blandford. Complicated framing that Mike simplified so even I could succeed at this build!
 
Thanks Doc, Yes I have the book here. Still there should be bolts through the timbers at intervals I think ? Would these bolts go all the way through ? Id assume so if they're threaded bolts. On the actual length / height of the frames I'm not clear at all what it should be. I want to cut them while they're still all removable. I also saw something about frame 9 possibly being the wrong drawing. How do I know if I have the correct drawing here or not ? I'm going to look through it again now see if I can make sense of it. Also I saw an issue with deck beam sizes being off. I guess the question is if I have the latest plan set is it all correct ?
 
Last edited:
Hi Tony, if you would like to build a more accurate model, I would recommend the book The Sailing Man-Of -War 1650-1850 it contains most of the design parameters used for this ship. It is a good idea to do your own research before starting a scratch model.

We are currently working on a more advanced cross section of the HMS Ontario you may be interested in.

Frame Design_Page_1.jpeg
 
For full bolts, only the outside frames are really fully visible, not much can be see on inner frames, so it becomes a time versus appearance and accuracy question.

Kurt
Yes just drilled and pinned all the frames today. Lot of work but I’m happy with it. I used brass as I don’t mind the brass color on the frames. Elsewhere I use the appropriate colors.
 
Back
Top