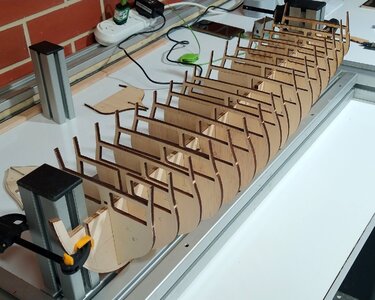
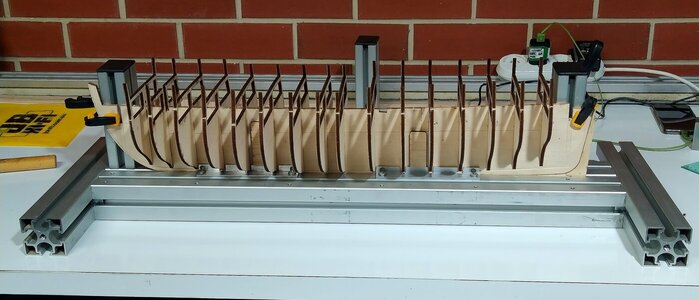
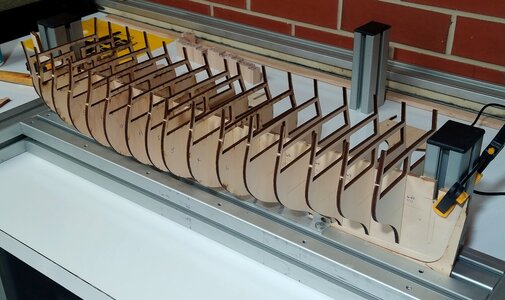
USS Constitution by Model Shipways 1:76 scale

Tony, You remind me of some of the long standing volunteer model shipwrights at the USNA museum workshop, who are a heck of a lot more experienced and thoughtful about the process than I am. I improvise pretty well, but these guys catch me up and when they do I usually get an hour or two tutorial. It's been like fifteen years or so of schooling. :rolleyes: Thanks for the lesson!
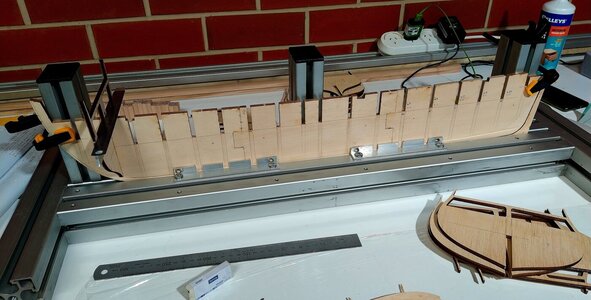
Pete
Pete. Thanks for the kind words I'm a toolmaker by trade and spent the last 20 years making parts for Boeing (FA18 & 787). This is why I tend to go overboard when things don't look right. As for ship modeling I still have a lot to learn, I think this model will be a big challenge.
Tony
 
Tony, many of the Guys at the USNA museum workshop have backgrounds like yours. Looks like you're up to the challenge given the attention to detail and precision you've already demonstrated. I especially appreciated the lesson you pointed out on accumulated error, aka "error creep".

Pete
Last year I picked up a Caldercraft Victory built to copper plating on one side, it looked good when I collected it. As I needed a something to work on while moving house I started checking what had to be done before carrying on with the build. Sad to say the more I looked the worst it got. Most of the issues were due to a number of bulkheads being to high on the keel. I made a log if you would like to see some pictures.
Tony
 
Definitely! I'll send you my email address on the mail option tomorrow.
This is the link to my Victory log.


Tony
 
I should have started this project a year ago but moving house prevented this from happening.

View attachment 378479
I posted a kit review February last year if you would like to know what's inside the box.
This will be the forth ship I've built and by far the most challenging. This build will be out of the box I'm not planning any bashing at this stage.
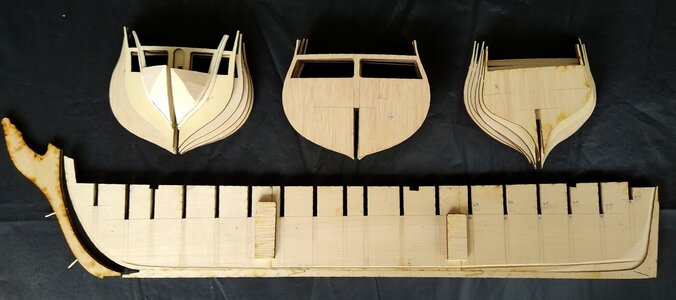
Started by removing the keel pieces and bulkheads, when I checked the way they fitted together there was a problem.

View attachment 378480
The material for the bulkheads was around 0.5mm oversized and the slots in the keel varied a lot, only two bulkheads fitted with a little bit of sanding. I can't work out why there was so much variation in the slots as the keel is made up from two 1/8 pieces glued together and both sides are exactly the same, could it have been programmed like this?

View attachment 378481 The smallest slot compared to the widest one (the sizes in pen are for the keel and bulkheads in pencil.)

View attachment 378482
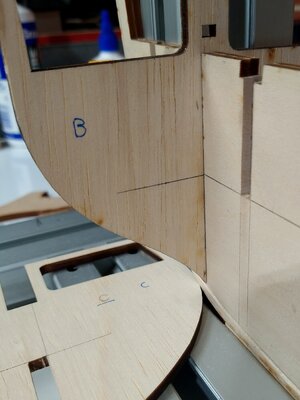
While marking the bevels on the bulkheads I found bulkhead B did not match the drawing

After some checks I glued the corresponding parts of the keel together.
View attachment 378489
View attachment 378490
View attachment 378491
If you look at the top end of the centre keel section there is a broken piece (BH L), I was surprised by how easy it was to break.
Hallo @Tony H
we wish you all the BEST and a HAPPY BIRTHDAY
Birthday-Cake
 
A big thank you for all the birthday wishes just about recovered now so back to work.

IMG_20230606_123255.jpg
IMG_20230606_123135.jpg
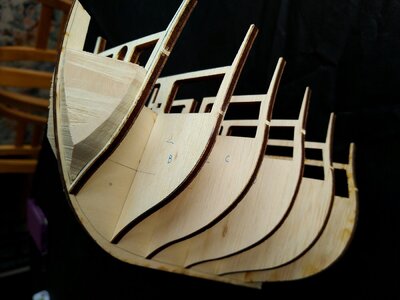
I've opened up the slots in the keel and dry fitted the bulkheads. It took a while due to the amount of material I had to remove. Also the bow blocks where roughed out.

IMG_20230609_132001.jpg
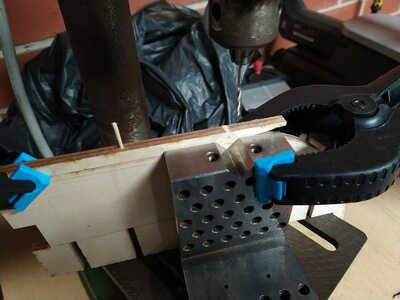
This is how I drilled the dowels for the keel pieces.

IMG_20230618_144953.jpg
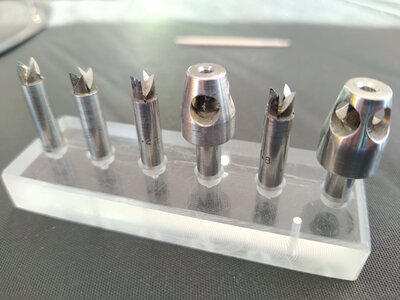
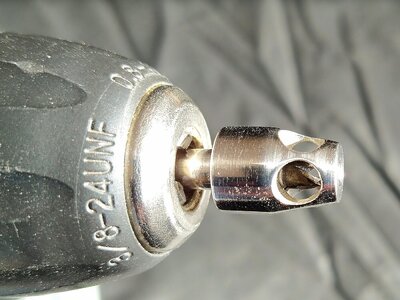
I have a set of cutters to make my own dowels. My set of 6 ranges from 0.8 - 2mm.
IMG_20230618_144712.jpg
They fit in a drill and you can feed a piece of timber into it.
IMG_20230618_200254.jpg
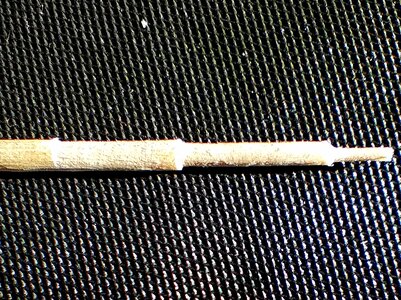
This is a toothpick which I used with three cutters the smallest is 0.8 the largest is 1.9mm.

Tony.
 
Hi thanks for dropping by.
I've glued together all the keel pieces except for the bow extension, this was left off till the rabbet is finished.
IMG_20230619_140537.jpg

IMG_20230624_184900.jpg
The ends of the slots in the keel and bulkheads have been pencil marked, when the bulkheads are all the down the marks will line up.

IMG_20230624_184331.jpg
This is my building jig made from extruded aluminium, very strong and accurate as long as the ends are cut square.

IMG_20230624_184719.jpg
IMG_20230624_184210.jpg
IMG_20230624_184558.jpg
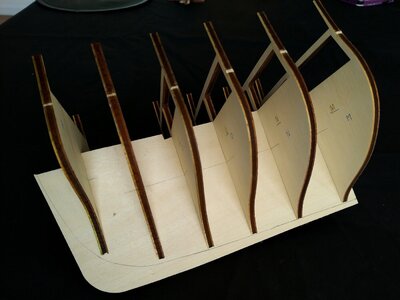
Final dry fitting completed bulkheads all ready to be glued in place. I've made some spacers to go between the bulkheads for reinforcement.

Tony
 
I love how we bring our past experiences and techniques to the hobby. I'm often jealous when I see things like this (or your other tooled/machined innovations) - but then I need to remember that I have skills and tools I bring to model building as well. Nicely done, Tony!
 
I love how we bring our past experiences and techniques to the hobby. I'm often jealous when I see things like this (or your other tooled/machined innovations) - but then I need to remember that I have skills and tools I bring to model building as well. Nicely done, Tony!
Hi Paul I agree so many ways to to do same job, always good to see something new.
Tony
 
Back
Top