USS Constitution by Model Shipways 1:76 scale

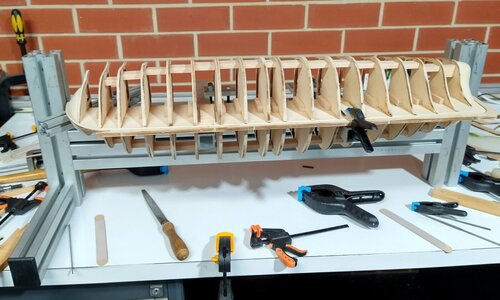
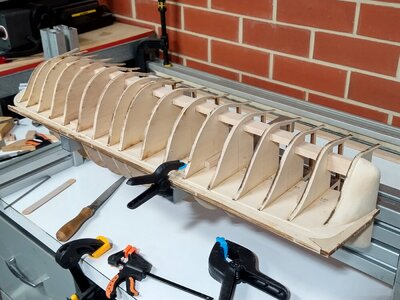
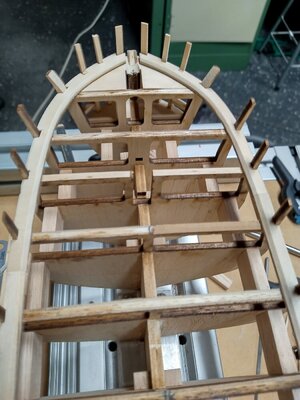
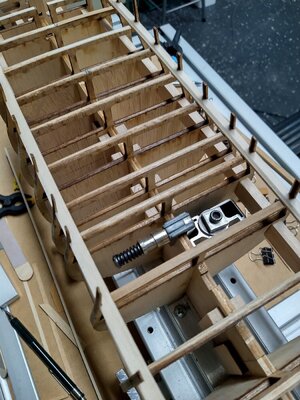
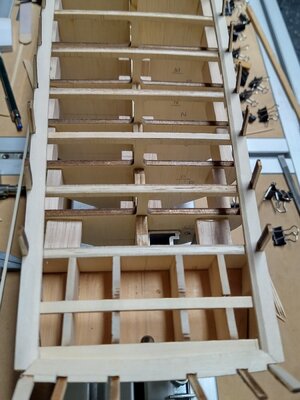
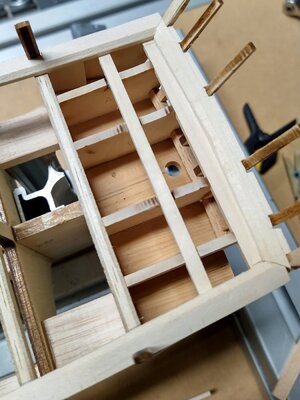
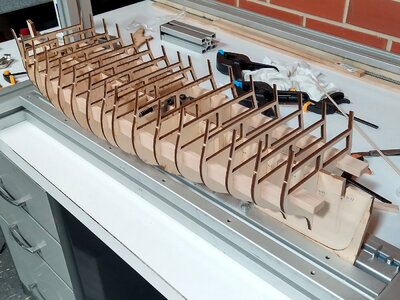
Hi just about finished gluing the bulkheads.

IMG_20230619_165229.jpg
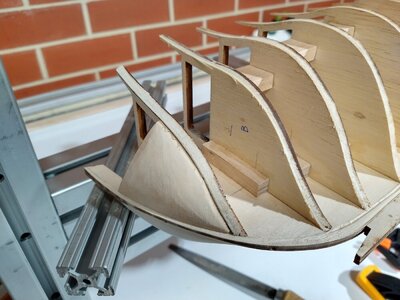
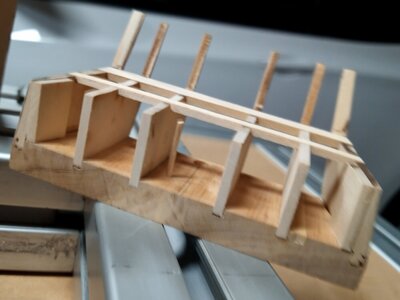
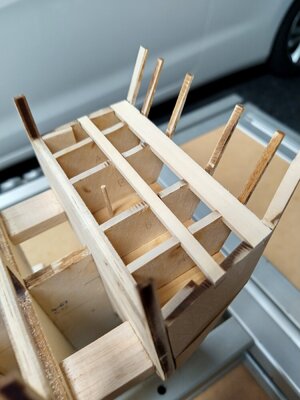
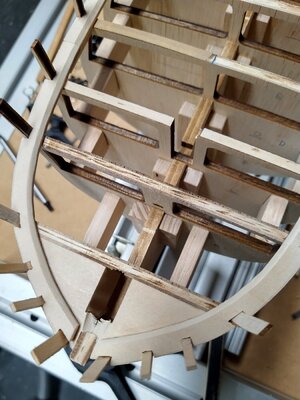
I found the best way to do this was to add the reinforcing pieces to the bulkhead before gluing the next one in place.

IMG_20230629_185921.jpg
As long as the reinforcements are accurate all the bulkheads come out nice and square

IMG_20230629_190112.jpg
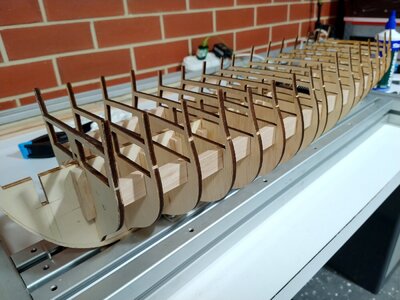
It's a slow process but I'm happy with the results it's surprising how strong the framework is with the extra reinforcement. I have left the first and last bulkheads off until the blocks are ready
 
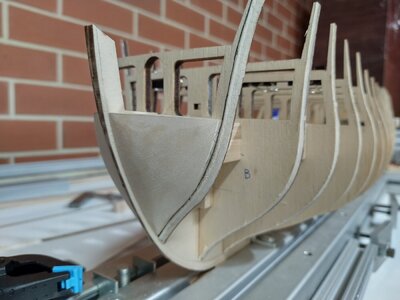
Hi this week I've been working on the bow and stern blocks it's surprising how much time it takes to get these done.

IMG_20230709_075920.jpg
IMG_20230709_075607.jpg
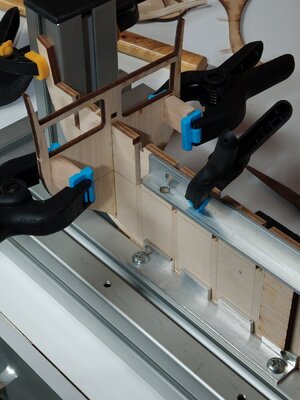
My jig can be turned on it's side, to let me work on the bulkheads, this makes sanding the bevels so much easier.

IMG_20230709_080022.jpg
IMG_20230709_075750.jpg
IMG_20230709_075134.jpg
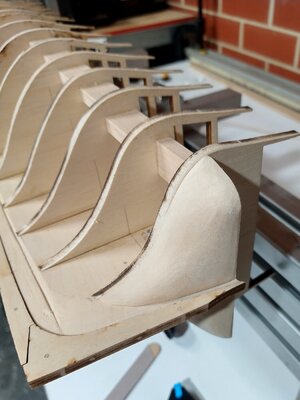
The bow and stern blocks are nearly finished and I have roughly shaped the bulkheads.

IMG_20230709_080311.jpg
IMG_20230709_080535.jpg
The counter block is a bit of a problem, I can cut the sides down to size quite easily but reducing the thickness is a lot harder. A thicknesser would be handy right now.
 
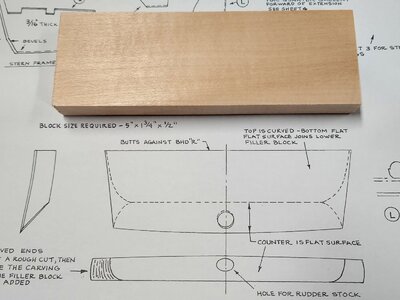
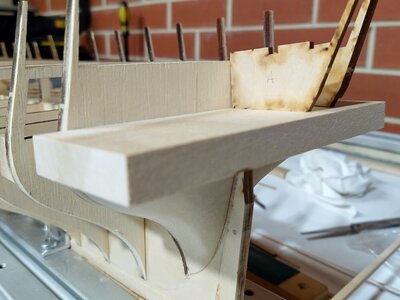
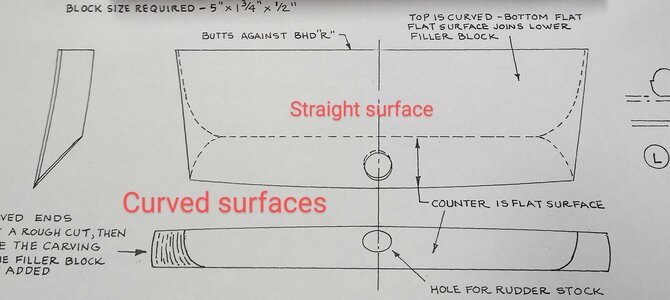
I've been having a lot fun with the counter block it's not as straightforward as it looks.

IMG_20230709_080311~2.jpg
Firstly the top surface follows the contour of the deck and the angled back is straight along the bottom and curved at the top. The block provided is half inch thick and needs a sixteenth taken off it.

IMG_20230625_155324.jpg
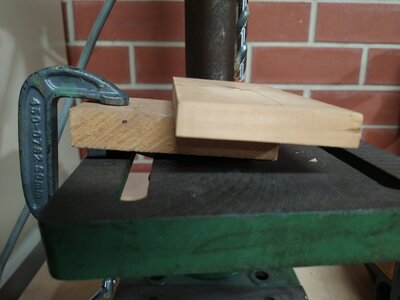
I wanted to try a few ideas for the best way to make this part so I used an offcut that was the same thickness to experiment with. This is how I drilled the 5° hole, it was drilled before cutting the angle at the back.

IMG_20230629_101613.jpg
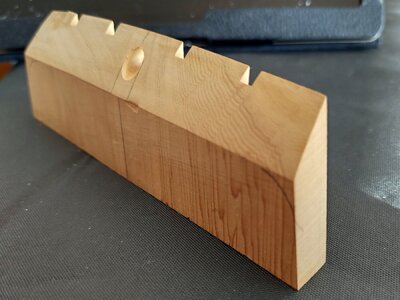
As I had no easy way of cutting the thickness down I cut slots in the block for the stern frames.


IMG_20230719_075945.jpg
IMG_20230719_075820.jpgIMG_20230719_080114.jpgIMG_20230719_080302.jpg
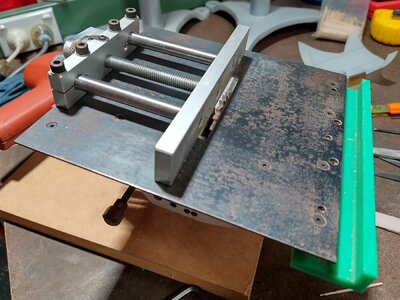
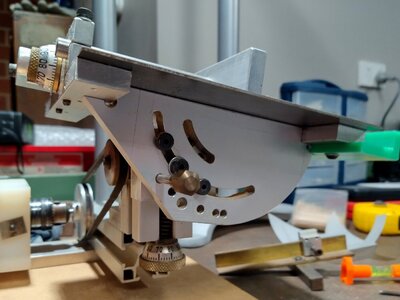
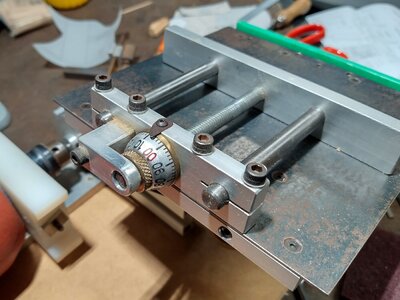
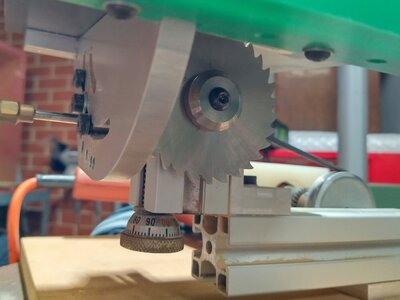
I made this saw around 30 years ago, it's the first time I've used it for a project. I have a number of milling cutters of different thickness I can use with it but I will need to get a proper saw blade.

IMG_20230719_085118~2.jpg
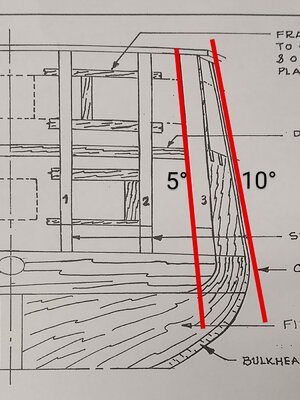
This is the trap that caught me out, I lined up the stern frame 3 with bulkhead R and cut a slot on a 10° angle. It was only when I had all the stern frames in place I could see it was wrong as the top of frame 3 was hitting frame 2. Checking the drawing I could see that stern frame 3 starts at 10° and finishes at 5°. I was able to change the angle and blend in the transition, all the sides of this frame have to be beveled to match the other surfaces.

IMG_20230719_075553.jpg
IMG_20230719_075703.jpg
This is how it finished up I was using a dowel to hold it in position while working on the other parts.

IMG_20230719_075238.jpg
IMG_20230719_075324.jpg
IMG_20230719_075443.jpg
In the end I was quite happy with the experimental part so I decided to keep it.
 
I've been having a lot fun with the counter block it's not as straightforward as it looks.

View attachment 385852
Firstly the top surface follows the contour of the deck and the angled back is straight along the bottom and curved at the top. The block provided is half inch thick and needs a sixteenth taken off it.

View attachment 385853
I wanted to try a few ideas for the best way to make this part so I used an offcut that was the same thickness to experiment with. This is how I drilled the 5° hole, it was drilled before cutting the angle at the back.

View attachment 385854
As I had no easy way of cutting the thickness down I cut slots in the block for the stern frames.


View attachment 385858
View attachment 385857View attachment 385859View attachment 385860
I made this saw around 30 years ago, it's the first time I've used it for a project. I have a number of milling cutters of different thickness I can use with it but I will need to get a proper saw blade.

View attachment 385856
This is the trap that caught me out, I lined up the stern frame 3 with bulkhead R and cut a slot on a 10° angle. It was only when I had all the stern frames in place I could see it was wrong as the top of frame 3 was hitting frame 2. Checking the drawing I could see that stern frame 3 starts at 10° and finishes at 5°. I was able to change the angle and blend in the transition, all the sides of this frame have to be beveled to match the other surfaces.

View attachment 385855
View attachment 385878
This is how it finished up I was using a dowel to hold it in position while working on the other parts.

View attachment 385879
View attachment 385880
View attachment 385881
In the end I was quite happy with the experimental part so I decided to keep it.
Good morning Tony. This is great work. Cheers Grant
 
I've been having a lot fun with the counter block it's not as straightforward as it looks.

View attachment 385852
Firstly the top surface follows the contour of the deck and the angled back is straight along the bottom and curved at the top. The block provided is half inch thick and needs a sixteenth taken off it.

View attachment 385853
I wanted to try a few ideas for the best way to make this part so I used an offcut that was the same thickness to experiment with. This is how I drilled the 5° hole, it was drilled before cutting the angle at the back.

View attachment 385854
As I had no easy way of cutting the thickness down I cut slots in the block for the stern frames.


View attachment 385858
View attachment 385857View attachment 385859View attachment 385860
I made this saw around 30 years ago, it's the first time I've used it for a project. I have a number of milling cutters of different thickness I can use with it but I will need to get a proper saw blade.

View attachment 385856
This is the trap that caught me out, I lined up the stern frame 3 with bulkhead R and cut a slot on a 10° angle. It was only when I had all the stern frames in place I could see it was wrong as the top of frame 3 was hitting frame 2. Checking the drawing I could see that stern frame 3 starts at 10° and finishes at 5°. I was able to change the angle and blend in the transition, all the sides of this frame have to be beveled to match the other surfaces.

View attachment 385855
View attachment 385878
This is how it finished up I was using a dowel to hold it in position while working on the other parts.

View attachment 385879
View attachment 385880
View attachment 385881
In the end I was quite happy with the experimental part so I decided to keep it.
Well done. Thanks for the detailed process that you went through.
 
I've been having a lot fun with the counter block it's not as straightforward as it looks.

View attachment 385852
Firstly the top surface follows the contour of the deck and the angled back is straight along the bottom and curved at the top. The block provided is half inch thick and needs a sixteenth taken off it.

View attachment 385853
I wanted to try a few ideas for the best way to make this part so I used an offcut that was the same thickness to experiment with. This is how I drilled the 5° hole, it was drilled before cutting the angle at the back.

View attachment 385854
As I had no easy way of cutting the thickness down I cut slots in the block for the stern frames.


View attachment 385858
View attachment 385857View attachment 385859View attachment 385860
I made this saw around 30 years ago, it's the first time I've used it for a project. I have a number of milling cutters of different thickness I can use with it but I will need to get a proper saw blade.

View attachment 385856
This is the trap that caught me out, I lined up the stern frame 3 with bulkhead R and cut a slot on a 10° angle. It was only when I had all the stern frames in place I could see it was wrong as the top of frame 3 was hitting frame 2. Checking the drawing I could see that stern frame 3 starts at 10° and finishes at 5°. I was able to change the angle and blend in the transition, all the sides of this frame have to be beveled to match the other surfaces.

View attachment 385855
View attachment 385878
This is how it finished up I was using a dowel to hold it in position while working on the other parts.

View attachment 385879
View attachment 385880
View attachment 385881
In the end I was quite happy with the experimental part so I decided to keep it.
Dear Tony,

I don't find words: perfect!
As you know, I'm also building the USS Constitution and I'm looking forward to follow your log.
 
Firstly thanks for the comments, likes and dropping by to see my progress.
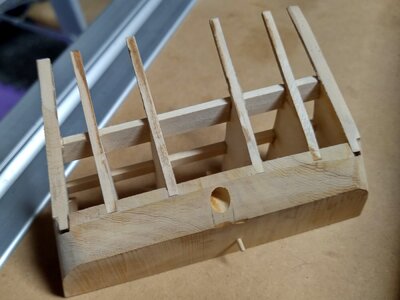
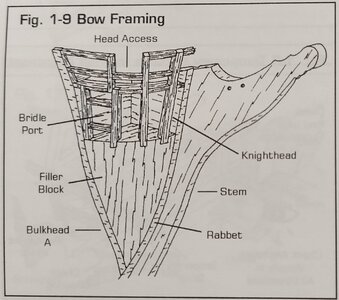
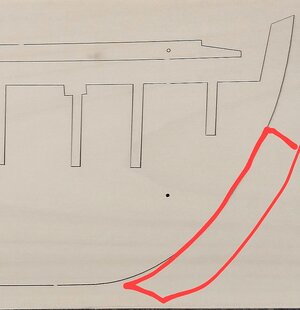
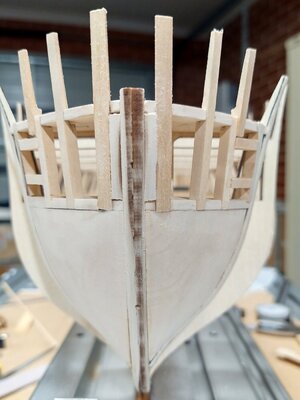
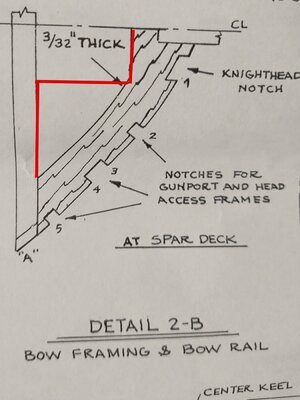
This is a part I wasn't looking forward to, cutting the notches in the bow blocks looked difficult.

IMG_20230726_145259~2.jpg

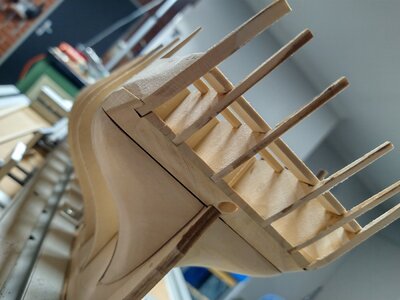
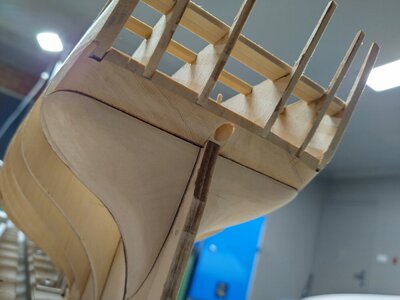
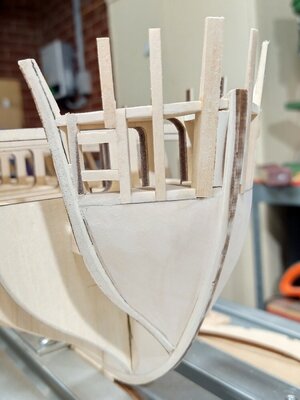
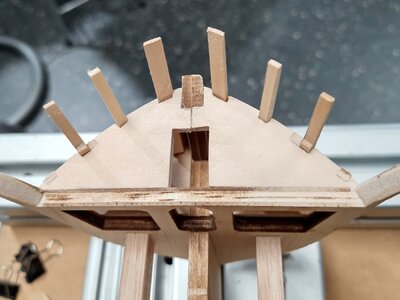
Instead of cutting the notches I made a lower frame and adjusted the size of the posts and gunport to suit. I left some extra material on the posts which will be removed when I finalise the frames.
IMG_20230726_213233.jpg
IMG_20230726_213340.jpg

I also changed the shape of the top bow frame, this looks stronger and will support the deck better.
IMG_20230726_212922.jpg
IMG_20230726_213654.jpg
I could see no reason for the big cutout, any suggestions welcome before it's too late to change.
Next job I will be fitting the waterways looks like another interesting challenge.
Tony
 
Last edited:
Clever solution to the 'notch in the block' problem. I trust you shortened the block to compensate (sorry to be pedantic - or maybe it doesn't matter going forward in the build?)...
Hi Paul.
The blocks where already in place, I was going to cut the notches in but I thought this would be a better way to do it and a lot easier to fix if it wasn't right. The posts have 1/8 removed from the bottom to compensate.
Tony
 
Hi Paul.
The blocks where already in place, I was going to cut the notches in but I thought this would be a better way to do it and a lot easier to fix if it wasn't right. The posts have 1/8 removed from the bottom to compensate.
Tony
Tony,

Splendid!
Are you going to start with the waterway? I'm at the some momentum but would get an idea how you are going to make the oblique side
 
Tony,

Splendid!
Are you going to start with the waterway? I'm at the some momentum but would get an idea how you are going to make the oblique side
HMSFly.
Hi, I'll post some photos soon to show how I'm going to do this, if I can think of a better way of doing things I often change my mind as the job progresses.
Tony
 
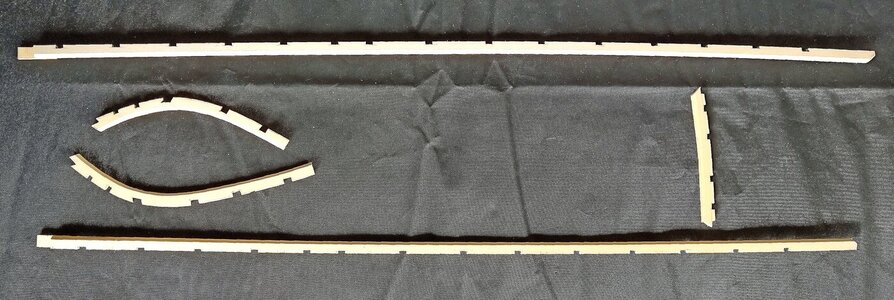
Hi I've just completed the waterways another simple looking project that proved to be a bit of a challenge.
IMG_20230730_131027.jpg
IMG_20230730_130619.jpg
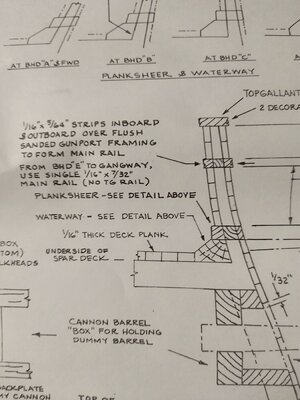
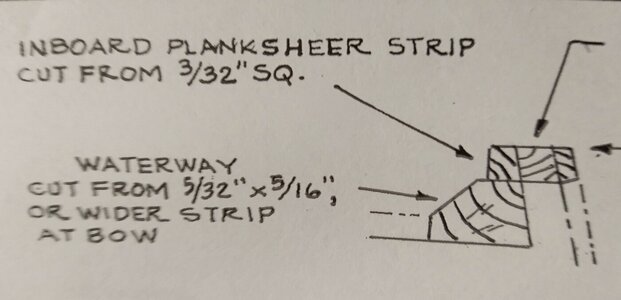
First problem the w/ways are made from 5/32*5/16" or wider at the bow, 5/16" is the widest 5/32 strip supplied. Another issue is at deck level the w/ways are 1/4" requiring 1/16" to be removed. The drawings don't really show how these are done with the material provided.

IMG_20230730_111333.jpg
My w/ways compromise of 5 pieces the two long pieces and stern piece where soaked in hot water and bent to shape. The bow w/ways have been fabricated from 1/8+1/32" sheet. Rather than cut down the width of the whole strip I filed notches matching the angle of the bulkhead.

IMG_20230730_111646.jpg
IMG_20230730_111813.jpg
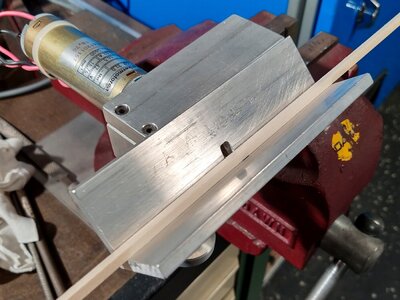
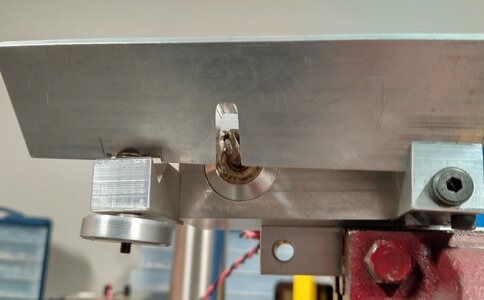
The chamfered edge was made before bending this is my homemade tool to cut a chamfered edge.

IMG_20230730_111454.jpg
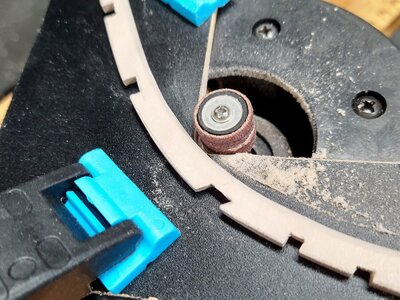
I traced the shape of the bow pieces, cut and sanded the outside to size. Next the notches where filed in place. The inside curve was cut out and finished with a Dremel.

IMG_20230730_091044.jpgIMG_20230730_091115.jpgIMG_20230730_110722.jpg
IMG_20230730_110530.jpg
IMG_20230730_110145.jpg
Now the w/ways are in place I can use them to set the hight of the gunports.
I thinking my next job will be planking the bulkhead extensions, they're very fragile and I'm amazed I haven't broken them.
Any questions or suggestions always welcome.

Tony
 
Dear Tony,

Now I'm totally jealous!
Perfection.

Unfortunately I don't have the tools to do this.
I have a Proxxon circular saw and a Dremel with accessories .. and a sander.

Would you please allow me to ask you a few questions?

If I understand correctly you used a straight piece of 5/32" x 5/16" for the part from stern to bulkhead E.
You have provided notches on this according to plan where the Bulkheads extension in fit.
Doing so avoids to cut the bevels according the Bulwark slope...
Is this correct?

But the Bow?
Did you also use an 5/32 x 5/16? because the 1/8+1/32 is not clear for me.

Nevertheless I would like to copy your idea to cut out the notches...

Marc
 
Hi I've just completed the waterways another simple looking project that proved to be a bit of a challenge.
View attachment 387368
View attachment 387367
First problem the w/ways are made from 5/32*5/16" or wider at the bow, 5/16" is the widest 5/32 strip supplied. Another issue is at deck level the w/ways are 1/4" requiring 1/16" to be removed. The drawings don't really show how these are done with the material provided.

View attachment 387369
My w/ways compromise of 5 pieces the two long pieces and stern piece where soaked in hot water and bent to shape. The bow w/ways have been fabricated from 1/8+1/32" sheet. Rather than cut down the width of the whole strip I filed notches matching the angle of the bulkhead.

View attachment 387370
View attachment 387371
The chamfered edge was made before bending this is my homemade tool to cut a chamfered edge.

View attachment 387372
I traced the shape of the bow pieces, cut and sanded the outside to size. Next the notches where filed in place. The inside curve was cut out and finished with a Dremel.

View attachment 387377View attachment 387378View attachment 387379
View attachment 387380
View attachment 387381
Now the w/ways are in place I can use them to set the hight of the gunports.
I thinking my next job will be planking the bulkhead extensions, they're very fragile and I'm amazed I haven't broken them.
Any questions or suggestions always welcome.

Tony
Those are some nice-looking waterways. Well done!
 
Dear Tony,

Now I'm totally jealous!
Perfection.

Unfortunately I don't have the tools to do this.
I have a Proxxon circular saw and a Dremel with accessories .. and a sander.

Would you please allow me to ask you a few questions?

If I understand correctly you used a straight piece of 5/32" x 5/16" for the part from stern to bulkhead E.
You have provided notches on this according to plan where the Bulkheads extension in fit.
Doing so avoids to cut the bevels according the Bulwark slope...
Is this correct?

But the Bow?
Did you also use an 5/32 x 5/16? because the 1/8+1/32 is not clear for me.

Nevertheless I would like to copy your idea to cut out the notches...

Marc
Hi Marc.
You are correct there are three parts made from 5/32*5/16 from the stern to bulkhead E the notches where filed at the same angle as the bulkhead extensions.
I should have taken some photos of the bow pieces as they were being built. As I had no suitable 5/32 material I cut the parts from one of the leftover 1/8 laser cut sheets.
IMG_20230731_122932.jpg
First I made a template and cut a part from this sheet. To get the correct thickness I glued some 1/32 strip to the underside.
Hope this helps.

Tony
 
Back
Top