USS Constitution by Model Shipways 1:76 scale

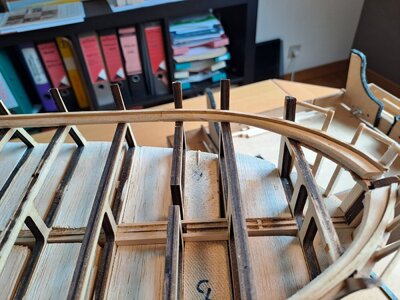
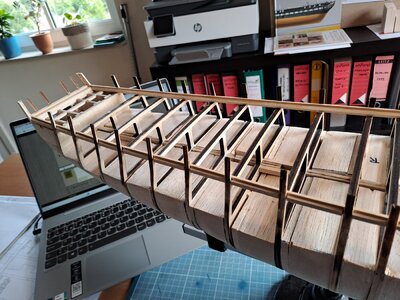
Waterway in place....
And inboard plank over gunport framing....

I would like to start the boxes for the dummy guns...
And I have an idea....

To avoid having to place a each time a plank between the Bulkheads, I am considering the idea of placing 1 plank of (1/8" x 13/32") eg 3 mm x 10 mm, i.e. in 1 piece... Glue this just under the spar deck with notches of the Bulkhead ribs....same principle as the Waterway plank.....
Try to work this out....

waterway.jpg

waterway2.jpg
 
Hello Tony,

Again a stupid question from my side: have some doubts what is de diameter of the fore mast?

gr

Marc
Hi Marc.

I had a quick look at the drawing and as far as I can tell the fore mast is 3/8" dia.

Your waterways came out well did you make them the same as me?

I'm doing the gunports now as well. I'm using single pieces between the ribs, I didn't consider one piece of timber but it could work very well much stronger and maybe quicker to make but bending to shape could be a problem. The challenging part is to get the dummy gun level and in the centre of the gunport. I will post some photos when I've worked out a way to do this.

Tony
 
Hey Tony,

Yes, I copied your idea for the Waterways and it works so wonderwel! Briljant idea from you!

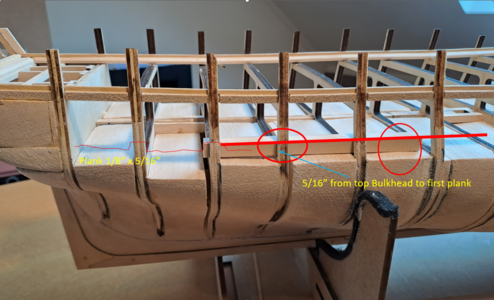
The idea is to have an exact reference point to place the vertical slats on.
After all, if you place individual planks between the Bulkhaeds, you will have slight differences in heights, which can influence the outdoor planking.
I will try to produce a plank 1/8" x 5/16" and bending the shape of each Bulkhead... I will try and see if it to do.
I'll come back to you.

1691045093443.png
 
Hey Tony,

Yes, I copied your idea for the Waterways and it works so wonderwel! Briljant idea from you!

The idea is to have an exact reference point to place the vertical slats on.
After all, if you place individual planks between the Bulkhaeds, you will have slight differences in heights, which can influence the outdoor planking.
I will try to produce a plank 1/8" x 5/16" and bending the shape of each Bulkhead... I will try and see if it to do.
I'll come back to you.

View attachment 387899
Marc
I'm starting my gunports from the top down using the waterway as a starting point, I'll try and post some photos tomorrow.
 
Dear Tony,

I failed with my try out.....It's not possible to shape it without big tolerances..... So, of course you are right, you have to do it with single pieces between the ribs.
Looking forward to your photos...:)
 
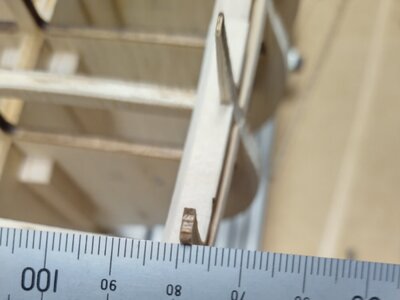
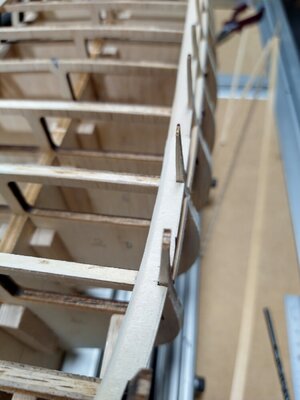
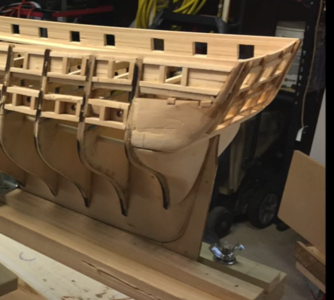
Here's my update for the week, I was going to plank the bulkhead extensions but there's an issue with them. There is a lot of variation in thickness and the thin ones are very flexible.
IMG_20230804_181022.jpg
IMG_20230804_180913.jpg
IMG_20230804_180736.jpg
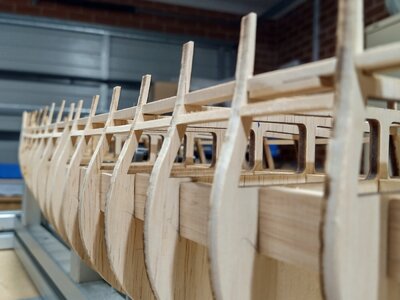
While I work out a fix for this I turned my attention to the gunports, this is how I ended up doing them.

IMG_20230804_181747.jpg
IMG_20230804_181549.jpg
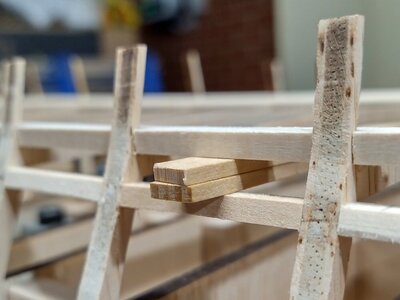
A spacer was placed under the waterway and the top gunport rails glued in place.

IMG_20230804_180301.jpg
IMG_20230804_181415.jpg
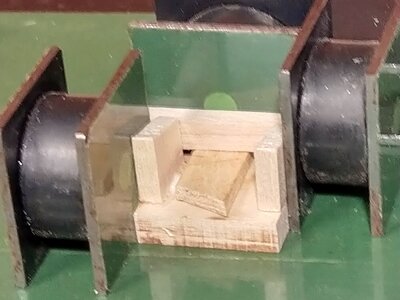
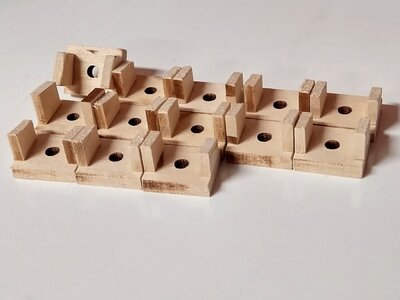
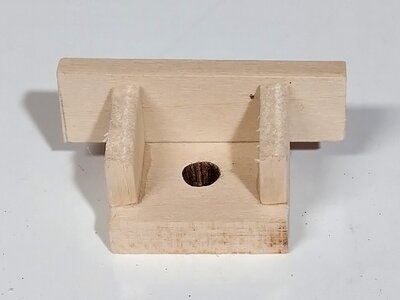
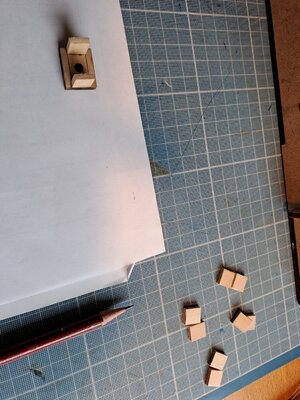
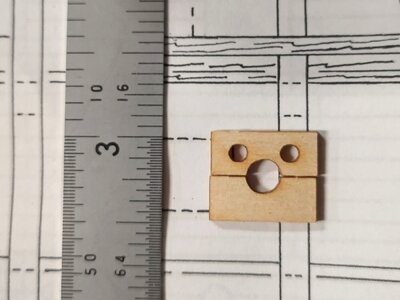
I'm assembling the dummy gunports off the ship first the sides then the lower rails.
I have a set of magnets l use to glue parts together. Only the sides are glued at this stage there's a 1/8" spacer behind the side pieces, it's sitting on a piece of scrap timber to prevent it from being glued.

IMG_20230804_181319.jpg
The lower rails have to be cut to suit the bulkheads then glued in the correct position. Each pair is different and the drawing has to be followed carefully to get them right. I find this is easier to do on the work table than the model.


IMG_20230804_181213.jpg
This is just dry fitted for the photo.
I've still got a fair bit to on the gunports, they should all be in place by next week.
 
GREAT!!! MOST helpful!!!! FYI - I have been saving these logs as PDF files and saving them as I build my models. Having to save them on a detachable memory. For all, the skills and techniques are super files to have and use on almost any model. SUPER work and THANKS!!!
 
cool trick. i will use this when I start my Constitution. Hopefully in less than a year. I am knee deep right now in PE hell, but am determined to finish the model.
 
Hello Tony,

I came to the same conclusion: spacer of 1/8" under the waterway and gluing the top gunway rails...
But prefab the dummy gunports is again a great idea...
I'll try it out...

PS
I have already broken five (5 !!!!!) bulkhead extensions.
I'm very very carefully but the slightest touch is enough to break them!
Fortunately, I was able to fit the broken pieces back in perfectly with CA glue every time....
I therefore enforced them with a layer of CA glue....it helps....
And yes, there is a lot off thickness variation!
 
Plan, Mockup, Measure as many times needed to alleviate hesitation, saw once - ASSEMBLE! Just that easy, lol :cool: No wonder it takes a year or more to complete a build! Great work - sound process Tony!!!
Hi Bill
Thanks for the kind comments, I can only wish a model I could finish one in a year, my last one was nearly 30 years in the making, lol.
 
GREAT!!! MOST helpful!!!! FYI - I have been saving these logs as PDF files and saving them as I build my models. Having to save them on a detachable memory. For all, the skills and techniques are super files to have and use on almost any model. SUPER work and THANKS!!!
Thanks for the reply glad that this is helpful to you, looking forward to seeing your builds in the future.
 
Hello Tony,

I came to the same conclusion: spacer of 1/8" under the waterway and gluing the top gunway rails...
But prefab the dummy gunports is again a great idea...
I'll try it out...

PS
I have already broken five (5 !!!!!) bulkhead extensions.
I'm very very carefully but the slightest touch is enough to break them!
Fortunately, I was able to fit the broken pieces back in perfectly with CA glue every time....
I therefore enforced them with a layer of CA glue....it helps....
And yes, there is a lot off thickness variation!
Hi Marc
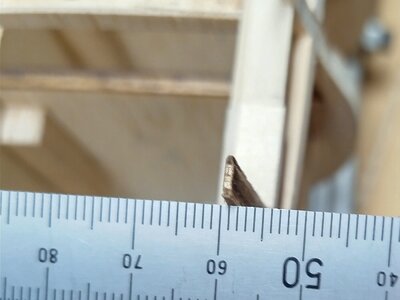
I used a 3/16" spacer to set the upper gunrail. I just checked my drawings and this looks right to me.
IMG_20230805_091619.jpg
From the bottom of the waterway to the top of the gunport it's 5/16" - 1/8" for the top rail = 3/16".

IMG_20230805_092806.jpg
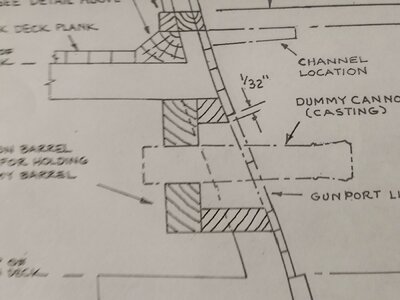
The gunports on sheet 2 are smaller than the gunport lids to allow for the 1/32" step around the gunport.

I wish there was more sizes included on the drawings it's to easy to make mistakes. Please let me know if I have got this wrong.

Thanks a lot Tony
 
Tony,

The reason why I mentioned the 1/8 was that I indeed ended up with 2 different sizes. And yes, sheet 2 is confusing. I checked everything twice and indeed you are right: it is 3/16..... :) :) :) :) :)

View attachment 388122

Yes, I always worked in the metric system..... an error happens fast.....
Hi Marc

How did the 1/8" spacer affect the rails?

We are metric here but a lot of the companys I have worked for still use inches. I find it's better to work exclusively in inches or millimetres and don't try converting one to the other.

Tony
 
Hi Tony,

Would like to get your opinion:
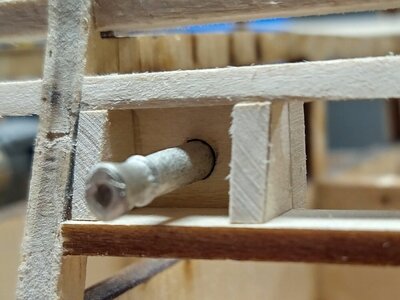
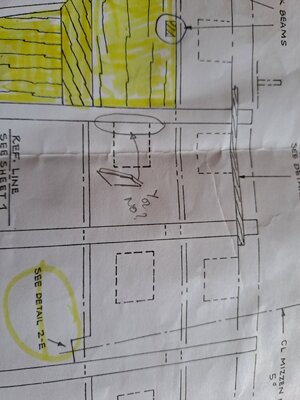
On sheet 2, just beside the counter block, they have drawn a gun box but whit one side against Bulkhead R.
If my measurements are right, we should NOT place an wouden part additionally to the R.. see photo included from a blog on another website below....
See also photo sheet 2...

PS
Work in progress....

1691314144863.png

Tony1.jpg

Tony2.jpg
 
Hi Tony,

Would like to get your opinion:
On sheet 2, just beside the counter block, they have drawn a gun box but whit one side against Bulkhead R.
If my measurements are right, we should NOT place an wouden part additionally to the R.. see photo included from a blog on another website below....
See also photo sheet 2...

PS
Work in progress....

View attachment 388358

View attachment 388359

View attachment 388360
Hi Marc
From memory there are 6 gunports per side that use the bulkheads as a side for the gunport.
in the morning I'll post some photos to show how I'm doing them.
Tony
 
Back
Top