• Win a Free Custom Engraved Brass Coin!!!
    As a way to introduce our brass coins to the community, we will raffle off a free coin during the month of August. Follow link ABOVE for instructions for entering.

USS Constitution - Model Shipways MS2040 - 1:76 - by Jeff T

Joined
Sep 1, 2020
Messages
872
Points
353

Location
Cicero, NY
After completing the cross section of the Constitution, I am about to start the full model in the same scale. I was able to get a good price on the kit by taking a chance and buying it off of one of the online auction sites. Since it had I had a 30 day return window and it was less than 1/2 of the normal price (and free shipping), I went for it. All of the parts in the pre-owned kit were still in their plastic bags and in excellent condition, so the purchase turned out to be a very good one from my perspective.

I am not going to do a contents review as that has been done by other builders of this kit in other logs. I started the kit already and will start posting progress updates soon.
 
FYI, Model Expo does sell a Sail Kit for this model if you intend to have full sails rigged on your model.

Saves lots of time in cutting and sewing the material for sails.


I got mine on sail a few months back.
Thanks for the info, Kurt. I am aware of the sail kit offered by MS. I have not made up my mind about sails yet. If I do add any it may only be topsails and topgallants.
 
Good to have you moving on to the full model. Believe me you will use all your skills gained on the cross section to help in the full model construction. I'm looking forward to your future posts. This will be a great build for you
 
Good to have you moving on to the full model. Believe me you will use all your skills gained on the cross section to help in the full model construction. I'm looking forward to your future posts. This will be a great build for you
I am certain you are correct about using all my skills acquired to date on this one. This is my 4th MS kit with the 3 previous builds leading up to this one.
 
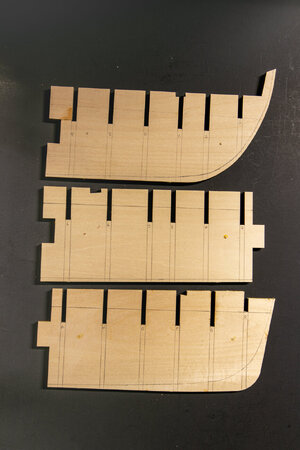
Finally - Time for an update on my slow progress. I started with marking the bearding line and continuation lines for the bulkheads on the 6 false keel pieces. The false keel is supplied as half thickness. These need to be glued together to form the three false keel pieces. The alignment holes can be seen in the pictures. I used toothpicks for the alignment pegs.
IMG_7943.jpg
IMG_7945.jpg

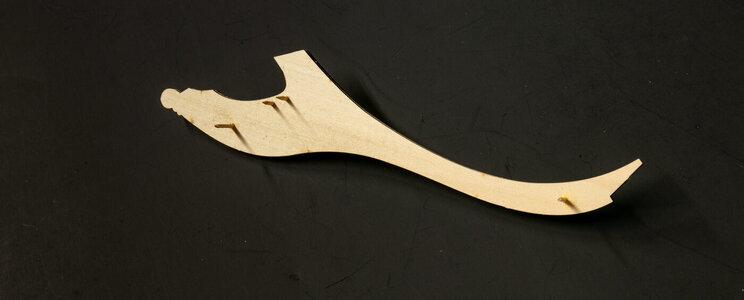
I also glued the 2 haves of the stem at the same time. The alignment toothpicks are evident in the picture.
IMG_7947.jpg

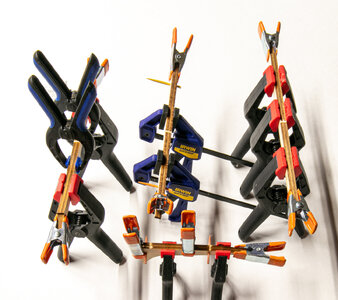
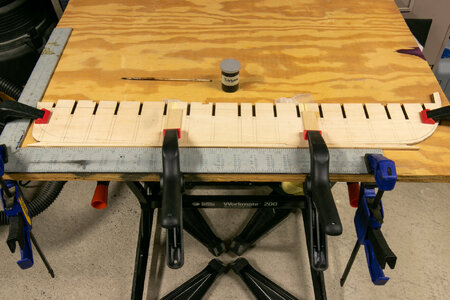
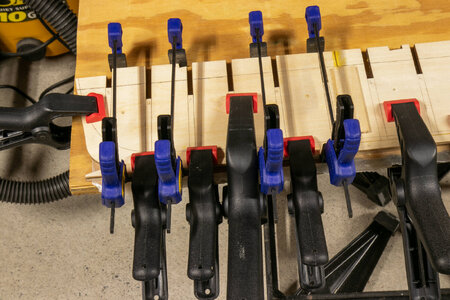
The keel was dry fit and used to help align the false keel when gluing the parts together. A reinforcing block was glued in place while gluing the false keel parts together. I clamped the parts to a 3/4 inch piece of plywood as a flat base for gluing. Wax paper was used under the seams to keep it from gluing to the board.
IMG_7950.jpg
IMG_7951.jpg

Once the glue had set overnight, I cut the bearding line into the false keel on both sides then I added the keel pieces to the backbone using more toothpicks
IMG_7954.jpg
IMG_7953.jpg

Once the bearding line was cut, I added reinforcing pieces to the other side of the keel to complete its construction. I plan on cleaning up the bearding line cuts before continuing with the bulkheads.
 
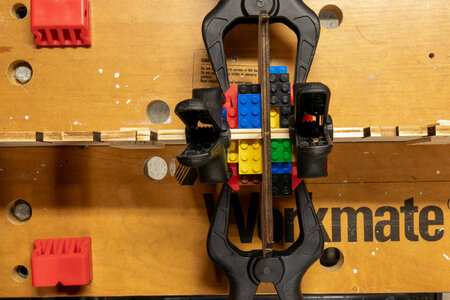
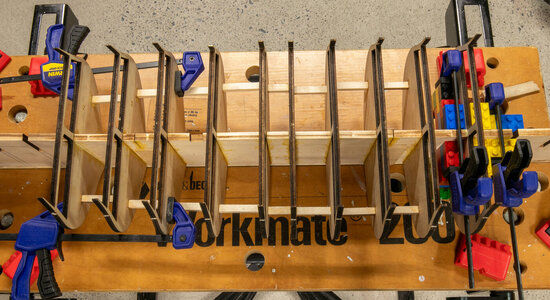
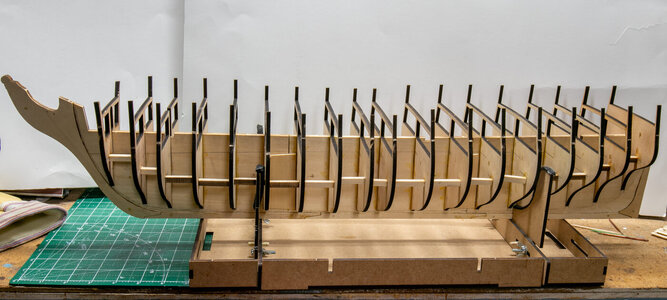
Time for a quick update. I have finished installing the bulkheads. I used LEGO bricks as squares to align the bulkheads after gluing with Titebond. The LEGOS work fairly well to get good alignment. As I was adding the bulkheads I also installed some fore and aft stabilization in the form of 1/4" square stock. I could have been more careful in getting these perfectly aligned with one another, but they are not going to show so only those of us who see it before planking will know.

IMG_7955.jpgIMG_7958.jpgIMG_7960.jpg
 
I too am building the Constitution. It is definitely a challenge. I plan on installing the full sail kit to mine. I am still months and maybe years away from that point, but I purchased the sail kit. They are nice looking sails. I just wish the instruction manual that comes with the kit was more detailed. Also, the plans are very confusing.
 
I hope your build goes well. I completely agree with your assessment of the instructions. I think the best instructions are probably the various builds that are posted here on SOS and other ship building forums. I will be using these postings as my guide as I move forward. I am reading the book but only for general information. Model Shipways is interesting in that they give very detailed plans but little specific instructions. This has been the theme for all of their kits that I have worked on to date.
 
Time for a quick update. I have finished installing the bulkheads. I used LEGO bricks as squares to align the bulkheads after gluing with Titebond. The LEGOS work fairly well to get good alignment. As I was adding the bulkheads I also installed some fore and aft stabilization in the form of 1/4" square stock. I could have been more careful in getting these perfectly aligned with one another, but they are not going to show so only those of us who see it before planking will know.

View attachment 454132View attachment 454133View attachment 454134
Hi Jeff
I've just found this log, looks like your off to a good start. Enjoy this build there's lots of challenges ahead.
Tony
 
You are progressing nicely. The addition of the 1/4 inch square stock for stabilizers will really help when you bevel the bulkheads for the planking.
 
Hi Jeff
I've just found this log, looks like your off to a good start. Enjoy this build there's lots of challenges ahead.
Tony
Off to a slow start. I have halted the hull for now and have been doing some other parts as I have time. I have been doing consultant work about 50% of my time the last month or so I haven't had too much time to spend on the fun stuff. It's hard to go back to working around 50% after being retired and maybe working 10% of my time.
 
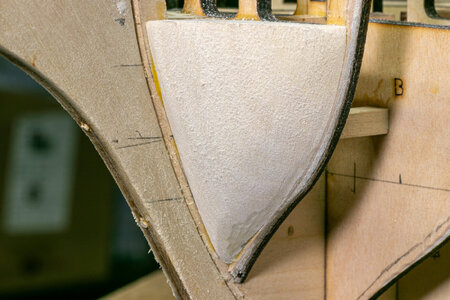
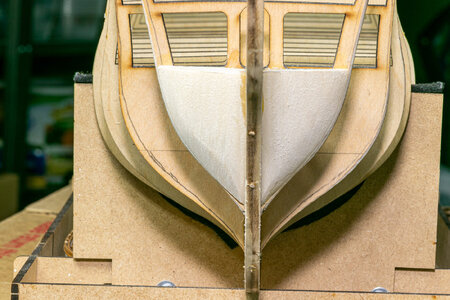
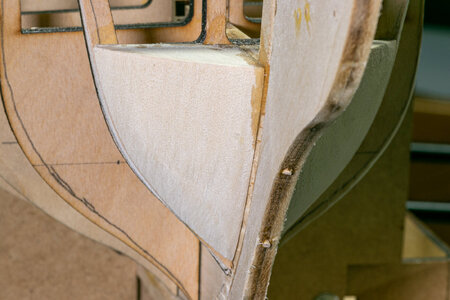
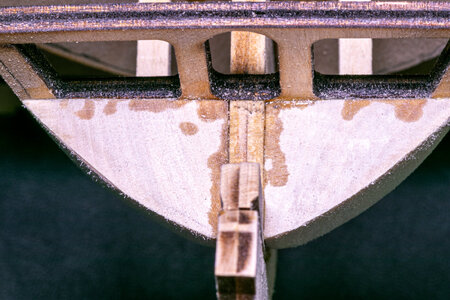
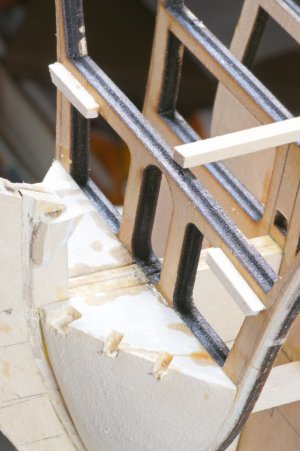
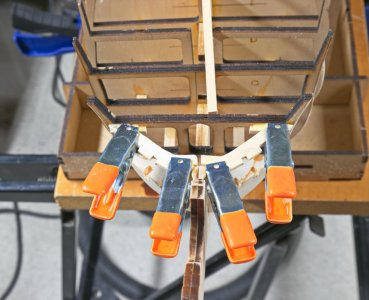
In keeping with catching up on where I am on the build, I have placed the blocks at the bow of the ship. They went reasonably well but may still need a bit of shaping which I will do when I shape the bulkheads prior to planking. I am still looking at the plans and to other forum postings for shaping the stern blocks.
IMG_7993-SOS Postings-2.jpgIMG_7994-SOS Postings-2.jpgIMG_7996-SOS Postings-2.jpgIMG_7999-SOS Postings-2.jpg
 
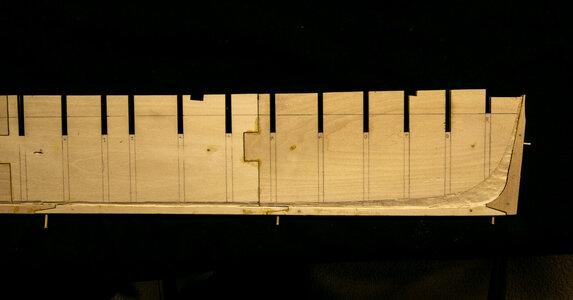
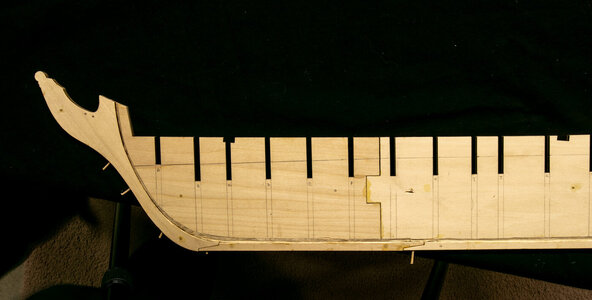
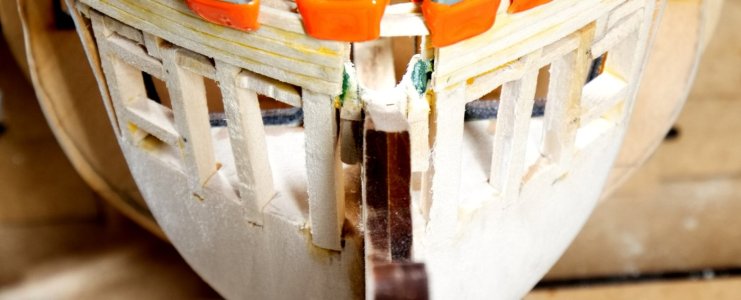
I did some more work on the Constitution. I worked on the bow area above the filler blocks. I first cut out the notches for the upright laser cut pieces.

IMG_8008.jpg

Next I glued in the upper horizontal pieces.
IMG_8009.jpg

I did not take pictures of the bow at this stage, but here are a couple of crops from later work that show the framing.
IMG_8015_1.jpgIMG_8026.jpg
 
Santa brought me the MSW Constitution model two years ago (been working Charles W Morgan). This year, Santa brought me the Cross Section and there are a number of items that are far better explained and demonstrated in this model than the full model so I will complete this kit first. Will definitely follow this build very carefully. Your technique and photography are VERY helpful! Thanks!!!!!!!
 
Santa brought me the MSW Constitution model two years ago (been working Charles W Morgan). This year, Santa brought me the Cross Section and there are a number of items that are far better explained and demonstrated in this model than the full model so I will complete this kit first. Will definitely follow this build very carefully. Your technique and photography are VERY helpful! Thanks!!!!!!!
Thanks for the compliments, much appreciated.

I built the cross section of the Constitution before I started on the full model. You can find a link to it in my signature line below. The full model is MUCH more difficult. I definitely recommend building the cross section first.
 
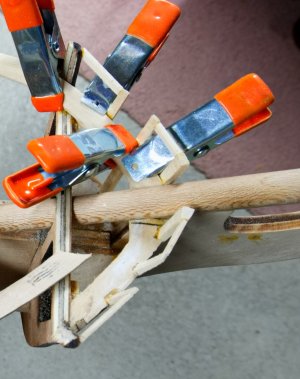
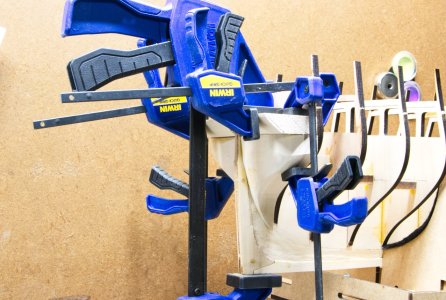
I dreaded working on the stern blocks but finally worked on it. I made a significant error here in that I failed to realize that I the piece placed above the carved blocks needed to be cut thinner than what was supplied. After a lot of sawing, cutting and sanding, I thinned it to (nearly) the correct thickness.
IMG_8001.jpg

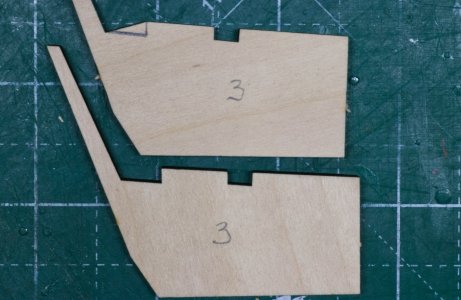
The laser cut stern pieces were next to be installed. As can be seen in the photo below, one of the laser cut pieces does not have a correctly formed slot. I clamped the "bad" piece to the correct piece and filed out the slot to the correct size. I really like Mode Shipways kits, but I find it irritating that after all of these years, the company has not corrected a well-documented error such as this. I guess in this case they figure that if you can build this model that requires making all kinds of pieces from wood stock, then you can fix such a simple issue without any problem.
IMG_8007.jpg
 
I have both kits from ME and I also have the build practicum from Lauck Street Shipyard for this kit, it does have good instructions to help you with the build, worth the funds to get a good build completed.

The owner is also a member here on the forum and if you sign up he sends out emails to get discounts on buys several times a year.

lauckstreet​


I dreaded working on the stern blocks but finally worked on it. I made a significant error here in that I failed to realize that I the piece placed above the carved blocks needed to be cut thinner than what was supplied. After a lot of sawing, cutting and sanding, I thinned it to (nearly) the correct thickness.
View attachment 493014

The laser cut stern pieces were next to be installed. As can be seen in the photo below, one of the laser cut pieces does not have a correctly formed slot. I clamped the "bad" piece to the correct piece and filed out the slot to the correct size. I really like Mode Shipways kits, but I find it irritating that after all of these years, the company has not corrected a well-documented error such as this. I guess in this case they figure that if you can build this model that requires making all kinds of pieces from wood stock, then you can fix such a simple issue without any problem.
View attachment 493013
I just found this build log. I am using your cross section build love which is helping me tremendously. I am pulling up a chair to watch you here!

Rob
 
Back
Top