USS Essex 1799 Frigate by rlwhitt - Model Shipways - 1:76 [COMPLETED BUILD]

Once you've mastered the art of planking, which clearly you have, one layer is all that's necessary! ( Like planking the real1:1 ship.)
fabulous work!ThumbsupOkay

Pete
 
Thanks Rafico, Swiftie, and Pete for the encouragement. Onward....

Main Decking

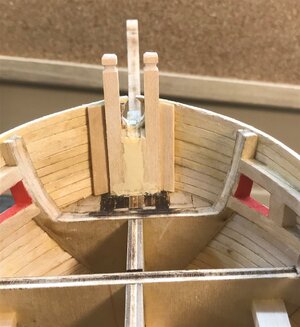
Before I got any further along, I decided I didn't like the recommended method of adding the Knightheads. They have you waiting until all the bulwark planking is done (inside and out), and cutting a square opening wide enough for the upper part of the knightheads and the bowsprit between them, and only as low as the bottom of the bowsprit. That would make them very fragile I think. So I went ahead and made them all the way down to the frames, and drilled a hole in the outer planking. (It's rounder than it looks in this picture, oddly). This is much more secure. I also added some scrap strips to either side to receive the ends of the inner bulwark planking.

MS2041-016.JPG

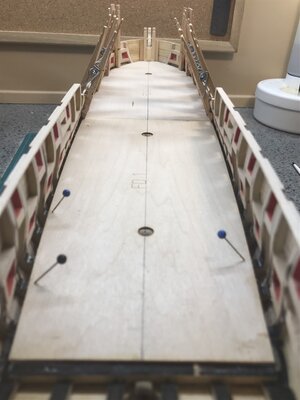
Then, in goes the false deck. Like the instructions say, this is not a tight, aligned fit. There will be significant gaps on the edges. These will be covered with the margin planks (laser cut). Obviously the important thing is to get it centered correctly. Then drill the mast stub holes into the blocking we previously installed. In my opinion, the masts as depicted in the plan are longer than they need to be, and I felt funny about drilling the holes that deep. I will adjust as needed when I get there.

MS2041-017.JPG

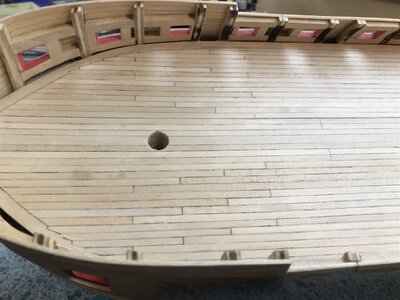
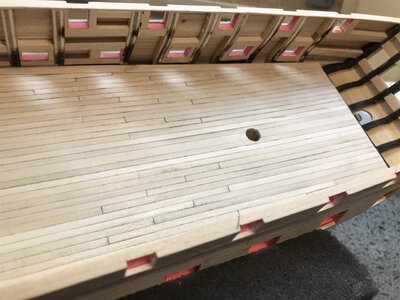
And here all the planking is done. I've got a few rough spots and room for improvement next time, but all in all I'm happy with it. Will need a bit more finish sanding before finishing, and that part has got me having a hard time deciding which way to go. Thinking about shellac. I've got amber, which might make a nice look, perhaps cut with clear to make it less pronounced. Or some kind of stain wash. Decisions. Luckily I don't need to make that one today. I'm going to continue on to do the inside bulwark planking while I ponder finishes.

MS2041-018.JPG

MS2041-019.JPG
 
Being a fan of shellac myself, I like your idea of cutting it with clear . I'd say at least 50/50, maybe even more. Make tests. Also cut the mixture at least 50/50 denatured alcohol, or thinner before using. Thin piss coats applied and allowed to dry thoroughly between each coat ( when it no longer feels cool to the touch).
Remember, Naval vessel decks were polished blindingly white with holystones to keep the off duty watches from malingering.
I love the model so far. You are doing a terrific job, and I'm learning a lot from following along! Okay

Pete
 
Bulwark Planking and Some Paintin'

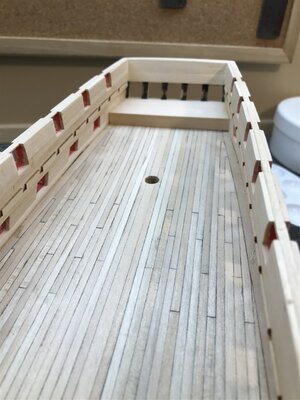
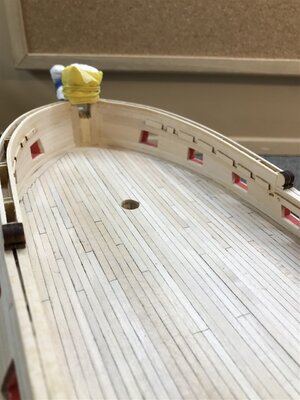
Finished up the major planking duties with the inner bulwarks. Feels good to have all the major planking effort done! Also visible are the beam pocket strips for the top deck beams. I would emphasize to spend some extra time on making sure these are situated right. There is really not much leeway for error here. The instructions point this out, but I would amplify it.

MS2041-020.JPGMS2041-021.JPG

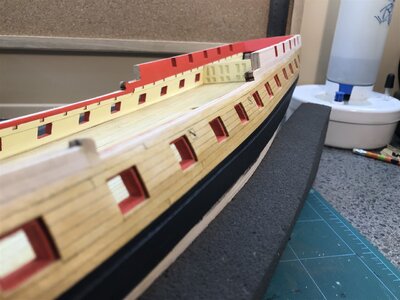
Started some painting. The outside planks at the ports was a shellac mix, 1/3 each of clear, amber, and alcohol, 3 coats looks about right to me.

MS2041-023.JPG

Put in the window frames. They went in with a perfect fit - but only because I took my time at the framing step to get the dimensions right.

MS2041-024.JPG

At this point in the planned sequence, they start into the coppering of the lower hull. I'm dreading this just a little bit
:)


I have ordered a tool from Artesania Latina to hopefully make the process of marking the copper tape a lot faster and easier. We will see how that goes. It's coming from across the pond so it'll be a bit before I see it, so in the meantime I'm going to work on hatches and other low profile deck stuff while I wait...
 
Bulwark Planking and Some Paintin'

Finished up the major planking duties with the inner bulwarks. Feels good to have all the major planking effort done! Also visible are the beam pocket strips for the top deck beams. I would emphasize to spend some extra time on making sure these are situated right. There is really not much leeway for error here. The instructions point this out, but I would amplify it.

View attachment 387606View attachment 387607

Started some painting. The outside planks at the ports was a shellac mix, 1/3 each of clear, amber, and alcohol, 3 coats looks about right to me.

View attachment 387608

Put in the window frames. They went in with a perfect fit - but only because I took my time at the framing step to get the dimensions right.

View attachment 387609

At this point in the planned sequence, they start into the coppering of the lower hull. I'm dreading this just a little bit
:)


I have ordered a tool from Artesania Latina to hopefully make the process of marking the copper tape a lot faster and easier. We will see how that goes. It's coming from across the pond so it'll be a bit before I see it, so in the meantime I'm going to work on hatches and other low profile deck stuff while I wait...
Rick, Inner bulwarks look great - love the yellow. really coming together! And the shellac mix worked well.
 
Stern and Quarter Galleries

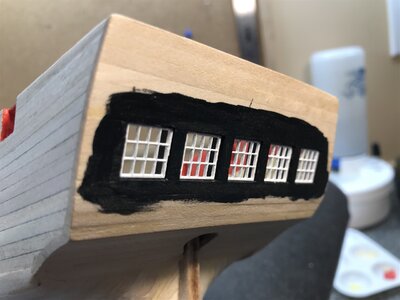
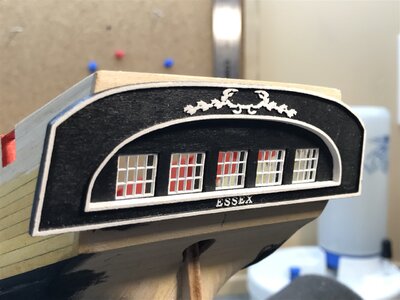
First up, trim out the stern piece with some tiny strip stock, paint and decorate with the PE brass decorations, painted.

MS2041-025.JPG

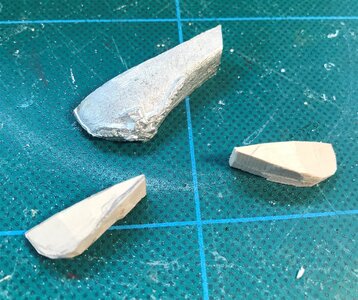
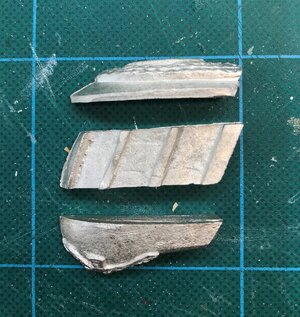
Now for the Quarter Galleries. As is common practice, at least with MS kits, these are provides as Britannia metal bits. These are just sad. They really don't fit together or with the hull. Not sure how anyone manages to make these look good. I don't think I can.

MS2041-026.JPG

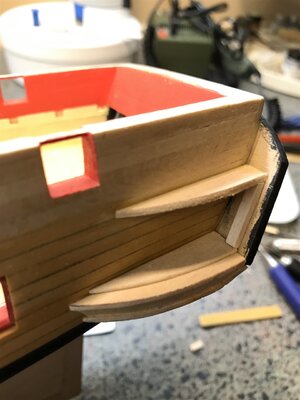
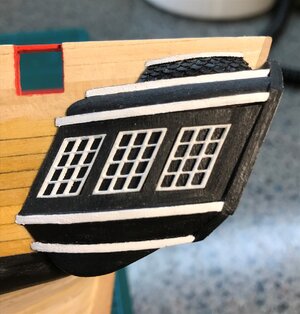
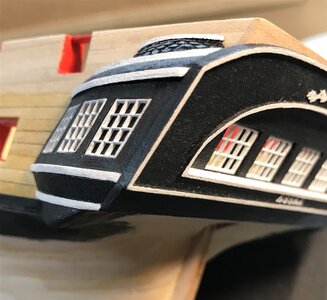
So I decided to scratch build the galleries. I have the Confederacy kit from MS in my queue to do and there you build up the galleries from parts supplied - a much superior design. I'm going to shamelessly steal what makes sense from those instructions, modifying as I need to fit this model. One of the main differences will be I don't need to make the windows clear because there's nothing to see back here on this kit - just a plank wall.

Starting by making a "floor" piece. This is sort of just eyeballed as to shape, taking the length from the plans.

MS2041-027.JPG

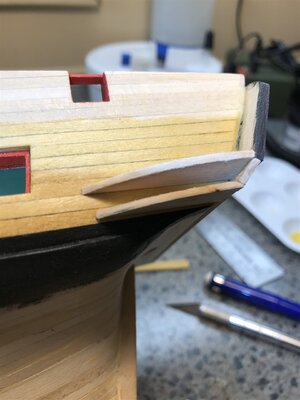
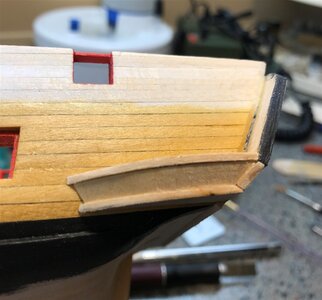
Then added a slightly smaller piece of similar shape below it, attached to the bottom of the lower counter board. These horizontal parts are 1/16" scrap stock.

MS2041-028.JPG

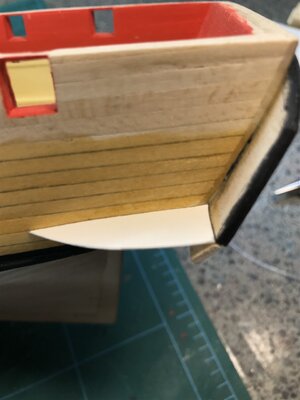
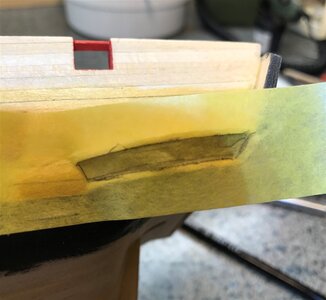
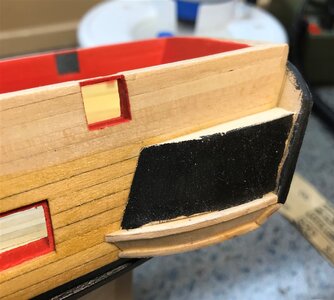
Next I need to make a "wall" between the 2 pieces. I could have made this lower section by laminating some thicker pieces, as I ended up doing with the upper part coming up later. But I decided to try using some 1/32" stock to make a planking sort of deal. I used the traced frog tape method to make a spiled piece to fit. It is basically made tight enough to be a press fit in here - I did not try to make any framing behind it.

MS2041-029.JPGMS2041-030.JPG

I did however make a frame for the curved window wall, which is a bit of 1/32" sheet with the grain vertical for easy bending.

MS2041-031.JPGMS2041-032.JPG

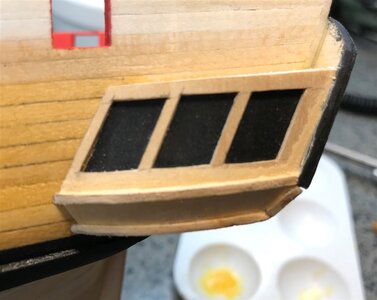
This followed by another thin skin, this one cut out for the laser cut window frames

MS2041-033.JPG

Moving on to the drops. Used some suitably sized scrap to try to make an approximation of the shape of the bottom of the provided lower part. This one has an eagle molded in, which I'll have to forego. Oh well...

MS2041-034.JPG

And here I've glued them to the floor and begun filling and shaping. Need lots of wood filler here.

MS2041-035.JPG

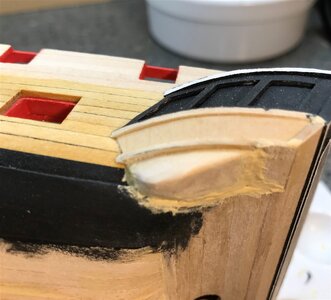
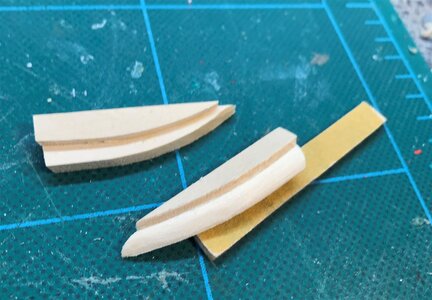
Moving to the upper part. For these I laminated a thick and a thin piece, then carved and sanded down to a pleasing shape.

MS2041-036.JPGMS2041-037.JPG

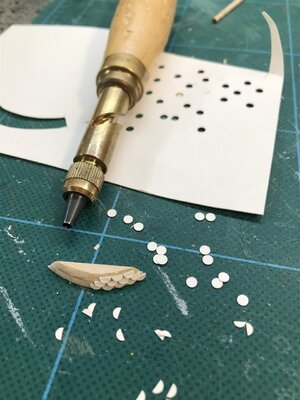
For the tops, the plans show this one has a little roof like thing with "shingles". I decided I wanted to show these. Luckily I happen to have a nice Japanese screw punch (it's a bookbinding tool) from my card modelling days. It makes nice little circles (or holes, depending on what you need). Cut in half and glued on makes a nice shingle effect.

MS2041-038.JPG

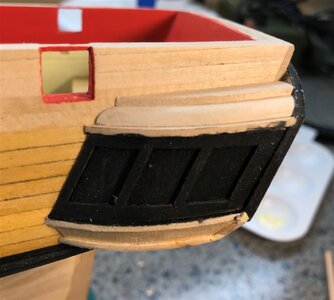
Fast forward a little after some finishing and painting. There are some PE brass decorations that will go on a couple of places, but I'm going to hold off on that until near the end. I'm pleased with the way these came out, and MUCH happier than I'd been trying to make those metal parts work.

MS2041-039.JPGMS2041-040.JPG
 
I am brand new to this hobby working on my first model, The Grand Banks Dory. I am not sure if I find this log frightening or inspiring. I look forward to my skills growing. I never expect them to be at this level but I do look forward to enjoying my builds. Thank you for sharing your build with the group.
 
I am brand new to this hobby working on my first model, The Grand Banks Dory. I am not sure if I find this log frightening or inspiring. I look forward to my skills growing. I never expect them to be at this level but I do look forward to enjoying my builds. Thank you for sharing your build with the group.
Don't be frightened by the work of expert skilled modelers. We all start from basic skills and tools and work up as we learn new skills and ship knowledge.
 
Thanks all for the kind words. I hardly consider myself an expert, but I agree with Kurt's comment. I look at builds from the real experts and yes it sometimes is almost discouraging to know I'll never be that good, or that patient, but we all learn something from those examples.
 
You are (from what I can gather from the evidence you've presented here) that good. You know, as in the person whose work is so well, expertly and imaginatively crafted and whose fit and finish are what I aspire to emulate.
Some of us (like me) have aspirations. Others ( apparently like yourself) just arrive.
Yes, your work (in my opinion for whatever it's worth) is THAT impressive!OkayAND inspiring!Thumbsup

Don't sell yourself short.;)

Pete
 
Back
Top