Nice work! Enjoying your posts.
-

Win a Free Custom Engraved Brass Coin!!!
As a way to introduce our brass coins to the community, we will raffle off a free coin during the month of August. Follow link ABOVE for instructions for entering.
-

PRE-ORDER SHIPS IN SCALE TODAY!
The beloved Ships in Scale Magazine is back and charting a new course for 2026!
Discover new skills, new techniques, and new inspirations in every issue.
NOTE THAT OUR FIRST ISSUE WILL BE JAN/FEB 2026
You are using an out of date browser. It may not display this or other websites correctly.
You should upgrade or use an alternative browser.
You should upgrade or use an alternative browser.
USS Essex 1799 Frigate by rlwhitt - Model Shipways - 1:76 [COMPLETED BUILD]
Miscellaneous Upper Bits
Thanks so much for all the likes and comments! you folks are overwhelming in your kindness!
I could easily call this section "stuff I'm doing to avoid coppering", but officially I'll say getting as much done now that will be OK to turn upside down.
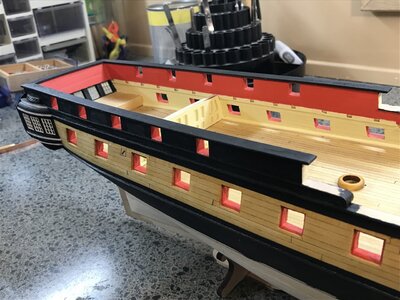
Starting with some of the low, non fragile deck bits. Mast surrounds, grates, capstan bases:
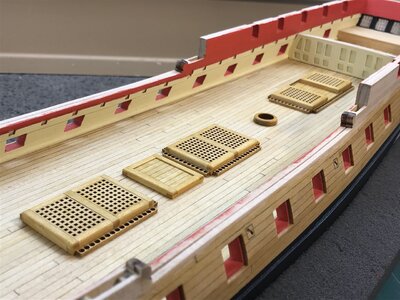
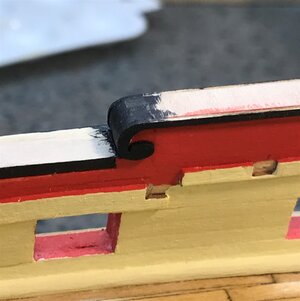
Adding cap rails, trim, and the little scroll trim bits at the hances. Plus upper bulwark black painting. Holding off on painting the tops of the fore and midships cap rails as they will have stanchions and upper rails attached.
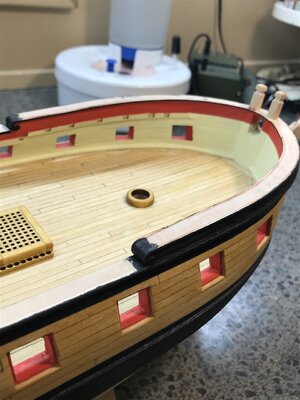
Thanks so much for all the likes and comments! you folks are overwhelming in your kindness!
I could easily call this section "stuff I'm doing to avoid coppering", but officially I'll say getting as much done now that will be OK to turn upside down.
Starting with some of the low, non fragile deck bits. Mast surrounds, grates, capstan bases:

Adding cap rails, trim, and the little scroll trim bits at the hances. Plus upper bulwark black painting. Holding off on painting the tops of the fore and midships cap rails as they will have stanchions and upper rails attached.


Copper Plating
I seriously considered painting the lower hull with Model Masters Oxidizing Copper Paint. This stuff has actual copper flake in it and is supposed to patina naturally over time. Or you can buy an accelerator to make green or blue patina immediately. I bought a bottle of the paint and painted some samples. I considered getting the accelerator, but by then I'd decided I didn't think I'd like the way it looked and that I would bite the bullet and go with the copper plating tape in the kit.
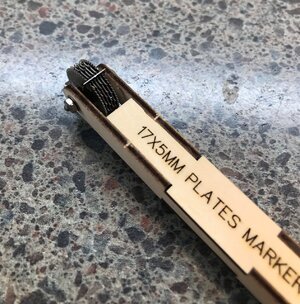
I also experimented with this tool. It's from Artesania Latina. It comes in kit form, you have to put it together. It looks promising because it combines fine edge divots, coarser mid plate ones in an alternating pattern, and seam markers. Theory is you just roll this thing down the tape and make all your marks in one quick pass. Much Time Saved! It works, but my main issue with it is that it's VERY hard to keep it going in a straight line keeping things properly aligned. Really no good way to run it in a guide or straightedge to guide it, that I could come up with at least. Plus it's got so many sharp points hitting the copper all at once it wants to pull the tape away from the backing and wrap around the wheels. Maybe this has promise, and someone will figure a better way to use it. But I'm putting it in a drawer for now and going back to a bit more old school, but tedious method.
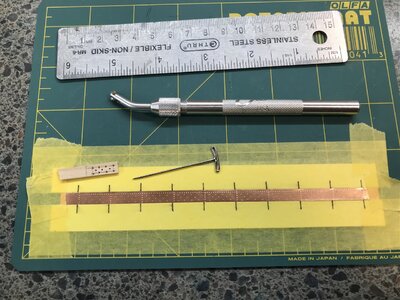
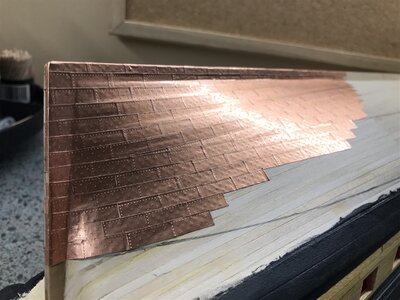
I made a simple card stock and tape jig, that I can use to produce 9 tiles at a time. Using the straight edge to guide a fine pounce wheel (sewing tool, Excel brand) for one edge and one side of each tile. Only marking one side and end because the tiles will be overlap jointed. I made a little wood jig to poke the mid-plate lines. That part is a bit tedious, but it's fast. Could probably be made quicker by making a multi-pin stamp, but I've tried making one and can never seem to get all the pins straight and the same length. Once all the divots are poked, just take a knife and cut each joint, careful to cut just the copper and not the backing. This gives a really easy to use strip of plates that peel off easily.
And so it begins. About 100 plates laid - only about 900 more to go

I seriously considered painting the lower hull with Model Masters Oxidizing Copper Paint. This stuff has actual copper flake in it and is supposed to patina naturally over time. Or you can buy an accelerator to make green or blue patina immediately. I bought a bottle of the paint and painted some samples. I considered getting the accelerator, but by then I'd decided I didn't think I'd like the way it looked and that I would bite the bullet and go with the copper plating tape in the kit.
I also experimented with this tool. It's from Artesania Latina. It comes in kit form, you have to put it together. It looks promising because it combines fine edge divots, coarser mid plate ones in an alternating pattern, and seam markers. Theory is you just roll this thing down the tape and make all your marks in one quick pass. Much Time Saved! It works, but my main issue with it is that it's VERY hard to keep it going in a straight line keeping things properly aligned. Really no good way to run it in a guide or straightedge to guide it, that I could come up with at least. Plus it's got so many sharp points hitting the copper all at once it wants to pull the tape away from the backing and wrap around the wheels. Maybe this has promise, and someone will figure a better way to use it. But I'm putting it in a drawer for now and going back to a bit more old school, but tedious method.

I made a simple card stock and tape jig, that I can use to produce 9 tiles at a time. Using the straight edge to guide a fine pounce wheel (sewing tool, Excel brand) for one edge and one side of each tile. Only marking one side and end because the tiles will be overlap jointed. I made a little wood jig to poke the mid-plate lines. That part is a bit tedious, but it's fast. Could probably be made quicker by making a multi-pin stamp, but I've tried making one and can never seem to get all the pins straight and the same length. Once all the divots are poked, just take a knife and cut each joint, careful to cut just the copper and not the backing. This gives a really easy to use strip of plates that peel off easily.

And so it begins. About 100 plates laid - only about 900 more to go

Last edited:
- Joined
- Dec 20, 2022
- Messages
- 58
- Points
- 58

Good workmanship. The coppering looks pretty good, too.
The coppering and the nailing of the copper plates are looking very good
- many thanks for showing us your method
- many thanks for showing us your method
Coppering Complete!
I was dreading this, but I've got to say it wasn't too bad. Just didn't try any marathon sessions to get too burned out at one sitting. Finished up being about 1200-1300 tiles. Whew! Couple of coats of shellac to seal some edges and corners to help keep them from peeling. Now it's on to guns and other deck paraphernalia.
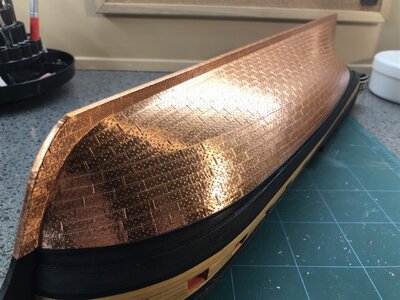
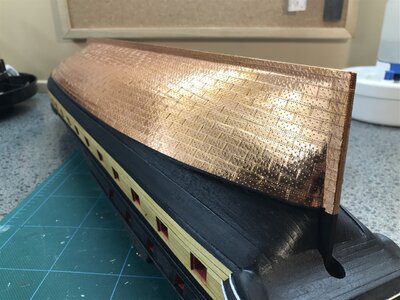
I was dreading this, but I've got to say it wasn't too bad. Just didn't try any marathon sessions to get too burned out at one sitting. Finished up being about 1200-1300 tiles. Whew! Couple of coats of shellac to seal some edges and corners to help keep them from peeling. Now it's on to guns and other deck paraphernalia.


Guns and Other Bit(t)s
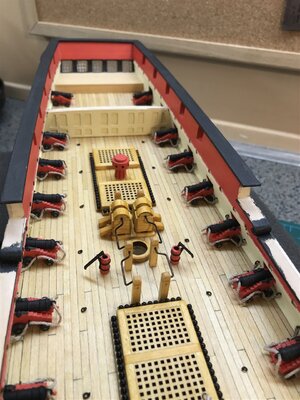
It's been a little slow going of late. I have gotten to the guns and I find this part quite tedious, especially cleaning the britannia barrels. I know there are options to buy better ones, but I didn't feel like spending the $$ on this one. Maybe in future builds like the Confederacy. I've made one prototype and all the rest (25) of the main deck carriages. Still to finish the remaining barrels and breech ropes. I will not be fully rigging the guns. And to reduce the boredom have been alternating other parts. I think it's safe to say there will be no 100-gun ships of the line in my future

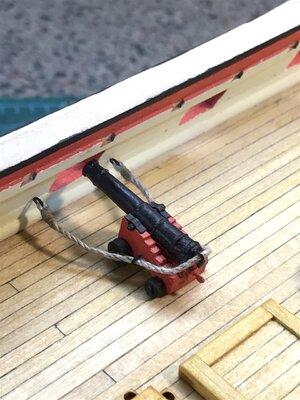
Shown is the one sample gun temporarily placed, retracted. I've simplified a bit by just using a larger eyebolt instead of a small eyebolt and ring on the bulwarks and carriages. Not exactly scale accuracy, but better for my sanity. As for the holes in the bulwarks, I made a little jig with a wooden plug to fit in the gun port glued to a bit of heavy card stock with holes in the right places. Then I put a small drill bit into the end of a dowel and reached through the opposing gun port to drill the holes. This made quite short (and accurate) work of the job.
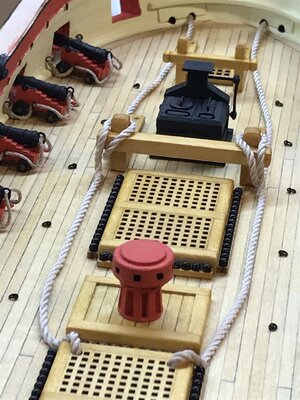
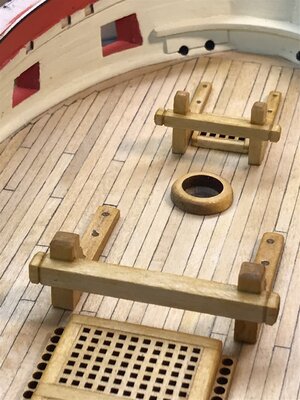
For a break, went ahead and made the 2 sets of bitts and installed them:
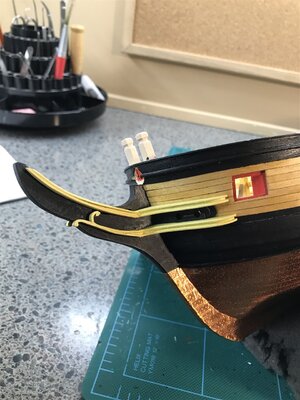
And also went ahead and did the non-fragile bits of the headworks. A few of the supplied parts here I will call "fantasy parts", as only in a wild fantasy will they fit as described. Had to roll some of my own here.
It's been a little slow going of late. I have gotten to the guns and I find this part quite tedious, especially cleaning the britannia barrels. I know there are options to buy better ones, but I didn't feel like spending the $$ on this one. Maybe in future builds like the Confederacy. I've made one prototype and all the rest (25) of the main deck carriages. Still to finish the remaining barrels and breech ropes. I will not be fully rigging the guns. And to reduce the boredom have been alternating other parts. I think it's safe to say there will be no 100-gun ships of the line in my future
Shown is the one sample gun temporarily placed, retracted. I've simplified a bit by just using a larger eyebolt instead of a small eyebolt and ring on the bulwarks and carriages. Not exactly scale accuracy, but better for my sanity. As for the holes in the bulwarks, I made a little jig with a wooden plug to fit in the gun port glued to a bit of heavy card stock with holes in the right places. Then I put a small drill bit into the end of a dowel and reached through the opposing gun port to drill the holes. This made quite short (and accurate) work of the job.

For a break, went ahead and made the 2 sets of bitts and installed them:

And also went ahead and did the non-fragile bits of the headworks. A few of the supplied parts here I will call "fantasy parts", as only in a wild fantasy will they fit as described. Had to roll some of my own here.

- Joined
- Dec 20, 2022
- Messages
- 58
- Points
- 58

Why do you build ship models? To develop an accurate portrayal of a ship? To show off your skills as a model builder ? To learn more about the ship and develop your skills? It seems to me that after so many hours and $500 plus already invested, You would want to end up with the very best job you could possibly do, and have a model you could be proud of. I would certainly encourage you to fully rig the cannons, especially the ones that are visible. Your workmanship looks good so far. Why not do it as completely as possible. Otherwise, I think you may regret it some day.
- Joined
- Dec 20, 2022
- Messages
- 58
- Points
- 58

Looking great !
Really nice work Rick, those quarter galleries look awesome! The whole model looks great! Those deck shots are awesome as well although I do hope you change your mind about the gun tackle, but I certainly agree that they are frustrating and tedious to do….
Very clean and accurate work
Thanks guys for the comments!
Spar Deck
It's been a while since last post. Came down with a bit of a case of "lazy blogger syndrome". So to catch up, I've done the upper deck beams, bitts, and hatches, planking all the areas that will be planked. Need some touch ups on several areas of the upper deck but will get those when I return for the deck furniture and guns. Started on the outside hull details.
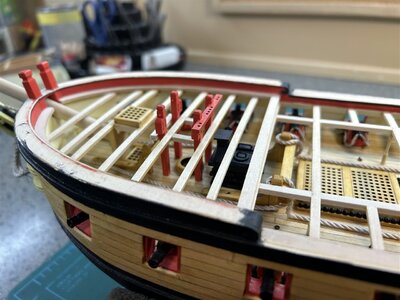
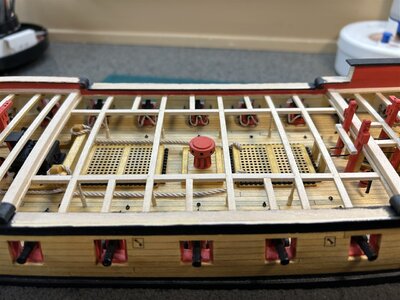
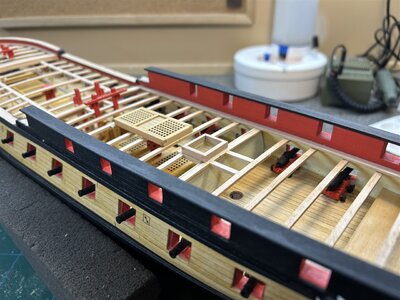
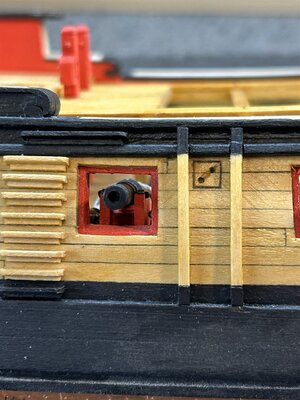
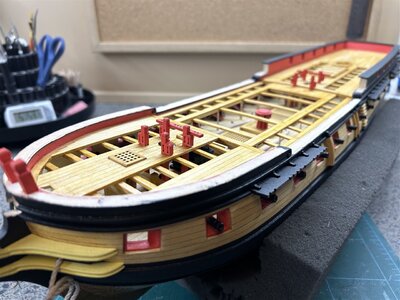
It's been a while since last post. Came down with a bit of a case of "lazy blogger syndrome". So to catch up, I've done the upper deck beams, bitts, and hatches, planking all the areas that will be planked. Need some touch ups on several areas of the upper deck but will get those when I return for the deck furniture and guns. Started on the outside hull details.


- Joined
- Dec 20, 2022
- Messages
- 58
- Points
- 58

Very nice workmanship !
- Joined
- Jun 17, 2021
- Messages
- 3,199
- Points
- 588

Hallo @rlwhittWelcome to my log for the Model Shipways MS2041 US Frigate Essex, Hull Model.
I've had my eye on this kit since I started not very long ago in wood kits. I liked the looks of it, and since I'd already known I wasn't going to be big on fully rigged models, the "Admiralty Style" had a lot of appeal to me. This one and the Confederacy immediately went on my wish list. Then I started looking for build logs and realized that there were a number of bad rumblings about the kit. It seems that there was a snafu with MS getting the correct digital files used in the production of the kit in 2013, its first release. The kit was re-released in 2015, but I think by then folks were wary. The designer made a comment that they never did incorporate all his changes, though the kit definitely did undergo some changes in 2015, as can be seen in the manual. So not sure what the exact story is. A while back MS put all their kits on sale 47% off and I could not resist so went ahead and got it, so here we are. How bad can it be right? I'll do my best to work around anything I find. I do know that one of the main issues with the initial build being the shape of some frames not matching the contemporary drawings or AOTS exactly, but there were a number of drawings with no way to reconcile them all. If I'm getting the details a bit off I apologize. I have a feeling some of these conversations were occurring offline. My main concerns at my level of experience is that the thing is buildable for an intermediate builder and will create a pleasing model. At this point if a frame shape is a bit off 100% of the historic accuracy, I'm not sweating it. Hopefully by the end of this, if it builds OK it will encourage others, who like myself were a bit wary, to take the plunge.
I don't really intend for this to be a very detailed log, mostly a milestones and exceptions kind of thing. If I have trouble that ought to be known, I'll show that and what I come up with to work around it.
Thanks all for looking!
we wish you all the BEST and a HAPPY BIRTHDAY

- Joined
- Dec 20, 2022
- Messages
- 58
- Points
- 58


