Thanks for sharing these great pix, Paul.
-

Win a Free Custom Engraved Brass Coin!!!
As a way to introduce our brass coins to the community, we will raffle off a free coin during the month of August. Follow link ABOVE for instructions for entering.
-

PRE-ORDER SHIPS IN SCALE TODAY!
The beloved Ships in Scale Magazine is back and charting a new course for 2026!
Discover new skills, new techniques, and new inspirations in every issue.
NOTE THAT OUR FIRST ISSUE WILL BE JAN/FEB 2026
You are using an out of date browser. It may not display this or other websites correctly.
You should upgrade or use an alternative browser.
You should upgrade or use an alternative browser.
Vasa - 1:65 DeAgostini [COMPLETED BUILD]
- Thread starter dockattner
- Start date
- Watchers 148
Thank you all for the likes and kind comments - you're the best!
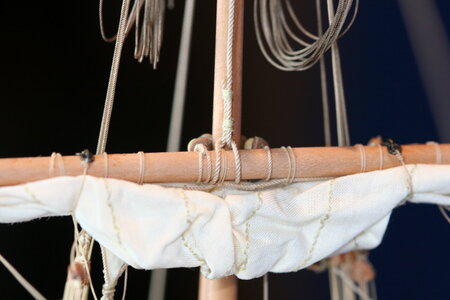
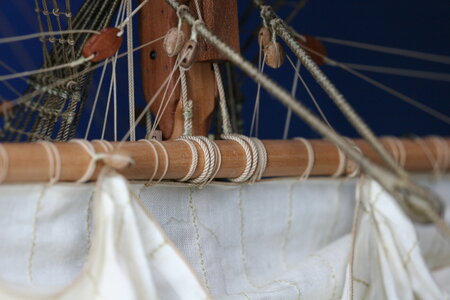
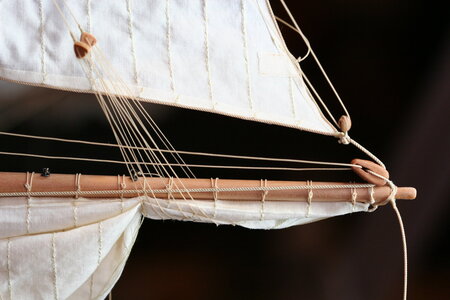
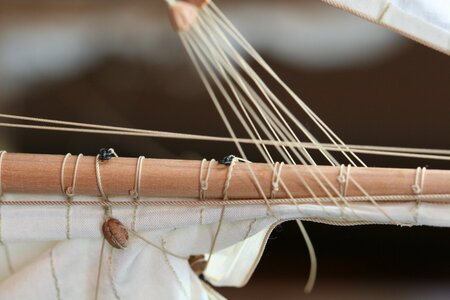
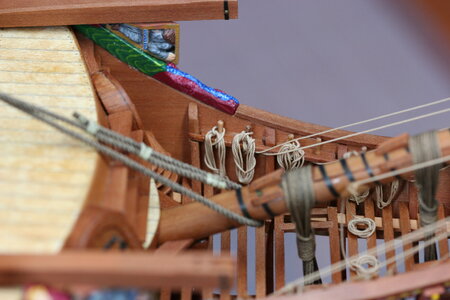
I'm following up now with some close-ups (btw, it has become nearly impossible to take clear photos of the rigging with all the rigging in the way , but I tried):
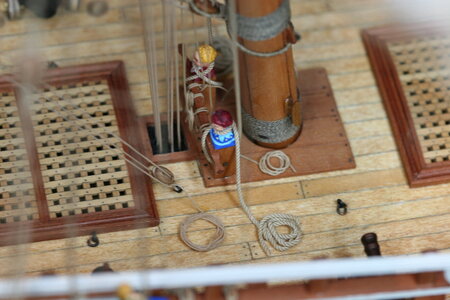
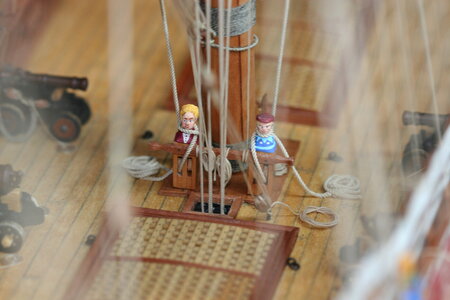
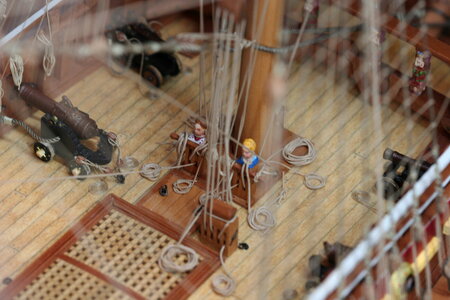
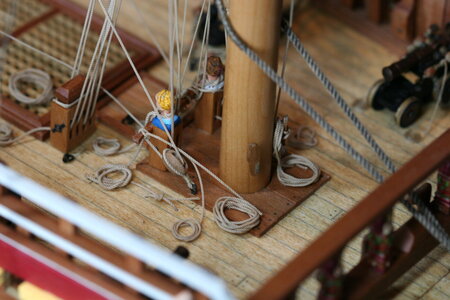
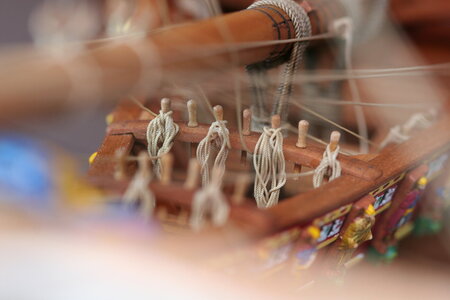
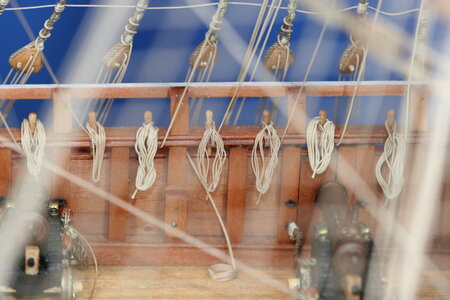
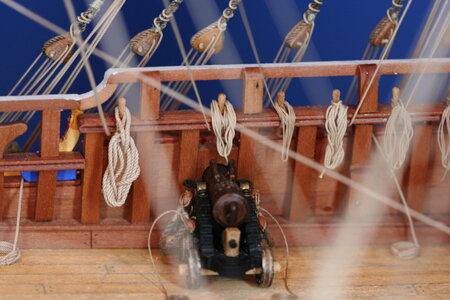
And now a collection of rope hanks (no two the same
 ):
):
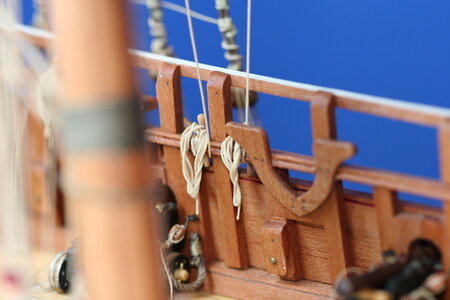
I said it before, but I am stunned by the talent so many of you have for getting the details of the rigging just so.
I have some pretty good hand skills but getting these rope hanks made and in place was HARD. Access requires finger gymnastics and luck to not get tangled up in the spider's web of lines that are running everywhere. I've decided that shrouds and ratlines are NOT my friend as they make it almost impossible to see what I am doing, never mind accessing what I am working on.
Getting a realistic drape on the ropes as if they had weight is no small challenge. And there are SO MANY of them - my sympathies to those of you building a bigger ship than the Wasa.
As always, I am grateful that you make the time to visit. I love following your inspirational work - good information and good technique is just a click away...if only I could remember where I saw it... I know it was on the forum somewhere... .
.
I'm following up now with some close-ups (btw, it has become nearly impossible to take clear photos of the rigging with all the rigging in the way


And now a collection of rope hanks (no two the same
 ):
):


I said it before, but I am stunned by the talent so many of you have for getting the details of the rigging just so.
I have some pretty good hand skills but getting these rope hanks made and in place was HARD. Access requires finger gymnastics and luck to not get tangled up in the spider's web of lines that are running everywhere. I've decided that shrouds and ratlines are NOT my friend as they make it almost impossible to see what I am doing, never mind accessing what I am working on.
Getting a realistic drape on the ropes as if they had weight is no small challenge. And there are SO MANY of them - my sympathies to those of you building a bigger ship than the Wasa.
As always, I am grateful that you make the time to visit. I love following your inspirational work - good information and good technique is just a click away...if only I could remember where I saw it... I know it was on the forum somewhere...
 .
.I love close ups Paul. Your work is exceptional. “Untidy” and irregular hanks is definitely the way to go. First class.Cheers GrantThank you all for the likes and kind comments - you're the best!
I'm following up now with some close-ups (btw, it has become nearly impossible to take clear photos of the rigging with all the rigging in the way, but I tried):
View attachment 334874
View attachment 334875
View attachment 334883
View attachment 334882
View attachment 334884
View attachment 334885
View attachment 334880
View attachment 334881
And now a collection of rope hanks (no two the same
):
View attachment 334876
View attachment 334877
View attachment 334878
View attachment 334879
View attachment 334886
I said it before, but I am stunned by the talent so many of you have for getting the details of the rigging just so.
I have some pretty good hand skills but getting these rope hanks made and in place was HARD. Access requires finger gymnastics and luck to not get tangled up in the spider's web of lines that are running everywhere. I've decided that shrouds and ratlines are NOT my friend as they make it almost impossible to see what I am doing, never mind accessing what I am working on.
Getting a realistic drape on the ropes as if they had weight is no small challenge. And there are SO MANY of them - my sympathies to those of you building a bigger ship than the Wasa.
As always, I am grateful that you make the time to visit. I love following your inspirational work - good information and good technique is just a click away...if only I could remember where I saw it... I know it was on the forum somewhere....
Fabulous work again Paul. I agree with Grant, the irregular hanks add to the overall impression.
Looking at your closeups, if I may offer some constructive criticism.The ropes from the tackle on your cannons have "wayward" sweep to them going down to the coils on deck.The weight of the tip of some tweezers and a tiny spot of PVA on the deck would hold these in place.This is really nit picking as everything else is exceptional
Kind Regards
Nigel
- Joined
- Aug 8, 2019
- Messages
- 5,584
- Points
- 738

So true. Especially when you have eyewear to read. Sometimes you work just on feeling.I've decided that shrouds and ratlines are NOT my friend as they make it almost impossible to see what I am doing, never mind accessing what I am working on.
You do a great job on the sails, almost invisble that you glued the bolt rope and the hem.
Good catch Nigel. I did those so long ago I don't even really see them anymore. I'll give fixing the lay of those ropes a go the next time the plastic is off the ship. Access will be dicey, but it's worth a shot.Fabulous work again Paul. I agree with Grant, the irregular hanks add to the overall impression.
Looking at your closeups, if I may offer some constructive criticism.The ropes from the tackle on your cannons have "wayward" sweep to them going down to the coils on deck.The weight of the tip of some tweezers and a tiny spot of PVA on the deck would hold these in place.This is really nit picking as everything else is exceptional
Kind Regards
Nigel
For the record, I am now operating under the "no more do-overs" rule. We'll just call this a revision.
You’ve probably seen this video on hanks before. My daughter mass produced mine for me in a way that’s similar.
Hi Paul,
It is such a pitty you mis the eye for details... .
.
Ohh no I am just jealouse, incredible work no body would believe this is your first build.
The main sails, I love it.
If I ever need a pair of braces I know I have to fly to Chicago. You are a craftsman pur sang.
It is such a pitty you mis the eye for details...
Ohh no I am just jealouse, incredible work no body would believe this is your first build.
The main sails, I love it.
If I ever need a pair of braces I know I have to fly to Chicago. You are a craftsman pur sang.
I'm actually GOOD at bracesHi Paul,
It is such a pitty you mis the eye for details....
Ohh no I am just jealouse, incredible work no body would believe this is your first build.
The main sails, I love it.
If I ever need a pair of braces I know I have to fly to Chicago. You are a craftsman pur sang.
 . But there is craftsmanship there too, I suppose.
Thank you kindly, Vic. A proven and reproducible method. I was shooting at a more 'one-off' target; the 'one-at-a-time' approach I used is FAR less efficient yet similar in concept. I hope the video you posted will be very helpful to folks who don't want their build to go on and on and on (and on and on and on) like mine has.You’ve probably seen this video on hanks before. My daughter mass produced mine for me in a way that’s similar.
Wonderful craftsmanship Paul, those sails, rigging etc look terrific. The close-ups really show your skills and attention to detail.
- Joined
- Oct 15, 2017
- Messages
- 1,191
- Points
- 443

Paul, Getting caught up and see you've made great progress. You've been able to achieve some very natural looking flows to your sail material. Something I certainly find challenging. Also, it's a modeler who is confident in their work that dares to take such macro photos. In your case it amplifies your work. I love your consistency in the scale of all of the elements and your belayed rope coils look fantastic. Really well done, and by now expected! 
Kurt Konrath
Kurt Konrath
Looks like the poor figure heads on the tie offs are being hanged with ropes around their necks.
Great job on the rigging and lines.
For better photos if you have zoom capabilities, have camera a bit further back so lines don't catch the focus and zoom into fine area you want to photograph.
Great job on the rigging and lines.
For better photos if you have zoom capabilities, have camera a bit further back so lines don't catch the focus and zoom into fine area you want to photograph.
Kurt Konrath
Kurt Konrath
You know Doc it seems it was only a few months ago we were talking about you will soon break 100 pages in the build log, now your almost gaining on 200 pages! 

And try manually focusing, smaller f-stop to increase your depth of field....Looks like the poor figure heads on the tie offs are being hanged with ropes around their necks.
Great job on the rigging and lines.
For better photos if you have zoom capabilities, have camera a bit further back so lines don't catch the focus and zoom into fine area you want to photograph.
Last edited:
Your build is just flat out amazing! Your eye for detail is just over the top. To say you have only just started with this hobbie speaks to your skill. I love your work and give you a bow sir.
I can answer that! Build HMS Sovereign of the Seas!The only trouble with building a masterpiece first up is how do you top it on build 2.

Beautiful work so clean, tidy and precise. Love the close up photography... awesome as usual.Thank you all for the likes and kind comments - you're the best!
I'm following up now with some close-ups (btw, it has become nearly impossible to take clear photos of the rigging with all the rigging in the way, but I tried):
View attachment 334874
View attachment 334875
View attachment 334883
View attachment 334882
View attachment 334884
View attachment 334885
View attachment 334880
View attachment 334881
And now a collection of rope hanks (no two the same
):
View attachment 334876
View attachment 334877
View attachment 334878
View attachment 334879
View attachment 334886
I said it before, but I am stunned by the talent so many of you have for getting the details of the rigging just so.
I have some pretty good hand skills but getting these rope hanks made and in place was HARD. Access requires finger gymnastics and luck to not get tangled up in the spider's web of lines that are running everywhere. I've decided that shrouds and ratlines are NOT my friend as they make it almost impossible to see what I am doing, never mind accessing what I am working on.
Getting a realistic drape on the ropes as if they had weight is no small challenge. And there are SO MANY of them - my sympathies to those of you building a bigger ship than the Wasa.
As always, I am grateful that you make the time to visit. I love following your inspirational work - good information and good technique is just a click away...if only I could remember where I saw it... I know it was on the forum somewhere....


