-

Win a Free Custom Engraved Brass Coin!!!
As a way to introduce our brass coins to the community, we will raffle off a free coin during the month of August. Follow link ABOVE for instructions for entering.
-

PRE-ORDER SHIPS IN SCALE TODAY!
The beloved Ships in Scale Magazine is back and charting a new course for 2026!
Discover new skills, new techniques, and new inspirations in every issue.
NOTE THAT OUR FIRST ISSUE WILL BE JAN/FEB 2026
You are using an out of date browser. It may not display this or other websites correctly.
You should upgrade or use an alternative browser.
You should upgrade or use an alternative browser.
Vasa - 1:65 DeAgostini [COMPLETED BUILD]
- Thread starter dockattner
- Start date
- Watchers 148
...they did not have a chance to light the candles at least once to find out it is too highHow does anyone get acces to the lantern to light the candles.
You are building a beautiful Vasa Paul
I want to say that Maurice (Blue Ensign) has discussed his method for (computer) printing awesome flags onto Silkspan, which he can then manipulate into realistically billowing flags. I’ll have to take a look to see if I can find it.As promised here are some images of little details I have been adding to my ship.
First, I added some shot boxes and buckets to accompany the guns:
View attachment 340655
View attachment 340656
Added a different rope coil to the davit:
View attachment 340657
Fabricated and installed spears for two of the soldiers on the stern. There's actually some controversy over how many of these little guys held spears. I chose two...
View attachment 340658
View attachment 340659
I completed a capstan more than a year ago, but I put the parts together and placed it on the deck this week:
View attachment 340660
View attachment 340661
A safety rope for the rudder:
View attachment 340653
Finally, I constructed a lantern. Several comments: a stern lantern was never found with the wreckage of the ship in Stockholm Harbor. Indeed, it remains uncertain if the Vasa even had a stern lantern. I chose to attempt one, but I'm not entirely convinced. Sadly, I failed to take pictures along the way. This was a fiddly thing to fabricate and stopping to take pictures never really occurred to me in the heat of battle. Still, I did manage a few images...
View attachment 340648
View attachment 340649
View attachment 340650
View attachment 340651
There was a comprehensive fail in my inaugural attempt at one of the man-arts. How hard can soldering be? Looks like I'll need to read up on how to do it....
Thanks for stopping by!
Oh, by the way, I had it in my head that I was going to add flags to my model. I ordered some silk ones from somewhere a long time ago, but they aren't really usable. I've poked around on the forum but haven't been able to discover a method of making/printing believable flags. Asking for help!
I am experimenting with that technique presently. Thanks, Marc!I want to say that Maurice (Blue Ensign) has discussed his method for (computer) printing awesome flags onto Silkspan, which he can then manipulate into realistically billowing flags. I’ll have to take a look to see if I can find it.
- Joined
- Aug 8, 2019
- Messages
- 5,584
- Points
- 738

Post in thread 'Tender Avos - Master Korabel 1:72' https://shipsofscale.com/sosforums/threads/tender-avos-master-korabel-1-72.5892/post-200807
Thank you, Stephan. This is exactly what I am attempting (turns out there are different thicknesses of silkspan). Preliminary results are good but not great.Post in thread 'Tender Avos - Master Korabel 1:72' https://shipsofscale.com/sosforums/threads/tender-avos-master-korabel-1-72.5892/post-200807
Post #943 is a clear explanation of this process:
 modelshipworld.com
The ship looks spectacular, Paul - I love the lantern!
HM Cutter Cheerful - 1806 - 1:48 scale by Chuck
 modelshipworld.com
The ship looks spectacular, Paul - I love the lantern!
Sails, anchors, small details - incredible all.
What can you do AFTER you make a masterpiece like that?
So, I had to pump the brakes on completing my Vasa.
First, I've ordered a few bits and baubles that I might add to my ship (or not), and several of these are being held hostage by US customs.
Next, I decided that I'd have a go at fabricating my own case. Of course, this entails some woodworking along with ordering panels of plexiglass from our local glass supply shop. Well, after several weeks waiting for my (shockingly expensive) plexiglass, one of the pieces was cut wrong... I just picked up the replacement panel this morning after another delay.
Finally, I've spent (translation: wasted) hours and hours researching how to make flags, ordering stuff I might need, and then experimenting/testing various materials and techniques.
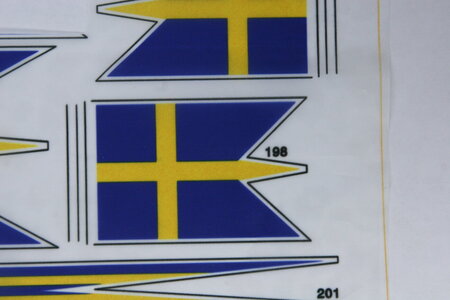
At first, I thought I had struck gold. I located 1:72 Vasa flags on the secondary market - close enough to my scale to use. They were reported to be printed on silk - PERFECT! Well, they are printed on some sort of polyester (plastic) based textile that cannot be shaped. Plus, the color (the blue) wasn't a very accurate representation of the Swedish flag:
I then decided to make my own. First, taking a tip from @Maarten I used a product called Mod Podge to transfer an image of a flag onto the fabric I used for my sails. It's fairly simple. You print out your flag onto paper using a laser printer (not an inkjet printer) - coat the image with Mod Podge - press into your fabric (smoothing it out carefully) and allowing it to dry for 24 hours. You then soak down the paper with water and rub it off - the image remains on the fabric. I ran into two issues. First, I couldn't get all the paper residue off the image (maybe I just needed to try harder), but I also realized that I would need to do the transfer on the other side of the fabric as well. Things started to get a bit thick...
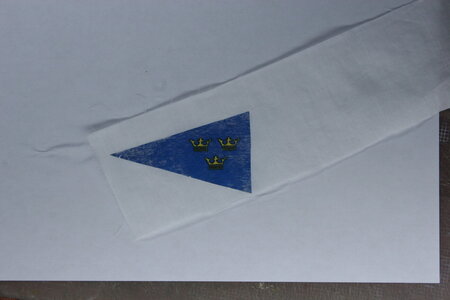
Not a total fail, but not quite what I was looking for.
Next, I order Silkspan. Turns out Silkspan comes in several thickness options (light, medium, heavy). I have been experimenting with both light and medium. Here is the technique. You use your printer to print the flag onto the Silkspan. Of course, the Silkspan is too flimsy to run through your printer on its own, so you need to tape it to a piece of paper first. This works remarkably well with both inkjet and laser printers.
Here is a trial using an inkjet printer:
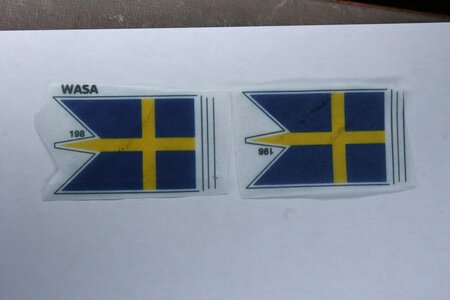
Not bad. The image even bleeds through to the other side of the Silkspan - but it doesn't come out as clear as the front side. Here is the back of the two flags above (one is light, and one is medium Silkspan):
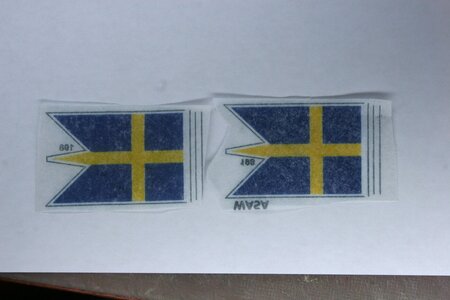
Here is the same thing using a laser printer (I have now color-corrected the blue).
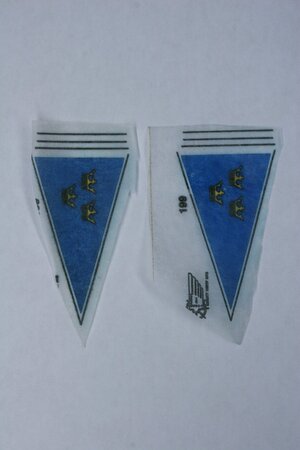
I neglected to take a picture of the back of these - but they are essentially the same as the inkjet versions...
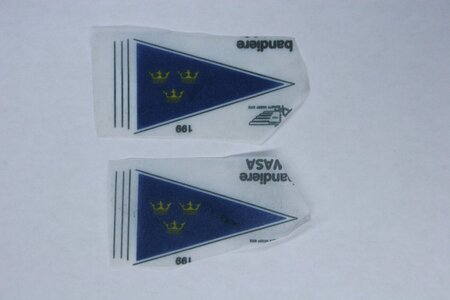
After a bit more research I came across a spray used to 'fix' chalk art when drawn on paper. I'm not exactly sure how it works, but this spray doesn't only sit on the surface - it causes the chalk to meld with the paper in some manner. Well, when I sprayed it on the BACK of these flags it caused the image (ink) to meld deeper into the Silkspan.
Front again:
Back:
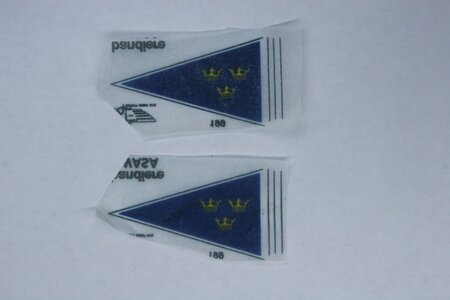
Much better. These are inkjet versions, but it works just as well with laser images.
I printed up a full page of flags on my laser printer. Generously sprayed the back and allowed everything to dry. When I went to retrieve my new flags, I discovered I had 'glued' the Silkspan to the cardboard I was using as a backer. I uttered a mild profanity and gave up for the day. I'll just wait until I work again and print more flags (the laser printer is at my office...).
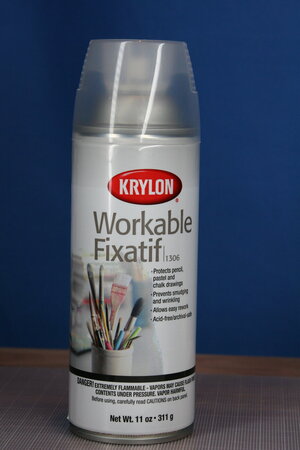
Here's the spray I used:
Stay tuned...
First, I've ordered a few bits and baubles that I might add to my ship (or not), and several of these are being held hostage by US customs.
Next, I decided that I'd have a go at fabricating my own case. Of course, this entails some woodworking along with ordering panels of plexiglass from our local glass supply shop. Well, after several weeks waiting for my (shockingly expensive) plexiglass, one of the pieces was cut wrong... I just picked up the replacement panel this morning after another delay.
Finally, I've spent (translation: wasted) hours and hours researching how to make flags, ordering stuff I might need, and then experimenting/testing various materials and techniques.
At first, I thought I had struck gold. I located 1:72 Vasa flags on the secondary market - close enough to my scale to use. They were reported to be printed on silk - PERFECT! Well, they are printed on some sort of polyester (plastic) based textile that cannot be shaped. Plus, the color (the blue) wasn't a very accurate representation of the Swedish flag:

I then decided to make my own. First, taking a tip from @Maarten I used a product called Mod Podge to transfer an image of a flag onto the fabric I used for my sails. It's fairly simple. You print out your flag onto paper using a laser printer (not an inkjet printer) - coat the image with Mod Podge - press into your fabric (smoothing it out carefully) and allowing it to dry for 24 hours. You then soak down the paper with water and rub it off - the image remains on the fabric. I ran into two issues. First, I couldn't get all the paper residue off the image (maybe I just needed to try harder), but I also realized that I would need to do the transfer on the other side of the fabric as well. Things started to get a bit thick...

Not a total fail, but not quite what I was looking for.
Next, I order Silkspan. Turns out Silkspan comes in several thickness options (light, medium, heavy). I have been experimenting with both light and medium. Here is the technique. You use your printer to print the flag onto the Silkspan. Of course, the Silkspan is too flimsy to run through your printer on its own, so you need to tape it to a piece of paper first. This works remarkably well with both inkjet and laser printers.
Here is a trial using an inkjet printer:

Not bad. The image even bleeds through to the other side of the Silkspan - but it doesn't come out as clear as the front side. Here is the back of the two flags above (one is light, and one is medium Silkspan):

Here is the same thing using a laser printer (I have now color-corrected the blue).

I neglected to take a picture of the back of these - but they are essentially the same as the inkjet versions...
After a bit more research I came across a spray used to 'fix' chalk art when drawn on paper. I'm not exactly sure how it works, but this spray doesn't only sit on the surface - it causes the chalk to meld with the paper in some manner. Well, when I sprayed it on the BACK of these flags it caused the image (ink) to meld deeper into the Silkspan.
Front again:

Back:

Much better. These are inkjet versions, but it works just as well with laser images.
I printed up a full page of flags on my laser printer. Generously sprayed the back and allowed everything to dry. When I went to retrieve my new flags, I discovered I had 'glued' the Silkspan to the cardboard I was using as a backer. I uttered a mild profanity and gave up for the day. I'll just wait until I work again and print more flags (the laser printer is at my office...).
Here's the spray I used:

Stay tuned...
Last edited:
Wow, that was quite the project. Great explanation of the different techniques you used.
Hi Paul, I admire the research and effort you are putting into the flags. Your last examples look great to me, I like the shape of the little crowns better than what I have from Billings. I'm not sure about your silk span but the edges on my flag material tend to unravel so I'll need to seize/seal the edges right off the bat.
Thanks Daniel. I don't think the Silkspan will unravel. It's closer to tissue paper than cloth. DeAg provided flags printed on thin cardstockHi Paul, I admire the research and effort you are putting into the flags. Your last examples look great to me, I like the shape of the little crowns better than what I have from Billings. I'm not sure about your silk span but the edges on my flag material tend to unravel so I'll need to seize/seal the edges right off the bat.
To be sure, I might be trying too hard...
Kurt Konrath
Kurt Konrath
I have not tried it yet, but Office Depot has ink jet transfer paper for printing image and heat transfer to "thin material" like T-shirts, might be worth a try.
Great tutorial, Paul. It's very helpful that you delve into a new technique and show us how to make it successful (eventually!).
- Joined
- Aug 14, 2018
- Messages
- 829
- Points
- 403

Hi Paul,
Great job on your flags, I use a similar method but instead of silkspan I use inkjet printable fabric sheets from a company called 'Jacquard' purchasable on Amazon over here. After the ink dries fully (indelible preferred), I brush the surface with thinned pva dry again and remove backing and cut out. The pva allows you to shape the flag as you like with the aid of steam ( I use a 'cake steamer' when my wife is not about ). Cheers JJ..
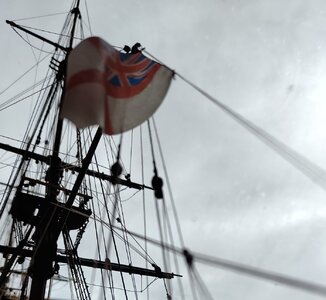 This is my HMS Speedy.
Great job on your flags, I use a similar method but instead of silkspan I use inkjet printable fabric sheets from a company called 'Jacquard' purchasable on Amazon over here. After the ink dries fully (indelible preferred), I brush the surface with thinned pva dry again and remove backing and cut out. The pva allows you to shape the flag as you like with the aid of steam ( I use a 'cake steamer' when my wife is not about
 This is my HMS Speedy.
I have not tried it yet, but Office Depot has ink jet transfer paper for printing image and heat transfer to "thin material" like T-shirts, might be worth a try.
Thanks Kurt, I'll look into it.
Hi Paul,
Great job on your flags, I use a similar method but instead of silkspan I use inkjet printable fabric sheets from a company called 'Jacquard' purchasable on Amazon over here. After the ink dries fully (indelible preferred), I brush the surface with thinned pva dry again and remove backing and cut out. The pva allows you to shape the flag as you like with the aid of steam ( I use a 'cake steamer' when my wife is not about). Cheers JJ..
View attachment 342226 This is my HMS Speedy.
Hi Jack. That approach (product) sounds promising. It's wonderful to share these techniques with each other on the forum! Did the ink print through fully to the reverse side?
- Joined
- Aug 14, 2018
- Messages
- 829
- Points
- 403

Hello Paul,Thanks Kurt, I'll look into it.
Hi Jack. That approach (product) sounds promising. It's wonderful to share these techniques with each other on the forum! Did the ink print through fully to the reverse side?
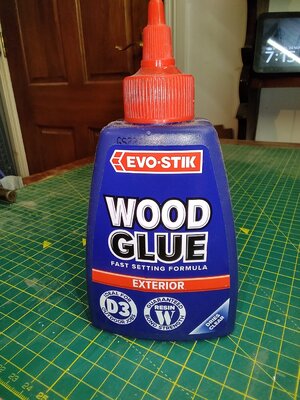
Yes the ink is pretty much consistent on both sides. I have discovered that there are several factors that cause variation, most important I think is the quality of the ink, if you use bog standard ink jet inks there is a big risk of bleeding when you apply the pva., particularly reds, see white ensign. Secondly the type of pva., I hadn't thought about this because I have always used an exterior quality Evo-stik but thinking about it applying steam to an ordinary pva. might 'wash it out' of the fabric so the more the water resistant pva. the better. Next the silk fabric, there are at least three different weave qualities I have come across, the customs flag below was printed on the most open weave and this lets the ink through the easiest but the flag is a bit transparent, (personally I don't think that a problem but others might). On the tighter weaves I found you have to set the ink-jet to its highest quality settings i.e. very slow printing, see Dutch flag. I would still like to use this weave but I cant find it over here any more. Mind you on the highest quality setting, using indelible ink applied to the finest silk it starts to get expensive. The other oblivious factor is the quality of the original flag you want to copy.
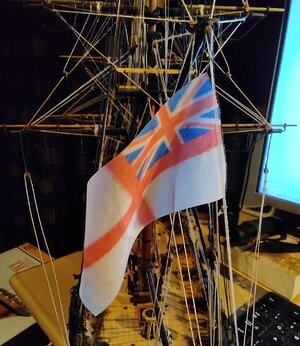
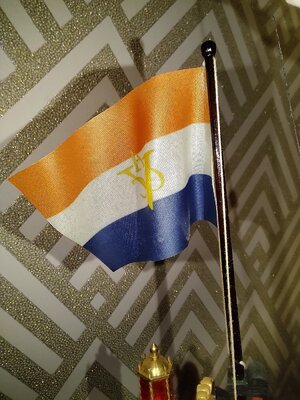
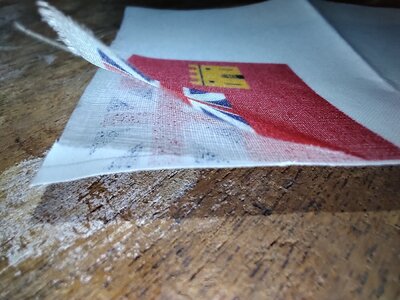
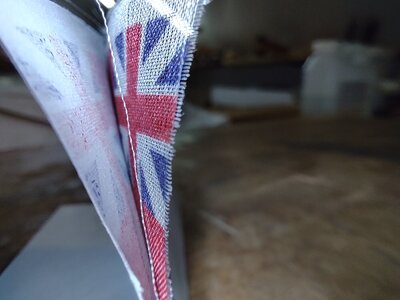
The 'bleed' on the white ensign is not really noticeable with the naked eye. I lifted the fabric from the backing paper on the customs flag to show the ink transfer, normally I would coat the flag with pva then let it dry then peel and cut to size and shape. The texture looks quite open but the pva fills it a bit, although too much pva and the flag becomes too shiny. I thin the pva until it just drops of my spatula. The Dutch flag is printed on the finest weave at the highest setting. Hope this helps but when all is said and done you just have to play around until you find what you like. Cheers JJ..


