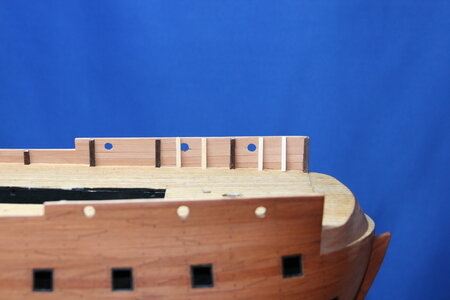
I'm sure you can scratch build some nice ladder treads and add them using tweezers. It would be a fine detail. As for the DeAgostini kits in general, Having the kit instruction format in such wildly organized steps makes planning a bit tough. My HMS SotS kit works the same as your Wasa kit. You spend a lot of time looking ahead in the instructions for things you want to change or add, and replace plywood parts with ones coped in hard woods. Very little time is actually spent assembling. I wish they provided plans similar to Mantua or Corel kits alongside those pretty color illustrated booklets.You're right Kurt. I have been studying this section intently once I discovered my oversight. The short/narrow deck landing made no sense to me - and my DeAg kit includes NO STAIRS at all for this area making the doorway nonsensical.
The actual ship shows access from the weather deck as well as from the upper gun deck so I intend to do the same. Notice that some of the stairs on the real ship are re-builds. On the non-rebuilt side they form a sweeping/curving stair that I'll need to configure at some point. I, for one, would not have been eager to attempt these steps in a rolling sea!
-

Win a Free Custom Engraved Brass Coin!!!
As a way to introduce our brass coins to the community, we will raffle off a free coin during the month of August. Follow link ABOVE for instructions for entering.
-

PRE-ORDER SHIPS IN SCALE TODAY!
The beloved Ships in Scale Magazine is back and charting a new course for 2026!
Discover new skills, new techniques, and new inspirations in every issue.
NOTE THAT OUR FIRST ISSUE WILL BE JAN/FEB 2026
You are using an out of date browser. It may not display this or other websites correctly.
You should upgrade or use an alternative browser.
You should upgrade or use an alternative browser.
Vasa - 1:65 DeAgostini [COMPLETED BUILD]
- Thread starter dockattner
- Start date
- Watchers 147
Agreed on the topic of provided plans (I don't even have printed booklets - only a downloaded .pdf).I'm sure you can scratch build some nice ladder treads and add them using tweezers. It would be a fine detail. As for the DeAgostini kits in general, Having the kit instruction format in such wildly organized steps makes planning a bit tough. My HMS SotS kit works the same as your Wasa kit. You spend a lot of time looking ahead in the instructions for things you want to change or add, and replace plywood parts with ones coped in hard woods. Very little time is actually spent assembling. I wish they provided plans similar to Mantua or Corel kits alongside those pretty color illustrated booklets.
And now you have raised an issue that I have been quiet about up to this point. All the laser cut sheets are ply. This is a real bummer because there are some nicely designed/detailed pieces but how do I make them work in plywood? One solution would be to paint all the wood parts of the model (that's what is shown in the instructions and in the "official build" on the website). But what if you don't want to make a painted model?!? I don't want to bash DeAg but for what these kits cost how about sheets with real wood! That would be a real boon to someone who wants their ship to look like it was made from wood. And don't even get me started on the false advertising (the image they use is of the 1:10 museum model). Sorry to be a grumbler - that's not really my nature - but this is information a future builder would want to know so I'll put it out there in the spirit of helpfulness.
All in all, I have found this kit to be very 'buildable' and I'm certain that's what DeAg is after. I guess the fun is taking what is provided and making it my own! And, to be honest, I am having a blast!
Take the plywood parts, like the ones used in the tops, and copy them into walnut, cutting them with a band saw or jigs saw, and file and sand to finish. Yes, it is tedious, and should be done with preference to the most visible parts. But, ahhh.... that pretty wood grain! You can color stain the wood, like the red cannon carriages, and retain that grain. I am trying not to use paint, instead use stains. Most of the cheap plywood is in the areas where it needs to be, in the framework of the hull. Yeah, they charge a lot, but consider this not to be a kit, but a transition to scratch building. I still prefer to start with a kit because the instructions still offer overall guidance, and the hull framework save lots of time just being there, and usually only needs some tweaking in shape. If I told you how much of the DeAgostini kit I am replacing, you'd cry. Still, look at the results from bashing the Corel La Couronne. TOTALLY WORTH IT! (despite costing $3300).Agreed on the topic of provided plans (I don't even have printed booklets - only a downloaded .pdf).
And now you have raised an issue that I have been quiet about up to this point. All the laser cut sheets are ply. This is a real bummer because there are some nicely designed/detailed pieces but how do I make them work in plywood? One solution would be to paint all the wood parts of the model (that's what is shown in the instructions and in the "official build" on the website). But what if you don't want to make a painted model?!? I don't want to bash DeAg but for what these kits cost how about sheets with real wood! That would be a real boon to someone who wants their ship to look like it was made from wood. And don't even get me started on the false advertising (the image they use is of the 1:10 museum model). Sorry to be a grumbler - that's not really my nature - but this is information a future builder would want to know so I'll put it out there in the spirit of helpfulness.
All in all, I have found this kit to be very 'buildable' and I'm certain that's what DeAg is after. I guess the fun is taking what is provided and making it my own! And, to be honest, I am having a blast!
What the kit it was supposed to look like...

How it turned out....
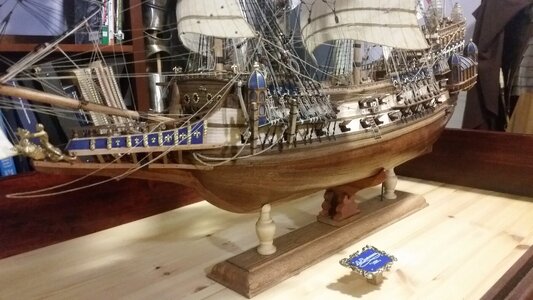
Dockattner, yours will look BETTER. Keep at it.
Paul, I was unhappy with the ply pieces provided in my kit because they don’t stain as well and the end shows the laminations, so it has stripes like a cutting board, when stained! I put a thin veneer of the walnut on them to cover up. So you either have to paint, veneer or make out of another type of wood. Some of my parts I was lucky enough to be able to paint black! 
Productive day today...
I wrapped up laying planks on the decks and added some 'nails' at the (randomly placed) butt joints. The Vasa had iron nails on the decks - no treenails and no wooden bungs. I did not add any nails in the locations of beams at this point. Like the hull, I'm holding off on adding too much - I can always add more of these sorts of details later.
Here is what things looked like before staining:
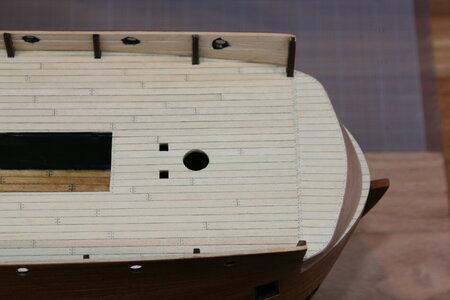
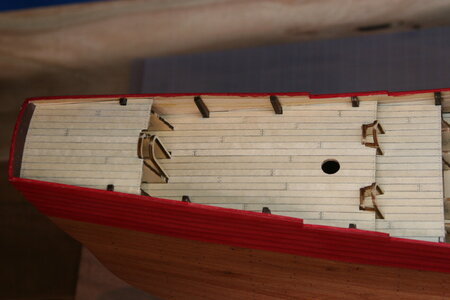
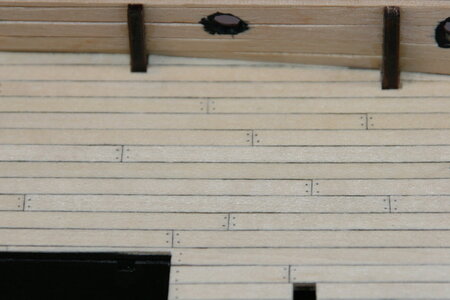
I then stained the deck. Personally, I love the result. At scale I believe it actually looks like oak boards - albeit 'fresh off the show-room floor' oak boards. I briefly considered aging the deck in the direction of gray but realize if I do that it will set a precedent that I have not been honoring with the elements completed thus far. My iteration of the Vasa will be prettier than it would have been in real life (just like me ).
).
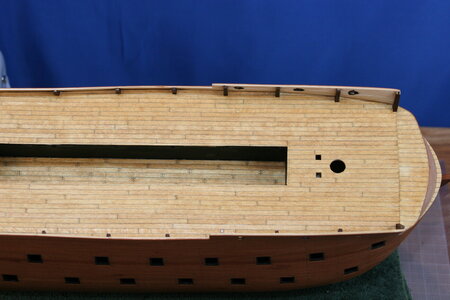
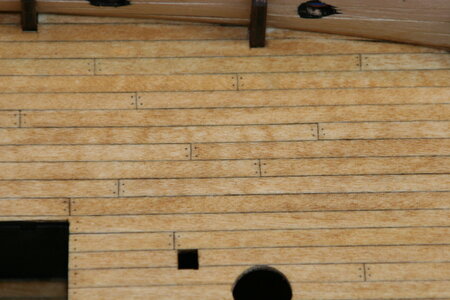
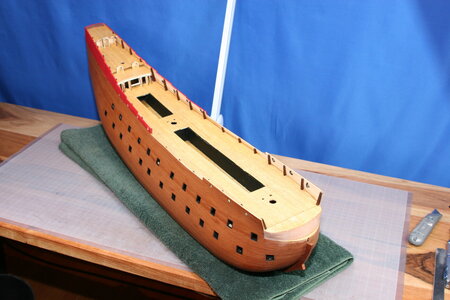
I also started working on the side walls below the (not installed) gunwales. Fiddly work and harder to do well than I expected...
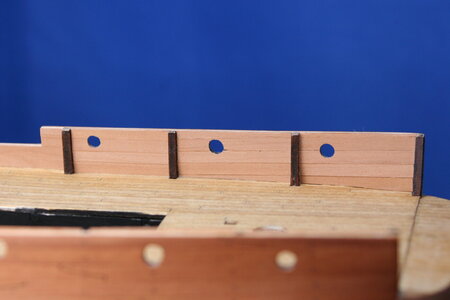
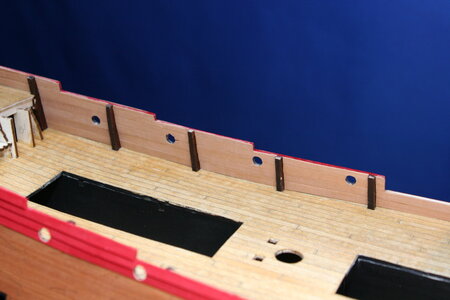
A day well-spent! Hope your builds are going well!
I wrapped up laying planks on the decks and added some 'nails' at the (randomly placed) butt joints. The Vasa had iron nails on the decks - no treenails and no wooden bungs. I did not add any nails in the locations of beams at this point. Like the hull, I'm holding off on adding too much - I can always add more of these sorts of details later.
Here is what things looked like before staining:


I then stained the deck. Personally, I love the result. At scale I believe it actually looks like oak boards - albeit 'fresh off the show-room floor' oak boards. I briefly considered aging the deck in the direction of gray but realize if I do that it will set a precedent that I have not been honoring with the elements completed thus far. My iteration of the Vasa will be prettier than it would have been in real life (just like me


I also started working on the side walls below the (not installed) gunwales. Fiddly work and harder to do well than I expected...


A day well-spent! Hope your builds are going well!
Looking good Paul! She’s taking shape. This is the fun part of the build where you detail the deck and ship with railings, cannons, gratings, doors, etc. and it really starts looking like a ship. Ornamentation will follow.Productive day today...
I wrapped up laying planks on the decks and added some 'nails' at the (randomly placed) butt joints. The Vasa had iron nails on the decks - no treenails and no wooden bungs. I did not add any nails in the locations of beams at this point. Like the hull, I'm holding off on adding too much - I can always add more of these sorts of details later.
Here is what things looked like before staining:
View attachment 207259
View attachment 207260
View attachment 207262
I then stained the deck. Personally, I love the result. At scale I believe it actually looks like oak boards - albeit 'fresh off the show-room floor' oak boards. I briefly considered aging the deck in the direction of gray but realize if I do that it will set a precedent that I have not been honoring with the elements completed thus far. My iteration of the Vasa will be prettier than it would have been in real life (just like me).
View attachment 207263
View attachment 207264
View attachment 207268
I also started working on the side walls below the (not installed) gunwales. Fiddly work and harder to do well than I expected...
View attachment 207273
View attachment 207274
A day well-spent! Hope your builds are going well!
I think the deck planking looks beautiful. For me I prefer the more new pristine look as apposed to a weathered look. After all the real ship was brand new in the beginning unless they used old weathered boards in it's construction.
Nice, very nice progress.
Jan
Jan
Thanks Daniel. Yes, as I look at the pictures this morning I really do like the tone of the deck with the hull. I'll probably add more nails, but first I think I'll add some faux frame tips so the nails align with something. I'm not sure I have wood in stock for that though. Fun just thinking about next steps (but first, those 'inside' walls need to be completed and that is a slow undertaking).I think the deck planking looks beautiful. For me I prefer the more new pristine look as apposed to a weathered look. After all the real ship was brand new in the beginning unless they used old weathered boards in it's construction.
I found out later in the build, after agonizing about how many nails I wanted to show, that 80 percent of the deck is covered by the time you put everything on it!The deck looks perfect Paul - in model shipbuilding, as with most things in life, less is indeed more!
I found out later in the build, after agonizing about how many nails I wanted to show, that 80 percent of the deck is covered by the time you put everything on it!
Yeah.... thanks to that I can cover most of my mistakes....
Thanks @Heinrich! One of the things I am learning is that producing detail at 1:65 is part art and part science. Science comes in via measuring and scaling - and it is often difficult to show the finer details at scale (that is, they end up being larger than they should be). I accept that this is my personal shortcoming in that I lack knowledge and experience regarding how to do certain things well. To that end, at some point, I defer to art. If I can't make it (whatever it is) small enough - then I should produce fewer of it/them. I know this fails the realism test but I'm hoping it will all come together visually. In a real ship no one sees the whole thing at once - but we do (to a certain extent) in model shipbuilding. I think this is part of it as well - and why I have been holding back on adding too much at this early stage. As I mentioned previously - I can always add more later...The deck looks perfect Paul - in model shipbuilding, as with most things in life, less is indeed more!
Whew! That's a lot of deep thinking for so early in the morning. I think I better go back to mindlessly lining bulwarks...
By the way - do all of you get injured doing this hobby? I have cuts in places that should not have been in harms way - with no idea how they got there...
Last edited:
You bet..., we are, IMHO. If you are working with various tools it is hard to avoid those little cuts. Ironically, if I sharpen our kitchen knives, my Admiral always manages to cut her fingers, the same day.By the way - do all of you get injured doing this hobby? I have cuts in places that should not have been in harms way - with no idea how they got there...
Yeah, me too. Especially when I drop the pointed scissors or Exacto knife in my lap.You bet..., we are, IMHO. If you are working with various tools it is hard to avoid those little cuts. Ironically, if I sharpen our kitchen knives, my Admiral always manages to cut her fingers, the same day.
I left that procedure to the professionals. No more children for me!Yeah, me too. Especially when I drop the pointed scissors or Exacto knife in my lap.
Ouch.....Yeah, me too. Especially when I drop the pointed scissors or Exacto knife in my lap
Paul, I think it will be worth it, however I'm not sure how you are determining how many and where? Keep in mind you need two stanchions (one each side) for the cannon openings, so you can attach the eyes for the hawser rope (large recoil rope).What do you say? Worth the effort? Most of these will need to be made individually as they are different dimensions...
View attachment 207692


