Vasa - 1:65 DeAgostini [COMPLETED BUILD]

Paul,
Okaynot an issue hahaha.... your hull has been my guide - just as is - It will be super time consuming painting so many detailed colors on all of those figures - you are certainly up to those tasks. It will look excellent when you're done. The Artesenia guide is excellent. That kit looks to be very impressive as well.

============

Of the three ships that I have built (SotS) my fourth - though one was just a cross section - have not used any sort of hull planking sealer - did use oil on the current build in order to differentiate the planks, as you know.
With my Vasa I only did a sorta hull look from the museum - The issue was also that I had unknowingly chosen a Corel - way back when... Did bash the hell out of it however and added sails. But all the figures where all "out to lunch".

Cheers,
I think your hull turned out great. I saved a bunch of images to my computer before I started my build. I even ordered the railroad spikes you used but I couldn't insert the micro ones without bending them (and violently smashing into my hull creating unattractive dents) so I ended up not using them.

Yes, the DeAg kit managed to get the hull shape/width right. And the figures are among the best available. I have chosen to scratch build some of the other pieces. I had no intention of bashing this kit when I started but my goals have changed along the way.
 
Paul,

Thanks again for your nice comments re: SotS planking ---

Re: RR spikes the ONLY way is to pre-drill with a super micro drill bit - then slide them in - once in, then with a flat "something" push them into the wood surface to sorta "lock" them into place so that they won't slide around and keep the same perspective angles.

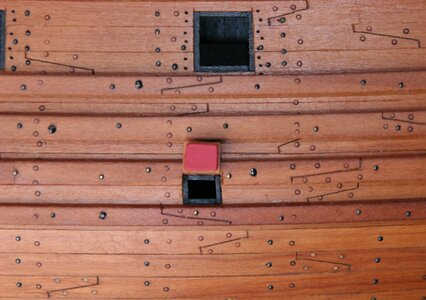
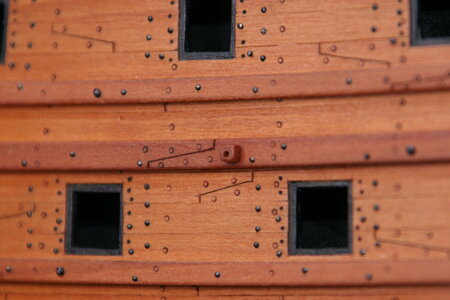
I used those, again for the SotS at the sides of the cannon doors - idea was to "look like" the bolts that are added so that the recoil ropes (inside) have a firm brace. right now they have moved around - will push them into place later.

If you add them to your Vasa hull they should look just right using the pre-drilled holes first.
PS: I used my Dremel - hand twisting doesn't work - and takes too much time - also drilled holes then are straight as well using a Dremel rotary tool (or Proxxon of course).
 
Hello Friends!

I am exploring a new theory you might be interested in. Since last fall I have been battling intermittent sinus infections - or so I thought. This past week my bride and I were on vacation and we returned on Thursday evening. I spent the whole day Friday working on the platforms/tops that I showed you previously as a prototype. I had a miserable night on Friday - couldn't hardly breathe (or sleep). I had felt great on vacation so what was it about Friday that had caused this rapid deterioration? My new theory: I sat about 12 inches from an open puddle of cyanoacrylate for around 6 hours - could I be allergic to CA fumes? Hmm...

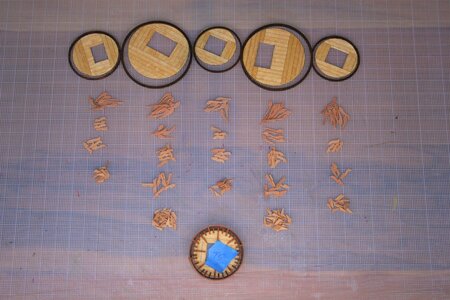
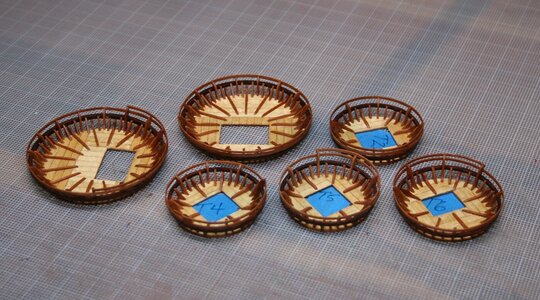
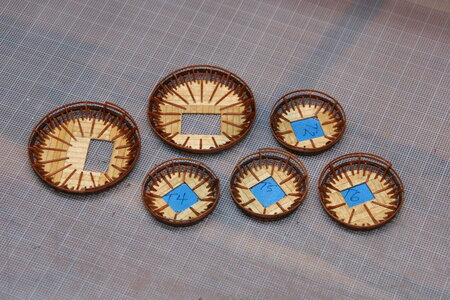
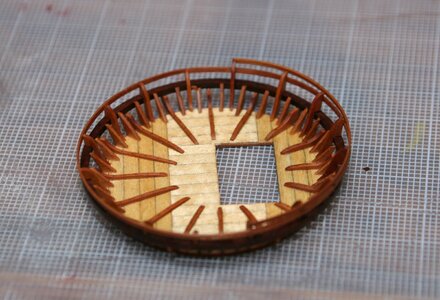
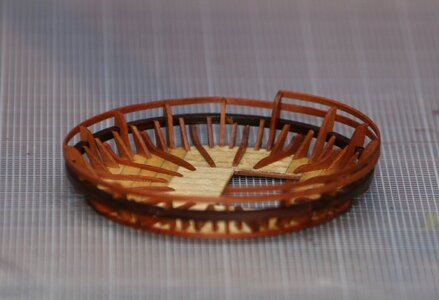
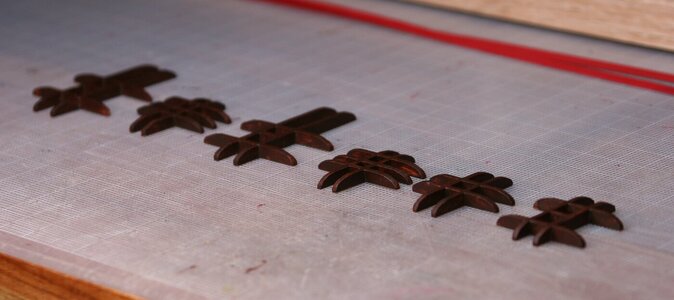
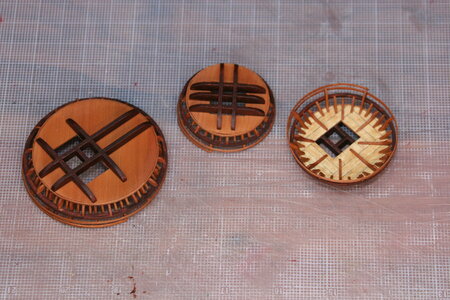
Anyway, I do have a progress report. The tops are done except for the trestle trees. In total there are two larger tops and four smaller tops. I mentioned previously that the smaller ones had 48 individual parts and the larger ones had 91. That was wrong; turns out the small tops have 64 pieces and the large ones have 123. In retrospect I'm not sure this diversion was worth it - but I picked up some scratch-building skills and a greater appreciation for what the masters accomplish on their builds (and what makes them masters and me a wanna-be).

He is the parts list:

IMG_6624.JPG

Next, the completed @dockattner Vasa tops:

IMG_6626 (2).JPG

IMG_6628.JPG

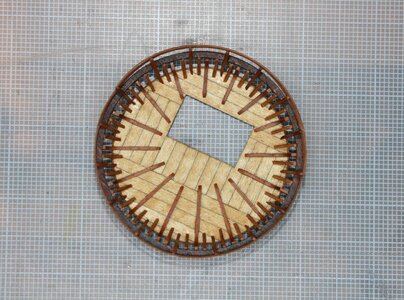
Previously I showed some closer images of the smaller top - here are some detail pics of the later top:

IMG_6639.JPG

IMG_6629 (2).JPG

IMG_6635 (2).JPG

As I transition toward detailing the hull and deck (and eventually the rigging) I have been studying other Vasa build logs, marveling at the amount of information on the Vasamuseet forums, and reading books (and research papers) about the Vasa (and period ship-building). The list of things I could add is becoming a bit overwhelming. I have also been learning a lot about Dutch ship-building - and it is those particular details that I am most interested in capturing to the extent that I can. A major problem I am facing is the vocabulary of ships - a lexicon I am only now learning. But I'm still having fun!

Thanks for stopping by!
 
Looking great Paul! Very nice work on the tops, crows nest, etc. ;)
I am very allergic to CA glue, and now use a respirator when using it...sigh. I have tried fans and opening the windows, etc. But only a respirator keeps me from bad reactions that are flu like. I can’t breath through my nose, sneezing, watery eyes, and of course histamines going bezerk! So get a respirator and try that. And of course avoid CA unless you have to use it.
 
Hi Paul
Your tops look great. Very fine work. You have to be very careful with cyano as the fumes can affect your brain as well. No problem for me as I don’t have one but I have a little fan next to me when working with anything that stinks. Keep up the great work.
Bo
 
Hello Friends!

I am exploring a new theory you might be interested in. Since last fall I have been battling intermittent sinus infections - or so I thought. This past week my bride and I were on vacation and we returned on Thursday evening. I spent the whole day Friday working on the platforms/tops that I showed you previously as a prototype. I had a miserable night on Friday - couldn't hardly breathe (or sleep). I had felt great on vacation so what was it about Friday that had caused this rapid deterioration? My new theory: I sat about 12 inches from an open puddle of cyanoacrylate for around 6 hours - could I be allergic to CA fumes? Hmm...

Anyway, I do have a progress report. The tops are done except for the trestle trees. In total there are two larger tops and four smaller tops. I mentioned previously that the smaller ones had 48 individual parts and the larger ones had 91. That was wrong; turns out the small tops have 64 pieces and the large ones have 123. In retrospect I'm not sure this diversion was worth it - but I picked up some scratch-building skills and a greater appreciation for what the masters accomplish on their builds (and what makes them masters and me a wanna-be).

He is the parts list:

View attachment 228215

Next, the completed @dockattner Vasa tops:

View attachment 228216

View attachment 228217

Previously I showed some closer images of the smaller top - here are some detail pics of the later top:

View attachment 228220

View attachment 228218

View attachment 228219

As I transition toward detailing the hull and deck (and eventually the rigging) I have been studying other Vasa build logs, marveling at the amount of information on the Vasamuseet forums, and reading books (and research papers) about the Vasa (and period ship-building). The list of things I could add is becoming a bit overwhelming. I have also been learning a lot about Dutch ship-building - and it is those particular details that I am most interested in capturing to the extent that I can. A major problem I am facing is the vocabulary of ships - a lexicon I am only now learning. But I'm still having fun!

Thanks for stopping by!
Absolutely stunning work Paul!
 
Hello Friends!

I am exploring a new theory you might be interested in. Since last fall I have been battling intermittent sinus infections - or so I thought. This past week my bride and I were on vacation and we returned on Thursday evening. I spent the whole day Friday working on the platforms/tops that I showed you previously as a prototype. I had a miserable night on Friday - couldn't hardly breathe (or sleep). I had felt great on vacation so what was it about Friday that had caused this rapid deterioration? My new theory: I sat about 12 inches from an open puddle of cyanoacrylate for around 6 hours - could I be allergic to CA fumes? Hmm...

Anyway, I do have a progress report. The tops are done except for the trestle trees. In total there are two larger tops and four smaller tops. I mentioned previously that the smaller ones had 48 individual parts and the larger ones had 91. That was wrong; turns out the small tops have 64 pieces and the large ones have 123. In retrospect I'm not sure this diversion was worth it - but I picked up some scratch-building skills and a greater appreciation for what the masters accomplish on their builds (and what makes them masters and me a wanna-be).

He is the parts list:

View attachment 228215

Next, the completed @dockattner Vasa tops:

View attachment 228216

View attachment 228217

Previously I showed some closer images of the smaller top - here are some detail pics of the later top:

View attachment 228220

View attachment 228218

View attachment 228219

As I transition toward detailing the hull and deck (and eventually the rigging) I have been studying other Vasa build logs, marveling at the amount of information on the Vasamuseet forums, and reading books (and research papers) about the Vasa (and periodship-building). The list of things I could add is becoming a bit overwhelming. I have also been learning a lot about Dutch ship-building - and it is those particular details that I am most interested in capturing to the extent that I can. A major problem I am facing is the vocabulary of ships - a lexicon I am only now learning. But I'm still having fun!

Thanks for stopping by!
Really beautiful work Paul, your build continues to impress, I always look forward to seeing each of your new.posts. I agree with your theory about cyno, to some extent the same happens to me.
 
I will be using your page as a guide as I start to tackle these next on my billings kit. Also I have found an issue when using ca glue mostly when I am sanding during the drying process. I find once dry not an issue but when sanding when still wet can cause the effects you are having.
 
I thought you were all my friends...but several days ago I was abducted by the owner of a hatch cover/grating factory and not a single one of you came looking for me:mad:.

I made the most of my time away by (surprise!) making hatch covers:

View attachment 224026

I also made this little platform that will one day host the capstan:

View attachment 224028

Back on the ship I added a 'shelf' on the inside of the deck openings along with a 'frame' on the deck surface:

View attachment 224029

Here's a closer look. I used a scraping tool to create the frame profile...

View attachment 224030

I then treated the hatch covers, the shelves, and the frames with linseed oil.

View attachment 224031

View attachment 224032

This was a fun little project and I am pleased with the scale and detailing.

View attachment 224033

View attachment 224034

Looking ahead, I'm beginning to realize that without power tools I am going to face some production obstacles. Then again, even if I buy some tools, I frankly lack the knowledge/experience that would make those purchases wise or helpful. Hmm...

As always, thanks for stopping by to see what I have been up to!
Paul! I am so jealous of the incredible detail you made to making the grates removable! I am definitely doing to take your idea and incorporate it into HMS Sovereign of the Seas! Heartily BRAVO shipmate!
I am truly inspired!

Kurt
 
First, I want to thank everyone for your very kind comments. All the likes and words of encouragement mean a lot and help keep me motivated.

Life challenges have prevented me from spending much time on my build recently - so this is a brief and rather uninspiring progress report.

The kit supplied parts for the trestle trees did not match what was on the original ship - but they were close enough that I could reshape and modify them to make them usable. I stained these the darker brown color you have seen on other portions of my build (frame tips - railing on the tops) and I will be continuing to use this color on a limited basis to provide some contrast to the pear hull and lighter decking. I am allowing the staining to be "imperfect" in the hopes that it will look more realistic. Not sure I'm succeeding but that's my goal.

IMG_6641 (2).JPG

IMG_6642 (2).JPG

IMG_6643.JPG

A quick note to anyone using this log to assist them on their own DeAg (or AL) Wasa build: the trestle trees for Top 5 are cut wrong so you will need to correct the bevel on one of the crosspiece pairs.

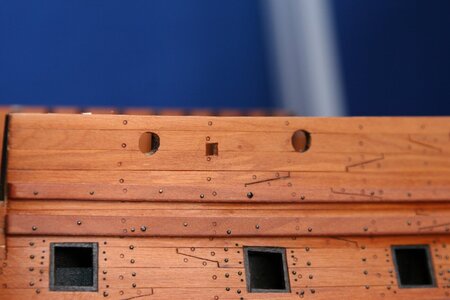
Next, I cut into the hull (an unnerving exercise if there ever was one) to provide for the clever "mail delivery" ports - one on the portside and one on the starboard side. I will add hinges to my little door when I build the gun port doors...

IMG_6647.JPG

Next, I discovered the following drain thing while studying pictures of the museum ship - it's not a scupper - the best I can guess is that this is the ejection point for one of the pumps (?):

IMG_6644.JPG

And I also cut in a space-saver for the anchor lift assist (the catheads are at the bow). This anchor lift assist is not represented in the DeAg kit for some reason but I have seen it on most every other build. The ship had this opening on both sides but there was only one "bar" that would need to be moved from side to side. I'll need to adjust the size of this opening once I figure out the size of the lift assist (the gun port rounds are also undersized at this point).

IMG_6646.JPG

See, I told you this would be an unimpressive update - but much of what we do on these kits falls into this category doesn't it?

I am truly enjoying this forum and peaking over your shoulders as you make progress on your individual projects. There have been some really impressive completions lately - you are a talented bunch!
 
Back
Top