Vasa - 1:65 DeAgostini [COMPLETED BUILD]

First of all, I am impressed. My self has a complete kit Vasa from Edition Atlas, (same as DeAgostini ) since 2016, start building the hull after I get the first 100 pack. It was finished 2 years ago with first layer. After that I wait to sort out the painting, and still do. I think so far that golden paint will bee my choice. All tips by reading forums will take in later.This is my change on the deck 2nd layer.View attachment 236746
Welcome aboard @Peo600SEL. Subscription kits are not very popular here in the US and I was fortunate to be able to order a full kit. As I have departed from the kit instructions I would have been in a tough spot if I was waiting for packages to arrive each week/month.

Unless you really love the idea of painting multi-color figures then gold may very well be an excellent option for your build. I would love to see more pictures and am certain others would as well. How about starting a build log yourself?
 
Paul,

Everytime that I visit your log - I tell myself that I need to go back to review how you did those awesome hull "treenails" with a syringe needle if I remember correctly - May attempt that for the pearwood lower hull. Hmmm?
 
Paul,

Everytime that I visit your log - I tell myself that I need to go back to review how you did those awesome hull "treenails" with a syringe needle if I remember correctly - May attempt that for the pearwood lower hull. Hmmm?
Here you go: https://shipsofscale.com/sosforums/threads/vasa-1-65-deagostini.5904/post-148990.

Be sure to practice on a replica of your hull (first and second planking) - it's easy and fast but also potentially destructive. Maarten was doing it on full thickness wood which is a bit more forgiving. I learned it requires a deft hand when working on veneer.
 
Hi Paul I admire your courage to remove those parts and risk doing damage to the other parts is a credit to you. After seeing the end result I think it's well worth it.
Thanks, Tony. Your concerns mirrored my own. I never had it in my mind that I would ever trim off the bulkhead tips. Indeed, I barely understood the implications of POB construction at that time. If I knew enough to plan ahead I would have partially cut through the plywood frames - and would have been more generous with the glue-up of the primary hull. Once the frames were cut back the bulwark is a bit flimsy but not really in danger of falling off. Still, I would caution members of the Swedish Navy to avoid leaning against the bulwark when sailing the Baltic Sea...
 
Thanks, Tony. Your concerns mirrored my own. I never had it in my mind that I would ever trim off the bulkhead tips. Indeed, I barely understood the implications of POB construction at that time. If I knew enough to plan ahead I would have partially cut through the plywood frames - and would have been more generous with the glue-up of the primary hull. Once the frames were cut back the bulwark is a bit flimsy but not really in danger of falling off. Still, I would caution members of the Swedish Navy to avoid leaning against the bulwark when sailing the Baltic Sea...
You KNOW that if you didn't correct those flaws in a kit, the big ones, you'd hate yourself for it. No matter the damage, you can always patch it up... before the final planking anyhow, then you tread on eggshells. :D
 
Last edited:
Here you go: https://shipsofscale.com/sosforums/threads/vasa-1-65-deagostini.5904/post-148990.

Be sure to practice on a replica of your hull (first and second planking) - it's easy and fast but also potentially destructive. Maarten was doing it on full thickness wood which is a bit more forgiving. I learned it requires a deft hand when working on veneer.
OK I went to Amazon and looked - of course - they have every possible item anyone could ever want to buy - I will try, will also buy a small butane torch -

I have a great Dupont torch cigar lighter ( yea I have about four cigars a year/along with a nice Scotch -- oh-course haha) but don't want to have to refill, and click it on/off all the time - just keeping a small butane torch on seems to be a much easier way of going back and forth.

PS:
1) did you have to use more than one needle/ It appears as you ended up with 1000s of circular perfect looking burn circles. (Marteen seems to have used only one. I put that needle set you got from Amazon into my cart - looks perfect thanks
2) did you just keep the torch on and go back-and-forth that many times heating the tip of the needle.
3) Just a quick not deep gentle jab - or need to leave needle on a couple of seconds?
4) does it create smoke when burning the wood?

Would this torch meet with your approval?


Sorry for all the questions :( and YES will practice on a made up bit of planking before - I would hate mess this up indeed.

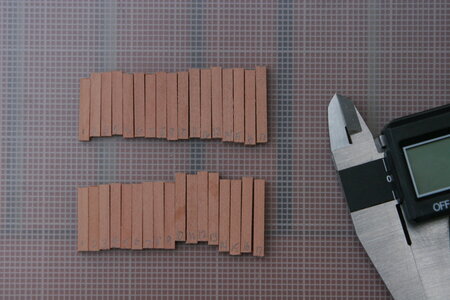
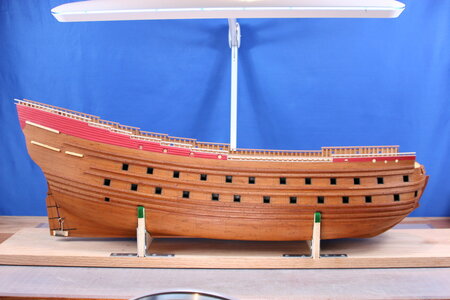
Your Vasa hull and upper hull planks came out beyond Awesome Thumbsup BRILLIANT idea big kudos for Maarten as well as to your resulting work.....
Regards,
 
Last edited:
OK I went to Amazon and looked - of course - they have every possible item anyone could ever want to buy - I will try, will also buy a small butane torch -

I have a great Dupont torch cigar lighter ( yea I have about four cigars a year/along with a nice Scotch -- oh-course haha) but don't want to have to refill, and click it on/off all the time - just keeping a small butane torch on seems to be a much easier way of going back and forth.

PS:
1) did you have to use more than one needle/ It appears as you ended up with 1000s of circular perfect looking burn circles. (Marteen seems to have used only one. I put that needle set you got from Amazon into my cart - looks perfect thanks
2) did you just keep the torch on and go back-and-forth that many times heating the tip of the needle.
3) Just a quick not deep gentle jab - or need to leave needle on a couple of seconds?
4) does it create smoke when burning the wood?

Would this torch meet with your approval?


Sorry for all the questions :( and YES will practice on a made up bit of planking before - I would hate mess this up indeed.

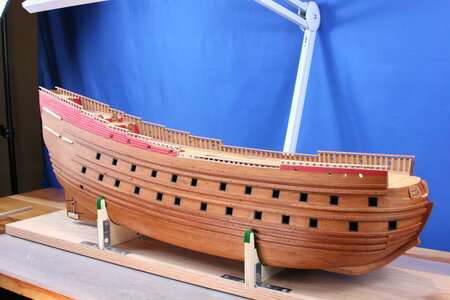
Your Vasa hull and upper hull planks came out beyond Awesome Thumbsup BRILLIANT idea big kudos for Maarten as well as to your resulting work.....
Regards,
No problem with questions. I have been given so much help on this forum that I am more than happy to share my experiences.

Fire: I used denatured alcohol in a specialty dental tool but any lamp will suffice. It burns nice and clean. For example: https://www.amazon.com/Classic-Alco...1&keywords=alcohol+lamp&qid=1622680907&sr=8-3

1. Only one syringe needle made all those faux trenails. Pick the size based on the lumen and then file down the outer edges to make the edges sharper (otherwise the circle is too 'thick').
2. Yes, I kept the lamp lit and moved the syringe back and forth. You have to reheat for each impression. And once the syringe is heated it only takes a few seconds in the flame each time. I brought it just to the beginning of turning orange. If you let it get red it will burn right through the veneer. If that happens simply retrieve the plug from the inside of the syringe and glue it back into the hole you just made.
3. The motion is a semi-firm tap. If you leave it in place you will burn your ship to the ground.
4. Yes, you will smell burning wood but the smoke detector won't go off. I did it indoors.

I was really nervous when I started. But after a while you will develop a nice rhythm.
 
You KNOW that if you didn't correct those flaws in a kit, the big ones, you'd hate yourself for it. No matter the damage, you can always patch it up... before the final planking anyhow, then you tread on eggshells. :D
You are right of course. There are probably only a few hundred people in the world that would know the difference - and maybe 10 or 20 on this forum. But one of those people is ME and it would have driven me bonkers every time I walked past my ship.
 
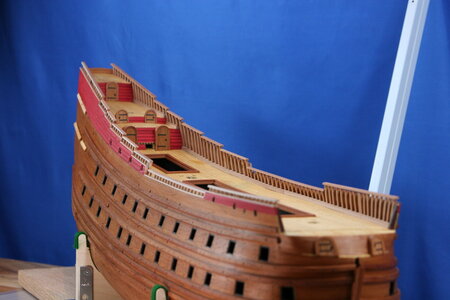
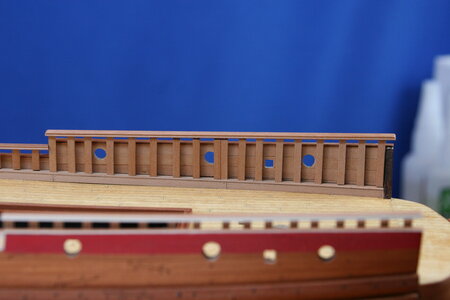
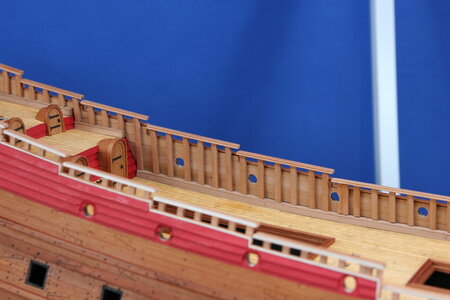
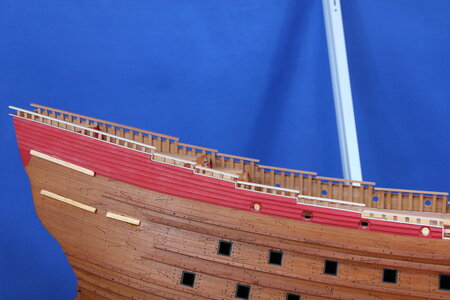
Well, I'm surprised to be sharing this update already. I have had LOTS of modeling time the past few days and managed to knock out my new bulwarks and primary railing in record time. It wasn't so bad once I built up some momentum (166 frame tops for anyone counting).

IMG_6811.JPG

I still need to do some clean-up and will eventually treat everything with oil. But for now...

IMG_6812.JPG

IMG_6813.JPG

IMG_6814.JPG

IMG_6816.JPG

IMG_6817.JPG


IMG_6819.JPG

She's starting to look like something now!

As always, thanks so much for checking in! You're a fine bunch!
 
Hi Paul. The bulwarks looks awesome, but I do have a question. Does the Vasa not get an upper box as well. I was just thinking that that would strengthen the whole bulwark assembly considerably.
 
Paul,
Wonderfully clean work mate! I love the lines, colors and warmth of your ship's hull. Each time I log in I think, "I wonder what Paul's up to on his Vasa?" I'm never disappointed. I can't wait to see what's coming next on your Vasa adventure.

Cheers,
Ken
 
As they say "Now that's what I'm talking about"! I noticed you left the front bulkhead extensions in place. I was going to remove mine but after seeing yours it is much wiser to leave them on. I know a front railing system goes across there and those extensions will serve to not only anchor the bulwark alignment but also serve as a anchor place for the front rail. Thanks Paul!

Daniel
 
Hi Paul. The bulwarks looks awesome, but I do have a question. Does the Vasa not get an upper box as well. I was just thinking that that would strengthen the whole bulwark assembly considerably.
Hello Heinrich,

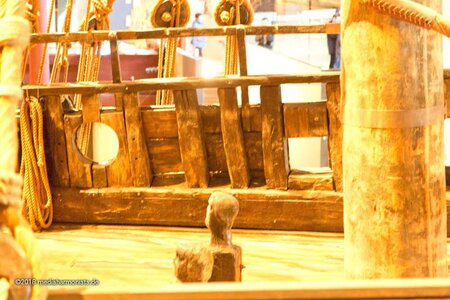
Nope. Only a lower box on the 1628 Dutch-built Vasa. I cannot account for the difference from the 1628 Dutch-built Batavia...

Stockholm-180325_9532.jpg
 
As they say "Now that's what I'm talking about"! I noticed you left the front bulkhead extensions in place. I was going to remove mine but after seeing yours it is much wiser to leave them on. I know a front railing system goes across there and those extensions will serve to not only anchor the bulwark alignment but also serve as a anchor place for the front rail. Thanks Paul!

Daniel
Hey Daniel,

Well, the forward bulkhead extensions remain in place for now. Some time ago my model took a header off my work table. A portion of the keel was shattered but the forward bulwark was also pushed over. I repaired the damage but that left me afraid to remove the frame in that spot. Plus, I have yet to sort out the forward railing and all the other stuff that is happening up there quite yet (the same is true of the back end). I suspect I will remove the old frame at some point - or at least veneer it in pear - but that is a story that remains to be told...
 
Last edited:
Back
Top