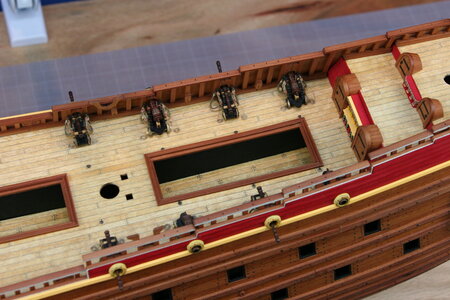
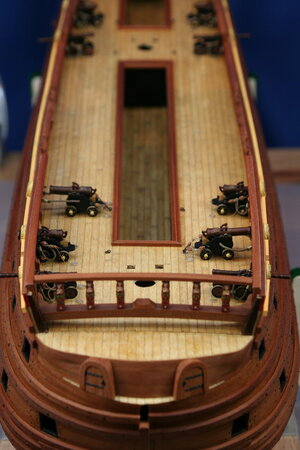
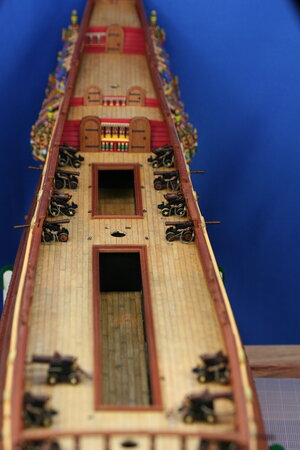
Vasa - 1:65 DeAgostini [COMPLETED BUILD]

Hallo Paul alias @dockattner
we wish you all the BEST and a HAPPY BIRTHDAY
Birthday-Cake
Enjoy your special day !!!
Thank you Uwe! Indeed it is my special day!

My birthday also roughly marks my one year anniversary on the SOS forum and that means this Vasa build has now been going on for one year. While I have celebrated seeing many others begin and finish builds in that same time span my progress has been much slower. But I have greatly enjoyed the process and especially this forum and the vicarious friendships it allows.

To celebrate I created two photo essays. The first one depicts the construction of my model and the second shows some of the painting that is such a unique feature of this ship. There is nothing new here you haven't seen before but it was fun for me to look back.

Here is the construction video (3 minutes):


And here is the painting video (2 minutes):


These videos are set to music so I should include a music credit:

1000x1000bb-60.jpg Daniel Peterson Suede-la Nychelharpa (Worldwide 2007)
 
Last edited:
Happy Birthday, Dr. Paul! Birthday-Cake May your health and happiness living together for many more years, helping you building more beautiful models.
 
First of all I want to thank everyone for the kind birthday wishes. You're a fine bunch!

Next, thanks to everyone who offered suggestions and encouragement with regard to my CA issues. I learned a lot from the resources you shared and have discovered that garden variety CA is either methyl or ethyl cyanoacrylate. These versions are poison to me. But there are also octyl and alkoxy ester varieties that are less toxic and less reactive (allergenic). These tend to be quite a bit more expensive but compared to being sick for a week I find the cost increase negligible. I have found several I can use if I keep my exposure at a reasonable level. Booyah!

Ship building time (scarce of late) has been dedicated to my first foray into rigging. Specifically, cannon rigging. Several general comments to begin: Rigging is hard. Really hard. Even to do a mediocre job takes patience and hand skills and knowledge that far eclipse what I had anticipated. To those who are accomplished in this area: RESPECT!

At first I tried to rig the guns in place and this was a total fail. I tried rigging with hooks - fail. I tried rigging without hooks - fail. I tried seizing every place Anderson shows seizing - fail. What I ended up doing was prefabricating the various components of the rigging, installing those components on the carriage, and only then putting the pre-rigged gun in place. I'm confident there must be a better way but this approach at least accomplished something acceptable (albeit less than what I had envisioned starting out). It's amazing what you will accept when you have been beaten into submission :p!

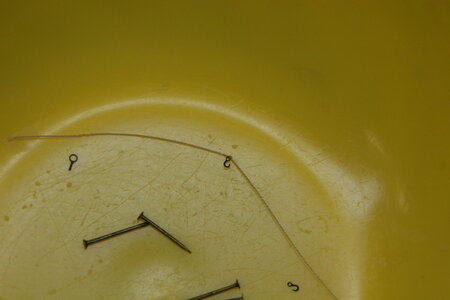
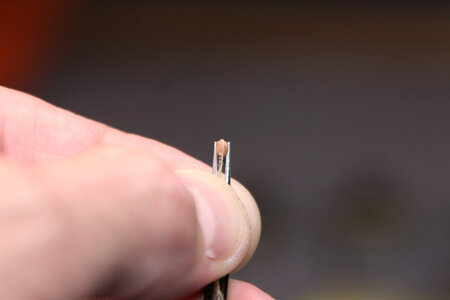
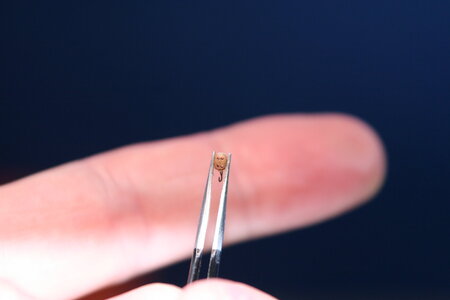
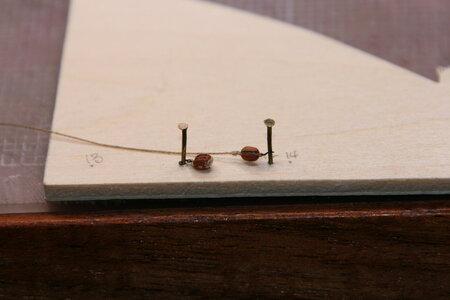
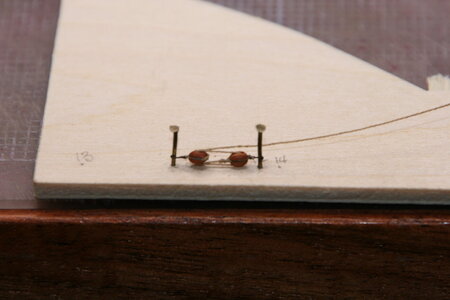
First I added a hook to the single block:

IMG_7022.JPG IMG_7023.JPG IMG_7033.JPG

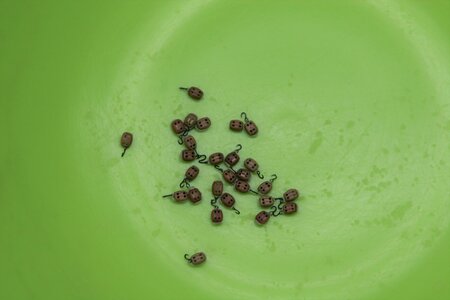
Then I did the same to the double blocks:

IMG_7036.JPG

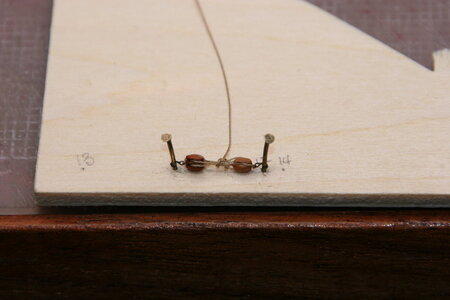
I then measured the distance needed (on the ship with the carriage in place) and made a simple jig to join the two blocks:

IMG_7041.JPG IMG_7042.JPG

And tied a loop-t-do...

IMG_7044.JPG

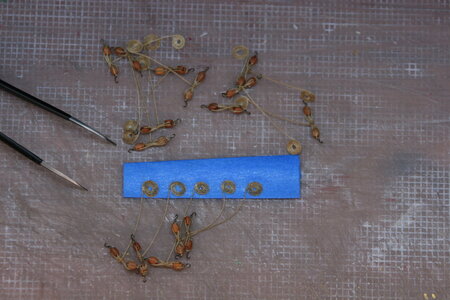
Next, I made some coils (I did not want these to be perfect Flemish Coils so I allowed their form and size to vary somewhat):

IMG_7049.JPG

See the next post for the exciting conclusion to my cannon rigging!!!
 
I have been following your build for a few months now Paul and knew your work was very well done. However, those videos put in perspective how stunning your craftsmanship really is.
 
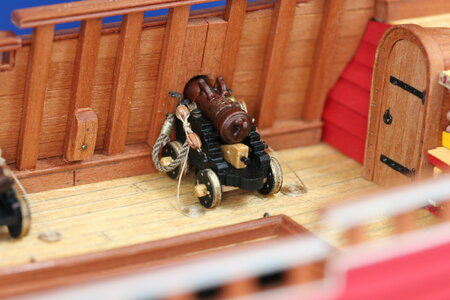
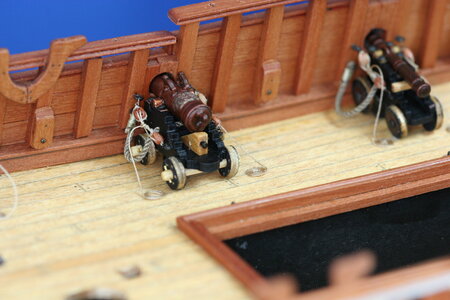
Finally, I glued the gun carriages in place and added my pre-rigged components...

IMG_7056.JPG

IMG_7058.JPG

The gun carriages on the Vasa are known to have been black. I'm not entirely sure I'm a fan but it is what it is.

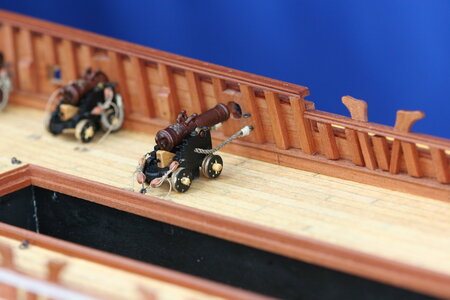
As a point of interest I chose to present two of the guns "pulled back". On the Vasa the out-haul tackle was used as the in-haul tackle. The hook was simple taken from the bulwark and moved to a location inboard of the cannon. Here is my interpretation of that transaction:

IMG_7054.JPG

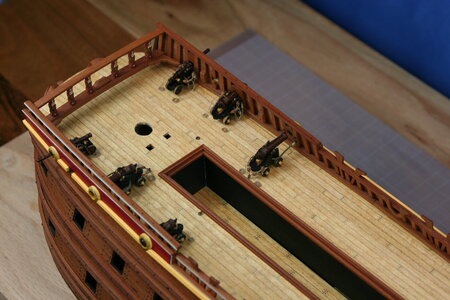
Here are several views of the deck as it stands today:

IMG_7062.JPG

IMG_7063.JPG

IMG_7065.JPG


IMG_7068.JPG

I see that one of the long guns is not as perky as the others - will need to address that...

As always I am humbled that you would stop by.
 
Cannon rigging looks grand so far.

I found a YouTube video on cannon rigging by Ogla, she did one unique thing, when building the cannon carriages she dropped a small nail in forward base around the axle line. Then she drilled a matching hole in deck. When she did her rigging on a board off ship, she had holes drilled in the board to hold eye bolts in place to get distances set. When the carriage was fully rigged she moved to ship and attached rigging to ship.

Seemed to work well for her, and with the quality of her ship work I think its an easy way to do cannons.
I've seen that video (@Jimsky shared it with me) - she makes it look so easy!
 
Happy belated birthday Paul! Many more to come and many more beautiful ship models to build. Guns are pure perfection. I've never managed to rigged them properly.
 
First of all I want to thank everyone for the kind birthday wishes. You're a fine bunch!

Next, thanks to everyone who offered suggestions and encouragement with regard to my CA issues. I learned a lot from the resources you shared and have discovered that garden variety CA is either methyl or ethyl cyanoacrylate. These versions are poison to me. But there are also octyl and alkoxy ester varieties that are less toxic and less reactive (allergenic). These tend to be quite a bit more expensive but compared to being sick for a week I find the cost increase negligible. I have found several I can use if I keep my exposure at a reasonable level. Booyah!

Ship building time (scarce of late) has been dedicated to my first foray into rigging. Specifically, cannon rigging. Several general comments to begin: Rigging is hard. Really hard. Even to do a mediocre job takes patience and hand skills and knowledge that far eclipse what I had anticipated. To those who are accomplished in this area: RESPECT!

At first I tried to rig the guns in place and this was a total fail. I tried rigging with hooks - fail. I tried rigging without hooks - fail. I tried seizing every place Anderson shows seizing - fail. What I ended up doing was prefabricating the various components of the rigging, installing those components on the carriage, and only then putting the pre-rigged gun in place. I'm confident there must be a better way but this approach at least accomplished something acceptable (albeit less than what I had envisioned starting out). It's amazing what you will accept when you have been beaten into submission :p!

First I added a hook to the single block:

View attachment 254055 View attachment 254056 View attachment 254057

Then I did the same to the double blocks:

View attachment 254058

I then measured the distance needed (on the ship with the carriage in place) and made a simple jig to join the two blocks:

View attachment 254060 View attachment 254061

And tied a loop-t-do...

View attachment 254062

Next, I made some coils (I did not want these to be perfect Flemish Coils so I allowed their form and size to vary somewhat):

View attachment 254063

See the next post for the exciting conclusion to my cannon rigging!!!
Hi Paul.
Sorry I missed the party yesterday: hope you had a fine birthday party?
Good idea to pre-rig the to tiny blocks.
Regards, Peter
 
Back
Top