Vasa - 1:65 DeAgostini [COMPLETED BUILD]

S
Hi Paul- I slept rather well. Your log and contributions from Dean etc are invaluable to me for when I get to my masts. Thanks. PS it appears I am going to have to invest in some of the magic machinery you have. Admiral may need some convincing tho.
Supposed to have ROTFROTFROTFROTF after I slept well. Lesson don’t use emoji on keyboard but the ones on the site.
 
Thank you, @Philski, for posting those videos. Very elegant solutions to two types of squares (one raised and one inset).

Thanks @DARIVS ARCHITECTVS. I did use a file to begin shaping the transition to the ball top on the upper mast sections. Some of the spots I want a squared transition are vulnerable though, so I may end up doing them in my hand as you suggested.
 
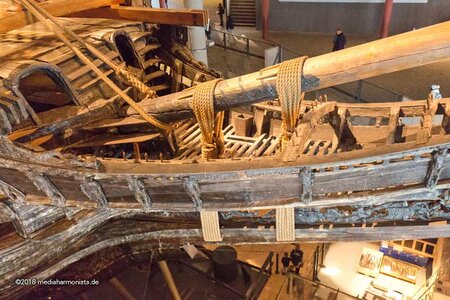
As I wait for some materials to arrive that I hope to be able to use for the fabrication of chainplates and strops in association with the deadeyes (are those the right words for the metal components found there?) I have continued to work on the masts. The simplest of them is the bowsprit though it was a two-piece thing with a complex join...(the main mast is constructed from many parts - a made mast). Here is the goal for the sprit mast:

Stockholm-180323_8848.jpg

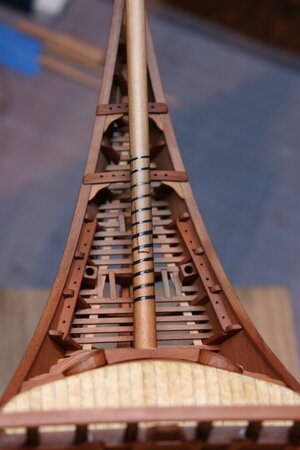
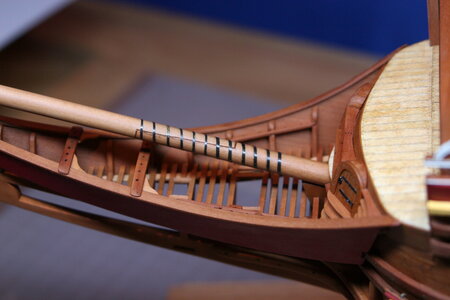
And here is what I ended up with (the wrapping is paper thin brass that I cut from a sheet and blackened):

IMG_7290.JPG

IMG_7293.JPG

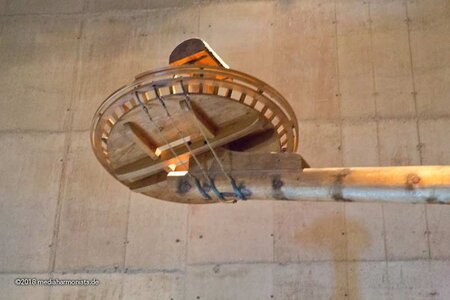
I then turned my attention to the top and the knee that joins it to the bowsprit. Again, let's begin with the goal:

Stockholm-180323_9137.jpg

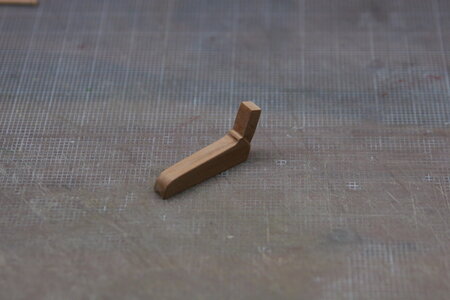
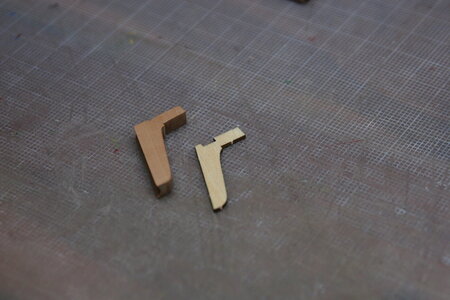
Thus far I have fabricated the knee (the second image presenting my work alongside the kit supplied part):

IMG_7286.JPG

IMG_7289.JPG

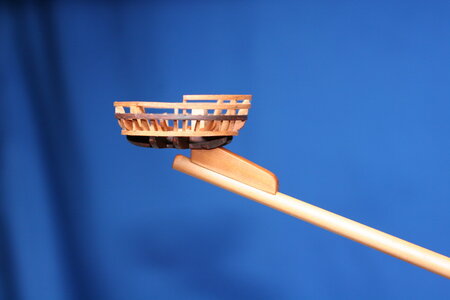
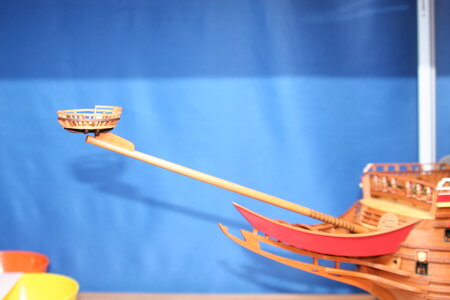
And now mounted with the top balanced temporarily in place:

IMG_7294.JPG

IMG_7296.JPG

I realize these are baby steps but everything seems to take me forever.

My hobby job will require some extra attention between now and the beginning of the new year but I'll try to steal away a few hours here and there for shipbuilding.

I'm seeing some really impressive work being posted by others. There are some extraordinary ships under construction right now (or maybe that's always been true and I just didn't notice). It is a pleasure to see so many of you excel!
 
Last edited:
As I wait for some materials to arrive that I hope to be able to use for the fabrication of chainplates and strops in association with the deadeyes (are those the right words for the metal components found there?) I have continued to work on the masts. The simplest of them is the bowsprit though it was a two-piece thing with a complex join...(the main mast is constructed from many parts - a made mast). Here is the goal for the sprit mast:

View attachment 268376

And here is what I ended up with (the wrapping is paper thin brass that I cut from a sheet and blackened):

View attachment 268372

View attachment 268373

I then turned my attention to the top and the knee that joins it to the bowsprit. Again, let's begin with the goal:

View attachment 268377

Thus far I have fabricated the knee (the second image presenting my work alongside the kit supplied part):

View attachment 268370

View attachment 268371

And now mounted with the top balanced temporarily in place:

View attachment 268374

View attachment 268375

I realize these are baby steps but everything seems to take me forever.

My hobby job will require some extra attention between now and the beginning of the new year but I'll try to steal away a few hours here and there for shipbuilding.

I'm seeing some really impressive work being posted by others lately. There are some extraordinary ships under construction right now (or maybe that's always been true but I just didn't notice). It is a pleasure to see so many of you excel!
Nice work with good detail.
 
The baby steps are just as important to the overall effect of a build than anything else. And often, they are the difference between a good and an extraordinary build. The work you have accomplished on the bowsprit looks very good and is no mean feat.
 
As I wait for some materials to arrive that I hope to be able to use for the fabrication of chainplates and strops in association with the deadeyes (are those the right words for the metal components found there?) I have continued to work on the masts. The simplest of them is the bowsprit though it was a two-piece thing with a complex join...(the main mast is constructed from many parts - a made mast). Here is the goal for the sprit mast:

View attachment 268376

And here is what I ended up with (the wrapping is paper thin brass that I cut from a sheet and blackened):

View attachment 268372

View attachment 268373

I then turned my attention to the top and the knee that joins it to the bowsprit. Again, let's begin with the goal:

View attachment 268377

Thus far I have fabricated the knee (the second image presenting my work alongside the kit supplied part):

View attachment 268370

View attachment 268371

And now mounted with the top balanced temporarily in place:

View attachment 268374

View attachment 268375

I realize these are baby steps but everything seems to take me forever.

My hobby job will require some extra attention between now and the beginning of the new year but I'll try to steal away a few hours here and there for shipbuilding.

I'm seeing some really impressive work being posted by others. There are some extraordinary ships under construction right now (or maybe that's always been true and I just didn't notice). It is a pleasure to see so many of you excel!
Interesting how we both are using less and less materials from the kit and scratch building more and more? Nice trick with the brass strip. Using paper strip would not have come out as good. Love your work, Paul!
 
As I wait for some materials to arrive that I hope to be able to use for the fabrication of chainplates and strops in association with the deadeyes (are those the right words for the metal components found there?) I have continued to work on the masts. The simplest of them is the bowsprit though it was a two-piece thing with a complex join...(the main mast is constructed from many parts - a made mast). Here is the goal for the sprit mast:

View attachment 268376

And here is what I ended up with (the wrapping is paper thin brass that I cut from a sheet and blackened):

View attachment 268372

View attachment 268373

I then turned my attention to the top and the knee that joins it to the bowsprit. Again, let's begin with the goal:

View attachment 268377

Thus far I have fabricated the knee (the second image presenting my work alongside the kit supplied part):

View attachment 268370

View attachment 268371

And now mounted with the top balanced temporarily in place:

View attachment 268374

View attachment 268375

I realize these are baby steps but everything seems to take me forever.

My hobby job will require some extra attention between now and the beginning of the new year but I'll try to steal away a few hours here and there for shipbuilding.

I'm seeing some really impressive work being posted by others. There are some extraordinary ships under construction right now (or maybe that's always been true and I just didn't notice). It is a pleasure to see so many of you excel!
You know the saying Paul…it’s not the quantity of work, but the quality! And you are doing quality work! ;)
 
As I wait for some materials to arrive that I hope to be able to use for the fabrication of chainplates and strops in association with the deadeyes (are those the right words for the metal components found there?) I have continued to work on the masts. The simplest of them is the bowsprit though it was a two-piece thing with a complex join...(the main mast is constructed from many parts - a made mast). Here is the goal for the sprit mast:

View attachment 268376

And here is what I ended up with (the wrapping is paper thin brass that I cut from a sheet and blackened):

View attachment 268372

View attachment 268373

I then turned my attention to the top and the knee that joins it to the bowsprit. Again, let's begin with the goal:

View attachment 268377

Thus far I have fabricated the knee (the second image presenting my work alongside the kit supplied part):

View attachment 268370

View attachment 268371

And now mounted with the top balanced temporarily in place:

View attachment 268374

View attachment 268375

I realize these are baby steps but everything seems to take me forever.

My hobby job will require some extra attention between now and the beginning of the new year but I'll try to steal away a few hours here and there for shipbuilding.

I'm seeing some really impressive work being posted by others. There are some extraordinary ships under construction right now (or maybe that's always been true and I just didn't notice). It is a pleasure to see so many of you excel!
What did you use to cut the knee with?
 
I realize these are baby steps but everything seems to take me forever.
That's because you are doing careful, beautiful work. The time taken will pay dividends in your finished product, I'm certain. I have truly been admiring your work.
I'm curious, having never seen this spliced bowsprit. Do you have a reference or guide to how that was done? I'd love to investigate this further.
 
As I wait for some materials to arrive that I hope to be able to use for the fabrication of chainplates and strops in association with the deadeyes (are those the right words for the metal components found there?) I have continued to work on the masts. The simplest of them is the bowsprit though it was a two-piece thing with a complex join...(the main mast is constructed from many parts - a made mast). Here is the goal for the sprit mast:

View attachment 268376

And here is what I ended up with (the wrapping is paper thin brass that I cut from a sheet and blackened):

View attachment 268372

View attachment 268373

I then turned my attention to the top and the knee that joins it to the bowsprit. Again, let's begin with the goal:

View attachment 268377

Thus far I have fabricated the knee (the second image presenting my work alongside the kit supplied part):

View attachment 268370

View attachment 268371

And now mounted with the top balanced temporarily in place:

View attachment 268374

View attachment 268375

I realize these are baby steps but everything seems to take me forever.

My hobby job will require some extra attention between now and the beginning of the new year but I'll try to steal away a few hours here and there for shipbuilding.

I'm seeing some really impressive work being posted by others. There are some extraordinary ships under construction right now (or maybe that's always been true and I just didn't notice). It is a pleasure to see so many of you excel!
Absolutely amazing job as usual
 
As I wait for some materials to arrive that I hope to be able to use for the fabrication of chainplates and strops in association with the deadeyes (are those the right words for the metal components found there?) I have continued to work on the masts. The simplest of them is the bowsprit though it was a two-piece thing with a complex join...(the main mast is constructed from many parts - a made mast). Here is the goal for the sprit mast:

View attachment 268376

And here is what I ended up with (the wrapping is paper thin brass that I cut from a sheet and blackened):

View attachment 268372

View attachment 268373

I then turned my attention to the top and the knee that joins it to the bowsprit. Again, let's begin with the goal:

View attachment 268377

Thus far I have fabricated the knee (the second image presenting my work alongside the kit supplied part):

View attachment 268370

View attachment 268371

And now mounted with the top balanced temporarily in place:

View attachment 268374

View attachment 268375

I realize these are baby steps but everything seems to take me forever.

My hobby job will require some extra attention between now and the beginning of the new year but I'll try to steal away a few hours here and there for shipbuilding.

I'm seeing some really impressive work being posted by others. There are some extraordinary ships under construction right now (or maybe that's always been true and I just didn't notice). It is a pleasure to see so many of you excel!
"seems to take for ever" I have the same problem.... but then, it wouldn't be a hobby. Or is it? ;)
 
Thank you friends for the many likes and encouraging comments about this last bit of work.

To simulate thin brass strips, you might think of thin Chartpak drafting tape, in different widths and colors.
Wonderful idea. I may adopt that idea for some future applications on this ship.

Interesting how we both are using less and less materials from the kit and scratch building more and more? Nice trick with the brass strip. Using paper strip would not have come out as good. Love your work, Paul!
I have paper in a few places as well but this was too 'visible' to fake it.

What did you use to cut the knee with?
Hi Vic, I have a scroll saw and a small pile of pear stock (sheets and strips). I'm getting pretty handy with a file as well ;) .

That's because you are doing careful, beautiful work. The time taken will pay dividends in your finished product, I'm certain. I have truly been admiring your work.
I'm curious, having never seen this spliced bowsprit. Do you have a reference or guide to how that was done? I'd love to investigate this further.
Of course I'm no expert Eric, but I have never seen this on another ship. No kit manufacturer includes this detail to my knowledge so if there are plans I have never seen them. At first I thought it was simply an artifact of the restoration/preservation work at the museum but the metal strapping is too integrated so I concluded the splice was original (clearly the blond colored extension has been replaced). As for its construction - I assume it is just fingers of wood in wedges but...
 
The bowsprit iron strap is indeed original. (Not the -actual- strap of course, it rusted long ago, but the design)
There is another one on the main mast.
The bowsprit and the mainmast are both made from multiple pieces.

Cheers,
Peter
 
Last edited:
Back
Top