The gold and red is really going to look excellent! I like it!Hi everyone!
I have a short update. My confidence level shot up several percentage points with the partial result of the VASA's galleries. Paint does wonders at covering certain imperfections. The brass finials and rear deco are just dry fit for this set of photos. I will start next on the starboard gallery's planking's. View attachment 245823View attachment 245824View attachment 245825View attachment 245826View attachment 245827
As always thanks for stopping by and Happy Modeling!
-

Win a Free Custom Engraved Brass Coin!!!
As a way to introduce our brass coins to the community, we will raffle off a free coin during the month of August. Follow link ABOVE for instructions for entering.
-

PRE-ORDER SHIPS IN SCALE TODAY!
The beloved Ships in Scale Magazine is back and charting a new course for 2026!
Discover new skills, new techniques, and new inspirations in every issue.
NOTE THAT OUR FIRST ISSUE WILL BE JAN/FEB 2026
You are using an out of date browser. It may not display this or other websites correctly.
You should upgrade or use an alternative browser.
You should upgrade or use an alternative browser.
VASA 490 Build Log - Billing Boats, 1:75 [COMPLETED BUILD]
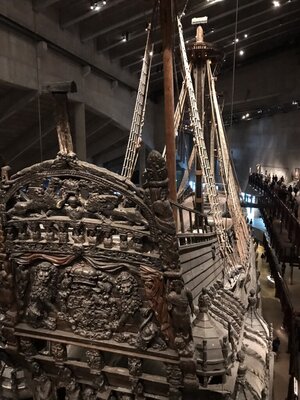
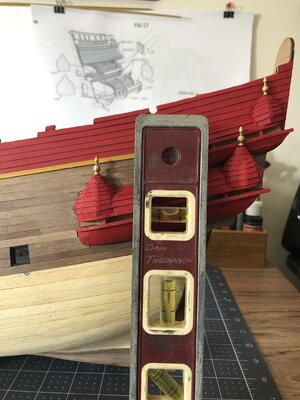
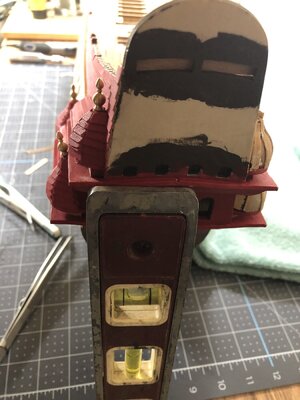
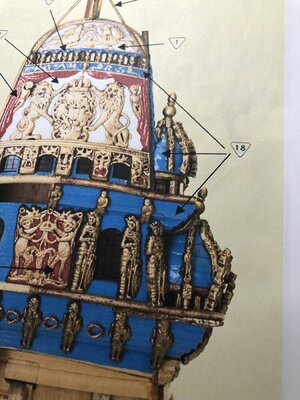
Hmmm. Great question about the alignment of the finials. In my last post I had just stuck them in the holes not really paying attention to their verticalness. In the attached photos now if I were going to glue them in permanently (this is only a dry fit) this is how they would appear. First I aligned the ship in its cradle then leveled it across the beam. The lower stern finial is skewed quite a bit in the transverse direction which I shall have to live with. Compared with the real ship my stern finial seems about 4 or 5 mm too high. The actual VASA photo you see here does show an ever so slight skew in the transverse direction but nothing near as dramatic as mine. I'm closer to the Billings plans. Thanks for pointing this out Peter, I will be much more careful when the glue down time comes.Hi Daniel,
Great work. The paint colour looks excellent and when all the sculptures go on, any minor imperfections are just not seen. A couple of things:
Finials - I ensured all mine fitted OK then removed them till the end - They play havoc with rigging later and can be reinserted at a late stage easily. Also, is it a trick of the camera angle or are a couple not quite vertical?
Window: Don’t forget the little window in the lower gallery. Now is the right time (positioned between sculptures) to cut and fit it in.
PeterG
Last edited:
Thanks Dean!The gold and red is really going to look excellent! I like it!
How about notching out the shelf on the upper gallery a bit? I agree that it appears the tip is built into the Billings design but you can improve on it (bold words from a guy whose not this far...)!
I have considered that but I would rather not notch the shelf, I think by slotting the hole in transvers direction by a millimeter or so then filing a mm or so off the base of the finial I can improve the tilt to an acceptable angle. I shall try it and post some results.How about notching out the shelf on the upper gallery a bit? I agree that it appears the tip is built into the Billings design but you can improve on it (bold words from a guy whose not this far...)!
That’s an interesting picture from the stern Daniel (your Post #182). I had not noticed before how the aft lower gallery finial actually appears to be set into the edge of the upper gallery base.
I remember going to some lengths to ensure mine were clear (albeit very close, but not touching).
PeterG
I remember going to some lengths to ensure mine were clear (albeit very close, but not touching).
PeterG
Good afternoon everyone!
I have a bit of an update to my build log here. I finally completed both port and starboard gallery structers with base coat paint. I still need to add all the carvings as well as the scallops. My skill level at hand painting the scallops is that of maybe a kindergartner so I am having some 3d scallops printed and will paint and glue them on when they arrive. The printing of these is experimental at this stage and if not successful then I will omit them all together. I have completed the port side veneer with sand down and began setting the whalers. I became so curious how the finish coat was going to look I did apply some from the top down to the third whaler and am very happy with it.
Another stern shot showing the four faux openings that I framed in twisted brass wire and painted the center black. Also added some of the supporting frame work which will have carvings on them .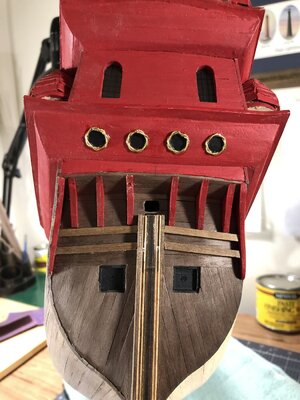
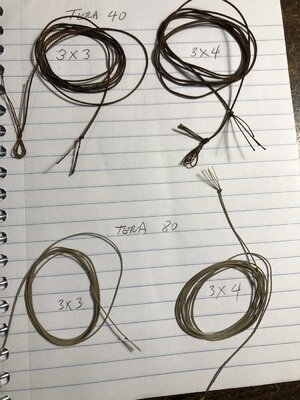
And finally my attempt at rope making which I'm really excited about. I have a long ways to go learning about this process, after practicing with the admirals threads she told me to buy my own and leave hers alone Ha. So following the expert advise from this forum I bought thread and here's some results.
As always thanks for looking in and happy modeling!
I have a bit of an update to my build log here. I finally completed both port and starboard gallery structers with base coat paint. I still need to add all the carvings as well as the scallops. My skill level at hand painting the scallops is that of maybe a kindergartner so I am having some 3d scallops printed and will paint and glue them on when they arrive. The printing of these is experimental at this stage and if not successful then I will omit them all together. I have completed the port side veneer with sand down and began setting the whalers. I became so curious how the finish coat was going to look I did apply some from the top down to the third whaler and am very happy with it.


Another stern shot showing the four faux openings that I framed in twisted brass wire and painted the center black. Also added some of the supporting frame work which will have carvings on them .

And finally my attempt at rope making which I'm really excited about. I have a long ways to go learning about this process, after practicing with the admirals threads she told me to buy my own and leave hers alone Ha. So following the expert advise from this forum I bought thread and here's some results.

As always thanks for looking in and happy modeling!
Looking good Daniel. I agree - the finished walnut(?) looks wonderful. And your ropes are fantastic!
Thanks Paul. I see I didn't mention the type wood veneer, its is walnut. I went through a lot of thread just to get to this point. I learned that you need the right kind of thread and lots of practice.Looking good Daniel. I agree - the finished walnut(?) looks wonderful. And your ropes are fantastic!
Hi Daniel great job on the planking it's coming on quickly. I'm very interested in your rope making as this will be part of my next build if all goes well. What rope walk are you using and thread colours?, I take it that tera 40 and 80 refer to the thickness
Thanks Tony.Hi Daniel great job on the planking it's coming on quickly. I'm very interested in your rope making as this will be part of my next build if all goes well. What rope walk are you using and thread colours?, I take it that tera 40 and 80 refer to the thickness
I'm using a Domanoff VR3.1. Its there entry level machine and very reasonably priced. I'm not sure what tera 40 ,80 really means I'm just following a chart they give from a download on the machine from their web site. There are several others on this forum that talk about rope making and I have gotten some good info as well but understanding thread size as it relates to modeling and millimeter size is still quite cryptic to me. As far as color I'm lucky to find the dark brown and tan as that happens to be exactly the color scheme I wanted and in the tera size to boot. I can see why some of the pros just buy white and stain it to liking.
Daniel,
Hull is coming together nicely.
I am curious however about the double planking, being a Billing Boats kit which is single planking in its design. Have you looked at any aspects which may be out of alignment with the additional hull thickness, or is the veneer just not thick enough to cause a problem?
PeterG
Hi Peter,Daniel,
Hull is coming together nicely.
I am curious however about the double planking, being a Billing Boats kit which is single planking in its design. Have you looked at any aspects which may be out of alignment with the additional hull thickness, or is the veneer just not thick enough to cause a problem?
PeterG
The veneer is 1mm thick and it gave me some problems along the keel and at the stern keel going up. It caused an additional 2mm thickness which I will have to add to the rudder as well. The rudder assembly will appear thicker than normal. Hopefully it will not detract from the overall appearance.
Daniel,
Looking good! I like the rope!
Looking good! I like the rope!
Last edited:
Thank you Dean. At first I thought the rope was going to be very problematic but after much practice and finally getting the right source thread I'm actually quite excited about it.Daniel,
Looking good! I like the rope!
I may have to try it myself…on the Norske Love.Thank you Dean. At first I thought the rope was going to be very problematic but after much practice and finally getting the right source thread I'm actually quite excited about it.
Hi all!
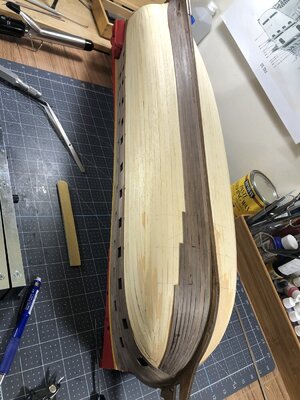
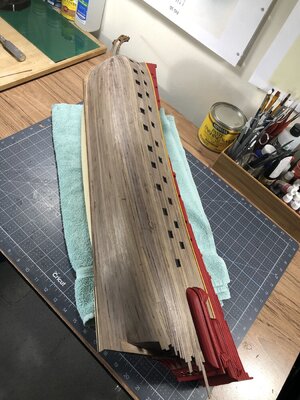
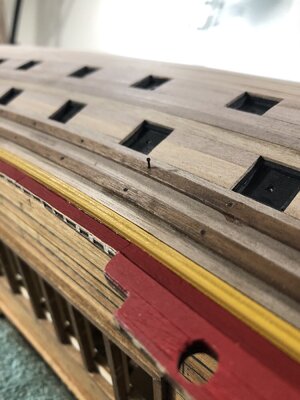
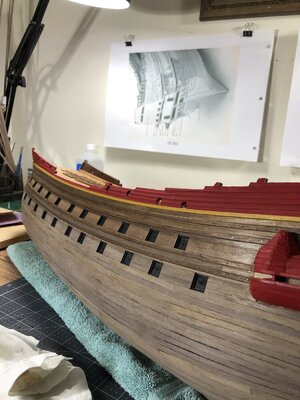
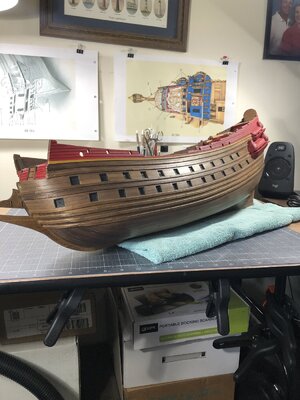
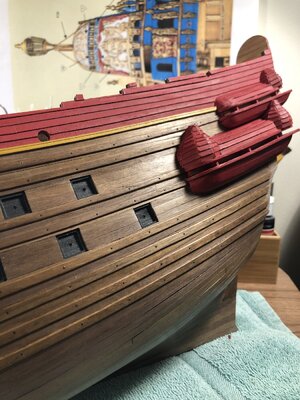
I couldn't resist this short update. Finished port side walnut veneer and whalers plus applied the wax finish. I even managed a few scarf joints in the whalers at the bow section . They enabled me to work around the severe bend. I know its a little rough looking upon zoom in but it will look good in our dining room. Another good week of planking and I'll have the starboard finished. I'm planning on placing a few faux scarf joints only in the whaler system.
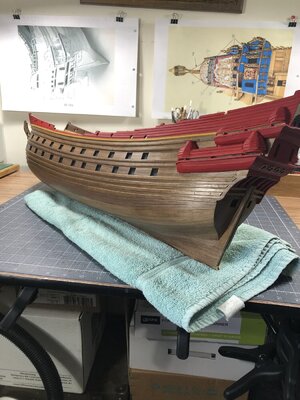
I hope you all enjoy
Happy modeling !
I couldn't resist this short update. Finished port side walnut veneer and whalers plus applied the wax finish. I even managed a few scarf joints in the whalers at the bow section . They enabled me to work around the severe bend. I know its a little rough looking upon zoom in but it will look good in our dining room. Another good week of planking and I'll have the starboard finished. I'm planning on placing a few faux scarf joints only in the whaler system.


I hope you all enjoy
Happy modeling !
I think it looks fantastic Daniel! And you're moving along at a fast pace!Hi all!
I couldn't resist this short update. Finished port side walnut veneer and whalers plus applied the wax finish. I even managed a few scarf joints in the whalers at the bow section . They enabled me to work around the severe bend. I know its a little rough looking upon zoom in but it will look good in our dining room. Another good week of planking and I'll have the starboard finished. I'm planning on placing a few faux scarf joints only in the whaler system.
View attachment 250933View attachment 250934View attachment 250935
I hope you all enjoy
Happy modeling !
WOW! That walnut looks fantastic under wax! I'm generally not a fan of walnut but I think you just converted me. Plus, it looks perfect with the red. Bravo Daniel!
Daniel, great job. It turned out very nicely. 


