Awesome Daniel! Much better than before (and much, much better than mine)!
-

Win a Free Custom Engraved Brass Coin!!!
As a way to introduce our brass coins to the community, we will raffle off a free coin during the month of August. Follow link ABOVE for instructions for entering.
-

PRE-ORDER SHIPS IN SCALE TODAY!
The beloved Ships in Scale Magazine is back and charting a new course for 2026!
Discover new skills, new techniques, and new inspirations in every issue.
NOTE THAT OUR FIRST ISSUE WILL BE JAN/FEB 2026
You are using an out of date browser. It may not display this or other websites correctly.
You should upgrade or use an alternative browser.
You should upgrade or use an alternative browser.
VASA 490 Build Log - Billing Boats, 1:75 [COMPLETED BUILD]
Thank you Heinrich, I hope you have a breakthrough success on your canon rigging.Beautiful work on the gratings Daniel. I know that kind of work is very time-consuming, but the effects are great!
Hi Daniel you've made a lot of good progress since I last saw your log. The Becket is awesome I'll have to look up how it's made. Those blocks are tiny would you even see them when they're rigged? The Vasa is looking great the new grates are an improvement.
Thank you Tony. Check out this link (https://shipworkshop.com/) and look at the video downloads offered on their serving machines page.Hi Daniel you've made a lot of good progress since I last saw your log. The Becket is awesome I'll have to look up how it's made. Those blocks are tiny would you even see them when they're rigged? The Vasa is looking great the new grates are an improvement.
I don't know how big the real blocks for canon rigging would be but lets say 8" . That would be just over 203mm and at 1:75 would put the blocks at 2.7mm.Too small for me so I will use 4mm.
Hello everyone,
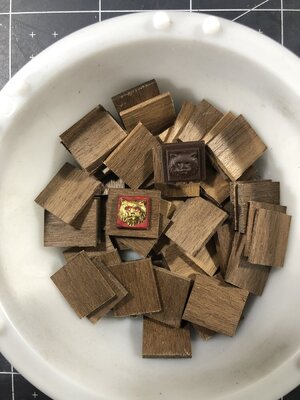
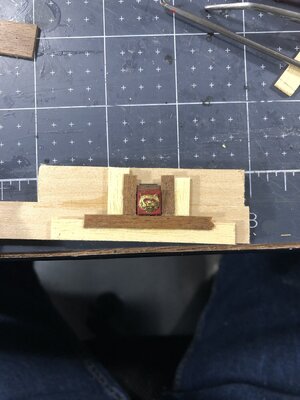
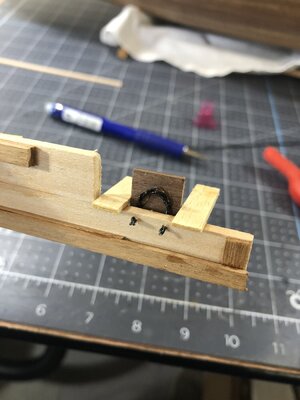
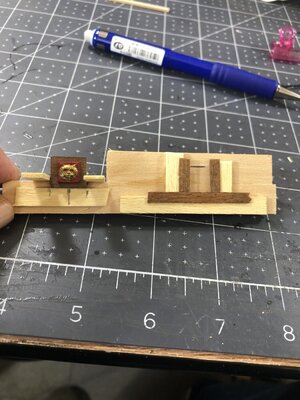
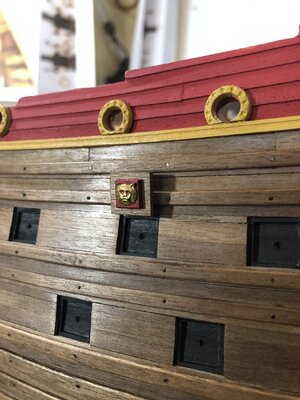
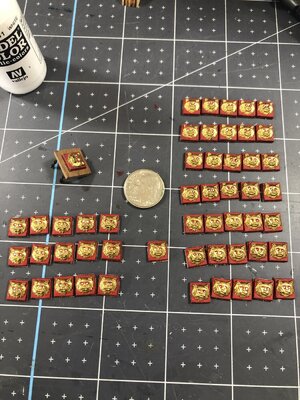
I have an Hodge podge of fiddly items to add to my build log. These past two weeks it seems I've been all over the place on my build, I need to just focus now and start completing areas according to some sort of critical path. I'll start with canon hatch covers. I created a multipurpose jig for centering the lions head and twisted wire hinge, I'm not entirely satisfied with the hinge system so have only created a couple so far. The hinges will never be seen but still... So I've shown myself that I can micro paint, I'm just concerned that after doing a handful I will explode from inside out all over the shipyard . Man does that ever take patients!!! Paul @dockattner ,Peter @PeterG and all of you out there who do the most awesome micro painting, my hat is off to you all!
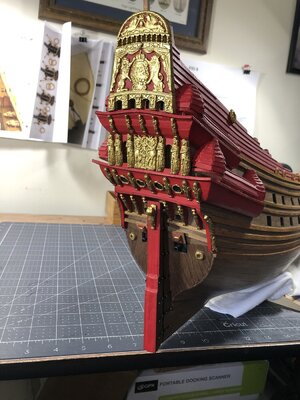
Next I have the rudder assembly and pretty much have finished the stern area.
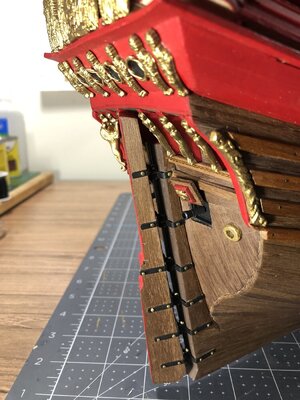
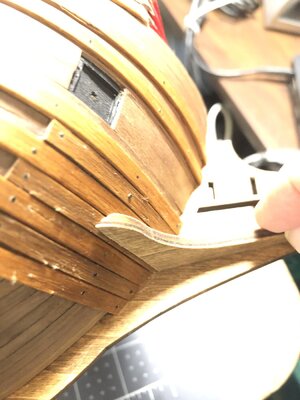
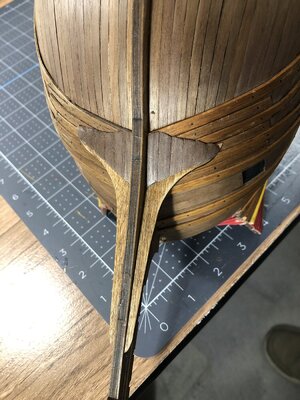
It came to my attention that I was not finished turning my ship upside down for more work thanks again to Paul @dockattner for the heads up about installing the 'knees' and splash guards.
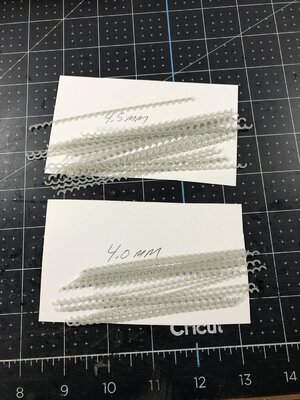
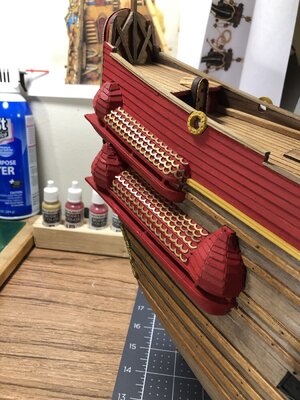
And finally to a section of build calling for painted scallops on the gallery roofs. Dave Stevens @Dave Stevens (Lumberyard) put me onto a man who could 3d print some 'scallops' for me since I was not going to ruin my whole project by trying to hand paint these little devils. Thank you Dave! I decided to only place the scallops on the straight portions and not the inverted hornets nest. The gold figures on those will be plenty. You might also notice I have begun setting the lower rail system component.
I sure hope you all have enjoyed the review and I am always humbled by your interest and comments.
Happy modeling!!
I have an Hodge podge of fiddly items to add to my build log. These past two weeks it seems I've been all over the place on my build, I need to just focus now and start completing areas according to some sort of critical path. I'll start with canon hatch covers. I created a multipurpose jig for centering the lions head and twisted wire hinge, I'm not entirely satisfied with the hinge system so have only created a couple so far. The hinges will never be seen but still... So I've shown myself that I can micro paint, I'm just concerned that after doing a handful I will explode from inside out all over the shipyard


Next I have the rudder assembly and pretty much have finished the stern area.


It came to my attention that I was not finished turning my ship upside down for more work thanks again to Paul @dockattner for the heads up about installing the 'knees' and splash guards.


And finally to a section of build calling for painted scallops on the gallery roofs. Dave Stevens @Dave Stevens (Lumberyard) put me onto a man who could 3d print some 'scallops' for me since I was not going to ruin my whole project by trying to hand paint these little devils. Thank you Dave! I decided to only place the scallops on the straight portions and not the inverted hornets nest. The gold figures on those will be plenty. You might also notice I have begun setting the lower rail system component.


I sure hope you all have enjoyed the review and I am always humbled by your interest and comments.
Happy modeling!!
- Joined
- Oct 9, 2020
- Messages
- 2,230
- Points
- 488

aaaahhh! Hard pass lolColleagues, go to scale 72 or less. You will learn how to work with blocks of 2.5 and 2 mm. In this scale, they are the most popular. There are most of them


Nice jig for the doors, and painting looks good on the lion heads. You are doing a great job on everything! She will be a beauty.Hello everyone,
I have an Hodge podge of fiddly items to add to my build log. These past two weeks it seems I've been all over the place on my build, I need to just focus now and start completing areas according to some sort of critical path. I'll start with canon hatch covers. I created a multipurpose jig for centering the lions head and twisted wire hinge, I'm not entirely satisfied with the hinge system so have only created a couple so far. The hinges will never be seen but still... So I've shown myself that I can micro paint, I'm just concerned that after doing a handful I will explode from inside out all over the shipyard. Man does that ever take patients!!! Paul @dockattner ,Peter @PeterG and all of you out there who do the most awesome micro painting, my hat is off to you all!
View attachment 260120View attachment 260121View attachment 260122View attachment 260123View attachment 260124View attachment 260125
Next I have the rudder assembly and pretty much have finished the stern area.
View attachment 260126View attachment 260127
It came to my attention that I was not finished turning my ship upside down for more work thanks again to Paul @dockattner for the heads up about installing the 'knees' and splash guards.
View attachment 260128View attachment 260129
And finally to a section of build calling for painted scallops on the gallery roofs. Dave Stevens @Dave Stevens (Lumberyard) put me onto a man who could 3d print some 'scallops' for me since I was not going to ruin my whole project by trying to hand paint these little devils. Thank you Dave! I decided to only place the scallops on the straight portions and not the inverted hornets nest. The gold figures on those will be plenty. You might also notice I have begun setting the lower rail system component.
View attachment 260130View attachment 260131
I sure hope you all have enjoyed the review and I am always humbled by your interest and comments.
Happy modeling!!
- Joined
- Jan 9, 2020
- Messages
- 10,566
- Points
- 938

WOW Daniel - you have indeed been busy! You do not have to fret about those painted lions heads at all - they look superb! Boy, am I glad I only have to do 24 gunport lids and for the fact that the Dutch omitted all forms of decoration on them. The scallops round off those side galleries beautifully!
I love everything you have done here Daniel. I think the gun port covers look great - YOU'RE A MICRO PAINTER NOW! The knees and the splashguard turned out great and the scallops are over the top - super clean and crisp. You are about a week or two away from passing me up so I'll be watching and learning from you from now on!!!
Great job on the gun covers, are the kit supplied ones plastic and did you have to cut them all down to size? Good result with the 3D printing looks superb.
All looking good Daniel. Your gunport covers look great. It’s hard when there are so many, isn’t it!!
The idea for the 3D scallops is brilliant. These would sure make the individual painting simple and they will stand out well.
When you place the gallery statues/ornaments will you cut the scallops, the statues or place them above and sitting on the scallops?
Regards,
PeterG
The idea for the 3D scallops is brilliant. These would sure make the individual painting simple and they will stand out well.
When you place the gallery statues/ornaments will you cut the scallops, the statues or place them above and sitting on the scallops?
Regards,
PeterG
Thanks Dean, Having a jig sure makes things look better and uniform.Nice jig for the doors, and painting looks good on the lion heads. You are doing a great job on everything! She will be a beauty.
Thank you Heinrich. This makes me wonder will I ever choose a ship in the future based on the number of gunports ? Actually I hope not.WOW Daniel - you have indeed been busy! You do not have to fret about those painted lions heads at all - they look superb! Boy, am I glad I only have to do 24 gunport lids and for the fact that the Dutch omitted all forms of decoration on them. The scallops round off those side galleries beautifully!
Thank you Paul. I really love the way we all learn from each other, that and everyone's personalities make this an amazing ,fun forum!I love everything you have done here Daniel. I think the gun port covers look great - YOU'RE A MICRO PAINTER NOW! The knees and the splashguard turned out great and the scallops are over the top - super clean and crisp. You are about a week or two away from passing me up so I'll be watching and learning from you from now on!!!
Thanks Tony, the gun covers are plastic and I did have to cut all 52 of them down to look and fit right on the covers.Great job on the gun covers, are the kit supplied ones plastic and did you have to cut them all down to size? Good result with the 3D printing looks superb.
Thank you Peter. Great question about the installation of the statues over the scallops. I could cut a slot and lay them in or place some kind of filler the same width as the statues and same thickness as the scallops in between the scallops. I'm 95% sure I'll go with the surface fit and try to fill the voids between the scallops.All looking good Daniel. Your gunport covers look great. It’s hard when there are so many, isn’t it!!
The idea for the 3D scallops is brilliant. These would sure make the individual painting simple and they will stand out well.
When you place the gallery statues/ornaments will you cut the scallops, the statues or place them above and sitting on the scallops?
Regards,
PeterG
- Joined
- Jan 9, 2020
- Messages
- 10,566
- Points
- 938

Thank you Heinrich. This makes me wonder will I ever choose a ship in the future based on the number of gunports ? Actually I hope not.


 I think the number of gunport covers are purely co-incidental. I love some subjects with only 8 guns in total and I love ones which have 84 guns - so it just depends on whether the ship touches your heart strings or not.
Hallo @Daniel20It's my pleasure to introduce my version of the famous Swedish VASA warship. I invite all to join in on this my second major build. My wife's mother was from Sweden and her dad was from Denmark. A few years ago she had the opportunity to visit relatives in Sweden and visited the VASA museum . So she insisted that this ship be my next build. I had intended to take a longer break from ship building (see HMS Fly) however I kept finding myself slowly unpacking and looking /working well you know building on it, so my break lasted all of 10 days. I'll start with unpacking the box and go from there
I had purchased several after market parts sheeve blocks, deck grating. I'll be buying aftermarket rope line as well.
I know all the external figures are plastic which I'm not too happy about but I will be painting them so should not diminish from the end product.
Hope you all enjoy the introduction and following this will be laying of the keel.
Happy modeling!!
we wish you all the BEST and a HAPPY BIRTHDAY


