-

Win a Free Custom Engraved Brass Coin!!!
As a way to introduce our brass coins to the community, we will raffle off a free coin during the month of August. Follow link ABOVE for instructions for entering.
-

PRE-ORDER SHIPS IN SCALE TODAY!
The beloved Ships in Scale Magazine is back and charting a new course for 2026!
Discover new skills, new techniques, and new inspirations in every issue.
NOTE THAT OUR FIRST ISSUE WILL BE JAN/FEB 2026
You are using an out of date browser. It may not display this or other websites correctly.
You should upgrade or use an alternative browser.
You should upgrade or use an alternative browser.
VOC ship The Prins Willem (scale 1:75) Year 1651
- Thread starter Steef66
- Start date
- Watchers 76
-
- Tags
- 1:75 prins willem
- Joined
- Aug 8, 2019
- Messages
- 5,584
- Points
- 738

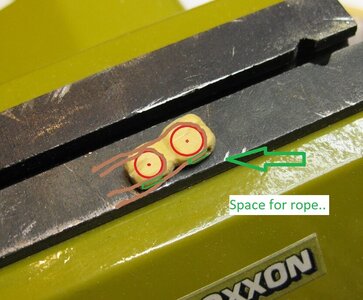
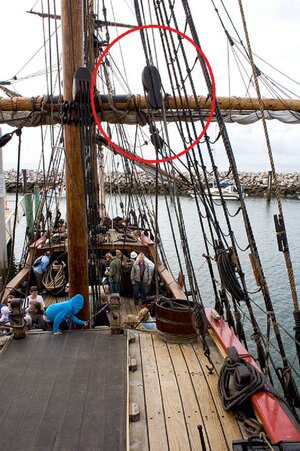
Yes I already didThese pulleys are already functional!!! I allowed myself a picture with a function. I would add more space for guiding the rope from the wheels. Green ...
I keep my fingers crossed !!!
View attachment 228687
View attachment 228688
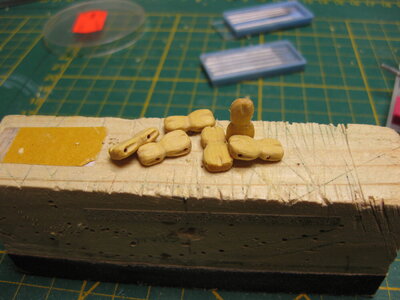
In post #104 you see on the right a chissel and I used that to make a tiny space for the rope. The blocks I made before I did this with the Electric cutter, no succes. But that little chissel does the job perfect.
Pictures I wil post with next update.
Thanks for your advice, it is welcome. Keep on doing

- Joined
- Aug 8, 2019
- Messages
- 5,584
- Points
- 738

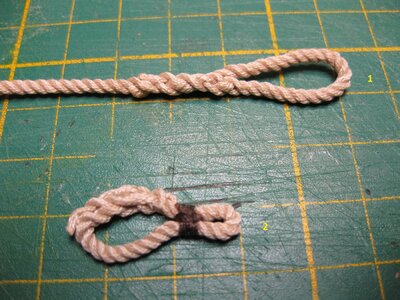
I started with the practise of grommets and eye splice. Some rope to get the knots. Never did this before. I think the eye splice (1) is correct, but the grommet (2) is not. I used the method @KUDIN explained. But looking to @mati.n his grommets they look if they made on another method.
Yes the rope must be serving, that is no problem I know how to do that. This post is about practise the knots.
Maybe I should need a little more practise doing.
Yes the rope must be serving, that is no problem I know how to do that. This post is about practise the knots.
Maybe I should need a little more practise doing.

I'm keeping my fingers crossed! You continue nicely and quickly. Take a look at Mati's photos again, these ropes are usually wrapped in a weak rope ..I started with the practise of grommets and eye splice. Some rope to get the knots. Never did this before. I think the eye splice (1) is correct, but the grommet (2) is not. I used the method @KUDIN explained. But looking to @mati.n his grommets they look if they made on another method.
Yes the rope must be serving, that is no problem I know how to do that. This post is about practise the knots.
Maybe I should need a little more practise doing.
View attachment 229047
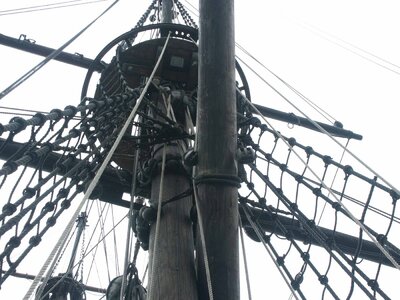
Here are Rope replicas of Batavia..
See a detailed plan of the ship De 7 provincien here..
http://www.otteblom.nl/tekeningen/
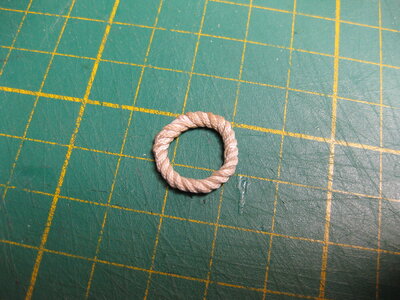
This one is really good, I cannot even see the ends...Third attempt to make a Grommet, I think this one is good.

Doesn't get any better than this! What's the diameter?Third attempt to make a Grommet, I think this one is good.
View attachment 229061
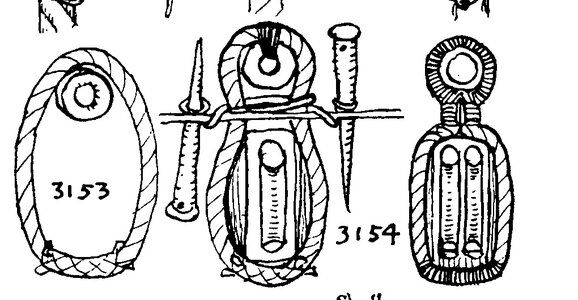
Now I wil try to make it on scale for a block
See you later
- Joined
- Aug 8, 2019
- Messages
- 5,584
- Points
- 738

Diameter 15 mm, rope 2 mmDoesn't get any better than this! What's the diameter?
- Joined
- Feb 22, 2021
- Messages
- 130
- Points
- 253

Hi Stephan,
I'm lazy bastard, so my eye splices are simply glued just one end is cut at angle to be able to form some sort of "tear shape".
For 0,3mm, 0,4mm or 0,5mm ropes it's ok... hardly you can see the joint... you will need big magnification glass
If rope is served... and I need to do eye splice I'm doing the same, cut one end at angle and form eye, CA glue... and eye splice done.
...same story with blocks stropping (served or not). I'm cutting desire length of the rope for strop, micro drop of CA glue and connecting two ends to have a loop.
Most of the time I'm hiding the joint under the seizing
Splicing it's another art in our hobby... but I'm finding this to be reasonable only with thicker diameter of ropes.
Other then that I'm cheating
@Ondras71 - would you be so kind and drop the link for website with Batavia photos. Once I found nice gallery... and I've lost the link and couldn't find it back after some time.
Cheers,
Matt
I'm lazy bastard, so my eye splices are simply glued
 just one end is cut at angle to be able to form some sort of "tear shape".
For 0,3mm, 0,4mm or 0,5mm ropes it's ok... hardly you can see the joint... you will need big magnification glass
If rope is served... and I need to do eye splice I'm doing the same, cut one end at angle and form eye, CA glue... and eye splice done.
...same story with blocks stropping (served or not). I'm cutting desire length of the rope for strop, micro drop of CA glue and connecting two ends to have a loop.
Most of the time I'm hiding the joint under the seizing
Splicing it's another art in our hobby... but I'm finding this to be reasonable only with thicker diameter of ropes.
Other then that I'm cheating

@Ondras71 - would you be so kind and drop the link for website with Batavia photos. Once I found nice gallery... and I've lost the link and couldn't find it back after some time.
Cheers,
Matt
- Joined
- Aug 8, 2019
- Messages
- 5,584
- Points
- 738

I already thought so. Because I study your pictures and couldn't find the joint or the thicker parts where they are joint.Hi Stephan,
I'm lazy bastard, so my eye splices are simply gluedjust one end is cut at angle to be able to form some sort of "tear shape".
For 0,3mm, 0,4mm or 0,5mm ropes it's ok... hardly you can see the joint... you will need big magnification glass
If rope is served... and I need to do eye splice I'm doing the same, cut one end at angle and form eye, CA glue... and eye splice done.
...same story with blocks stropping (served or not). I'm cutting desire length of the rope for strop, micro drop of CA glue and connecting two ends to have a loop.
Most of the time I'm hiding the joint under the seizing
Splicing it's another art in our hobby... but I'm finding this to be reasonable only with thicker diameter of ropes.
Other then that I'm cheating
@Ondras71 - would you be so kind and drop the link for website with Batavia photos. Once I found nice gallery... and I've lost the link and couldn't find it back after some time.
Cheers,
Matt
But a good idea, so small, nobody can tell the difference. I follow your way on the smal parts. The bigger ropes will be correct to show off.
Don't tell anyone......

- Joined
- Aug 8, 2019
- Messages
- 5,584
- Points
- 738

Everybody thanks for al the likes that I got the past days 
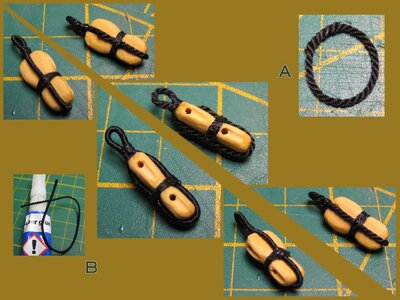
Rope that is backed in the oven works better than rope that is backed with a heat gun (paint stripper)
The sand colour rope before was done with a paint stripper.
This rope below (black 1 mm) is backed in the oven and the shape is perfect when unravelled.
First try, just one mistake the diameter of the grommet or the length of the rope was a little to short.
But it was practise for the right scale of the main mast. The block is also incorrect mounted.
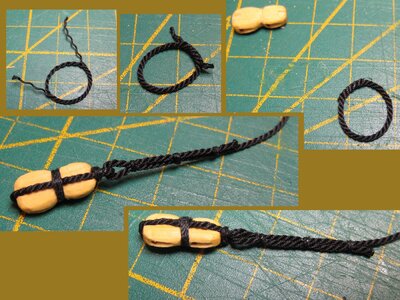
Next try, is include serving.
The blacks will change colour to, I think dark brown. The boxwood is to light. Ecoline of Talens seems to me the rigt product to paint al the blocks on the ship in the same colour. Because the blocks that I use are al of different kind of wood (boxwood, pear, cherry and nut). I don't like to throw away stuff/scratch.
Rope that is backed in the oven works better than rope that is backed with a heat gun (paint stripper)
The sand colour rope before was done with a paint stripper.
This rope below (black 1 mm) is backed in the oven and the shape is perfect when unravelled.
First try, just one mistake the diameter of the grommet or the length of the rope was a little to short.
But it was practise for the right scale of the main mast. The block is also incorrect mounted.

Next try, is include serving.
The blacks will change colour to, I think dark brown. The boxwood is to light. Ecoline of Talens seems to me the rigt product to paint al the blocks on the ship in the same colour. Because the blocks that I use are al of different kind of wood (boxwood, pear, cherry and nut). I don't like to throw away stuff/scratch.
Last edited:
- Joined
- Feb 22, 2021
- Messages
- 130
- Points
- 253

Nicely done 
...but this uniform black color of the ropes... it's just sooooo black

You've mentioned that you very using same color of the ropes earlier on the model so you have to continue.
Also you said that for the next model you'll go with tarred and worn look so I'll hold you to that
Good luck with other ropes
By the way.... If you have some major or nasty glue mess on the rope you can tone down the shine with black weathering pigment
...but this uniform black color of the ropes... it's just sooooo black

You've mentioned that you very using same color of the ropes earlier on the model so you have to continue.
Also you said that for the next model you'll go with tarred and worn look so I'll hold you to that
Good luck with other ropes
By the way.... If you have some major or nasty glue mess on the rope you can tone down the shine with black weathering pigment
- Joined
- Aug 8, 2019
- Messages
- 5,584
- Points
- 738

Today I redone my serving tool.
old one
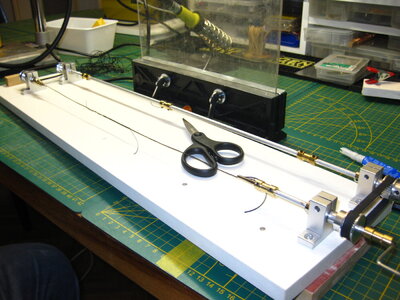
The problem with this one was that I couldn't tension the rope tight enough through the crocodile beaks. Sometimes they let go of the rope or the tension drops.
The new one works better and I have place to install an electric motor. And eventually a automatic rope feed.
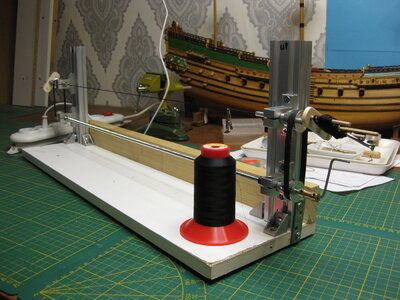
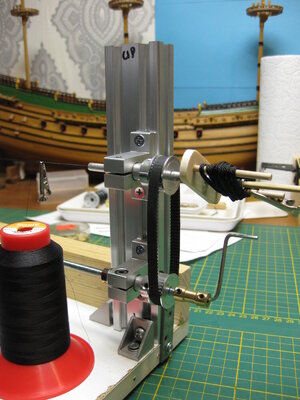
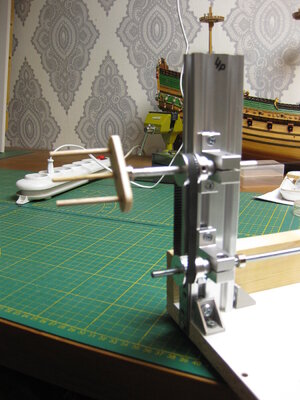
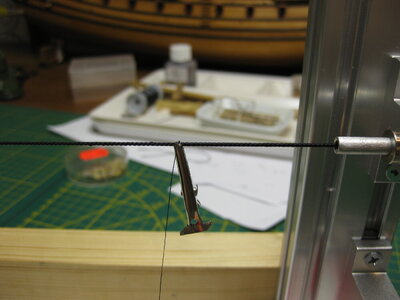
old one

The problem with this one was that I couldn't tension the rope tight enough through the crocodile beaks. Sometimes they let go of the rope or the tension drops.
The new one works better and I have place to install an electric motor. And eventually a automatic rope feed.


Hello Steff. Very nicely made wrapped and unwrapped blocks!! 
As Mati suggested, here is a link to photos of a replica of Batavia. Informative ..
 www.modelships.de
And here I found an interactive tour on board Batavia ..

 www.360cities.net

As Mati suggested, here is a link to photos of a replica of Batavia. Informative ..
Photos replica VOC ship Batavia 1628
And here I found an interactive tour on board Batavia ..
On the deck of Batavia ship, Lelystad, the Netherlands 360 Panorama | 360Cities
360° panorama photo from Netherlands by Vil Muhametshin. Batavia was a ship of the Dutch East India Company (VOC). She was built in Amsterdam in 1628, ...
- Joined
- Aug 8, 2019
- Messages
- 5,584
- Points
- 738

It was a day work but I'm satisfy about the result. It is not my idea, just copy it from what I saw. I was always thinking to get such thing fishermen use to serve the top of their fishing rod. Looks similar to this tool. Yes and it works at the first try.
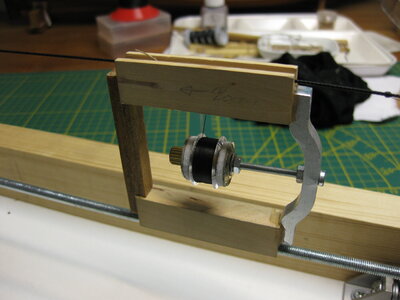
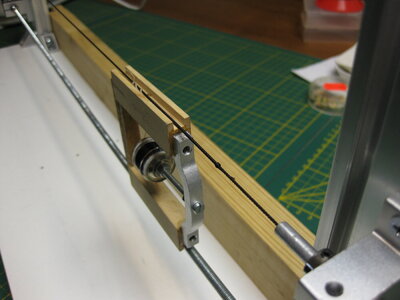
and a short video
I tried to connect a motor, but the threaded rod humps up and down, because it is not straight. I think a brass or aluminium pipe will do a better job.


and a short video
Very interesting posts and very good work - many thansk for showing these details and all the hints from members 


