I typically go where the momentum takes me...lol. I was really excited to build the Cazador, and once I got a head of steam, there was no turning back or slowing down. Make no mistake, two kits arrived during that time, and I wanted to jump ship (pun intended) on a few occasions. But I think the current build deserved all of my attention! That's because I know from experience, when you stop and start on projects, two things happen...you forget where you were and that kills efficiency and productivity, and also things get missed or forgotten. I guess some are better at multi tasking than others, but I find I personally am more productive to see something to the end before starting anything else. I still have a grandfather clock I haven't finished because I had stop to pack it up when we moved. The parts are still in boxes...sigh!Thank you Dean. I have seen from your build just how important continuity is. I have set myself a goal where I want to be at the end of year one and for that I need to get a move on. The whole of 2020 has just been a rollercoaster ride - especially with Bluenose. Bluenose has been hugely important (not only for the kit itself), but for the connection it has achieved between YuanQing and I. This augurs very well for future models.
-

Win a Free Custom Engraved Brass Coin!!!
As a way to introduce our brass coins to the community, we will raffle off a free coin during the month of August. Follow link ABOVE for instructions for entering.
-

PRE-ORDER SHIPS IN SCALE TODAY!
The beloved Ships in Scale Magazine is back and charting a new course for 2026!
Discover new skills, new techniques, and new inspirations in every issue.
NOTE THAT OUR FIRST ISSUE WILL BE JAN/FEB 2026
You are using an out of date browser. It may not display this or other websites correctly.
You should upgrade or use an alternative browser.
You should upgrade or use an alternative browser.
VOC SPIEGELRETOURSCHIP BATAVIA 1628 - KOLDERSTOK 1:72
- Thread starter Heinrich
- Start date
- Watchers 64
-
- Tags
- batavia kolderstok
- Joined
- Jan 9, 2020
- Messages
- 10,566
- Points
- 938

Hello Everyone
Despite of a few harsh reminders of the reality of the Model Shipbuilding Industry, I continued unabated and unperturbed with the Haarlem. As you may recall from the last posting, I started the planking of the galleon.
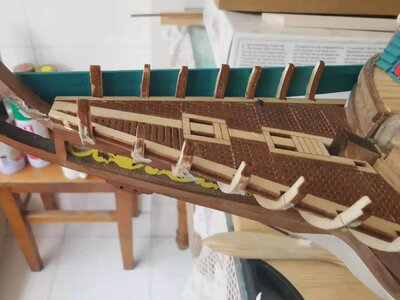
The Starboard side completed.
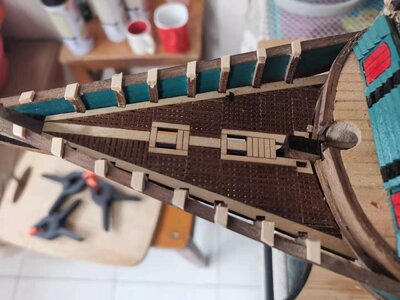
Both sides are done! Normally the top railing that now needs to go on, gets mounted on top of the "galleon bulkheads", but I wanted more purchase for the top railing. I thus filed those tops flat and replaced them with small wooden blocks of the correct height. With that done, it was now time to do the weathering of the galleon.
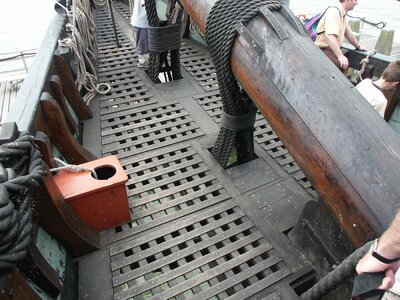
In a perfect world, this was the kind of weathered effect (maybe slightly more severe) I was trying to achieve.
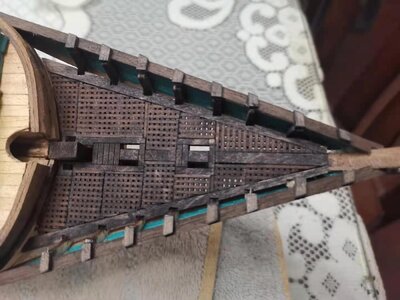
Very happy with how that turned out!
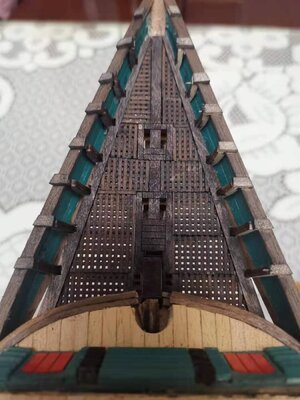
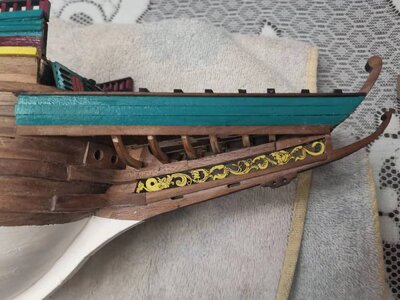
And the exterior view.
Thank you all for watching and following. Until next time keep well and take care.
Heinrich
Despite of a few harsh reminders of the reality of the Model Shipbuilding Industry, I continued unabated and unperturbed with the Haarlem. As you may recall from the last posting, I started the planking of the galleon.

The Starboard side completed.

Both sides are done! Normally the top railing that now needs to go on, gets mounted on top of the "galleon bulkheads", but I wanted more purchase for the top railing. I thus filed those tops flat and replaced them with small wooden blocks of the correct height. With that done, it was now time to do the weathering of the galleon.

In a perfect world, this was the kind of weathered effect (maybe slightly more severe) I was trying to achieve.

Very happy with how that turned out!


And the exterior view.
Thank you all for watching and following. Until next time keep well and take care.
Heinrich
You have every right to be happy Heinrich, looks great
Wonderful job Heinrich! She is becoming a real beauty!
- Joined
- Jan 9, 2020
- Messages
- 10,566
- Points
- 938

@DonRobinson Thanks Don! Those heavily curved top railings are next and that is going to be a real challenge. 
- Joined
- Jan 9, 2020
- Messages
- 10,566
- Points
- 938

@dockattner Thank you very much, Paul! As you have gathered by now, the Dutch ships were not built in a very planned or co-ordinated way. That is probably why I enjoy building her so much! 

She looks great Heinrich! Awesome job!Hello Everyone
Despite of a few harsh reminders of the reality of the Model Shipbuilding Industry, I continued unabated and unperturbed with the Haarlem. As you may recall from the last posting, I started the planking of the galleon.
View attachment 208944
The Starboard side completed.
View attachment 208945
Both sides are done! Normally the top railing that now needs to go on, gets mounted on top of the "galleon bulkheads", but I wanted more purchase for the top railing. I thus filed those tops flat and replaced them with small wooden blocks of the correct height. With that done, it was now time to do the weathering of the galleon.
View attachment 208950
In a perfect world, this was the kind of weathered effect (maybe slightly more severe) I was trying to achieve.
View attachment 208951
Very happy with how that turned out!
View attachment 208956
View attachment 208957
And the exterior view.
Thank you all for watching and following. Until next time keep well and take care.
Heinrich
I would suggest adding the belaying pins and boards (as well as anything else needed in there) prior to putting the bow sprit in, as it will be harder to get in there at that point!Hello Everyone
Despite of a few harsh reminders of the reality of the Model Shipbuilding Industry, I continued unabated and unperturbed with the Haarlem. As you may recall from the last posting, I started the planking of the galleon.
View attachment 208944
The Starboard side completed.
View attachment 208945
Both sides are done! Normally the top railing that now needs to go on, gets mounted on top of the "galleon bulkheads", but I wanted more purchase for the top railing. I thus filed those tops flat and replaced them with small wooden blocks of the correct height. With that done, it was now time to do the weathering of the galleon.
View attachment 208950
In a perfect world, this was the kind of weathered effect (maybe slightly more severe) I was trying to achieve.
View attachment 208951
Very happy with how that turned out!
View attachment 208956
View attachment 208957
And the exterior view.
Thank you all for watching and following. Until next time keep well and take care.
Heinrich
That looks fantastic, very nice job.
Jan
Jan
- Joined
- Jan 9, 2020
- Messages
- 10,566
- Points
- 938

- Joined
- Jan 9, 2020
- Messages
- 10,566
- Points
- 938

@Pathfinder65 Thank you Jan! Finishing up that area is next on the agenda.
Lovely scroll work! Is it part of the kit? Thanks.Hello Everyone
Despite of a few harsh reminders of the reality of the Model Shipbuilding Industry, I continued unabated and unperturbed with the Haarlem. As you may recall from the last posting, I started the planking of the galleon.
View attachment 208944
The Starboard side completed.
View attachment 208945
Both sides are done! Normally the top railing that now needs to go on, gets mounted on top of the "galleon bulkheads", but I wanted more purchase for the top railing. I thus filed those tops flat and replaced them with small wooden blocks of the correct height. With that done, it was now time to do the weathering of the galleon.
View attachment 208950
In a perfect world, this was the kind of weathered effect (maybe slightly more severe) I was trying to achieve.
View attachment 208951
Very happy with how that turned out!
View attachment 208956
View attachment 208957
And the exterior view.
Thank you all for watching and following. Until next time keep well and take care.
Heinrich
- Joined
- Jan 9, 2020
- Messages
- 10,566
- Points
- 938

Hi Gennaro. Yes, it is part of the kit. It does indeed look good, doesn't it! Kudos to Hans from @Kolderstok.
Have just looked over your work from last 2 months. Looking fantastic. Can't wait to get back into my Batavia. All packed up for a while.
Great work.
Great work.
- Joined
- Jan 9, 2020
- Messages
- 10,566
- Points
- 938

- Joined
- Jan 9, 2020
- Messages
- 10,566
- Points
- 938

Hello everyone. Further progress on the Haarlem.
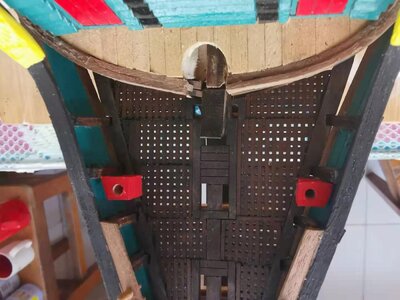
Toilets (gemakken in Dutch) for the galleon made and installed. When I sent my mother - she is 84 and following along - the picture, she wanted to know if it was done just like this - "so out in the open! ). The rope that was used as toilet paper, still needs to be added.
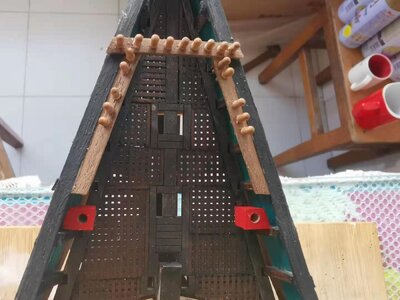
Belaying racks and pins for the galleon installed. On the rack in front, the really initiated will spot a deviation from the plans. I was supposed to use only 9 belaying pins, but symmetrically, that did not appeal to me - thus I used 10.
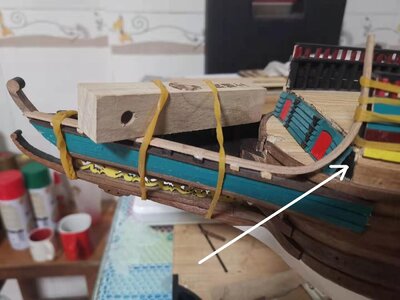
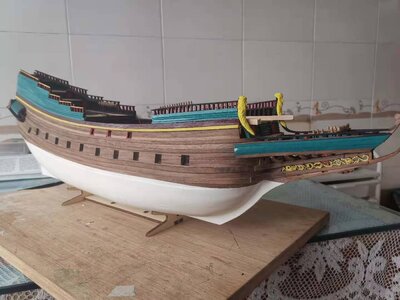
Bending the walnut for the top railing of the galleon was not an easy exercise - even with a plank bender. As each builder's curvature on the bow will vary to some extent, you can't possibly know if you have done it right, until the ornaments are fitted. Only then will you see if your curvature was correct. You will also notice that I cut away too much of my hull planking at the luizenplecht area leaving me now with an unsightly gap. Here, I still need to figure out a plan.
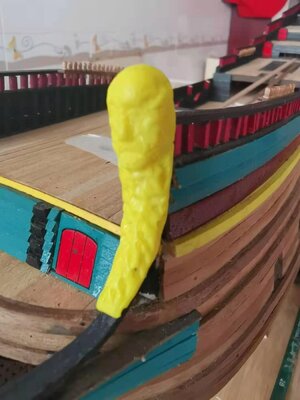
Luckily grumpy old man #1 fitted perfectly. At this stage of the build they have just received their primary colour - wash will be added later.
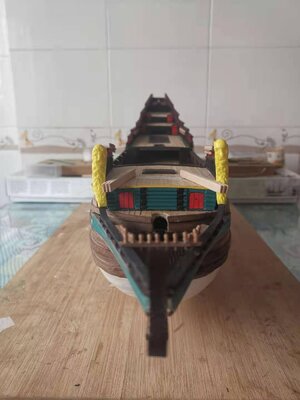
And now the Grumpy Old Men picture is completed! The two catheads have had the slots for their sheaves cut, but are just lying loose on the foredeck at this stage. Onwards with the belaying racks and pins.
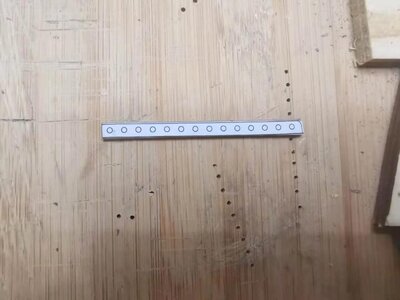
From the plans, I cut the drawing in question and then glue that to the piece of the wood is that is to become the rack. Photo copying plans have given me one or two nasty surprises in the past. So, apologies for your plans @Kolderstok Hans - after I'm done building, they don't like that good anymore.
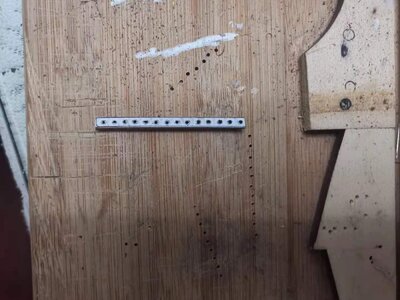
I first drilled a pilot hole with a hand drill before enlarging the holes in a further two stages. Even then - the walnut was susceptible to cracking down the middle.
And here are the results:
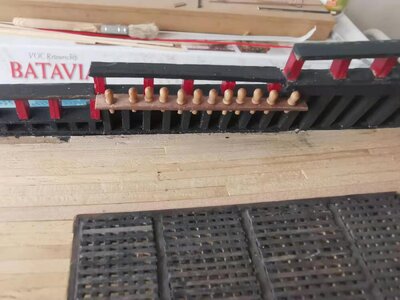
On the half-deck starboard side.
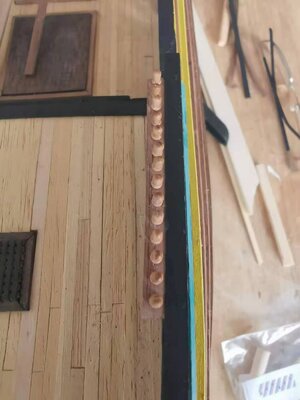
Forecastle Port Side
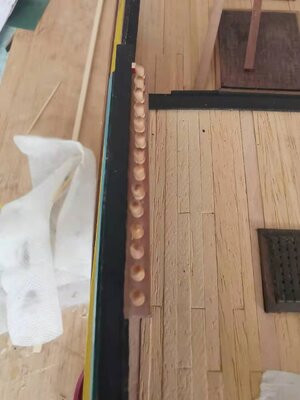
Forecastle starboard side.
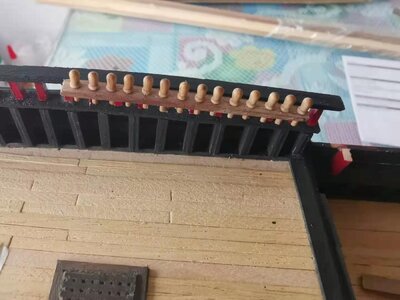
Forecastle - starboard side viewed from the side.
And lastly, a few pictures of the overall view:
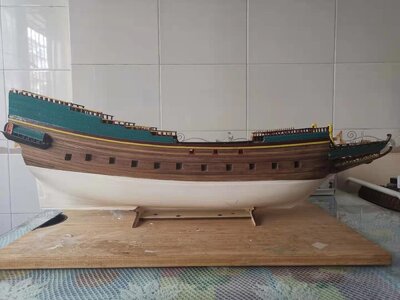
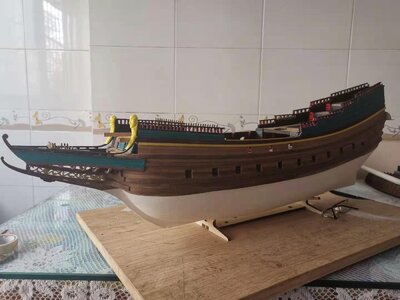
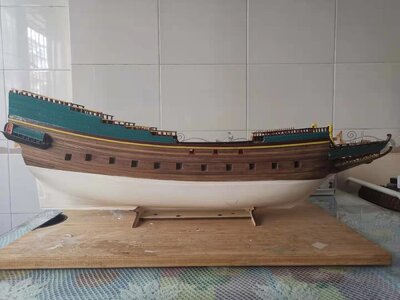
And that my dear friends, conclude my news for today. Thank you all for watching, following, commenting, advising, or just being here - it is all apprecaited and valued.
Take care out there and stay safe.
Kind regards -Heinrich

Toilets (gemakken in Dutch) for the galleon made and installed. When I sent my mother - she is 84 and following along - the picture, she wanted to know if it was done just like this - "so out in the open!

Belaying racks and pins for the galleon installed. On the rack in front, the really initiated will spot a deviation from the plans. I was supposed to use only 9 belaying pins, but symmetrically, that did not appeal to me - thus I used 10.

Bending the walnut for the top railing of the galleon was not an easy exercise - even with a plank bender. As each builder's curvature on the bow will vary to some extent, you can't possibly know if you have done it right, until the ornaments are fitted. Only then will you see if your curvature was correct. You will also notice that I cut away too much of my hull planking at the luizenplecht area leaving me now with an unsightly gap. Here, I still need to figure out a plan.

Luckily grumpy old man #1 fitted perfectly. At this stage of the build they have just received their primary colour - wash will be added later.

And now the Grumpy Old Men picture is completed! The two catheads have had the slots for their sheaves cut, but are just lying loose on the foredeck at this stage. Onwards with the belaying racks and pins.

From the plans, I cut the drawing in question and then glue that to the piece of the wood is that is to become the rack. Photo copying plans have given me one or two nasty surprises in the past. So, apologies for your plans @Kolderstok Hans - after I'm done building, they don't like that good anymore.

I first drilled a pilot hole with a hand drill before enlarging the holes in a further two stages. Even then - the walnut was susceptible to cracking down the middle.
And here are the results:

On the half-deck starboard side.

Forecastle Port Side

Forecastle starboard side.

Forecastle - starboard side viewed from the side.
And lastly, a few pictures of the overall view:


And that my dear friends, conclude my news for today. Thank you all for watching, following, commenting, advising, or just being here - it is all apprecaited and valued.
Take care out there and stay safe.
Kind regards -Heinrich
Hi Heinrich,
That is very nice progress. Could the tiny gap shown by your arrow could be covered with a bit of scrollwork complimenting the figure?
Jan
That is very nice progress. Could the tiny gap shown by your arrow could be covered with a bit of scrollwork complimenting the figure?
Jan
- Joined
- Jan 9, 2020
- Messages
- 10,566
- Points
- 938

@Pathfinder65 Hello Jan. That is an interesting possibility that I have not thought of. It is certainly an idea worth investigating. 


