-

Win a Free Custom Engraved Brass Coin!!!
As a way to introduce our brass coins to the community, we will raffle off a free coin during the month of August. Follow link ABOVE for instructions for entering.
-

PRE-ORDER SHIPS IN SCALE TODAY!
The beloved Ships in Scale Magazine is back and charting a new course for 2026!
Discover new skills, new techniques, and new inspirations in every issue.
NOTE THAT OUR FIRST ISSUE WILL BE JAN/FEB 2026
You are using an out of date browser. It may not display this or other websites correctly.
You should upgrade or use an alternative browser.
You should upgrade or use an alternative browser.
VOC SPIEGELRETOURSCHIP BATAVIA 1628 - KOLDERSTOK 1:72
- Thread starter Heinrich
- Start date
- Watchers 64
-
- Tags
- batavia kolderstok
- Joined
- Jan 9, 2020
- Messages
- 10,566
- Points
- 938

Hello All
Normally I only post when I have finished a certain section, but sticking to that might mean a loooong silence. So here is a small update.
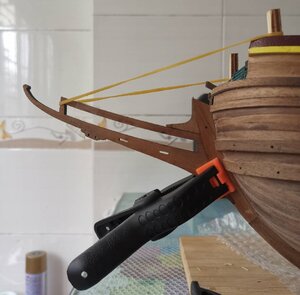
I fitted the beakhead "galjoen" to the hull. This was straightforward and wooden dowels were used as an extra means of security to ensure the beakhead stays put.
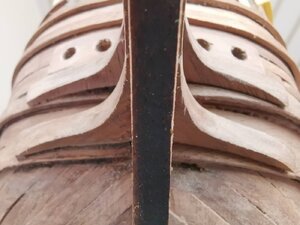
The beakhead cheeks "Slooiknieen" were fitted and filed to follow the shape of the hull. This was followed by the fitment of the anchor hawses which go directly above the cheeks. Seeing that these pieces of wood are 10mm wide and 3mm thick, I filed them hollow at the rear in order to get them to follow the curvature of the hull. In this picture the holes still needed to be drilled through to the hull.
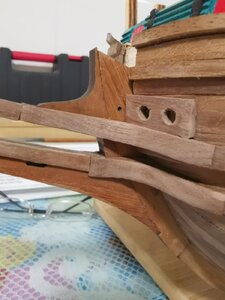
The cheeks then had to be lengthened to blend in with the lines of the beakhead and ensure that there is no abrupt joint between the beakhead and the cheeks.
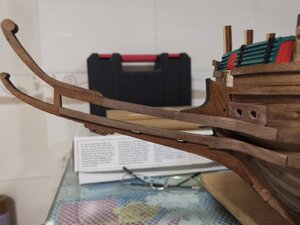
Beakhead assembly viewed from the port side.
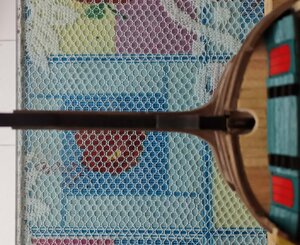
From the top.
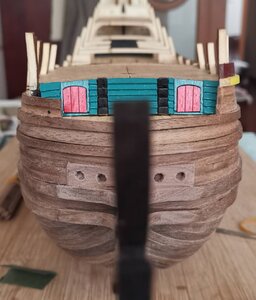
And from the front.
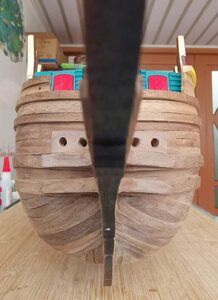
View from the front after the anchor hawses' holes had been drilled through the hull.
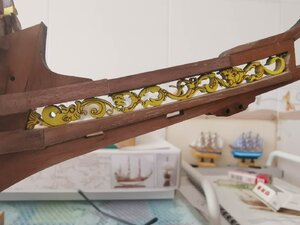
Lastly I made a start with the roosters in the galjoen. When I told Hans this, he wished me "success" - now I know why. So far I haven't broken anything or wasted anything, but progress is slow at best ...
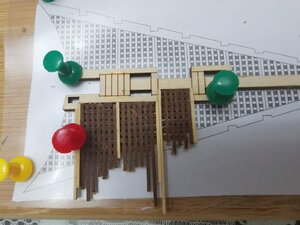
Luckily we have a public holiday on Thursday so maybe I can finish the roosters.
Keep well everyone and stay safe.
Heinrich
Normally I only post when I have finished a certain section, but sticking to that might mean a loooong silence. So here is a small update.

I fitted the beakhead "galjoen" to the hull. This was straightforward and wooden dowels were used as an extra means of security to ensure the beakhead stays put.

The beakhead cheeks "Slooiknieen" were fitted and filed to follow the shape of the hull. This was followed by the fitment of the anchor hawses which go directly above the cheeks. Seeing that these pieces of wood are 10mm wide and 3mm thick, I filed them hollow at the rear in order to get them to follow the curvature of the hull. In this picture the holes still needed to be drilled through to the hull.

The cheeks then had to be lengthened to blend in with the lines of the beakhead and ensure that there is no abrupt joint between the beakhead and the cheeks.

Beakhead assembly viewed from the port side.

From the top.

And from the front.

View from the front after the anchor hawses' holes had been drilled through the hull.
Lastly I made a start with the roosters in the galjoen. When I told Hans this, he wished me "success" - now I know why. So far I haven't broken anything or wasted anything, but progress is slow at best ...

Luckily we have a public holiday on Thursday so maybe I can finish the roosters.
Keep well everyone and stay safe.
Heinrich
- Joined
- Jul 9, 2019
- Messages
- 497
- Points
- 323

Very nice work, I'm not that far yet but find the grates a very fine (small) timber, I guess that is to maintain scale by Kolderstok?
- Joined
- Jan 9, 2020
- Messages
- 10,566
- Points
- 938

@Brewbrarian Hi Eric, thank you for the kind words. That is the Kolderstok beakhead  But bear in mind that it is already incredibly strong on the ship itself and there are still plenty of items that need to be added. They will all help to secure th whole beakhead assembly even further.
- Joined
- Jan 9, 2020
- Messages
- 10,566
- Points
- 938

Very nice indeed. Lots of patience needed to work on the little details.
Jan
Jan
- Joined
- Jan 9, 2020
- Messages
- 10,566
- Points
- 938

@Pathfinder65 Hi Jan! Patience is the name of the game - the problem is just that time is very limited at the moment - so it feels as if I am making almost no progress.
Just to give you an idea what the 3D printed one looks like. Probably would see more detail after painting.Just to take a little break from the gratings, I gave the Haarlem the Midas Touch!
View attachment 159411
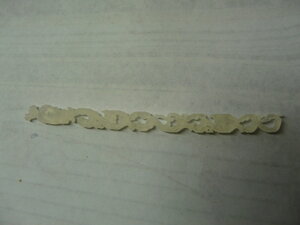
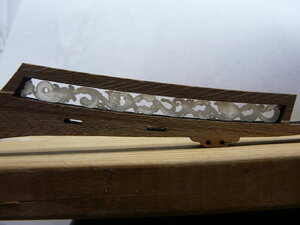
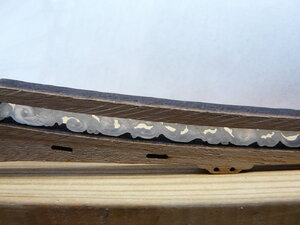
Last edited:
Gents, why not grap an exacto knive and carve from some pear or boxwood.
You can do it, just try it is fun to do.
You can do it, just try it is fun to do.
- Joined
- Jan 9, 2020
- Messages
- 10,566
- Points
- 938

That's great, look forward to seeing the 3D printed coat of arms!@frankieg Hi Frankie. That looks great! (My stern badge Coat of Arms is 3D printed so I'm looking forward to see what that will pan out like.) I am happy with the wooden one though!
- Joined
- Jan 9, 2020
- Messages
- 10,566
- Points
- 938

Hello Everyone
Time for a decent update. Yesterday I had the day off and had (by my slow standards) a very productive day. So to kick off this post just a status quo picture of where I am at the moment before work commenced.
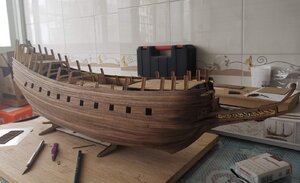
With my replenished wood supply from Kolderstok having arrived, it was time to complete the coloured wales on the starboard side. I have to point out that me having to order extra wood is by no means an oversight on Kolderstok's part. I have purposely used the 4mm walnut strips for certain parts of the build where I should have used basswood.
With that done it was time to remove the protruding bulkheads from the deck.
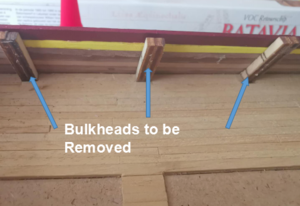
During the installation of the wales, great care was taken not to apply glue to these parts of the bulkheads; so removing them was a simple task by using a pair of pliers to snap them off at the base. Even so, it was quite strange breaking something on purpose after you have taken such great care during the building process not to.
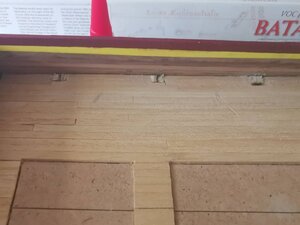
The remaining stubs were simply sanded flat to deck level. Next the waterway was constructed from two 4mm x 1mm slats glued squarely to each other and then painted black. These two strips were then glued into position on both sides.
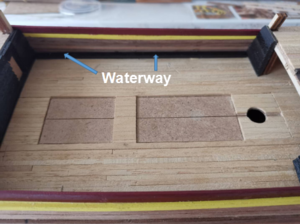
The waterway is indicated above. Also visible on this photo are the coloured (maroon and yellow) wales newly fitted to the starboard side.
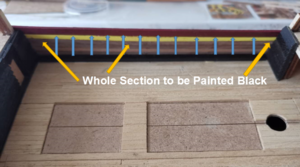
The idea now is to glue 2mm x 3mm strips (indicated by the blue arrows) on top of the waterway and against the inner sides of the wales to act as bracing and as a start for finishing off the interior part of the wales. I say "start" because these slats will have a horizontal 4mm plank glued on top of them with more vertical bracing on top of that. Finally, the whole assembly will be finished off with another horizontal plank on top of those. If it sounds complicated; it is. Finally the sides will be painted black on the inside.
However, I am still contemplating on where to install my cannons and as this deck remains a candidate, great care will have to be taken with the positioning of the vertical slats. Hence, I decided to keep that for a later stage.
Next I finally placed the half deck into position and glued the grating in its cut-out. The gratings: Trial and Error - far more "error" than "trial". However, I finally had something that I was happy. I stained it with the Dark Oak water-based stain that Hans has so kindly provided me with Free of Charge and was pleasantly surprised at the result. At first I thought it was far too dark, but seeing it on the ship - especially after I had planked the Half Deck - changed my mind completely.
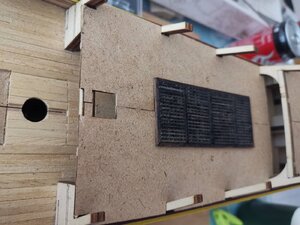
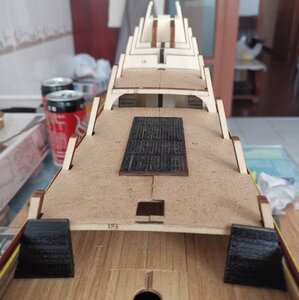
Half deck with grating and the two black half-walls are installed. As can be seen these are also constructed of overlapping planks in clinker-style.
As it was not yet bed-time, I placed the walnut border around the front deck cut-out and started to commence with the planking.
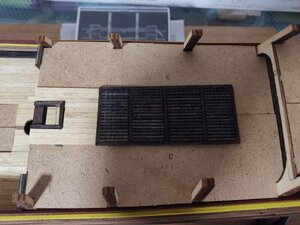
As I was very pleased at how this turned out, I continued planking ...
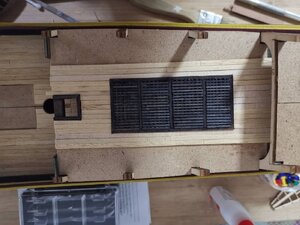
And when dawn broke this morning ...
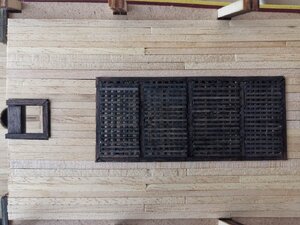
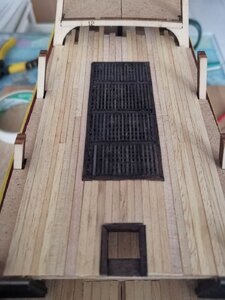
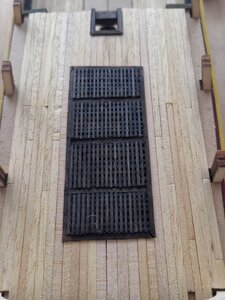
Voila !!!
Thank you all for following the build, all your positive comments and suggestions. Hans says his kits have a "gripping factor". Yesterday, for the first time - in a very long time - I lost myself in this build and became fully immersed in what I was doing. A rare, and most pleasant feeling.
Keep well everyone and take care.
Friendly greetings - Heinrich
Time for a decent update. Yesterday I had the day off and had (by my slow standards) a very productive day. So to kick off this post just a status quo picture of where I am at the moment before work commenced.

With my replenished wood supply from Kolderstok having arrived, it was time to complete the coloured wales on the starboard side. I have to point out that me having to order extra wood is by no means an oversight on Kolderstok's part. I have purposely used the 4mm walnut strips for certain parts of the build where I should have used basswood.
With that done it was time to remove the protruding bulkheads from the deck.

During the installation of the wales, great care was taken not to apply glue to these parts of the bulkheads; so removing them was a simple task by using a pair of pliers to snap them off at the base. Even so, it was quite strange breaking something on purpose after you have taken such great care during the building process not to.

The remaining stubs were simply sanded flat to deck level. Next the waterway was constructed from two 4mm x 1mm slats glued squarely to each other and then painted black. These two strips were then glued into position on both sides.

The waterway is indicated above. Also visible on this photo are the coloured (maroon and yellow) wales newly fitted to the starboard side.

The idea now is to glue 2mm x 3mm strips (indicated by the blue arrows) on top of the waterway and against the inner sides of the wales to act as bracing and as a start for finishing off the interior part of the wales. I say "start" because these slats will have a horizontal 4mm plank glued on top of them with more vertical bracing on top of that. Finally, the whole assembly will be finished off with another horizontal plank on top of those. If it sounds complicated; it is.
However, I am still contemplating on where to install my cannons and as this deck remains a candidate, great care will have to be taken with the positioning of the vertical slats. Hence, I decided to keep that for a later stage.
Next I finally placed the half deck into position and glued the grating in its cut-out. The gratings: Trial and Error - far more "error" than "trial". However, I finally had something that I was happy. I stained it with the Dark Oak water-based stain that Hans has so kindly provided me with Free of Charge and was pleasantly surprised at the result. At first I thought it was far too dark, but seeing it on the ship - especially after I had planked the Half Deck - changed my mind completely.


Half deck with grating and the two black half-walls are installed. As can be seen these are also constructed of overlapping planks in clinker-style.
As it was not yet bed-time, I placed the walnut border around the front deck cut-out and started to commence with the planking.

As I was very pleased at how this turned out, I continued planking ...

And when dawn broke this morning ...


Voila !!!
Thank you all for following the build, all your positive comments and suggestions. Hans says his kits have a "gripping factor". Yesterday, for the first time - in a very long time - I lost myself in this build and became fully immersed in what I was doing. A rare, and most pleasant feeling.
Keep well everyone and take care.
Friendly greetings - Heinrich
Very nice Heinrich,
Additional guns I would place below the halfdeck and maybe in the fore castle.
How much extra guns do you need?
Additional guns I would place below the halfdeck and maybe in the fore castle.
How much extra guns do you need?
Splendid Heinrich, quite the accomplishment for a “day off”.
Jan
Jan
- Joined
- Jan 9, 2020
- Messages
- 10,566
- Points
- 938

@Pathfinder65 Thank you Jan. At last I felt as if I had made some progress!
Beautiful work, great pictures, really helps with the explanations.


