Hatch cover Handles.
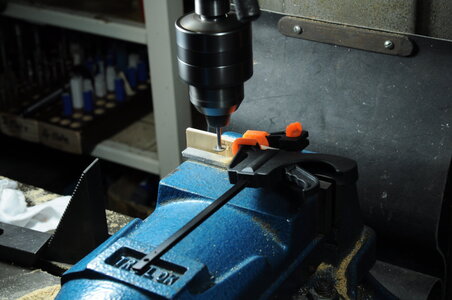
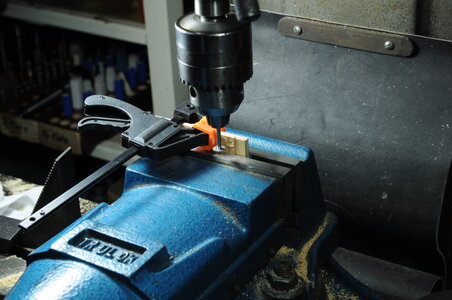
The hatch cover handles started by cutting a small groove using an even smaller woodruff cutter than before to rough out the width and length, reusing the jig made for making the recess.
.JPG")
One little trick to find out when the cutter is getting close to touching the job is to use a piece of paper, as you slowly move the job towards the cutter it will start to grab the paper then you know you are getting close.
.JPG")
I set the stops on the mill to give me a repeated slot length, this was done with a bit of back and forth try a bit and check taking my time, even though I had a couple of spare pieces I didn’t want to stuff any up.

Next thing was to get some brass strip that was 1.3mm x .5mm something I didn’t have in stock, though I had some Brass sheet .5mm thick, all I had to do is cut some strips 1.3mm wide. I know from previous experience that cutting such thin strips is problematic I therefore decided to use one of the zero clearance saw table inserts I bought with the saw.

Using a .5mm wide slitting blade I cut through the insert until I got to a height I was happy with then removed the insert and carefully added a very small amount of clearance so the slitting blade would not rub.
.JPG")
When it came to cutting the .5mm sheet I stuck it to an old piece of ply wood using double sided tape to provide some support, set the required thickness and cut a few strips.

After cleaning up the double sided tape which was by now getting quite ordinary because of the cutting oil I used when cutting, I started cutting it into the required lengths.
To do this I used 2 pieces of scrap to trap and support the strip while I cut it, this preformed 2 functions one to prevent the piece from deforming the other to prevent it flying across the room at the end of cut, these 2 things I have learnt the hard way in the past.

.JPG")
.JPG")
Now I had the handles made and having roughly cut the slots on the mill for them to sit in I needed to finish off the slots, after making a bit of a mess of the first one, I then had a look around the workshop trying to find a suitable tool with no luck. Then I decided to modify a scalpel blade and turn it into a little chisel, this was quite easily done using a bench grinder, being careful not to overheat the blade.
.JPG")
.JPG")
Then the process of cutting all of the slots to size began, this took me quite a while as I wanted a good fit for all of them.
.JPG")
.JPG")
.JPG")
Once all the slots were finished off I began gluing in the handles using Titebond 3.
.JPG")

There are a couple of workers that came along in their Sunday best for a photo in the ship yard, they are quite happy with the progress.
")

At the end I am quite happy with the end result even though the handles seemed like a bit of an anti climax, what seems like a lot of work for little reward.
Still some more work to do on the Hatch coaming, and eventually painting blue.
Next up Fore room Hatch coaming and covers.
That’s it for the moment, thanks for looking in and stay safe.
Cheers,
Stephen.


")
.JPG")


.JPG")
.JPG")
.JPG")

.JPG")
.JPG")


.JPG")
.JPG")
.JPG")
.JPG")


.JPG")


.JPG")

.JPG")
.JPG")
.JPG")