Xebec of 1753 - Plank on Bulkhead Kit by Amati in 1/60 Scale - Build by Smithy

From the frequency of the updates you might think that Coquin is holding my interest. However, it wasn't delight that brought me to the playbench, WORKbench today but sheer bloody-mindedness. I have a feeling that if I take a day off, it will swiftly turn into an indefinite postponement and yet another unfinished project. Must. Keep. Going.

My reluctance to spend even a single week doing more or less the same thing 40 times over is something of a fatal flaw for a modeller of wooden boats. It's now clear to me that at least two of the models in my collection will never be built by me even if I live to a thousand. I have La Real, the Christian flagship at Lepanto, which is a galley with thousands of oars, seats etc. That's a Dusek kit. And there's Le Requin from ZHL which is a 1/48 scale plank on FRAME xebec kit with zillions of frames to build.
P3310037.JPG

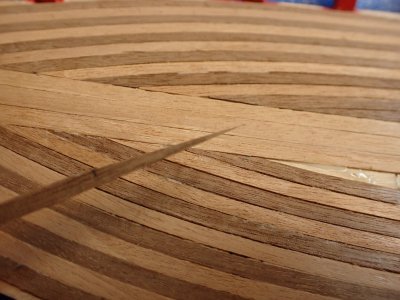
There was one delightful moment within the drudgery. That dark plank at the top of the picture fitted so well without glue or clamps (just the weight of the scalpel to hold it in place) that I had to take its portrait. Most of the strakes fit a little less well and it's only the hot setting technique that makes them so easy, or perhaps even possible to tack into place.
P3310039.JPG

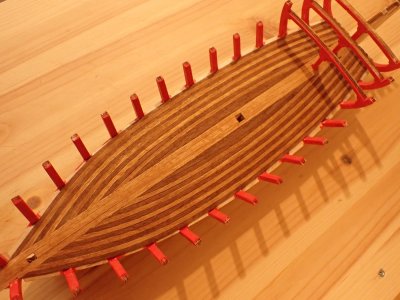
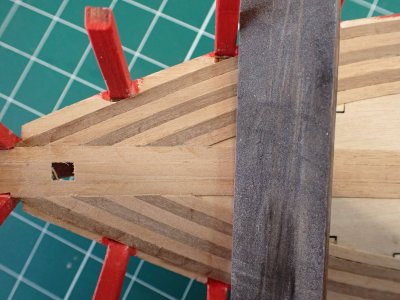
I have about half of the curved pieces laid now. I think the pattern will work aesthetically and emphasise the fish-like shape of the boat.
P3310040.JPG

As I expected, the plank ends have slipped a little out of synchrony, though without the straight edge wedged in the bulkheads, it's not too obvious. Remember, the many gratings and some massive deck mounted structures will hide three quarters of all this.
P3310041.JPG

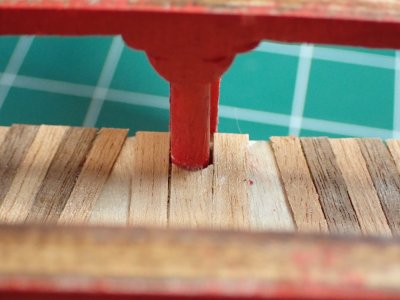
I've run out of room aft and will now have to make joints at both ends of the curved pieces. This will slow me down a bit but while the aft ends of the planks continue to terminate under the quarterdeck, they will be impossible to see clearly, so they don't need to be very good. Nor did the planks you see in the photo - hence the gaps. I'll fill the space with barrels if the pattern really falls apart. Come to think of it, I'll fill the space with barrels anyway. Yo-ho-ho and a big saving of effort!
 
Last edited:
P3310042.JPG

How's that for a sideways bend? It's more than 90 degrees over 70cm. Thin wood is the trick here.

P3310043.JPG

As I neared the centreline the plank ends became ridiculously sharp. The only way a shipwright would allow that would be if it was a thin cosmetic layer over the real deck planking. So that's exactly what this is - parquet flooring for the dances at the weekend.

P3310044.JPG

The best way to do a job that you don't like very much is to do it quickly. I've done that and then applied a quick drying coat of Tamiya clear acrylic varnish cut with their lacquer thinner. It won't be shiny on wood and it might seal and protect the finish while I work on top of it.

P3310046.JPG

What do you think of that then, comrades?
 
Last edited:
View attachment 511003

How's that for a sideways bend? It's more than 90 degrees over 70cm. Thin wood is the trick here.

View attachment 511004

As I neared the centreline the plank ends became ridiculously sharp. The only way a shipwright would allow that would be if it was a thin cosmetic layer over the real deck planking. So that's exactly what this is - parquet flooring for the dances at the weekend.

View attachment 511005

The best way to do a job that you don't like very much is to do it quickly. I've done that and then applied a quick drying coat of Tamiya clear acrylic varnish cut with their lacquer thinner. It won't be shiny on wood and it might seal and protect the finish while I work on top of it.

View attachment 511006

What do you think of that then, comrades?
Looks “racey” Smithy. ;) Nicely done.
 
I felt the urge for a little woodwork this morning and built the supporting structure for the quarterdeck.

P4060001.JPG

It is a simple step in the build. Three of the bulkheads were already in place, those double-decker ones with the red paint in the photo above. That left only three and a half to be attached. I knew where they would need attention to make them fit as well as the previous fourteen and I'd learned to paint them before fitting to the keel.

P4060003.JPG

As before I primed the plywood and painted the red by brush.

P4060002.JPG

Most of the filing to fit was done with hand tools but that half-frame forward of the transom needed a lot of shaping so I used this miniature disc sander in the Proxxon. I use a vacuum cleaner held between my legs to catch the dust produced. I have a bigger, desk mounted disc sander but I like this one because of its flexibility in use and slow controlled cut. It's almost like using a light-sabre to carve those curving strokes.

P4060005.JPG

This time I didn't use the sub-deck as a jig to ensure the bulkheads were square. The sub-deck comes in two pieces split longitudinally and couldn't be relied on. It didn't even fit well and the instructions recommended cutting the deck to fit the bulkheads. I attached the bulkheads, went for a walk and glued and clamped the sub-deck on my return. I came close to gluing one of the frames into the slot for the mizzen mast but fortunately realised just in time. The slots are the same size and are a Murphy just waiting for the unwary.

I used clamps and weights instead of rubber bands this time and I think the contact between deck and framework was better than I'd managed on the main deck.

P4060004.JPG

And there he sits until teatime, looking very odd.

During today's session I retouched the scratched paintwork on the main deck and while doing so, realised that I need to add another plank of some kind to the outside of my artistic 'parquet dancefloor' to make a seal with the bulkheads. I'll call it the waterway.
 
Last edited:
Having two models in progress is really good for me. Even though I generally do something to one of them each day and write some sort of update, it feels like I’m taking time off and only working when I’m in the mood. A change is as good as a rest in this case. :)
 
View attachment 511003

How's that for a sideways bend? It's more than 90 degrees over 70cm. Thin wood is the trick here.

View attachment 511004

As I neared the centreline the plank ends became ridiculously sharp. The only way a shipwright would allow that would be if it was a thin cosmetic layer over the real deck planking. So that's exactly what this is - parquet flooring for the dances at the weekend.

View attachment 511005

The best way to do a job that you don't like very much is to do it quickly. I've done that and then applied a quick drying coat of Tamiya clear acrylic varnish cut with their lacquer thinner. It won't be shiny on wood and it might seal and protect the finish while I work on top of it.

View attachment 511006

What do you think of that then, comrades?
nice effect. congratulations.
 
Having two models in progress is really good for me. Even though I generally do something to one of them each day and write some sort of update, it feels like I’m taking time off and only working when I’m in the mood. A change is as good as a rest in this case. :)
I am only working on one build and I only seem to work on the boat when I am in the mood. If I had two boats on the go, that would definitely keep me out of trouble, but I don't have the room.
 
I am only working on one build and I only seem to work on the boat when I am in the mood. If I had two boats on the go, that would definitely keep me out of trouble, but I don't have the room.

I found that with only one, whether plastic or wooden, I'd become jaded going to the same thing day after day. I'm a butterfly, I need to flit from one thing to another. Ideally, and given a bigger flat, I'd have a boat in planking, another one at the rigging stage, an aircraft building and another one painting, a tank.... You get the idea. :D
 
More deck planking today and then a little surprise that needed a quick fix.

P4070008.JPG

In the last few days I've designed half a dozen strange patterns for the quarterdeck planks but when time came to cut wood, I elected for straight fore and aft planks. There was a gap between the two halves of the sub-deck so I filled that with a square section strip of walnut which I'll probably scrape flat when the rest of the planks are laid.

I'd made it this far and was just about to pack up for the day when I glanced under the quarterdeck.

P4070006.JPG

That was the little surprise. There's no rear bulkhead. I'm fairly certain that empty space and bare plywood would be visible, and would spoil the illusion like the fake lift/elevator in the Truman Show. Remember that? I considered simply painting the distant, solid bulkhead but the main deck would still seem to end in mid-air.

P4070007.JPG

It was the work of a moment to make a screen to block off the space.

P4070009.JPG

I invented a couple of doors. One leads to the pirate Captain's cabin and the other compartment is where he keeps his beautiful captives while waiting for the good guys to come and slaughter all of the pirates while rescuing and falling in love with the beautiful captives. I believe this was the correct procedure for dealing with beautiful captives.

P4070010.JPG

A splash of paint and a dab of drybrushing to bring out the detail and that will do. Remember, it will be in shadow when the hull is planked and will only be visible to those dedicated observers with torches. It's far from brilliant but much better than before so that's good enough.
 
Last edited:
P4080013.JPG

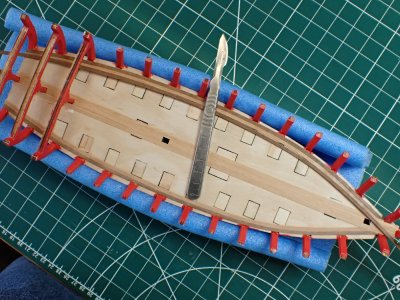
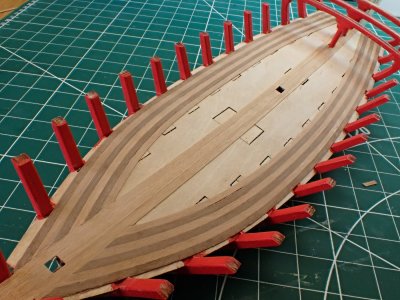
The deck is laid. Hurrah!

(I opened the quarterdeck where the gratings will go because they will light the area below.)

You know, since I decided to allow myself some generous working tolerances I'm a much happier modeller. :D

P4080012.JPG

I think the overall effect is still quite 'organic', sort of fishy or squid-like, you know?

Since the small pieces on the edge of the quarterdeck are so precariously attached, I'm going to leave Coquin alone for a while so that the glue can set really hard. There are similar 'little pieces of something interesting' required along the sides of the main deck before application of the finish, and then I can move on to the next phase, the hull.
 
View attachment 512190

The deck is laid. Hurrah!

(I opened the quarterdeck where the gratings will go because they will light the area below.)

You know, since I decided to allow myself some generous working tolerances I'm a much happier modeller. :D

View attachment 512189

I think the overall effect is still quite 'organic', sort of fishy or squid-like, you know?

Since the small pieces on the edge of the quarterdeck are so precariously attached, I'm going to leave Coquin alone for a while so that the glue can set really hard. There are similar 'little pieces of something interesting' required along the sides of the main deck before application of the finish, and then I can move on to the next phase, the hull.
Good evening Smithy. Lovely progress. What are the dimensions of your Xebec? Just out of interest I am keen to compare it with my Occre Cazador. Cheers Grant
 
Good evening Smithy. Lovely progress. What are the dimensions of your Xebec? Just out of interest I am keen to compare it with my Occre Cazador. Cheers Grant

According to Amati

Model scale1:60
Height. 51 cm.
Width. 13 cm.
Length. 28.35 inch

I wonder why it’s centimetres high and wide but inches long?
 
I'm having almost as much fun reading these posts as Smitty is having building the ship. I really like the somewhat free-wheeling approach. Very instructive descriptions.
 
Hello Smithy,
I just found your build thread. It seems I never find someone's thread from the beginning. I spent some time reading through the posts. You have a lot of great information throughout your thread. Your Xebec is looking great.

Bill
 
I'm having almost as much fun reading these posts as Smitty is having building the ship. I really like the somewhat free-wheeling approach. Very instructive descriptions.

Hello Smithy,
I just found your build thread. It seems I never find someone's thread from the beginning. I spent some time reading through the posts. You have a lot of great information throughout your thread. Your Xebec is looking great.

Bill

Here's a hearty welcome aboard the pirate ship Le Coquin, lads. You are wise to have signed up to follow because I do tend to flit backwards and forwards between the seas of the Enlightenment and the skies of WWII. That will be how you missed the thread Bill, it's been dormant while I worked on my 1940 Avro Anson. That plastic model is now paused because I woke in the night, crying aloud "Odd's bodkins and buckets of blood! The Xebec! I should have..."

It's quite a coincidence that two of you should have posted here at just about the same time that I was alarming the dog with my foul curses.

Technically, I haven't actually made a mistake. I followed the Amati instructions and did not fair the INSIDE of the bulwarks extensions to the bulkheads.

P3300035.JPG

Consequently the inside faces of those timbers are parallel to the centerline of the ship. If I had followed the suggested planking plan, this simplification would not have been significant, but I had to be clever, didn't I? Not clever enough though. I didn't realise that with my curving planks following the line of the deck edge, it's really necessary for the inside faces of the timberheads to be parallel to the hull, just like the real thing in fact.

I think I might be able to sand and chisel the plywood into shape without tearing the 0.5mm thick deck to pieces.

I hope that will leave enough wood to support the bulwarks planking. Remember that the outside of the bulkheads/timberheads will also need to be faired parallel to the deck edge! It will be easy midships, the bow will be the dangerous part.

I could just fill in the spaces with unusually shaped waterway pieces and hope no-one realises how I missed the opportunity to learn a bit about fairing the inside of the frames before tackling the plank on frame Le Requin next year. But as I'm building this model in part as a Xebec familiarisation exercise for Requin, that would make me a bit of a wuss, wouldn't it?
 
Smithy, what would be your fairing reference on the exterior side? If you use the edge of the existing deck plywood sub floor, then you would have to eliminate the entire (5th from the bow) bulkhead extension. Typically, the subfloor would extend out to the exterior side of the bulkhead extensions like it does on the 7th from the bow extension. Hmm?
 

Hmmm? Indeed!

The bulkheads aren’t quite as smoothly graduated as I’d have liked. There’s going to be a lot of sanding and some shimming needed before I have a smoothly flowing bottom.

I am working the exterior first so that I get to know the angles needed for the hull lines. Then I’m fairing the inside of the timber heads to match.

I’ve made a start this morning and become aware of the less than perfect alignment of the deck (my error). So the current plan for that is to build the bulwarks onto the modified timber heads and top part of the bulkheads and then build out the deck to meet it.

Then, I’ll tidy up my ‘dance floor’ with a circumferential stringer of some dark wood and install a waterway between the timber heads.

I’m very pleased that historical accuracy isn’t a particularly important criteria here. :D
 
P4190036.JPG

This process is a bit repetitious so to prevent impatience, I'm breaking off frequently to do other things, such as writing this. 'This' Yes, that's much better. ROTF

I roughed out the exterior with a 2" sanding disk in my Proxxon (Dremel-ish thing).

P4190037.JPG

Look at bulkhead #2 after the exterior was shaped and you'll see the danger of making the inside flat and parallel with the outside. That particular timberhead would disappear!

P4190041.JPG

The solution is to make the insides half round. This keeps structural strength but makes the post seem thinner as well as less obviously at the wrong angle. I really like the effect. I think it suits the deck planking and the boat overall to have rounded organic shapes wherever I can. It also reduces the surely oversized timberheads to something a little more plausible.

P4190042[1].JPG

# 13004 (and 1006) of a series of Smithy's Handy Hints

13004 Throw 80% of your unwanted sawdust out of the window with Smithy's airbrushing spray bay.

1006 Make a cheap and effective spray bay for airbrushing and dust extraction from a bathroom extractor and a box. If you use a ten foot long piece of flexible convoluted plastic ducting, the paint will dry long before it reaches the end and static will hold the dry paint particles in the convolutions until you wash them away in the shower (once per decade seems about right.)
 
P4190043[1].JPG

That was inevitable. Even with the regular breaks (ha!) sooner or later I was going to become impatient and go just a little too fast, a little too hard. I've never built a boat without breaking some of these. I didn't even curse. I carefully put the broken part somewhere safe* and when the planks are on, it will be glued tidily into place again. One out of 22 ain't bad, as the great philosopher Mr M Loaf (almost) put it.

And now I've run out of 240 grit sandpaper in the middle of the Easter Holiday. Sigh.

Good day though. I'm pleased with progress and I think I might be able to put a few planks on tomorrow. I'll have to check the instructions first in case there's something important that I've forgotten.

Evenin' all.

_____________________
* That sounds oddly familiar.
 
Back
Top