• "Thank you for your Donations and Support"
    As we close this Annual Donations Drive, I want to thank you all for your Generosity in Donating to Ships of Scale. It is Greatly Apreciated !!!
    Ships of Scale continues to explore exciting things to offer to the Ship Building Community.

Xebec of 1753 - Plank on Bulkhead Kit by Amati in 1/60 Scale - Build by Smithy

Have fun with your Xebec Smithy.
Nice looking bunch of goodies! Enjoy

I think it will be a blast when I get going. I'm not good at long term projects, even one as relatively simple as this. I'm thinking that when I get bored I'll stop and build a plastic aircraft as a palette cleanser before returning. I'm having a lot of fun with my Airfix Anson right now and may well finish that before starting on the Xebec in earnest. I'm also going to need materials for the ship's base before anything else can kick off.

In the meantime, would anyone like to suggest a suitably swashbuckling name for a barbary pirate ship? I'm empty of ideas.
 
I asked an AI for help with that name and was flooded with suggestions, mostly quite good ideas. Now I have too many to choose from!

That was my first use of AI as an assistant. An interesting little amusement but also a waste of a little time. :rolleyes:
 
Last edited:
Our Amati Xebec is often listed by model shops as a French Xebec of 1753. Neither history nor name is given anywhere in the instructions, yet that date seems oddly specific. I thought I’d have a look in the only reference book I have for this type of vessel and see whether I could identify our model.

P3260001.JPG


It's quite an authoritative text primarily on Le Requin, another kit which I have on hand and intend to build as soon as I feel adequate to the job. Not yet!

The monograph contains an article on the background of Le Requin - The Xebec in the French Navy 1750 to 1779 - so I wondered whether our mystery ship might be mentioned.

It appears that during 1749 a proposal was made that some xebecs should be built for the French Navy. They were intended to counter the commerce raiders of the Barbary States. Xebecs were used by the Corsairs and since their sailing characteristics were so different to the convention square rigged ships of the French Navy, they were proving troublesome.

The idea seemed a good one and Spanish specialists in xebec building were engaged to design and build the four vessels at Toulon. The four were built between 1750 and 1751. Requin and Indiscret carried 24 guns while Serpent and Ruse were armed with 18. Our model from Amati xebec has 14 guns and is dated 1753 so it's not one of the first Toulon Quartet.

Four more xebecs were Toulon built in 1762 without the aid of the Spanish experts. The date is later than our 1753 model and since these later 'xebecs were built with a partial square rig it's very clear that Amati haven't used any of these for inspiration.

I’m willing to believe that only eight xebecs were built by the French for the French Navy. However, although I have no historical evidence whatever to back me up, I am going to make a working assumption that sometime in 1753 a xebec was captured by the French from one of the Barbary States of North Africa and brought into French service perhaps as a privateer? Perhaps one of these captured vessels was modelled for some reason maybe, just maybe, Amati based our model upon one of these? I still don’t know what it’s called but I like to think it has some historical basis.

Unless of course, you know differently...
 
Last edited:
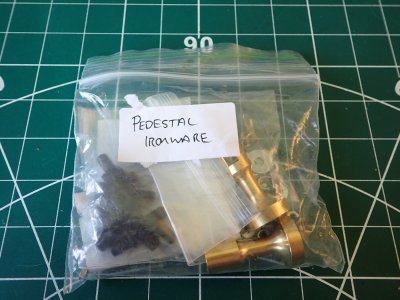
One thing that was holding me up was the lack of suitable pedestals and associated ironmongery for attaching Coquin to the base which in my case, I don't have either.

But then...

P3270001.JPG

I found this little bag of buried treasure.

P3270002.JPG

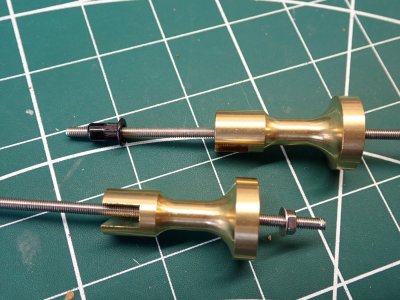
These will do very nicely thanks very much. The captive nut, with flats filed into the skirt, will be perfect for embedding into the keel, having a flared entry for the threaded rod to find its way home later. I'd have preferred pedestals with a bit more bling but these will do the job.

So, as soon as the muse seizes me by the scruff of the neck and drags me to the bench, I can make a start. Groovy!
 
Last edited:
All ashore who's goin' ashore!
~
Le Coquin will sail on the tide!
~

Vive La France!
~
Vive le trésor!


Er... Just as soon as she's built, lads.

Not wanting to present a bunch of evil and viscous privateers (i.e. legalised pirates)(i.e. you lot ;)) with a frustrating hiatus I've filled my glue pot and made a start at making a start.

P3270002b.JPG

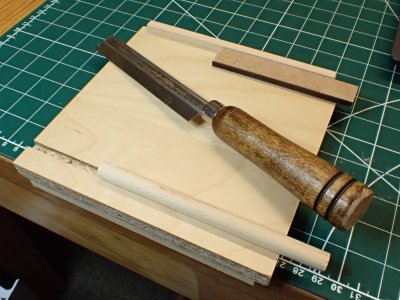
When I packed away after finishing my last little boat my bench hook was deemed life-expired so the first gluing job on this project was to build another one. Many of you will be familiar with this simple device for holding wood for sawing but if you haven't seen one before - you need to make one too. Do I need to explain how it's made and used? I think it's fairly obvious but here's a few pointers.

You hook one end to the edge of your bench, place the wood to be sawn against the batten glued to the other end, lean on it and saw. The square base helps the angularly challenged, like me to line the saw up for a tidy perpendicular cut. The slot is optional for round stock and in fact my square of chipboard came with the slot already cut (it's a CD shelf from IKEA).

Important: Don't use nails, just glue the two battens on so that at a later date you can cut slots at various points and angles in the battens for special jobs, without damaging your saw.

I believe a bench hook and a sharp saw is often better than those gimmicky guillotines/slicers which all tend to leave sloping ends on your timber (and the guillotine wasn't invented until 1789 anyway).

P3270001a.JPG

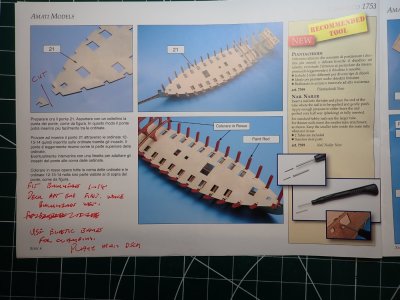
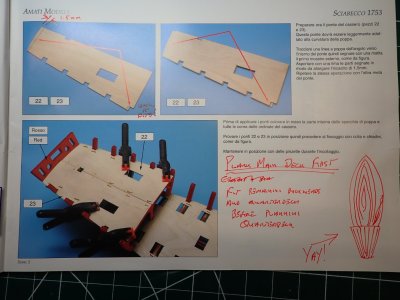
Step two for me was reading the translation of the instructions and studying the photos. I don't consider it essential to follow the instructions but I think it's pretty dumb not to read them at all. I've read the first part in detail and made my own notes in red, I'll browse the rest at leisure and read/translate in detail at the beginning of each stage in the build.

Some of the information in the Italian text wasn't translated. Eeek! This was easy to spot as it contained a dimension in mm which wasn't there in the English. iPhones, and probably all smart phones will translate text for you, often in curious and interesting ways.

P3270002a.JPG

The sequence of operations in the instructions works well and is designed for beginners, who will work slowly and carefully, taking no chances and avoiding drama and panic. They will produce a very nice model that way.

However, I'm quite partial to working quickly, risking all on a spin of the wheel, experiencing a little drama and panic and crucially I want to do something remarkable on the deck planking; something that would be blingy enough to suit the devil-may-care-chien-de-la-mer, Le Capitaine Smith. I'll need full access to plank the main deck before fitting the quarterdeck on top of the aftermost couple of inches of it.

I'm also going to glue the forward bulkheads to the keel all in one go and then fit the main deck to the top of them before the glue dries. This will enable the laser-cut deck to work as a jig to keep those bulkheads perpendicular. Remember my eyes don't work well at judging angles - see above. Once the main deck's done I'll be able to repeat the whole sequence - bulkheads - deck - deck planking for the quarterdeck area.

It seems that I've finally learned that lesson about the 6Ps - prior planning preventing painfully poor performance. I learned the hard way of course, by NOT planning ahead and making life very difficult for myself on my last few model boats, some of which have provided me with nothing but a vast stock of spare wood. :rolleyes:

I have the tools. I have the knowledge. I have the ambition. Question: Do I have the skill to carry out this formidable deck plan? Good question, Moriarty. I'll let you know.
 
Last edited:
Lurkers and likers, readers and writers, mods and odd bods, we all have our parts to play in this cheery little community of souls. :)

I've now read the rest of the Coquin manual and I think I understand almost all of it. It's very interesting and nothing like anything I've done before. I'm so excited, and I just can't hide it. I'm about to build this boat and I think I like it. I'm so excited, and I just can't hide it. And I know, I know, I know, I know, I know I want to tell you all about it.
 
The game's afoot!

P3280006.JPG

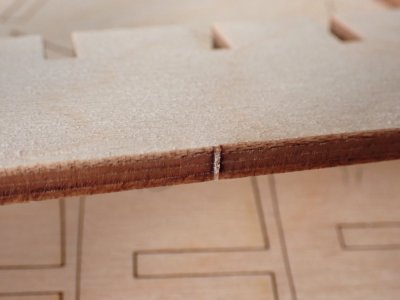
Let's have a close look at that thick piece of plywood that contains the keel and bulkheads. The laser cutting is superb. Hardly any charring, almost no chamfer and the retaining pips are tiny. It's also good plywood, with no voids or other anomalies noted today. The surface layers let it down a bit though, being a bit woolly. Most of it will be painted, so I'll be able to lay it on thick and hope that works out OK.
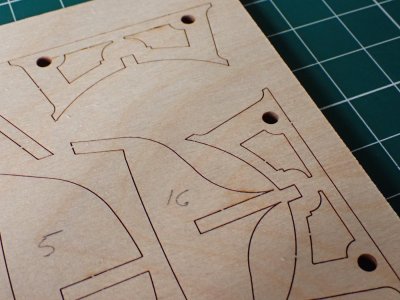
P3280007.JPG

I was pleased to see that there's a stand included. This wasn't mentioned in the manual and I'm now considering using this instead of faffing around with the pedestals and buying a pretty piece of wood for the actual base. Does this cheap'n'cheerful build rate a base that could easily cost more than the kit? I have until next session to decide because that's when I'll be gluing up the keel.

P3280008.JPG

This is what I mean by cheap and cheerful. This is one of three bulkheads which includes a pillar and beam to support the quarterdeck and it's quite primitive, very flat. There are many modellers in SOS who would cut the pillar and the brackets away and turn new ones with their computer controlled lathes. I'd have to do it with a power drill and improvisation but again, is the game worth the candle in this case? Nah, not really.
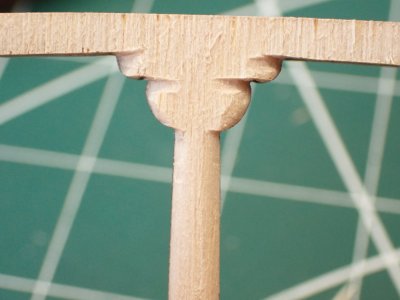
P3280009.JPG

I sanded and filed instead and made the things look tons better while still being a bit shabby. There are three of these but they are mostly in the shadow of that upper deck so this will have to do. I'm just not that bothered about getting everything right. You can call it a character defect if you like but I can't deny that I've always been 'a bit of a gash hand'. I get the job done to the minimum acceptable (to me) standard with the minimum of cost and effort.
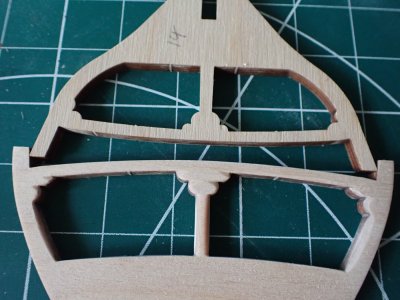
P3280010.JPG

That said, by my standards, the improvement is pleasing.
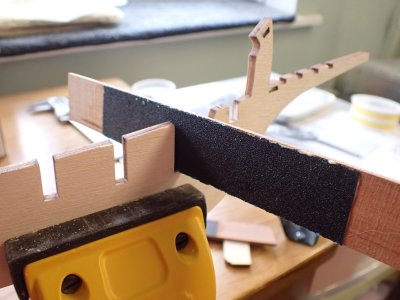
P3280011.JPG

Those perfectly lasered slots were a little too good. Had the kerf been half a mil wider, everything would have fitted perfectly. Maybe the designer expected the production guys to be a bit more like me! As it is, every slot had to be widened just a little bit. That's 40 slots. I began by making a suitable sanding stick.
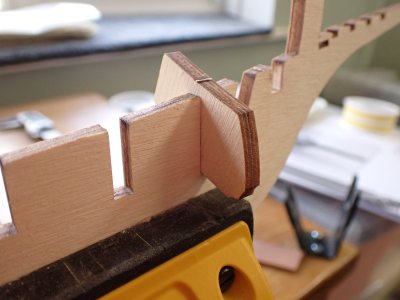
P3280012.JPG

I used a scrap piece from the fret as a gauge to save wear and tear on the bulkheads, some of which are quite fragile looking. This was taking aaaaaages and driving me nuts. How do you POF builders cope with months of building frames? An hour of tickling these slots drove me over the edge. I switched to using a great big file and forgot about the gauge altogether. "Hack hack, that'll do!"
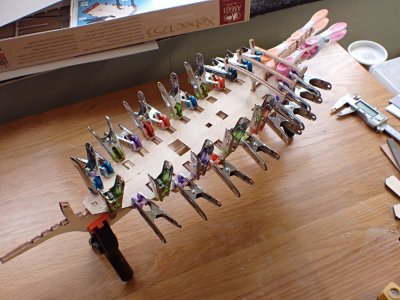
P3280014.JPG

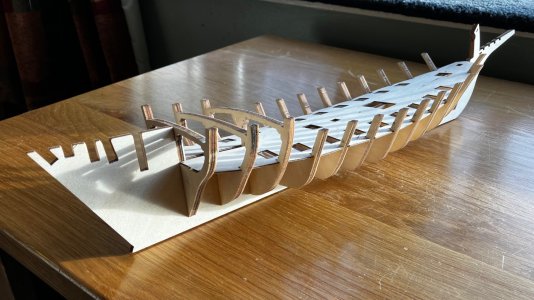
It all came together in the end and the sub-deck worked well as a jig, despite being a little skinny in the beam which is going to cause trouble for me later...

I had to soak the deck in hot water to soften it enough to take on the saddleback curve and I'll leave it pegged in position for a day or two to fully dry. I plan to nail it down the centreline, leaving the nails in, and then glue the rest of it together with slightly diluted Titebond and capillary action. There's no need to dismantle this just to get glue right into the centre of the joints - it's not a real boat.

Note the pink/orange pegs at the back which I had to use in the spreading mode to push the dek down from above. I'm pleased with that arrangement which I cobbled together at very short notice. Getting the job done at least possible cost and effort. Ha!
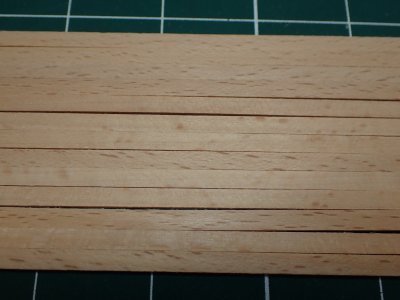
P3280015.JPG

This is the supplied beech deck planking. It's ok. Perhaps the flecks are a bit overscale? It's hard wood and 1.0mm thick by 3.5mm wide. Nope! Don't like it, won't use it! I want more bling. I'm assuming this was a ship built for a Muslim pirate warlord from the Barbary Coast, and I think a guy like that would appreciate some geometrical decoration. I've seen a drawing somewhere of a xebec with the deck planks curved around the bulwarks and maintaining the curves as they march to the centerline like a mirror matched parquetry pattern. That's what I'm going to attempt.
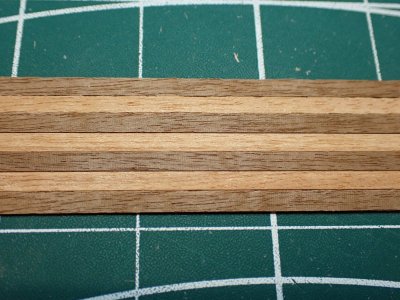
P3280016.JPG

I'll be using these timbers alternately. The dark one is walnut and the lighter one is anybody's guess, possibly a different sort of walnut. They are both 3mm wide which is handy, though I wouldn't have baulked at pinstriping, and at only 0.5mm thick, they will bend like hot spaghetti. I'm not bringing the pattern all the way to the centreline because the tiniest athwartships error would make a big lateral mismatch and the slightest mismatch would look pants. Instead, I'll run a few planks in another wood straight down the middle, possibly making them thicker in the manner of a king plank for strength.

That will be more fun than filing thousands of slots 0.1mm wider all day!

So now you know what I'm going for, there's no backing out. My colours are firmly nailed to the mast.
 
Le Coquin! Thats a great name Smithy. You mentioned months of building frames by POF builders, indeed there are times when I feel like I will explode so I get up and go wash the ever-present char off my hands, shake the dust off my mask, vacuum my immediate area, grab a cup of coffee and start again. Hmm, must be something in the dust!
 
IMG_2091.jpeg

Am I the only one of us that heads for the playbench immediately on waking, removes the clips and weights and admires the progress made yesterday?

Le Coquin like all xebecs, has a gorgeous shape. Even at this stage he looks organic. I’m imagining he’s the fossil of a strange fish. Nice!

And now, I can make a cup of tea.
 
Your off to a good start on the unboxing and display, and I will be waiting to see the keel laid and work to begin in the shipyard.
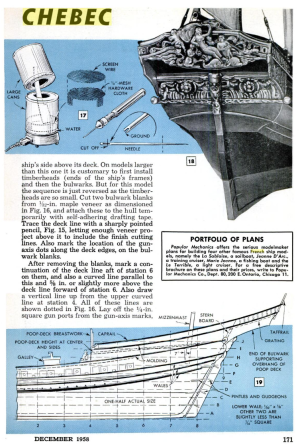
I'm in complete agreement with choosing a Xebec/Chebec. I think it's the most beautiful of all ships, and was one of my first models, using plans published in Popular Mechanics magazine in the 1950s.
1743260137079.png
Also, a very nicely written dialog; I love your writing style and will be going along for this ride, as long or as short as it may be.
 
I am building the same kit.
for me the instructions are not very good, and I don;t have the sheet with pictures. but I am moving along slowly, and looks good so far.
I will be watching!
 
I wrote the above post after just starting to read this thread. I can say, after reading this far, that I enjoy your writing even more than the photos, which is unusual for me. I admit to sometimes skimming a thread to mostly look at the photos, stopping to read about a photo that interests me. But your writing is like a good book to me. Quite enjoyable!
 
Back
Top